|
|
|
#1
 05/18/2006, 08:49 PM
|
|||
|
|||
|
Hi guys
Well Iâve officially been in the reefing hobby for a year now, and I decided to celebrate by upgrading my tank from a 33gal system to a 90 gal! First off, hereâs a little bit about my old tank. It was a 33 gal running through a 40 gal sump/fuge with a 175 watt MH pendant and a Remora C hang on skimmer. It probably has about 50 lbs of LR and 40 lbs LS. I keep a BTA (whoâs bubbles are long gone) along with some softy chorals. I grow cheato in the fuge and do weekly chem tests and water changes. The reef has done very well and has plenty little critters running around the sand bed when they think Iâm not looking. As far as fish go, I have a pair of tomato clowns (Ping and Ying) hosting the BTA (which recently split), a pair or green chromis (Jerry and Larry) and a yellow tang (named Timmyâ¦donât tell tang police.. I figure I should get off this once since I just bought him a 90 gal). Hereâs a pic of the older tank. 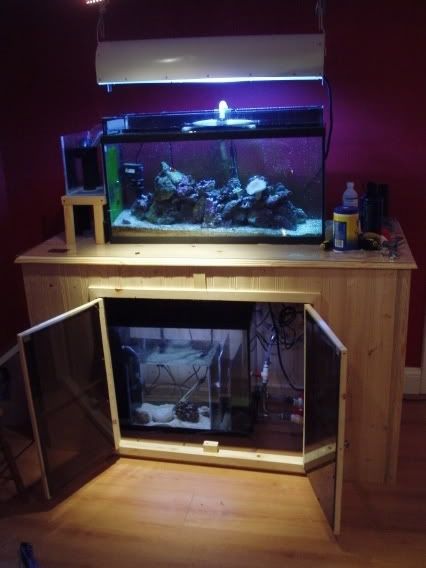 I got a little ambitious (or was it lazy?) when I decided to build up the tank walls to accommodate an external overflow. This I did as an alternative to emptying the whole tank and drilling it. Hereâs a pic of the built up tank wall 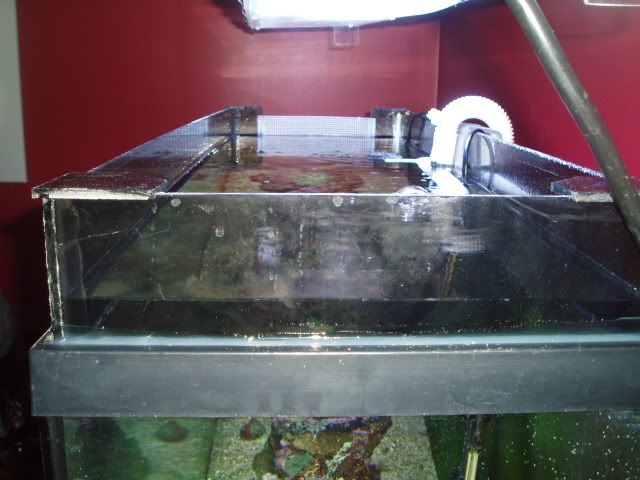 And where it drains into the overflow 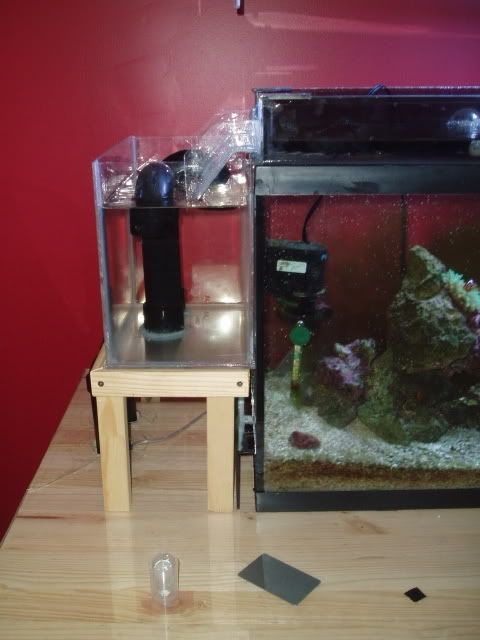 It was all done with acrylic, and actually worked (believe it or not). In retrospect it was risky and I wouldnât really recommend doing this because a few months down the road and it started sprouting leaks. I would call the operation a success though, but for my next tank I will defiantly being doing a proper drilling job. Hereâs one last pic of the cabinet that I made, which I will be putting the 90 gal on once the 33 is out of the way. Should be plenty of room as it measures approximately 3âx5âx2.5â HxLxW. 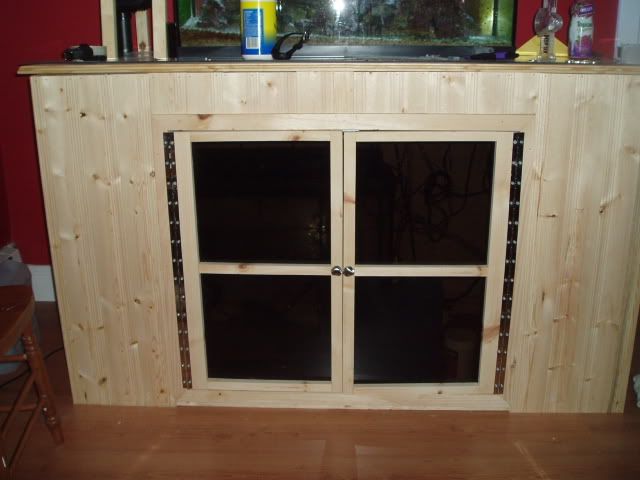
__________________
I'm not as think as you stupid i am |
|
#2
05/18/2006, 09:05 PM
|
|||
|
|||
|
Anyway, out with the old and in with the new. I neglegted to get a pic of the new tank before I started work on it, but Iâm sure we all know what an empty 90 gal tank looks like. (48âx24â?x18â? by the way)
Here it is on the floor waiting to be painted. I used âmarine blueâ spray paint I got at home depot. I was going to go with black but the name won me over. 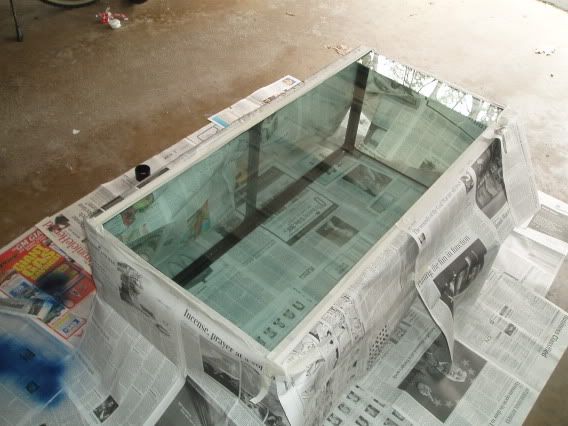 And here she is painted. Took about 4 quotes, and there were still a few lighter spots, but I though it looked more natural that way (or was I just being lazy again?â¦yes). 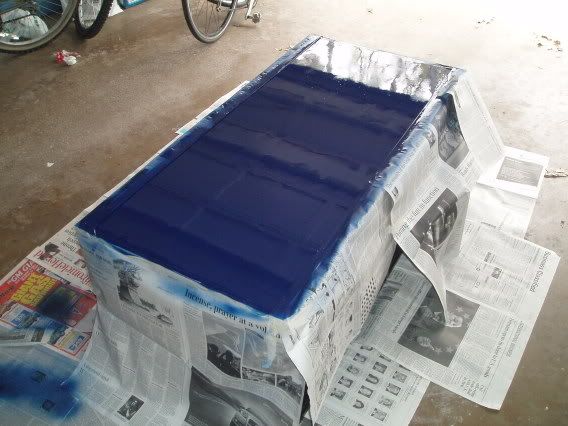 I decided to put some egg crate on the bottom of the tank. this will protect the bottom from rocks should an avalanche occur, and it will also help my anchor the rockwork and plumbing. Ignore the pvc pipe, its just there so I donât forget about the internal overflow. 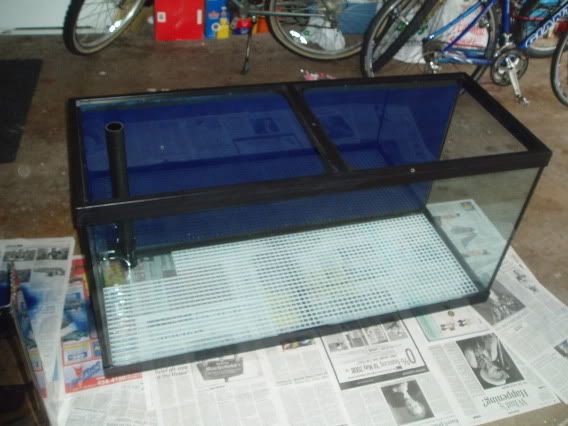 Hereâs a pic of the internal overflow baffle I made out of smoke grey acrylic (I think it looks brown personally). The idea of an internal overflow was one I didnât arrive at easily. Iâm a stickler for tank realistate, and I didnât want to take up much room with the overflow baffle, but after much consideration, and a threat from my girlfriend who does not want another leaky tank, I opted for the much simpler to make and less risky internal overflow. The baffle itself wasnât too hard to make. This is the first time Iâve ever attempted to cut out teeth and I think they turned out pretty well. I used a ban saw for the teeth and molded the corner by clamping the acrylic sheet to a 2x4 and molding a 90 º curve with the blow torch. I is a pretty easy method as long as you measure carefully. It is a little risky if you havenât tried it before because if you donât get a perfect 90º curve the baffle wonât fit. Somehow I managed to get it right my first try. 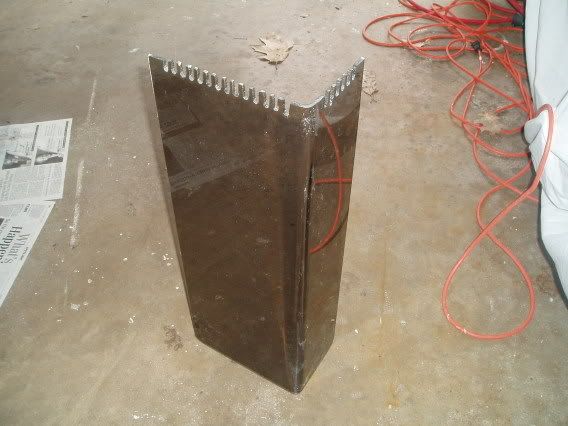
__________________
I'm not as think as you stupid i am |
|
#3
05/18/2006, 09:13 PM
|
|||
|
|||
|
Hereâs the best I could do for an up close shot of the baffle sitting in the tank. It sits nice and flush on all edges, so Iâm pretty happy (or lucky). I had to use the belt sander to round the edges that would stick into the silicone on the bottom of the tank. Nothing is glued yet, just try fitted. I plan to use 100% clear GE silicone to attach the baffle to the tank.
 Iâve only began to ponder the plumbing for this thing, but I know that Iâm going to go with standard 1 ½â? black pvc for the overflow drain. Hereâs a pic of the overflow assembly. I used plastic mesh that you can buy in the sewing or crafts section at Wal-Mart, and zippy tied it to the pvc to make a strainer. This should keep any fishies or enterprising anemoneâs from taking a trip to my sump. 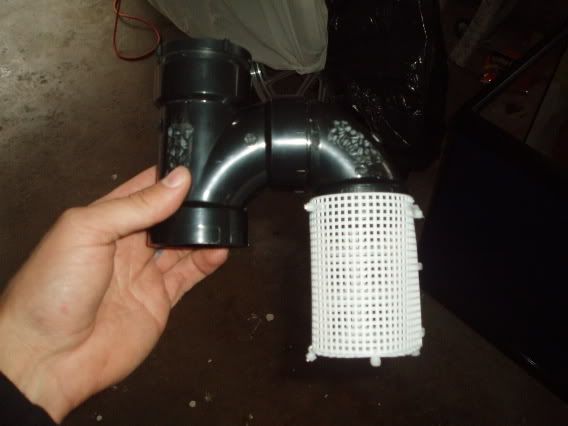 Hereâs the overflow assembly all dry fitted behind the baffle. Everything fits nice. Hopefully it wonât be too noisy. 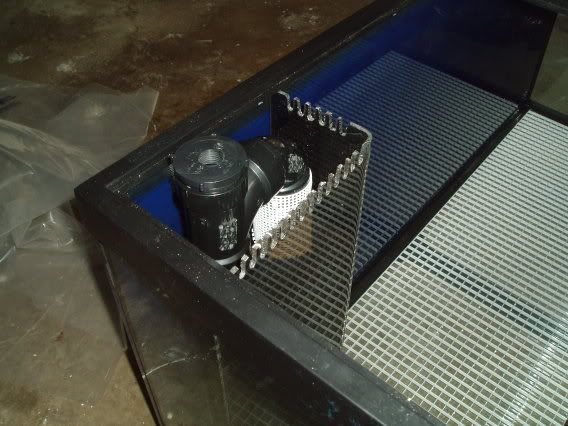
__________________
I'm not as think as you stupid i am Last edited by george1098; 05/18/2006 at 09:26 PM. |
|
#4
05/18/2006, 09:25 PM
|
|||
|
|||
|
Everything above represents about 2 days work ( work also includes shopping for the rest of my plumbing supplies). I was hoping to start drilling my tank with the diamond bit I have coming in the mail, but it still hasnât arrived, so I fount myself beginning work on the canopy before I can start tinkering with the plumbing.
First off, I knocked up this sucker, which will make moving the tank around to avoid traffic coming in and out of the garage. 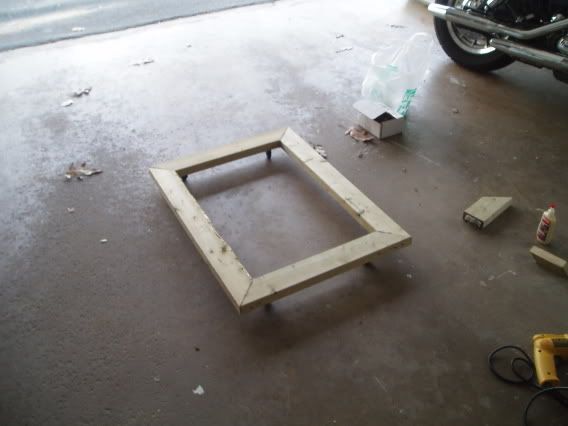 Benny the Benze isnât happy about the tank occupying his parking spot during the day. Especially when it rains. 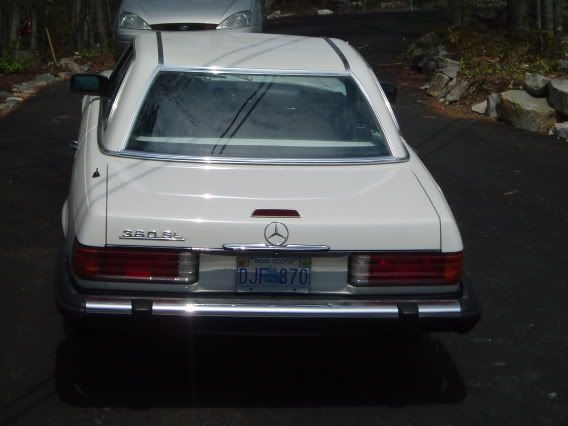 Hereâs the beginnings of my reflector. It is sheet aluminum I bent on my dads bending jig. It is not the shiniest piece of metal, but it should reflect the light down, which is all it needs to do. 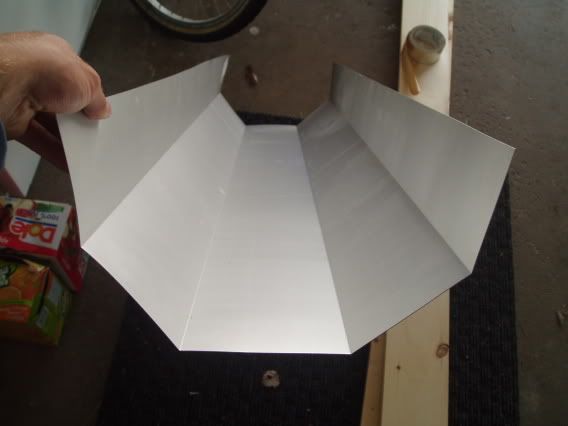 First I knocked up a wooden frame for the reflector and fitted it on top of the tank. should work well. This wonât be a full canopy, it will merely sit on top and hold the lights. I will have some ropes on pulleyâs going up to the ceiling so I can rays it for easy tank access. 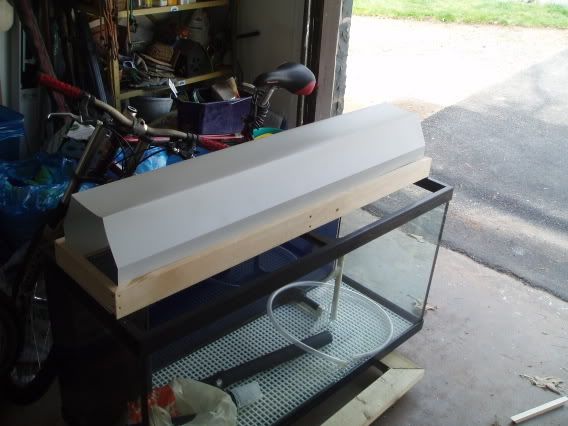 I will use an acrylic shield to protect the bulbs from splashing and misting, and the tank should the worst happen and a bulb explodes (Iâm sure Mr. Icecap wonât do that to me though.) The shield will be able to slide in and out of the canopy for easy cleaning and bulb changing on ¼â? grooves I cut with the table saw. 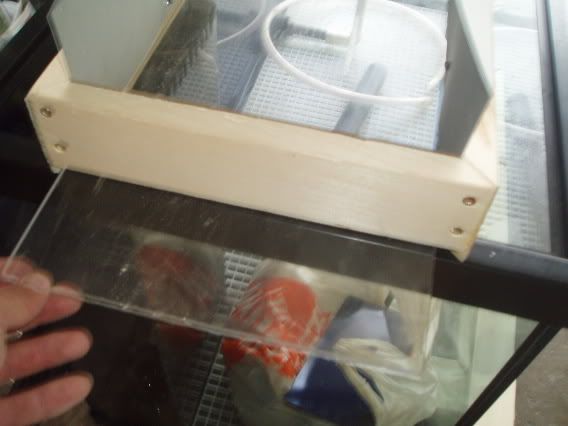
__________________
I'm not as think as you stupid i am |
|
#5
05/18/2006, 09:40 PM
|
|||
|
|||
|
Continuing on with the canopy, I started to build up the sides and added the fans that will hopefully keep the lights nice and cool.
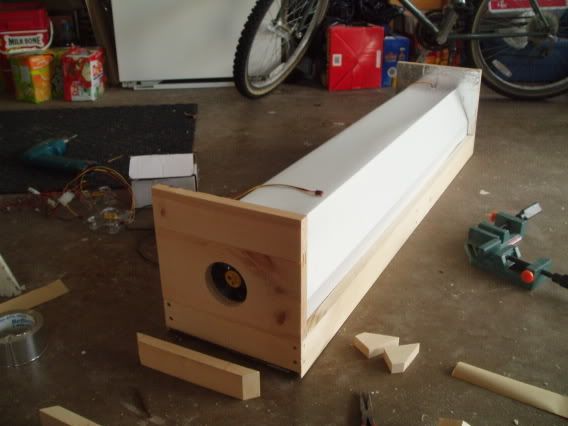 Hereâs a shot of the business end of the reflector. Should kick lots of light down at my reef with two 250watt MH bulbs. Iâm thinking of adding a 3â VHO strip with actinics, or possibly re-using my 175 watt ballast to fire a 20,000k bulb. What should I do? 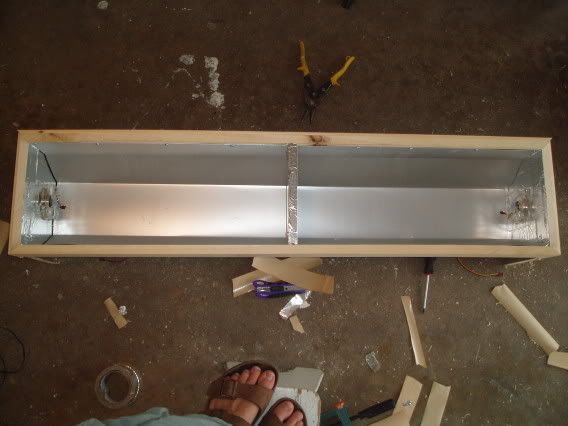 p.s. I used the aluminum tape they use to tape up heat ventilation piping (or whatever they call it) to tape up the exposed wood. It makes a great reflector. My camera seemed to go missing half way through the day, and I missed a few steps, but its not hard to see that I managed to get a bit done. I built up the back and installed a few more fans. The top and back will remain open for ventilation 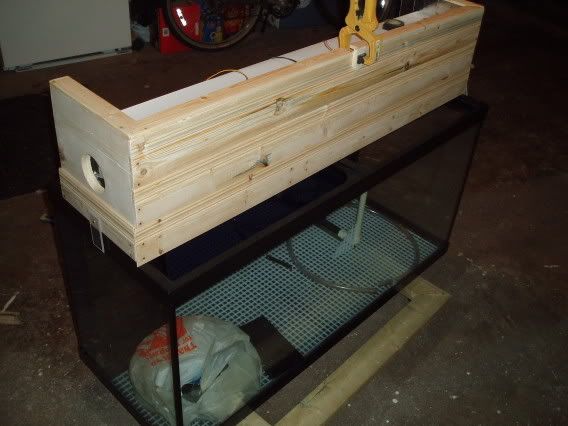 Hereâs a pic of the fans all wired up and running. They have blue LEDâs in them which Iâm hoping will kill two birds with one stone and act as a moonlight at night, but its not very likely that they are bring enough to light the whole 90 gallons like a proper moonlight should. The two fans on the back are mounted with acrylic brackets I made. They should blow across the surface water and provide some nice agitation for better gas exchange and evaporation (thus cooling). 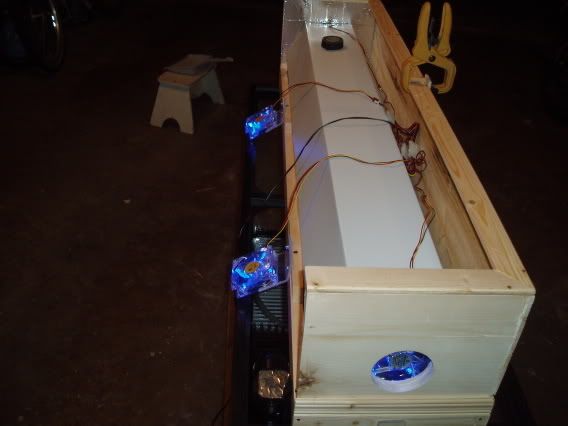 And for my last pic of the night, here is yet another shot of the back of the tank. with the canopy roughly in the spot it will sit. Should be plenty of room to squeeze some plumbing back here. Iâd like to install a wavy sea unite back here, hope there is enough room. Or Iâll just have to make some. 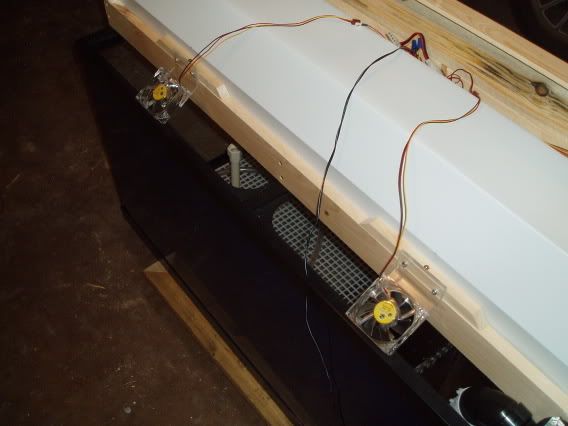
__________________
I'm not as think as you stupid i am |
|
#7
05/19/2006, 12:32 AM
|
|||
|
|||
|
old pro, hah, I'm 22, but thanks
 i'll keep everyone posted i'll keep everyone posted
__________________
I'm not as think as you stupid i am |
|
#8
05/19/2006, 05:02 AM
|
|||
|
|||
|
Are you using metal halides? That acrylic sheet for splashing will bubble and melt with halides. Eventually it will sink into your tank.
You have to use tempered glass. You can buy it from a glass store cut exactly to size. It is heat resistant glass. Not like normal glass. Most places will have to pre-order the size of glass then send it to be tempered under high heat.
__________________
Its a good idea to have a refrence sample for alk test kits. 1.1350 grams of baking soda in 1gallon of distilled water=10dkh. Check your alkalinity test kit! |
|
#9
05/19/2006, 09:14 AM
|
|||
|
|||
|
i've use acrylic before as a splash guard without anyproblems. if it doesnt work out i could easily get some tempered glass ordered up and slide it right in. thanks though
__________________
I'm not as think as you stupid i am |
|
#10
05/19/2006, 07:32 PM
|
|||
|
|||
|
Didn't get anything done today unfortionatly, i'm waiting on a shipment from custom aquatics before i can really get going
__________________
I'm not as think as you stupid i am |
|
#11
05/20/2006, 06:32 PM
|
|||
|
|||
|
here is a diagram of what i am thinking for a close loop system. it is powered by a dart. as alwais, questions, comments and crytisisms (i'm too lazy to do spell check) are welcome

__________________
I'm not as think as you stupid i am |
|
#12
05/24/2006, 06:00 PM
|
|||
|
|||
|
Here's an update
Over the weekend i got busy installing some fluorescent fixtures. Once again my camera went missing so i didn't get any shots of the work in progress, but basically i used rivets to attach the ballast to the top of the canopy, and i cut out little brackets out of aluminum to hold the end caps and riveted them onto the inside of the canopy. 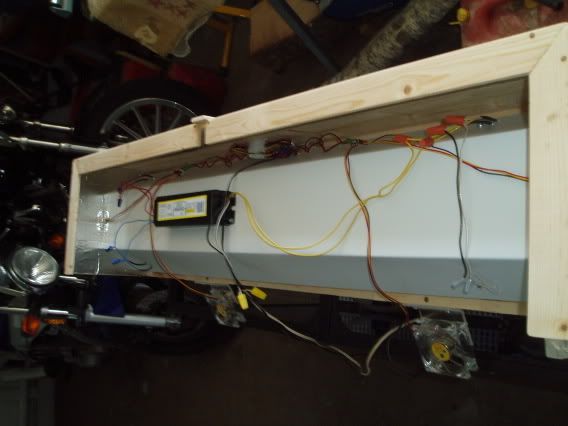 and the inside. I used a regular 2x30 watt florescent ballast i bought at home depot. they fire two 3' florescent strips. these are just two spare bulbs i had lying around, i plan to use incandescent bulbs along with 2x250watt MH bulbs (if i ever get my balast). 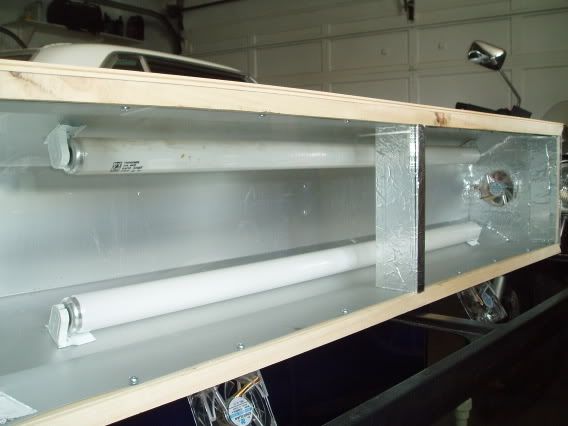 still plenty of room for the metal halide brackets and bulbs to fit. and i replaced my acrylic guard with two glass pains ( i learned how to cut glass over the weekend too). It is regular 1/4" glass that i had lying around. My father, who runs a sunroom company (who knows a thing or two about glass) think this should hold up fine against the heat, even though it is not tempered. I plan to test it pretty Thoroughly without the fans on once i get my MH ballasts and bulbs installed. 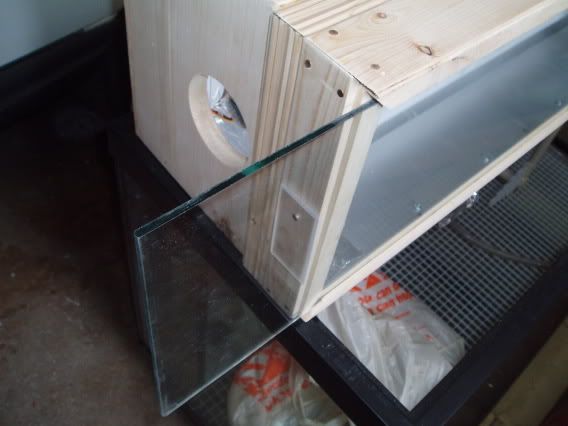
__________________
I'm not as think as you stupid i am |
|
#13
05/26/2006, 02:27 AM
|
|||
|
|||
|
wow, you are very handy and crafy with your tools. i dont think i could ever do all this!
__________________
-rich |
|
#14
05/26/2006, 08:43 AM
|
|||
|
|||
|
Just curious as I don't know much about glass, but even though the glass may hold up under the heat, will it hold up when it's really hot and gets splashed?
|
|
#15
05/26/2006, 08:47 AM
|
|||
|
|||
|
After some of the feedback i've been receiving about the glass from some of my other reefer buddies, i am starting to re-think the idea. I cut out acrylic sheilds that slide into the groves aswell. i'm going to test both with the lights before i put anything alive into the tank to be sure. I deffinatly want to use some kind of sheild, weather it will be glass or acrylic i have yet to decide.
__________________
I'm not as think as you stupid i am |
|
#16
05/26/2006, 08:58 AM
|
|||
|
|||
|
I wouldn't use any glass or acrylic as a splash gaurd.
It will really cut down on the light getting to the tank. I had glas on mine, it broke, removed it and have not had any problems with the lights being open over the tank. Also if tempered glas breaks it is a really ,really big mess.
__________________
Go Sens Go |
|
#17
05/26/2006, 02:26 PM
|
|||
|
|||
|
I finally got my diamond whole cutting bit today from Lauâs eBay store. Took about 3 weeks to ship from Hong Kong, and only cost me about 20 bucks. It is a 48mm bit, which is the same diameter of 1 ½ pvc. I think I can also use it to cut holes for my 1â? bulkheads, as they require a 45mm hole. Do you think 3 mm makes a difference? Or should I get the proper sized bit for the bulkheads?
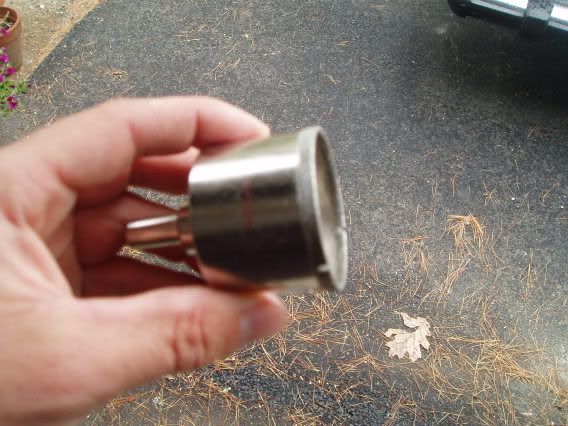 In cutting the hole I stopped every 30 seconds or so and pored some water on the glass and bit to keep them cool. I also dripped some 3in1 oil on as that supposedly helps keep the glass from cracking.. so says Dad (my glass authority). I think it turned out pretty good, and a breathed a sigh of relief when I made it through to the other side without shattering the side of my tank. 1 hole down, 4 to go. Thatâs a nice hole if I donât say so myself. 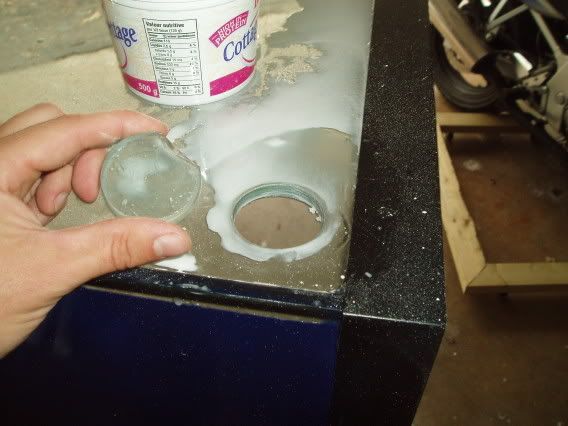 The hole was the perfect size for the pvc. I actually had to tap it lightly with a hammer to get it to go through the hole. It was probably pretty close to being water tight before I added the silicone. Some may ask why I didnât use a bulkhead here, and I would say, because this works just as well. Just put a little silicone around the pipe and you have a waterproof seal (I hope). Anyway, I used this method when I did my sump and it works like a charm. 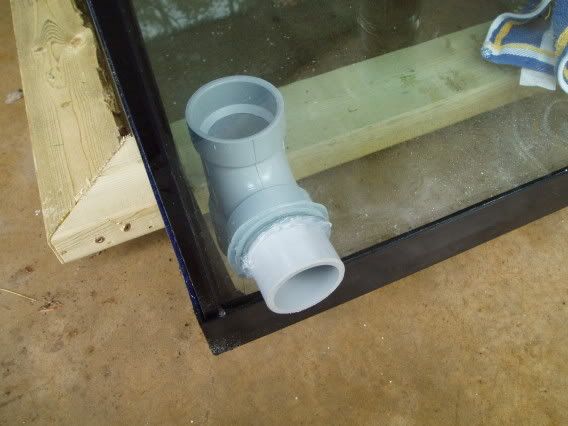
__________________
I'm not as think as you stupid i am |
|
#18
05/26/2006, 02:30 PM
|
|||
|
|||
|
I threw a 1 ½â? union on the other side, and ran a silicone bead around the edge touching the glass.
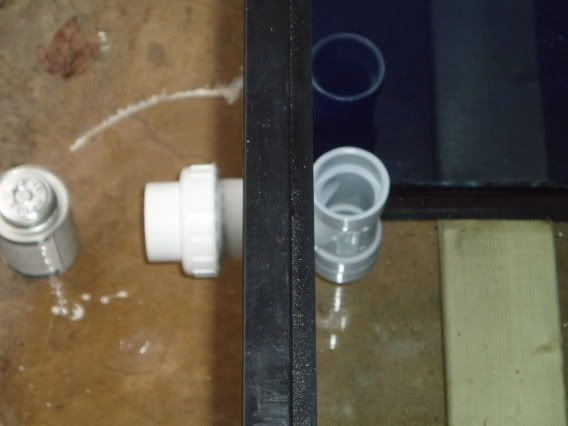 Next it was time to install the overflow bulkhead. First I ran a silicone bead around all the edges that would be in contact with the glass. 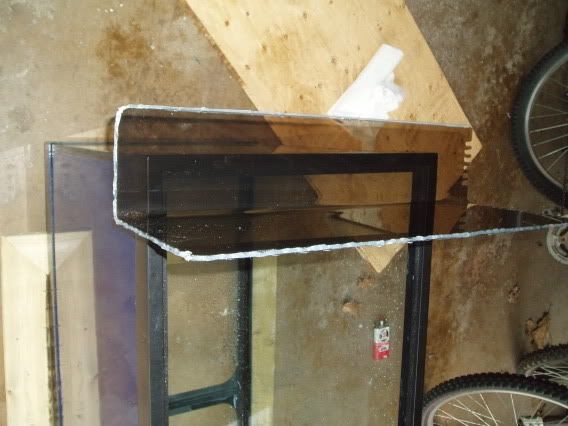 Then I simply stuck it in. It fit like a charm, but that didnât surprise me Hereâs a pic of everything put together. 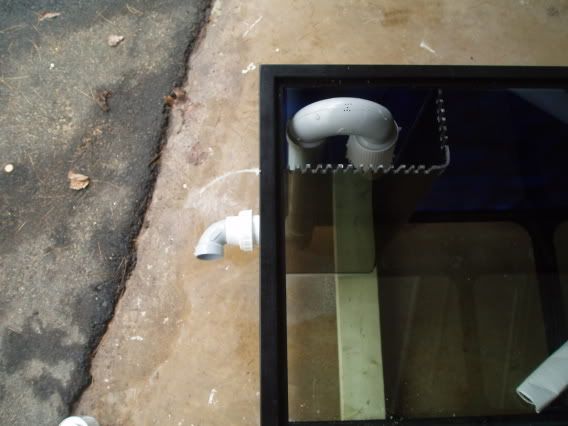
__________________
I'm not as think as you stupid i am |
|
#21
05/26/2006, 08:47 PM
|
|||
|
|||
|
very nice job on the lighting fixture. i think it will work out great! i like the led cooling fans. i got the same ones in my amp rack in my car-ebay-$.99 lol
__________________
" You are here to enable the divine purpose of the universe to unfold. That is how important you are." -Eckhart Tolle always hunting for some nice frags.....pm me with what you got. |
|
#22
05/26/2006, 09:22 PM
|
|||
|
|||
|
Can't beat the price! hope they last for a reasonably long period of time... my brother said my tank is starting to look like his computer
__________________
I'm not as think as you stupid i am |
|
#23
05/29/2006, 10:36 PM
|
|||
|
|||
|
how much for you to build all my tank stuff?

|
|
#24
06/08/2006, 05:53 PM
|
|||
|
|||
|
Hi guys
So I havent been as busy on the tank build as I would like in the last few weeks because Im waiting for a rather slow shipment, but I did manage to get some stuff done. First of all, I got my Icecap ballasts! They are 250 watt metal halide ballasts. 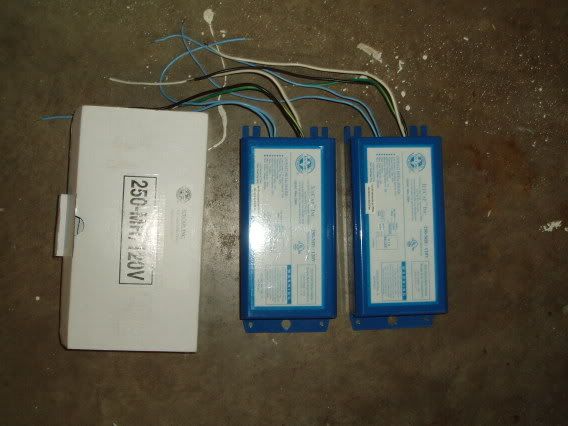 I also got some morgul sockets from the local hydroponics store (funny story that goes along with that, but not really appropriate to be told in a public forum ). I built my own brackets out of aluminum for the sockets and riveted them into the canopy. Heres a shot of the reflector, I think its looking pretty good.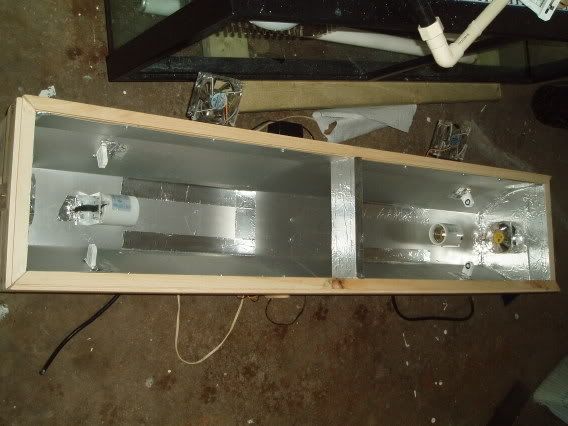 I wired up the ballasts and riveted them onto the top of the canopy along with the fluorescent ballast. Initially I didnt intend on putting them on top of the canopy as I thought the ballasts would be much bigger and heavier. When I got them out of the box and had a look at them, I decided it would be much simpler to stick them on top of the canopy. 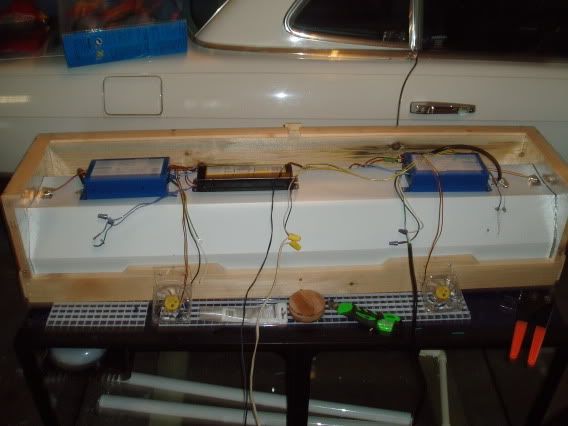 Im not quite sure why I put the fluorescent ballast off to the one side. I think I had good reasoning for it at the time, but I seem to have forgotten it 
__________________
I'm not as think as you stupid i am |
|
#25
06/08/2006, 06:03 PM
|
|||
|
|||
|
It Works!!!
You might even think I knew what I was doing. This is an old 175watt bulb I used to test my wiring, it makes me really itch to get my bulbs in so I can see how much light the fully loaded rig will put out! 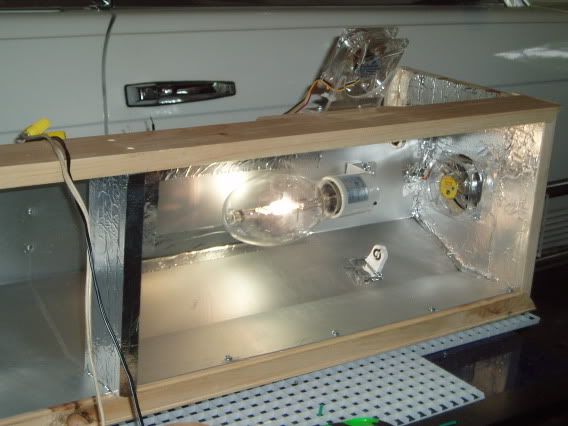 Heres a pic of the 3 1/4 hole I cut (with a dremel, boy did that take a long time) for the 2bulkhead Im going to be using to feed my dart for the close loop. Hopefully I will get my package in tomorrow and start moving on the plumbing for my close loop. I had to cut away some of the black plastic at the bottom of the tank to make room for the bulkhead. I also scraped away the paint around the hole so the silicone will stick better. 
__________________
I'm not as think as you stupid i am |
|
|


 Linear Mode

