|
|
|
#1
 10/21/2007, 08:25 PM
|
|||
|
|||
|
Glass Overflow Question
I'm planning to drill a 75 gal all glass tank and thinking about how I want to construct the overflow.
I do want to do this as simple as possible without a bunch of fuss. I wouldn't mind a coast to coast overflow, but I don't feel the need for it. My fist thought was to install the glass panels in this fashion:  Then I figured that this would definitely be easier:  Does anyone think there would be any drawbacks with the 2nd pic? Im thinking the 2nd pic would have fewer linear inches of surface skimming but then again it would still work as long as I left enough room for the standpipe/Durso/Stockman. |
|
#2
10/21/2007, 08:30 PM
|
|||
|
|||
|
Would the edges of the glass overflow in the second pick be cut on an angle to sit flush against the tank glass? That might be way more work.
|
|
#3
10/21/2007, 08:40 PM
|
|||
|
|||
|
No, actually I was thinking of installing the glass like this:
 The red portion indicates where the bead of silicone would be. This would fill in the rough edges and by applying the silicone on the exterior it would allow me to pre-paint the back of the glass. The more I think about it I want to do it this way 
|
|
#4
10/21/2007, 09:21 PM
|
|||
|
|||
|
Randy, I don't see any glaring problems with doing it the #2 way, as long as everything will fit inside the weirs.
You will be reducing the rear panes available free length between the two weirs so if you have plans for any equipment to hang on the center back wall, you should take that into consideration.
__________________
Guy Smilie |
|
#7
10/24/2007, 07:11 AM
|
|||
|
|||
|
Randy,
I made some overflows this weekend out of PVC. They work great, look good and function flawlessly. I painted them with Krylon fusion black but you could easily get the black PVC to make them out of. Just either cut the pvc in quarters using a table saw or in halves (depending on how you want it to look. One plus with PVC is that you can stack a bunch of rock against them if you want and not have to worry about pressure points breaking the glass. I also used the table saw to cut teeth in the tops of the pvc. I used 3" PVC cut in half but you could easily go as large as you needed.
__________________
90gal display 40gal propagation/refugium tank 30gal sump |
|
#9
10/24/2007, 04:59 PM
|
|||
|
|||
|
It will work fine, it is exactly how my tank is done but with the glass set at a 45 angle, make sure ur arm fits in it for maintainance
|
|
#10
10/24/2007, 05:34 PM
|
|||
|
|||
|
Quote:
I am considering leaving enough room for a downward facing elbow and having the Durso on the exterior. I just dont want to take up too much room in the tank. I'll likely use black glass if the price isnt too extreme and have the top edges beveled (maybe all edges). Now that I think about it I think I might already have the black glass I kept it from an old entertainment center!Anyways Im just thinking out loud Ill post pics ASAP once the job is underway. Ill likely post a video of drilling the tank and the whole 9 yards. Thanks yall for the input. If anyone has ANY thoughts just speak
|
|
#11
10/24/2007, 05:46 PM
|
|||
|
|||
|
Nope, I don't have any black glass
 Does anyone recall the preferred distance to drill from the end of a pane of glass? I think I recall it being 3", but is that 3" from the edge to the exterior of the hole? |
|
#12
10/24/2007, 07:54 PM
|
|||
|
|||
|
If you are drilling a 1" hole, drill 1" from the edge, 2" hole, 2" from the edge. That is what I have been told. I have broken the rule though. I saw a thread somewhere once where a guy cut up a plastic mailbox and used it for an overflow. It actually looked really good. I am a big fan of the coast to coast with the external box though. It is a PITA cutting the glass for the weir though.
__________________
Joe Cude Save a reef, trade a frag! |
|
#13
10/24/2007, 10:20 PM
|
|||
|
|||
|
i did my 135 like pic 2. except at 45*s.i used dark tinted glass too. for the weirs i cut them out of black acrylic and siliconed them to the glass. looks good.
i used stockmans vs durso's and it works great! |
|
#15
11/29/2007, 07:27 PM
|
|||
|
|||
|
Well here's what I've done so far. I started with getting the 1-1/2" bulkhead (from www.thefilterguys.biz) and finished the Durso standpipe.
 I began with a 90 and a male adapter. I chopped the fittings with a miter saw to make a compact 90 street ell. This will conserve space as much as possible. The compact 90 is now 3-1/2" wide:    I also chopped the fittings for the Durso as close as I could and I will glue them soon. Right now a rubber band is holding the pieces together. 
|
|
#16
11/29/2007, 09:09 PM
|
|||
|
|||
|
this is a bad shot of how i did the overflow, before weirs
 and a you can see how it looks after running for a couple months 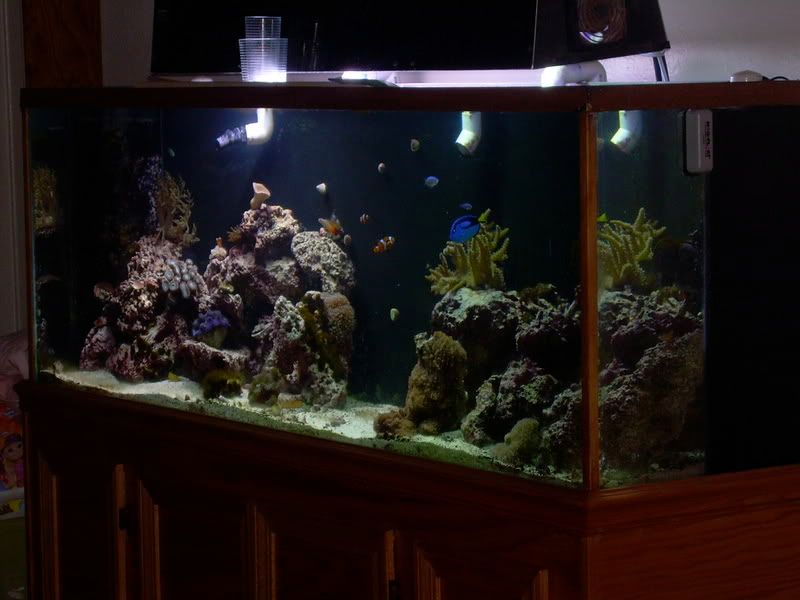 i just painted the ends on the outside to hide the plumbing |
|
#17
11/29/2007, 09:45 PM
|
|||
|
|||
|
Looks great!
It gives a less obtrusive appearance than my coast to coast overflow.
__________________
Scott |
|
#18
12/10/2007, 10:17 PM
|
|||
|
|||
|
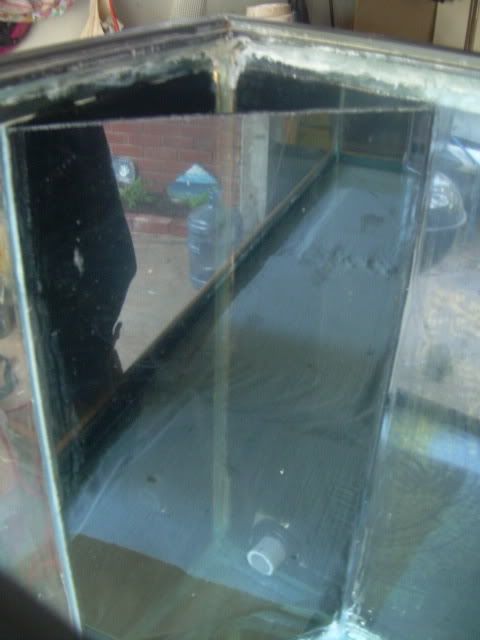
That does look nice kinghokus420!
Well I had some time tonight so I drilled 4 holes for the bulkhead fittings. 4 holes total, 2 for the 1-1/2" fittings (Dursos) and 2 for the 3/4" fittings. This was my first attempt at drilling a tank. I'm just glad it didn't shatter  This one has me concerned a bit. This one is for a 3/4" bulkhead:  Last week I sealed the interior of the stand and the lower portion was leak tested to ensure that it holds water.     Now it's time to take down some measurements and have the glass cut. |
|
#19
12/15/2007, 05:40 PM
|
|||
|
|||
|
How did you manage to get a good seal where the 45 degree pane of glass meets the original silicone from the tank on the bottom. Will new silicone create a good seal next to old silicone? I would like to to the same idea as you but am worried about the seal near the bottom where the corner of the pane touches the original silcione from the tank. Did you bevel the bottom corners of the pane to leave rooom for the original silicone?
|
|
#20
12/15/2007, 05:50 PM
|
|||
|
|||
|
I'm just going to silicone over the old. I'll just clean it well.
If you do not then you would have to disassemble all panes of glass, remove 100% of the silicone, re-silicone the entire tank while installing the overflow at the same time. Sounds like a lot of work. Silicone doesn't really adhere well to anything, but I'm sure it will make a water tight seal. |
|
#21
12/15/2007, 06:59 PM
|
|||
|
|||
|
Plus all the pressure of the water is forcing the silicone INTO the corner and not pushing it out like it would if it were the outside corner of a tank. I did mine with 2 pcs of glass each but have one piece angled. I have trouble reaching into the bottom of the overflow but I can still do it with some effort.
I did mine like this:  HTH
__________________
It doesn't make a difference what temperature a room is, it's always room temperature. ~ Steven Wright |
|
#22
12/15/2007, 07:16 PM
|
|||
|
|||
|
What dopes the durso stand pipe do? Why is the drain so close to the bottom? If the draind (hole u drilled) is higher then there would be more water in the back compartment of the overflow. This would exert equal pressure on the pane of glasss.
|
|
#23
12/15/2007, 07:29 PM
|
|||
|
|||
|
Check out Durso Standpipe and the Stockman Aqua-Silencer
You'll see that it doesn't really matter where you place the hole, but the standpipe height determines the water level height within the overflow. The Durso and the Stockman Aqua-Silencer makes the standpipe dead silent. If one had just a pipe sticking up within the overflow then you would hear slurping sounds as the water spilled into the standpipe. |
|
#24
12/15/2007, 09:20 PM
|
|||
|
|||
|
Thanks for the links. Very clear now except 2 things. If a leak occurs in the bulkhead , the amount of water on the floor will not be very different than if u placed ur bulkhead higher? The durso goes inside the overflow or outside the tank. Thanks for ur time. I plan on doing the same method as you did. I was hoping to just make an oveflow in one corner of the tank. If I use 2 " bulkhead . But using only one corner will reduce the surface area of the weir. . Still kinda nervous about drilling the glass. If i crack the tank , all is lost! Im sure its not so hard , ive read up on the methods, but it does create potential for disaster if it cracks the tank.
|
|
#25
12/15/2007, 09:59 PM
|
|||
|
|||
|
The Durso can be on the Exterior if you wish. That' show most people do it with coast to coast overflows.
I'm just keeping everythin internal. Coast to coast overflows stretch from one side to the other which gives them the ultimate amount of surface skimming. Mine will likely give me ... maybe half that, so I'm happy. Tanks usually crack if the pane you drill is tempered ... I can't say that no one has cracked their tank before even if it was not tempered. I have to say I was nervous, but I think it went well over all. |
|
|


 Linear Mode

