|
|
|
#1
 10/23/2007, 12:56 PM
|
|||
|
|||
|
Build of JBJ 28G HQI Tank, Stand, and Pictures
Hi all - first time poster here - love the website - it is an excellent resource.
I have been out of the hobby for three years and am just getting back in to it. I previously had a 50 gallon fish only with a wet dry, CPR skimmer, and VHO's that was beautiful but lack of time and other hobbies got in the way. I sold it for $300 - kind of regret it now. Oh well! I just picked up a new JBJ 28G HQI from the LFS. I would have had the tank already up and running but the stand that JBJ makes for it is just fugly in my opinion - so I am making my own. Here it is an an unfinished state. I also created a small platform behind the tank to hold a light for a refuge. JBJ made things a lot easier - the back of the tank is clear now!  Here is a pic of the back of the tank - notice no more plastic covering things up.  This is the inside of the stand. I drilled holes in the sides so I can move the shelves to any height.  Once last pic of the tank on the stand.  I just stained the stand black last night - I am hoping to get it finished by this weekend so I can get some water in it. Also waiting on the nano-tuners Actinic mod - that is supposed to be here tomorrow. 
|
|
#2
10/23/2007, 01:28 PM
|
|||
|
|||
|
Nice job. I think you will be happy with this tank. I am loving mine!
. The jbj stand does suck but I was a sucker and bought it. It isn't even that sturdy..I am worried about an earthquake here in SoCal and what that will do to my stand.
|
|
#4
10/23/2007, 05:51 PM
|
|||
|
|||
|
nice skills on the stand. looks like youre off to a great start! BTW WELCOME TO REEF CENTRAL... =)
__________________
The Answer to Life, the Universe, and Everything Is........................Forty Two! |
|
#5
10/23/2007, 07:15 PM
|
|||
|
|||
|
Nice stand.I also didn't want to spend$ 100 for that stand so I'm in the middle of building one to.
|
|
#6
10/23/2007, 11:15 PM
|
|||
|
|||
|
Quote:
This is how the stand looks tonight with a fresh coat of stain on it - just needs 2 or 3 layers of varnish and it will be ready for the tank. 
Last edited by scottydo; 10/23/2007 at 11:20 PM. |
|
#7
10/24/2007, 09:02 AM
|
|||
|
|||
|
Looking good.I have a little over $100. in mine but I did mine in oak and as so as I'm done with it I'll start my thread
|
|
#8
10/25/2007, 12:23 PM
|
|||
|
|||
|
Got the actinic mod installed
I got the nano-tuners actinic mod installed last night. It went pretty well but Nano-tuners did not include the instructions. I found a PDF on their website that did the trick, although a few wires were different colors in my kit than in the directions.
Nano-tuners tell you to drill a 1/2" hole into the inner compartment for the power cord - which opens it up to the elements of the tank, and eventually corrosion. I ended up drilling a smaller hole through the inner wall just big enough for the wire and sealed around it with silicone. The other thing to watch for is the plastic does not drill well, especially with a 1/2" bit - I almost cracked the inner wall when my bit grabbed. Drill bits also leave rough edges. I switched to the dremel, which worked great. I would also not leave the screws on the table where a 3-year old can get to them, even if they are supposed to be sleeping. There are 24 of those little screws and when you step out to the garage and come back to find ALL the screws are gone, it will make your heart stop. It took me 30 minutes to find them all... Here is a shot after it was completed - by the way, the glass goes UNDER the plastic. 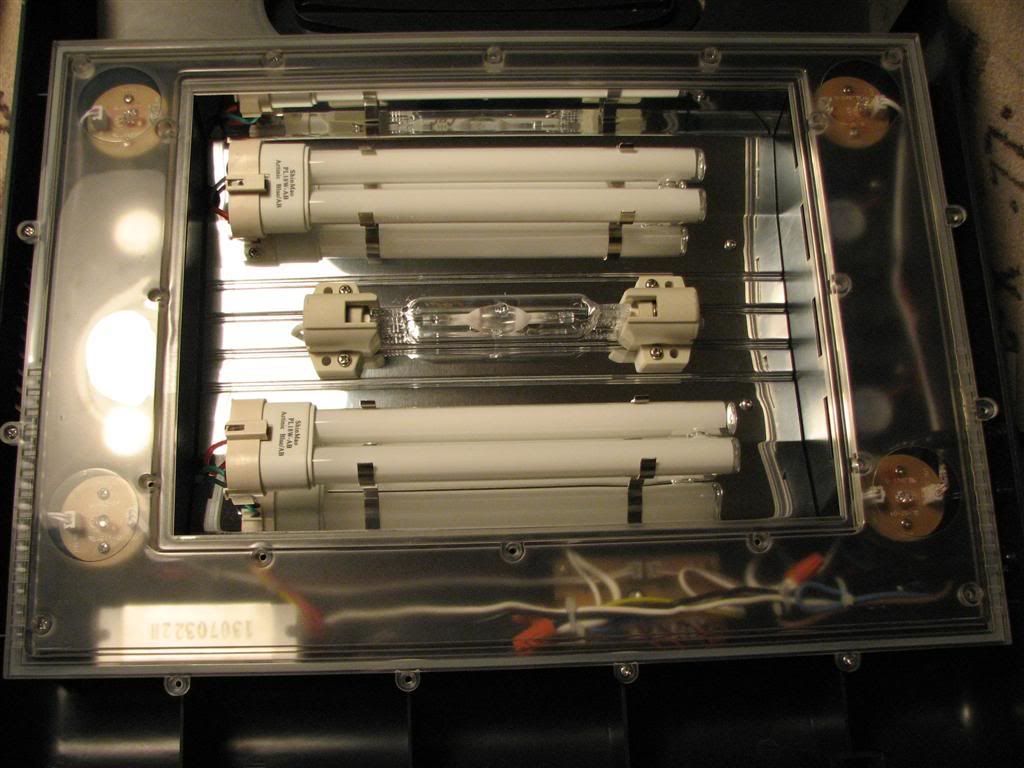
|
|
#9
10/28/2007, 11:00 PM
|
|||
|
|||
|
Well, I got the stand completed and the tank filled this weekend. I have a good friend that has been a great resource and a lot of help. I got a 5-gallon bucket full of previously live rock from him that came from another guys tank after he broke it down, 5 gallons of water from his tank, and a cup of sand. I hope this will give me a head start on cycling.
Here is how the tank looked on Friday night - despite washing the sand off pretty well, it wasn't enough...I am not sure how the aquascaping turned out - I couldn't see so I just put stuff in at random.  Saturday morning I broke out a Magnum 350 I borrowed to help clear the water faster - not sure if it helped or not, the filter was pretty much toast but I let it run all day - here is how it looked that morning - that is my three year old in the pic that stole all my screws - little thief. :P 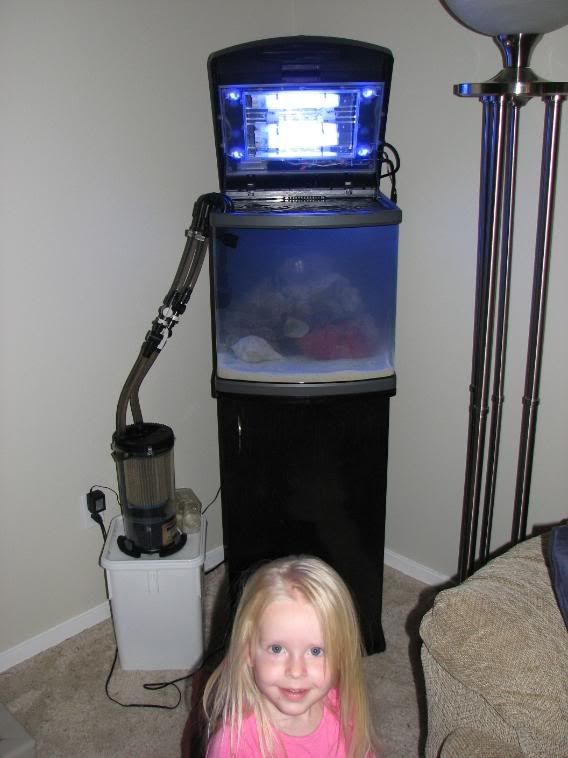 Saturday night things were looking a lot better - not too happy with the aquascaping but I think I want to find some more base rock before I mess with it. I added some snails and hermit crabs from my friends tank - hope they survive, not much food in there yet. 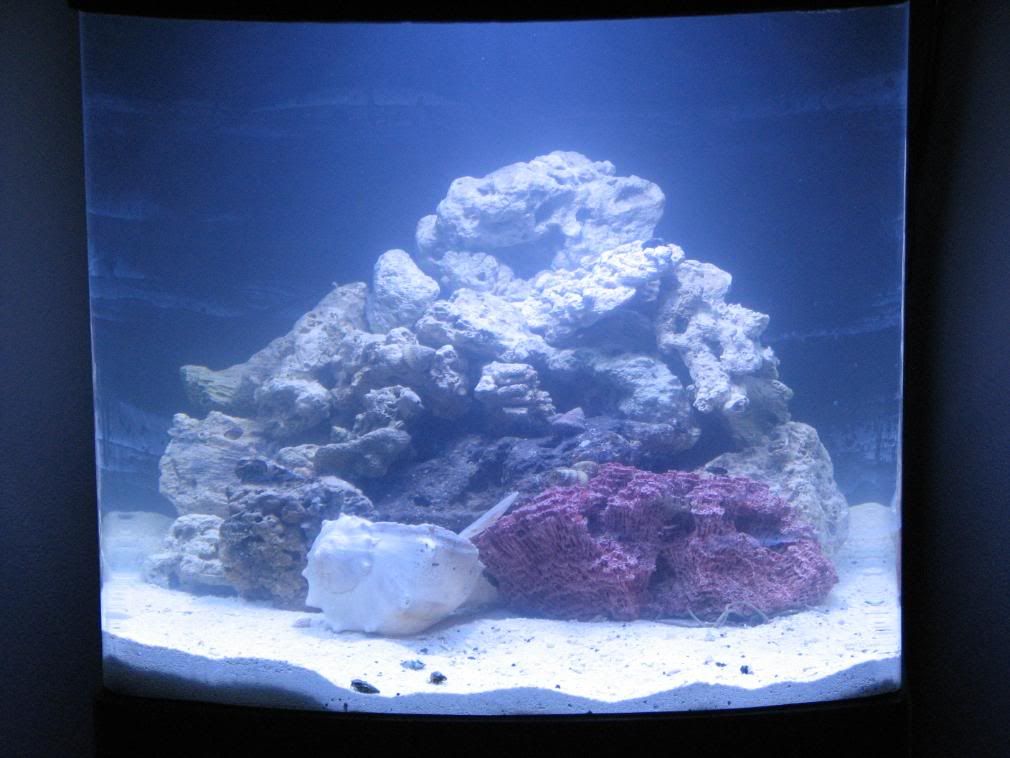 Here are a few shots of just the stand and how it turned out - I am pretty pleased but already have the thing 1/2 full (or is it 1/2 empty?) 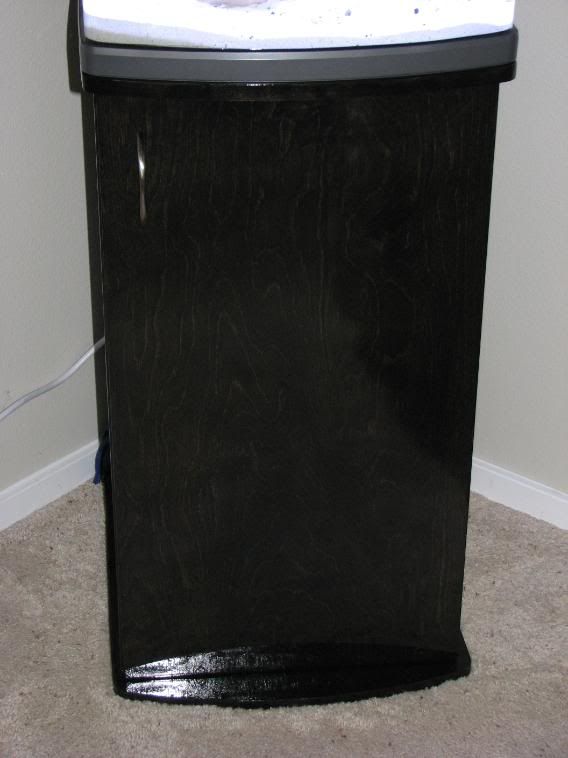 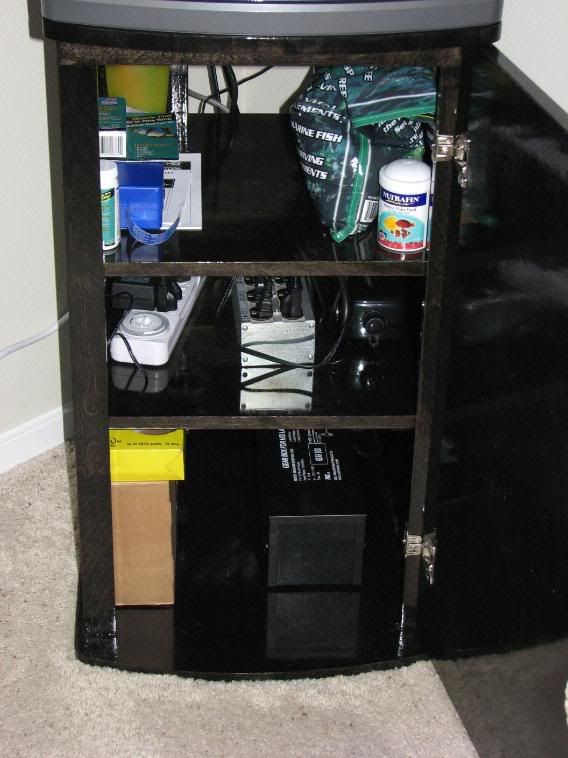 Here is how it is looking Sunday, day 3 - tank is much clearer - hermit crabs and snails are still alive and so far all tank conditions are in the green (nitrites, nitrates, etc.) I picked up a Coralife power center to run the lights today, seems to work well but the cord is a little short, barely reaches, might have to rethink that purchase. I also started running the protein skimmer - I am pretty please with the skimmer, it is working well - the only thing I don't like about the skimmer is it is difficult to remove to open the lid. I am thinking about a Tunze 9002 but I still need to measure to see if it will fit or not. 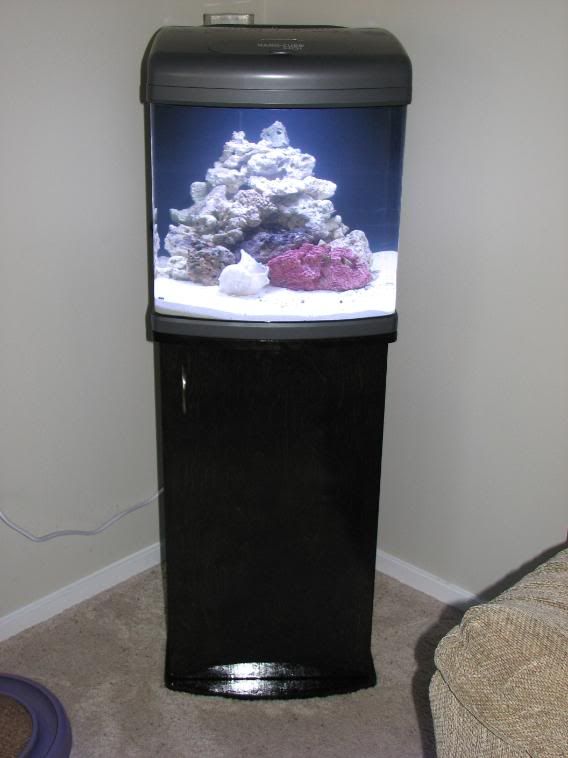
|
|
#11
10/30/2007, 01:12 PM
|
|||
|
|||
|
Very well thought out process and it looks good so far. Wish I had your wood working skills.
__________________
"Yeah it's Reef Safe" |
|
#12
10/30/2007, 01:58 PM
|
|||
|
|||
|
Very Nice Stand!
-Chris-
__________________
I learned it from Reefcast! |
|
#14
10/31/2007, 11:08 PM
|
|||
|
|||
|
Quote:
|
|
#15
10/31/2007, 11:10 PM
|
|||
|
|||
|
I have been having problems with the temperature in the tank when trying to run the halide over 6 hours. The temperature has been climbing from 78 to 82.5 in 6 hours - too much for my liking. I was thinking about a chiller but my buddy suggested a fan first. This is what a came up with. I am a bit of a pack rat so I had most of these parts lying around. Total cost was $0.00
The PC fan came out of a junk computer at work. It has a thermal sensor so I shorted it with solder to run at full speed so I could control it with voltage. I used two window locks and some brackets I found in my tool box to make the mounts. 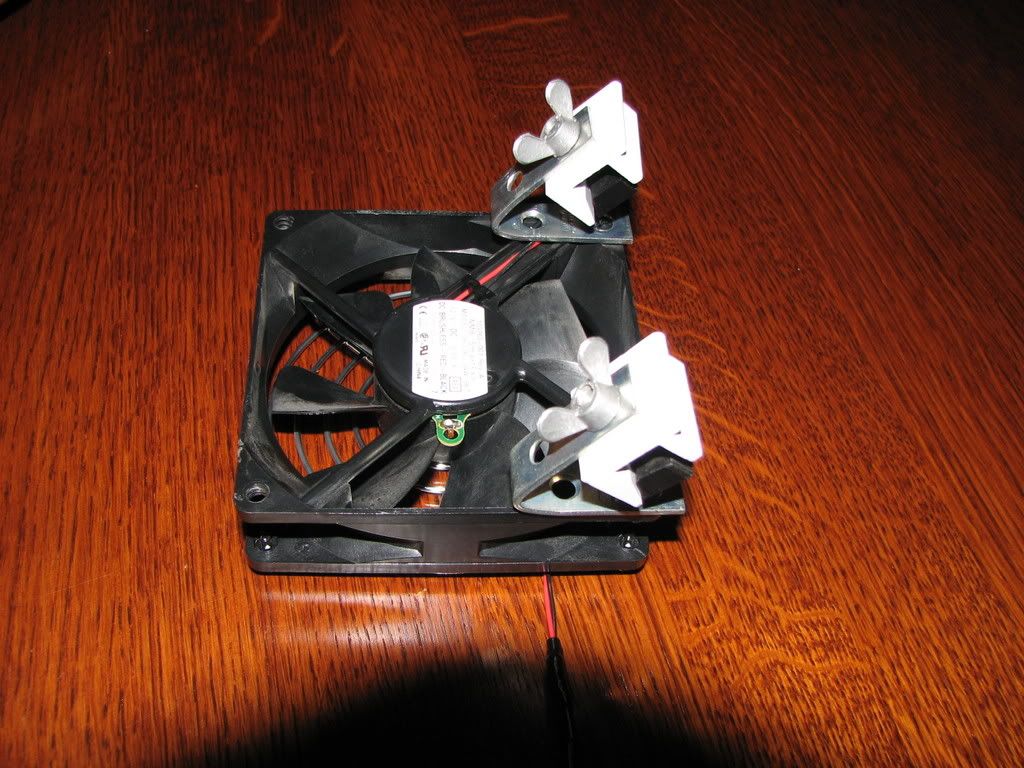 I used an old AC adapter I had and just cut the end off and soldered and shrink wrapped it to the PC fan. Since it has selectable voltage, I can turn down the voltage to slow the fan (and the noise) down. It seems to work just right at about 6 volts - good flow but not too loud. 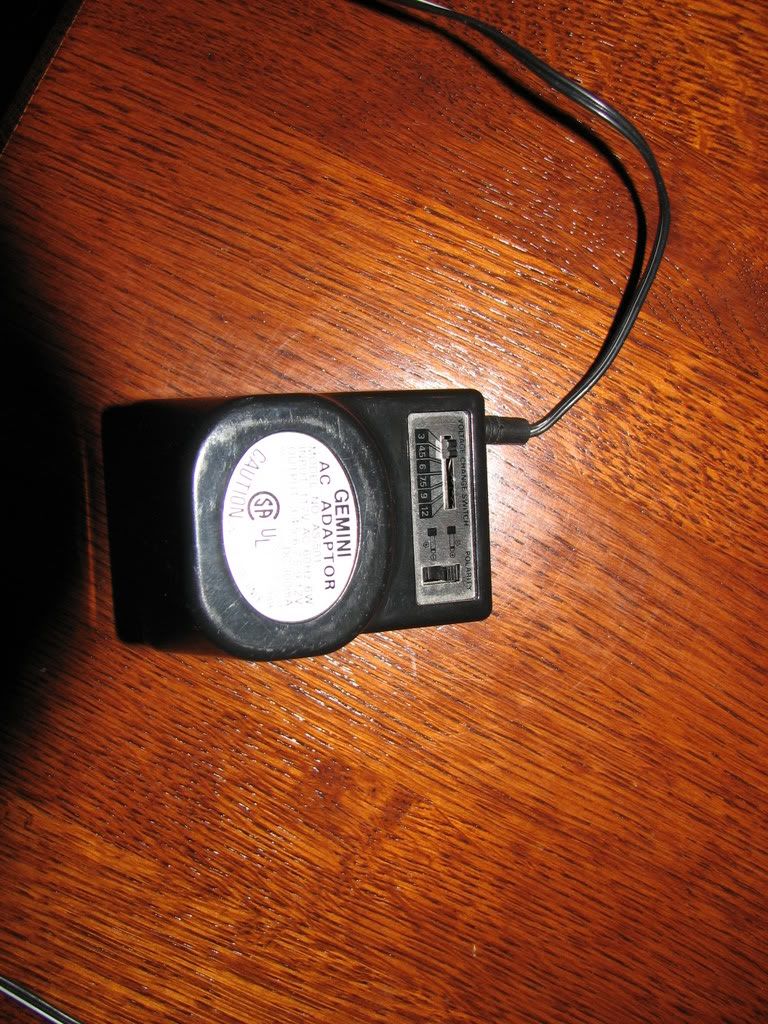 Here it is on the tank. It doesn't look too bad and seems to be doing a good job of cooling the tank. I hooked it up to the halide timer circuit so it will come on with the halide. In testing for an hour tonight, the tank temperature dropped a full degree. I am going to run it for 8 hours tomorrow and see if it makes a big difference. If it doesn't, I am going to buy a chiller. 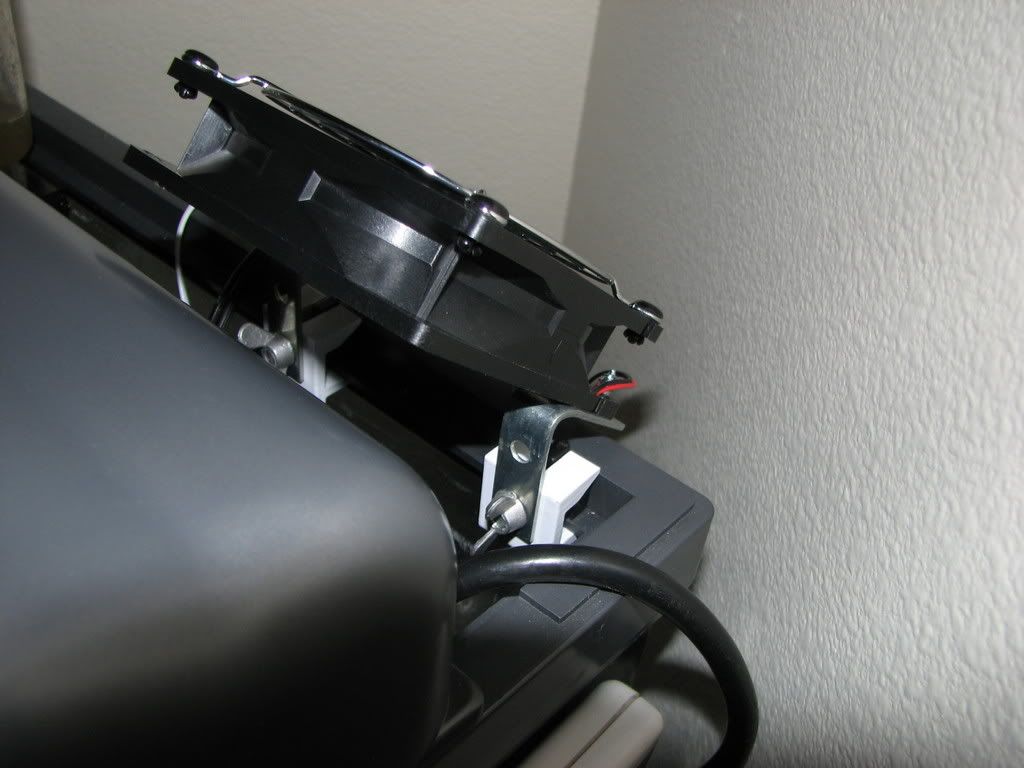
|
|
#16
11/01/2007, 12:57 PM
|
|||
|
|||
|
Any measurements or tips would be appreciated. I kind of sketched what I could see, but I guessed on dimensions since I haven't purchased the tank yet. Couldn't tell if there were any internal supporting pieces. Did you round the front edge with a saber saw? Mark
|
|
#17
11/01/2007, 12:57 PM
|
|||
|
|||
|
I noticed some microbubbles in the tank last night - they are coming from the fan. I was surprised that it would do that, the fan is really not blowing very hard. The pump chamber in the back was down about 1/3 when it was occuring so I topped off the tank until the chambers were almost full - that seemed to take care of it for the most part but it looks like I may need to move the fan over to the center where the water level is constant.
|
|
#18
11/13/2007, 01:19 AM
|
|||
|
|||
|
I have made quite few changes in the last week or so
I found a used chiller on eBay in Vegas that was ending at the same time I was down there so I took advantage of an opportunity for local pickup and got a Current USA 1/15th HP chiller for $172. I was glad I made the shelves adjustable because the chiller is pretty big. 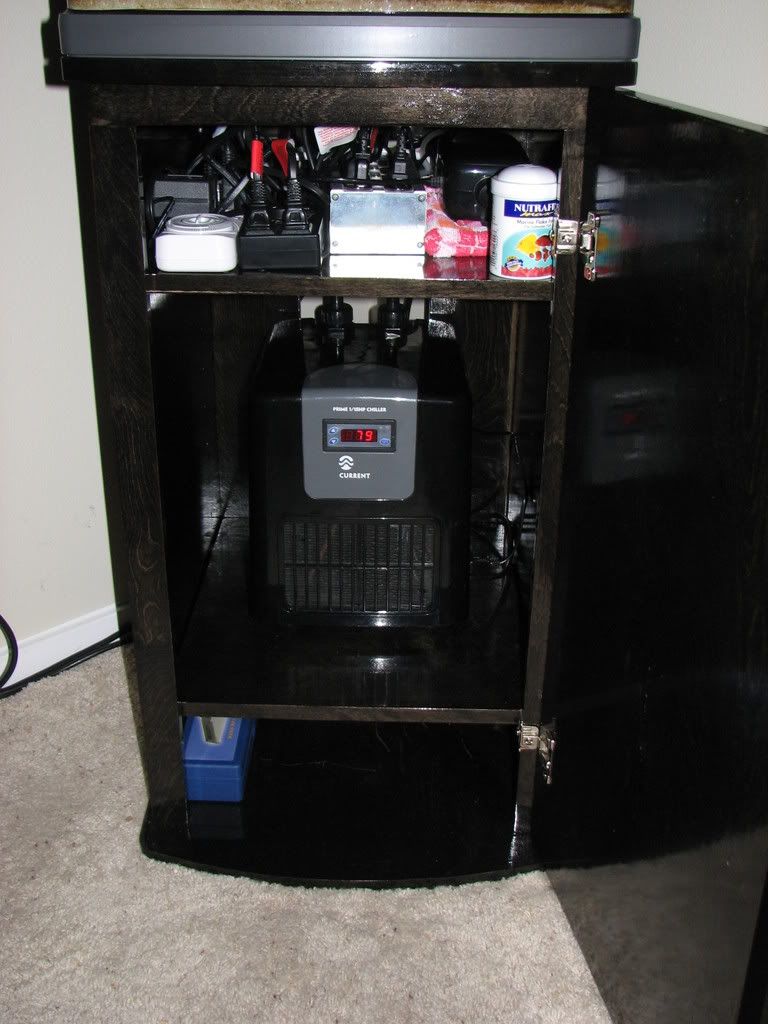 The chiller also prompted me to swap out the stock pumps because I wanted to use one pump for the chiller as it needs at least 300 gph. I went with Rio 6 HF's since someone else mentioned they were the biggest pump you could fit in the rear chambers. They barely fit without any attachments. I need to come up with a way to dampen them somehow as they vibrate against the glass on the bottom and make too much noise. I got some more base rock and spent an hour or so aquascaping. I tried to leave quite a bit of room for corals and so forth and made sure I have lots of little caves and nooks and crannies. I picked up two Koralia Nano's and mounted them to the back wall's in the corners. Since I swapped out the stock pumps for the Rio's and one pump was running the chiller, I couldn't run the pumps on the wavemaker. I decided to put the Koralia's on the wavemaker. At first neither of the Koralias would power up and I figured out it had something to do with the circuitry of a standard powerstrip. I switched to a fancy Isobar powerstrip with isolated circuits and now it is working fine. I set the delay to 2 minutes. I was getting tired of nothing to look at so I went and bought the required "Nemo" fish - every tank should have at least one, especially if your kids have seen Nemo. I let my kids name him - you'll never guess the name. :P Here is a full tank shot with the new aquascaping, the Koralia Nano's, and the clown fish. The tank is starting to cycle a little with some brown algae starting. I am also starting to get some nitrate buildup in the tank. It is hovering right around 20-30 PPM. I will continue to do water changes once or twice a week until it is under control. 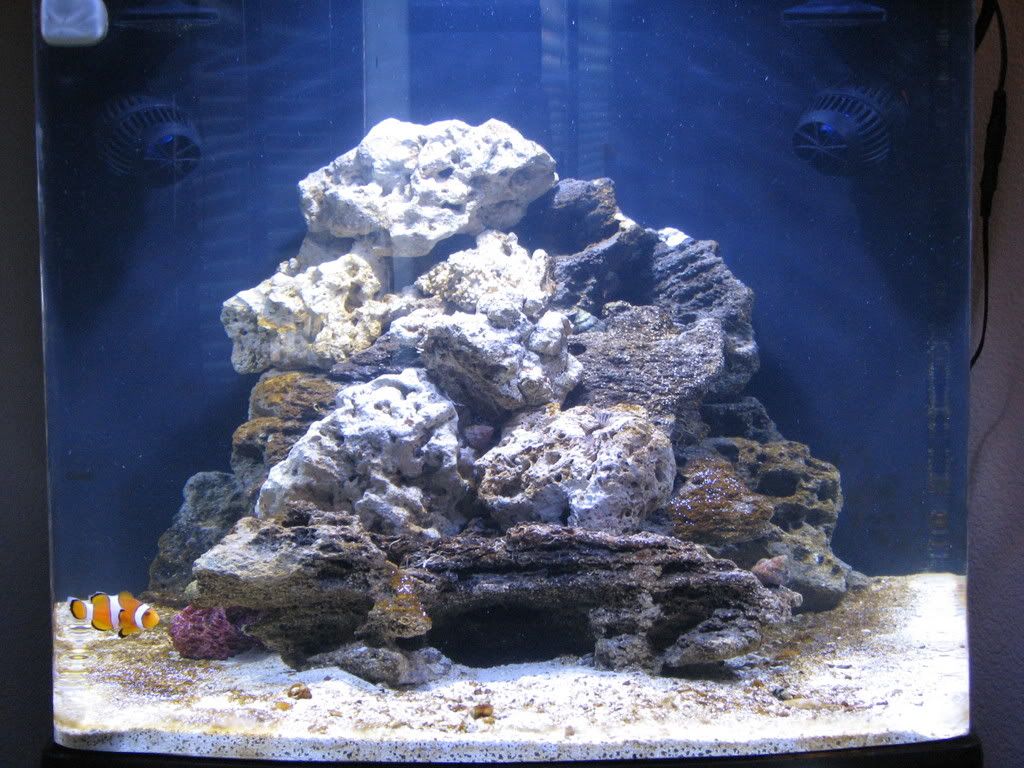 I also got some other little creatures to add to the tank from my friend. I added a brittle star, some zoathids, some SPS's, and quite a few copepods. I am not sure of the names of any of the corals at this point - still new at corals so it will take me some time to familiarize myself with them. Here is a time-delayed FTS with just moonlights on. 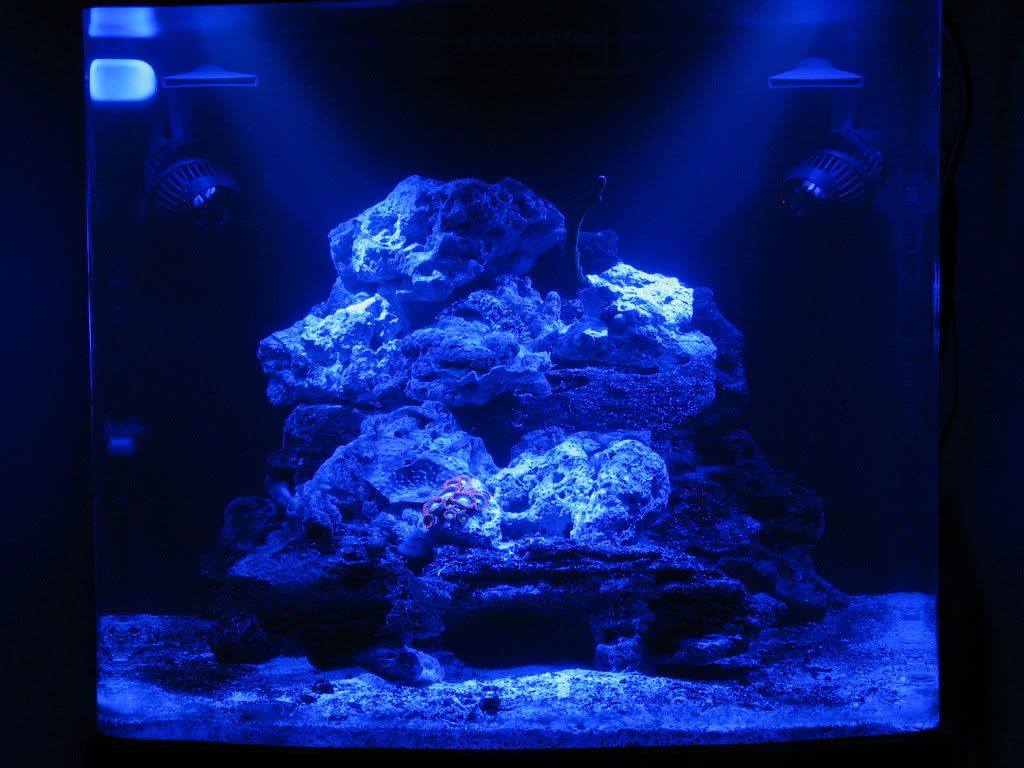 Here are the zoanthids, pictures turned out pretty well but in person the colors are much more vibrant. 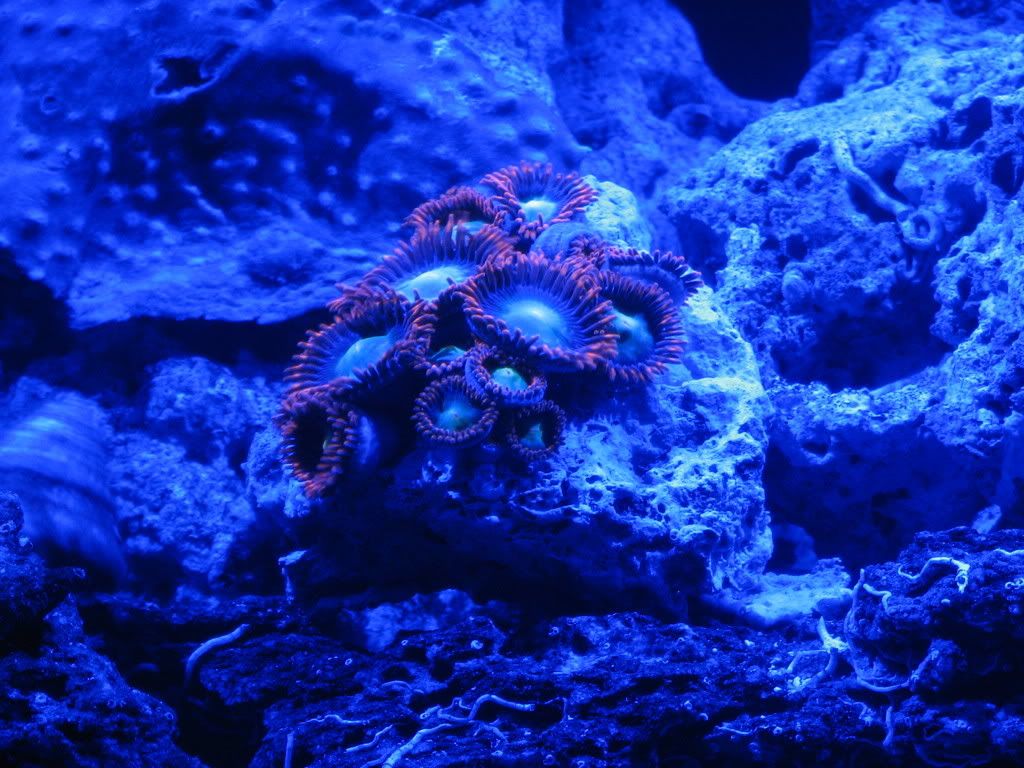 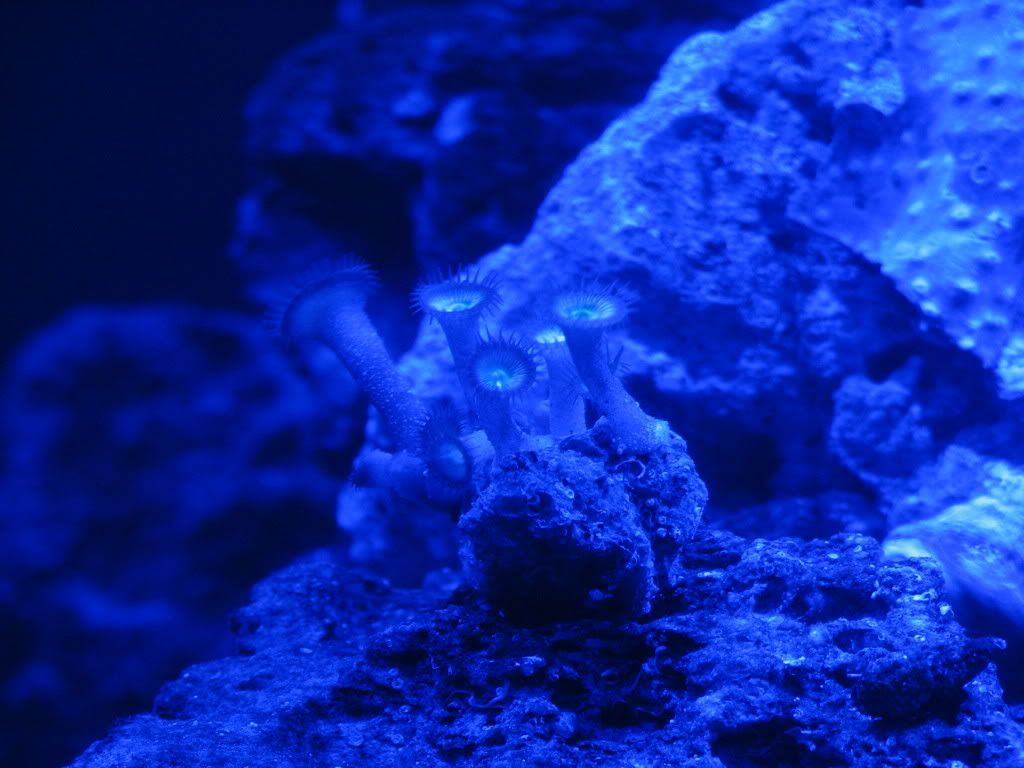
|
|
#20
12/09/2007, 10:57 PM
|
|||
|
|||
|
My tank finished cycling a few weeks ago and now everything is starting to look a lot better. I am slowly adding inhabitants and coral frags. So far everything is doing well - the only casualty up to this point is a Kenyan tree frag that I could not get to stick. I glued it three times and rubber banded it once but the last time it came loose it went down between the rocks and I decided to let it stay there - too much hassle to dig it out and I was ticked at it - oh well.
I switched salt this week to Reef Crystals - it definitely has some extra calcium in it. I tested the calcium in the tank last week and it was 360 so I ordered some Reef Complete to supplement. Before using the Reef Complete I decided to do a 5 gallon water change with the Reef Crystals. When I tested the calcium in the tank again after the water change it tested at 400, right about where I want it. The stock protein skimmer works awesome but because it gets in the way of the hood and the air pump is loud so I am getting a used AquaC Remora to replace it. It will be here tomorrow and hopefully with a few mods to the MaxiJet 1200 pump I will be able to install it. Last week my tank had babies - there has been an explosion of copepods in the tank - you can see little white specks all over the place in the photo's below. Here are a few full tank shots with the halide on. 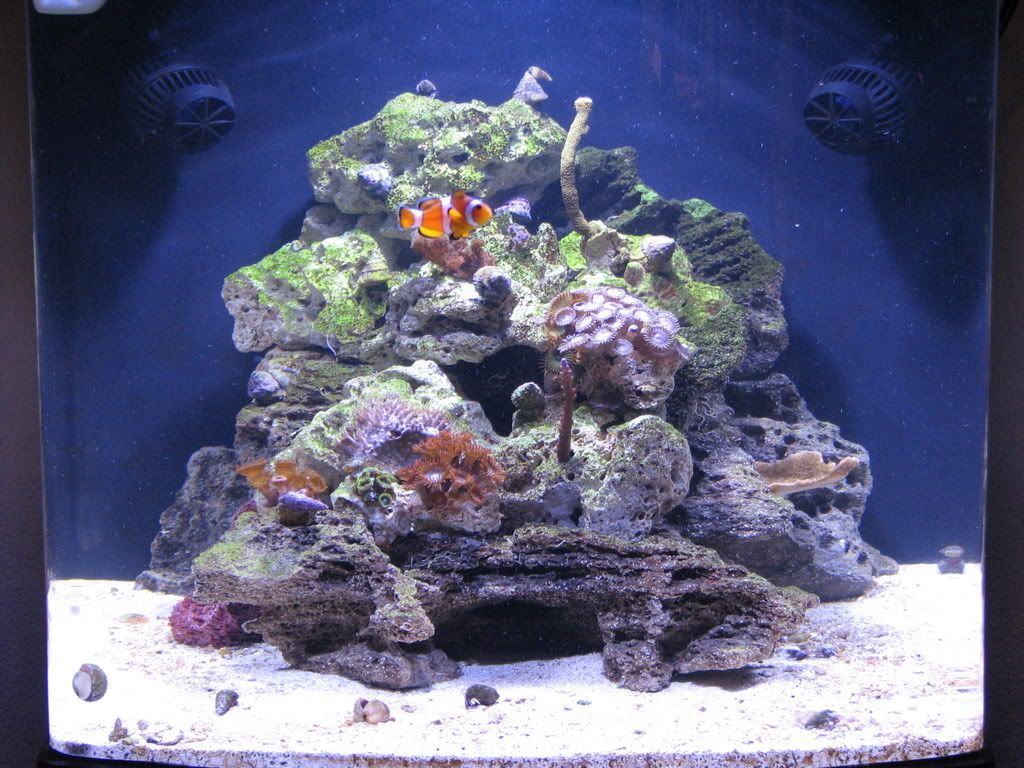 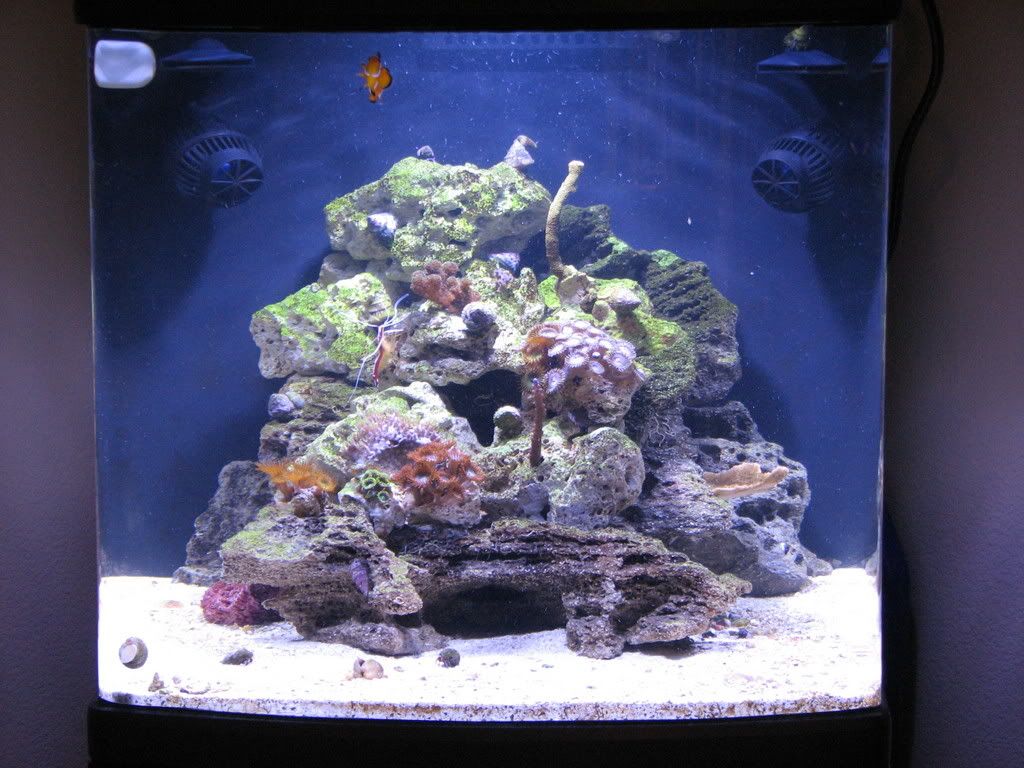 Here is Purple Tipped Acropora in the bottom of the pic. I have not seen much out of this coral yet but hopefully will see some growth soon. It has been in the tank for 3 or 4 weeks now.  Here is a Pocillopora - at least I think it is. 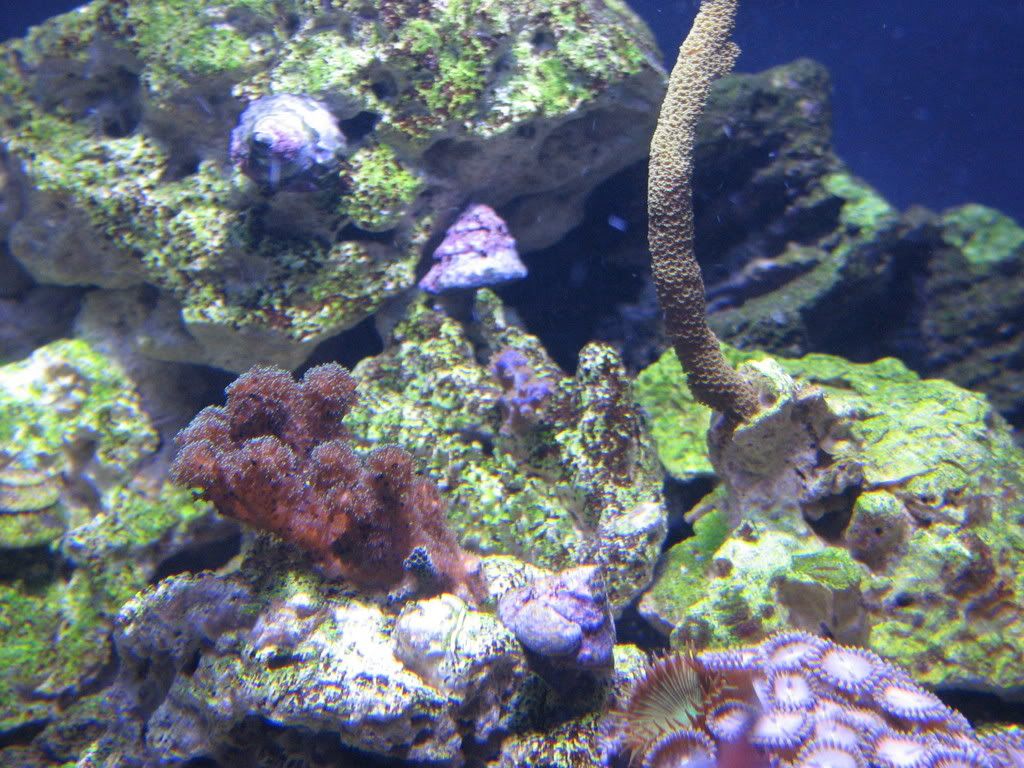 Here is a plating coral - not too much color in this coral but the are pretty cool when the start growing.  I can't seem to keep the hermit crabs from perching on this digi coral. They don't seem to be hurting it and when I flick one off, they are back on it within 10 minutes - must be sun-bathing. 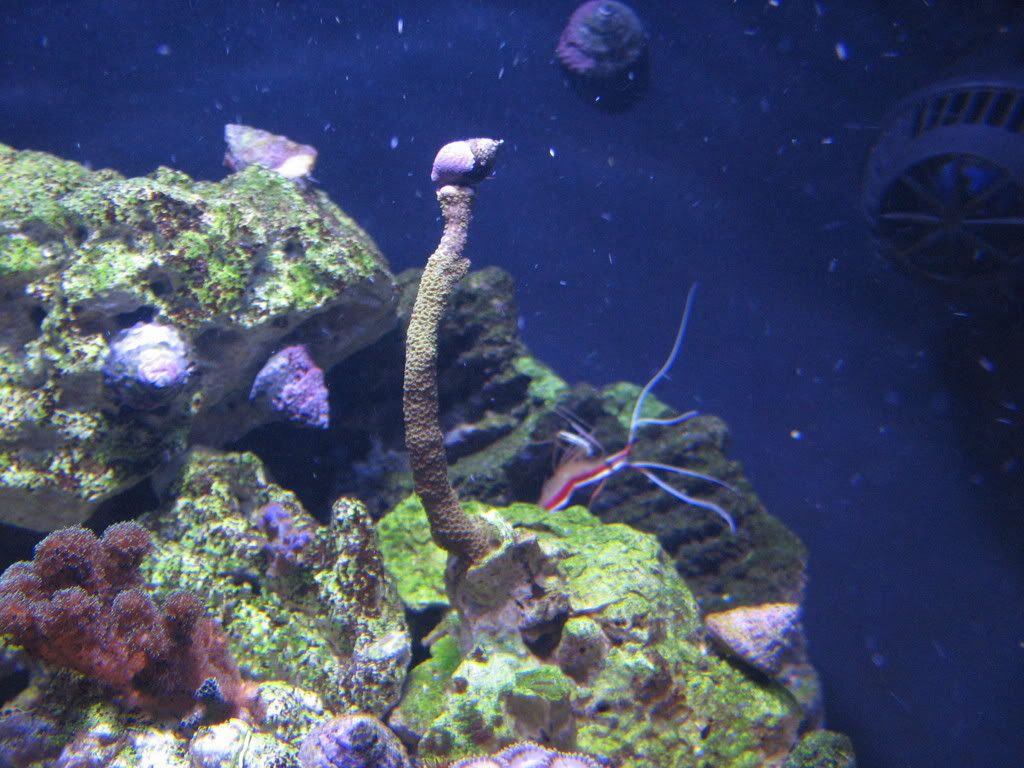 Here are some dragon eye and wild zoanthids. Very pretty under bright light but not the fastest growing zoa's. 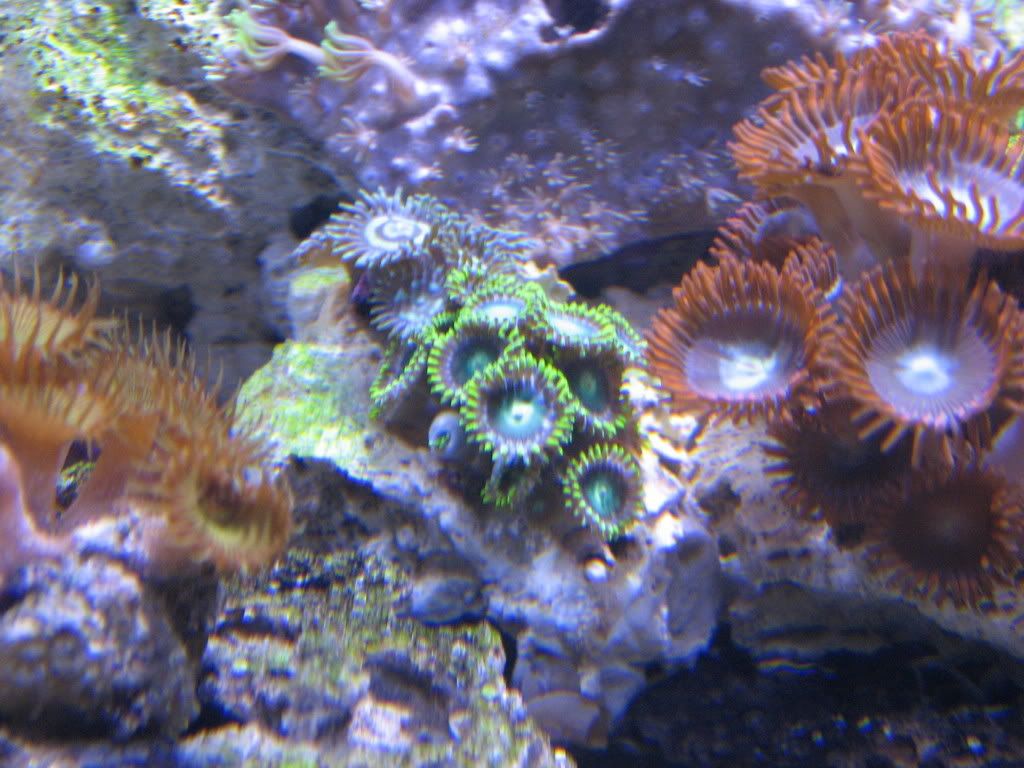 Here is a mystery coral - I cannot remember the name of it but it is pretty spendy. I will have to check with my buddy that fragged it for me to get the name. 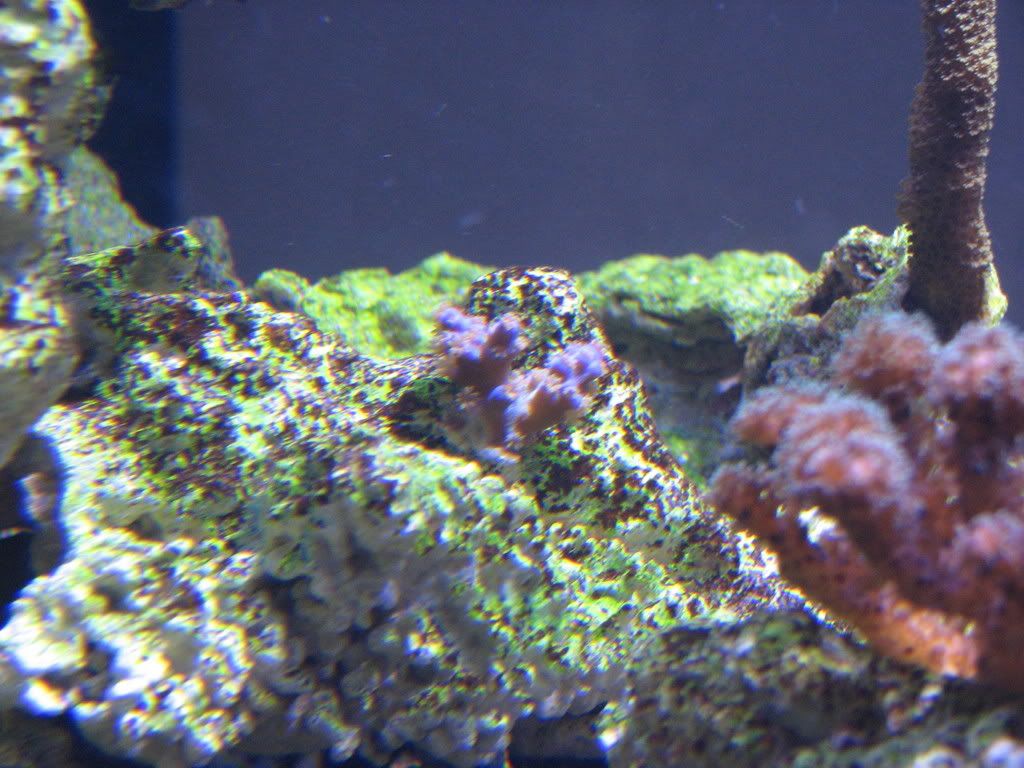
|
|
#22
12/10/2007, 11:38 AM
|
|||
|
|||
|
Quote:
|
|
#23
12/11/2007, 12:21 AM
|
|||
|
|||
|
Got my AquaC Remora today
I got my AquaC Remora today - a little but quieter than the air pump but not by much. I understand they quiet down after a week or so - hopefully mine will as well. The best part is I can open the hood now - not all the way but far enough.
I had to mod the pump quite a bit to get it to fit but these pumps are cheap and mine was used - even better. Here is a detailed thread on how I modded it - http://www.reefcentral.com/forums/showthread.php?s=&threadid=1269122 Here are a few pics of it installed on the tank. 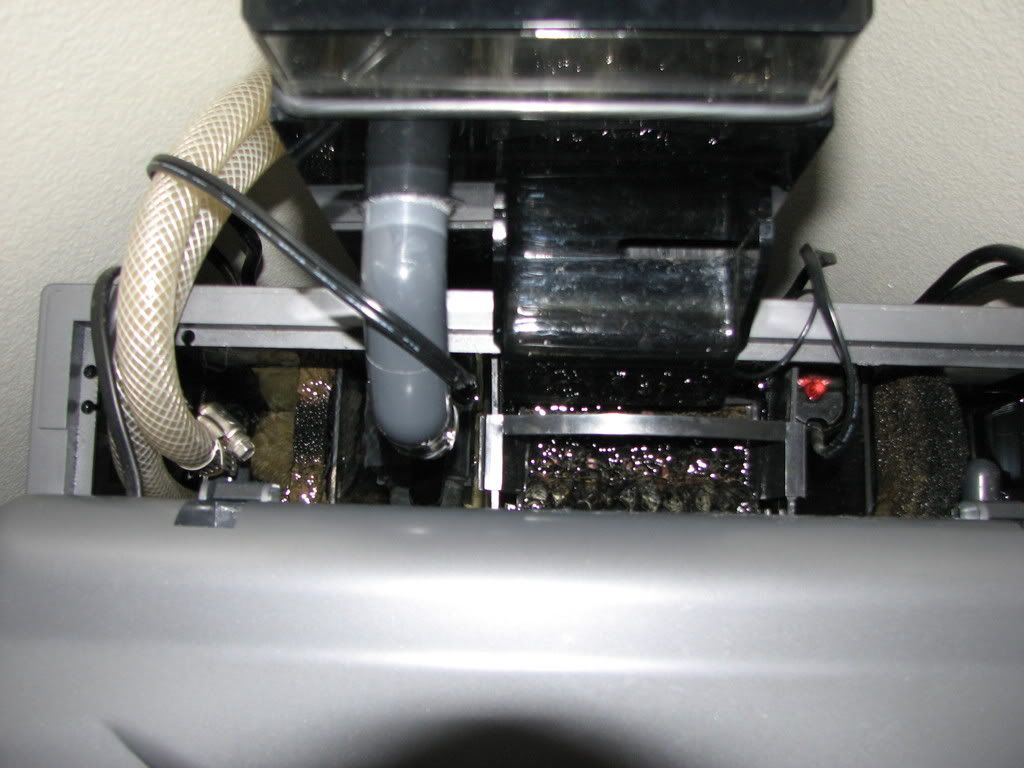 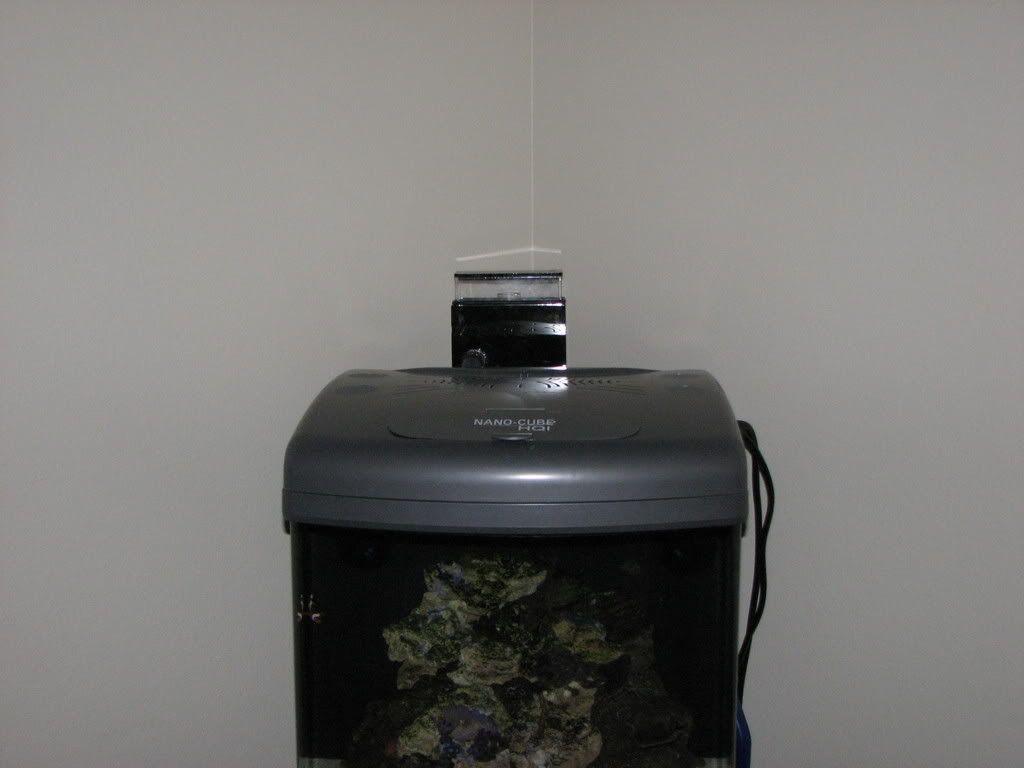
|
|
#24
12/11/2007, 02:33 PM
|
|||
|
|||
|
Looking good love the dragon eye looks really nice.Is the clown the only fish you have?
|
|
#25
12/11/2007, 03:03 PM
|
|||
|
|||
|
So far the clown is the only fish. But there is also 1 cleaner shrimp, 15 - 20 hermit crabs, 15 snails, 1 large brittle star, and 20 or so little brittle stars. I plan on adding more fish soon but I am being very selective since the tank is so small.
I am currently waiting for the lfs to get a Green Clown Goby for me. |
|
|


 Linear Mode

