|
|
|
#1
 10/30/2007, 12:12 PM
|
|||
|
|||
|
I tried this over in the reef section thinking because I am setting the tank up like a reef equipment wise, I would get help but that was not the case. Besides about 4 great people over there, most people ignored it!
Anyways, I will basically post the same stuff here and then continue on where I left off. Here is the same first post from my other thread: Long story short, I moved and could not set up my old tank in my new apartment. I had to downgrade from a 180G to something around 120G...But I have 2 large Puffers and an eel that are going to get even bigger! So I now have a custom tank with a decent footprint that I believe will make them happy. They will loose a decent amount of water volume, mostly in the height but will have a better overall set up. So by now your probably wondering why this FOWLR build is in the reef forum. Two reasons, one because this will be heavily planted with macro algae and mushrooms, making it a sort of reef...not really but I like to think it is, and two because more people will give me advice here! I really want this tank to have a lot of life even though it will not have many corals. I LOVE extremely natural looking tanks! I saw one in a LFS years ago that was full of all kinds of algae that most people on here consider nuisance algae but in moderation, it looked incredible. Thats what I am going for. Before I get to pictures, I will explain the tank set up and also that I am a terrible DIY guy who likes to DIY. I am bad at woodworking and I have never plumbed a tank on my own. So go easy. I would love any help and advice though! The tank will either be BB or have a very shallow sand bed, just for looks though. I am leaning towards a tiny bit of sand and I think my eel is too! The skimmer will be external, as well as the return pump. The sump will be a 33G and refugium will be a 10G. Flow will coem from the huge return pump I have and a closed loop powered by a very, very big pump. The tank is drilled for 4 x 2" bulklheads in the bottom. It was drilled in the wrong places for the closed loop but I can work around that. Lighting is all T5. I am looking at adding a ozonizer but am not sure yet because of how I want some extra algae to grow. Anyways, here is a list if what I have to this point: -72"x20"x19"tall Eurobraced -33G sump -10G refugium -$600 or so of plumbing supplies -4 x 80 watt retrofit T5's with individual reflectors (320 watts total) -PM Bullet 2 Skimmer -Aqua Controller JR. -Sequence 1100 series 5800 Pump for closed loop -Mag 24 return (I dont really want to hear about how you dont like mags...) -DIY Canopy -DIY Stand -2 Puffers who are sick of QT -1 Eel who seems to love QT -200 lbs of LR that are tired of being in rubbermaids -A small start to what will hopefully be a big macro algae collection Heres some random pics of where things are at. I have not had time this week to do anything. I will tomorrow I hope. Again, go easy on the woodworking! BTW, only have a camera phone at the moment so quality is not good at all but you get the idea! 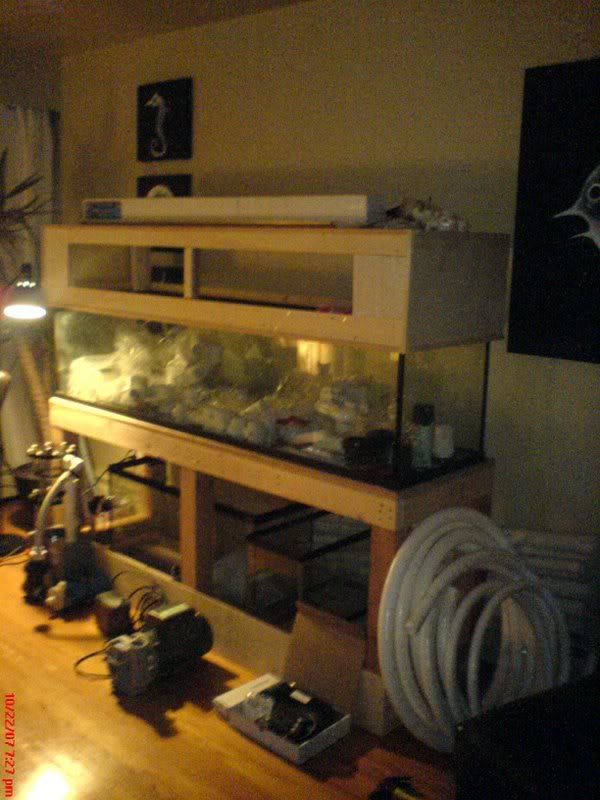 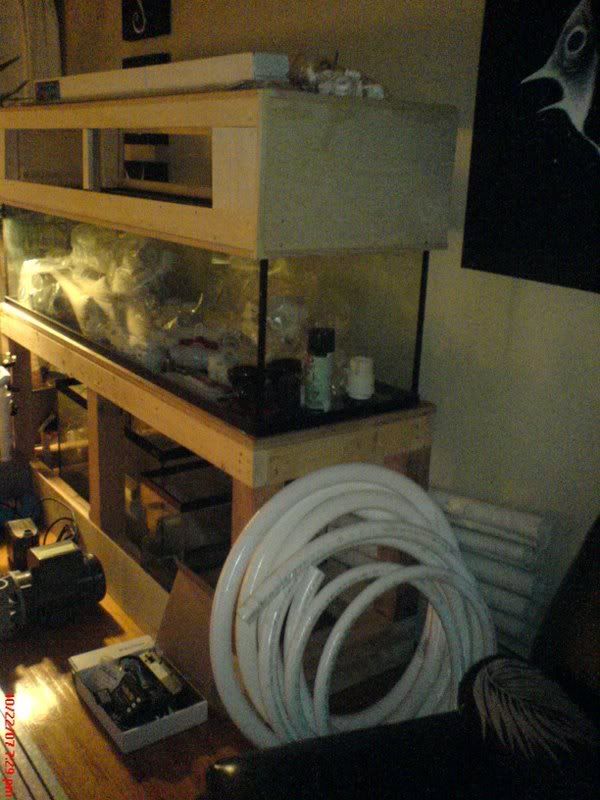  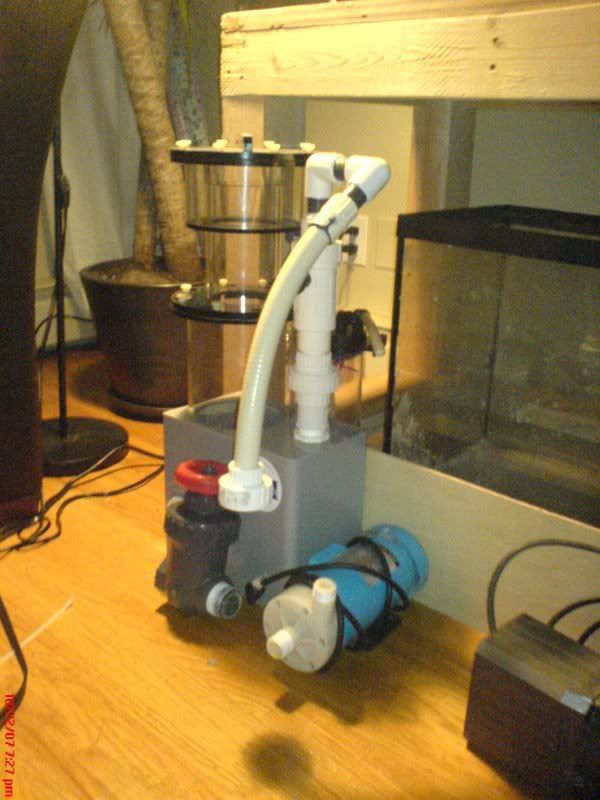 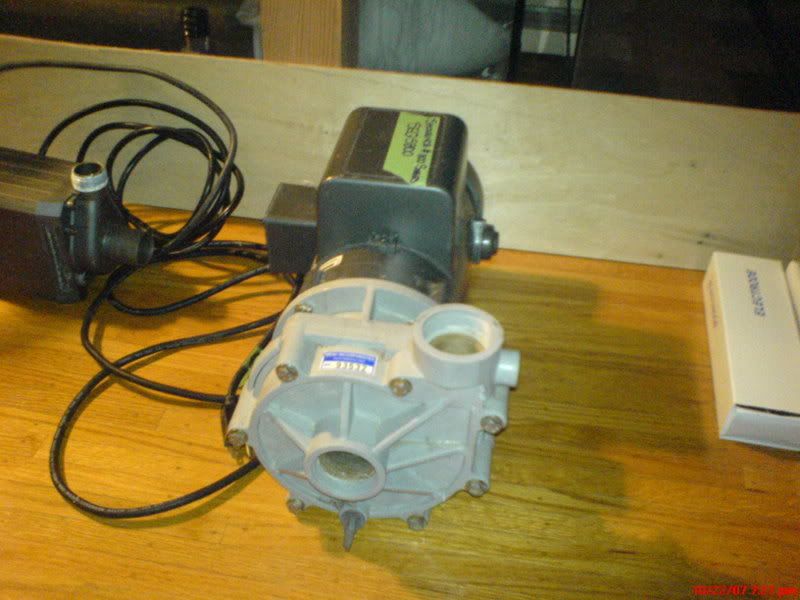 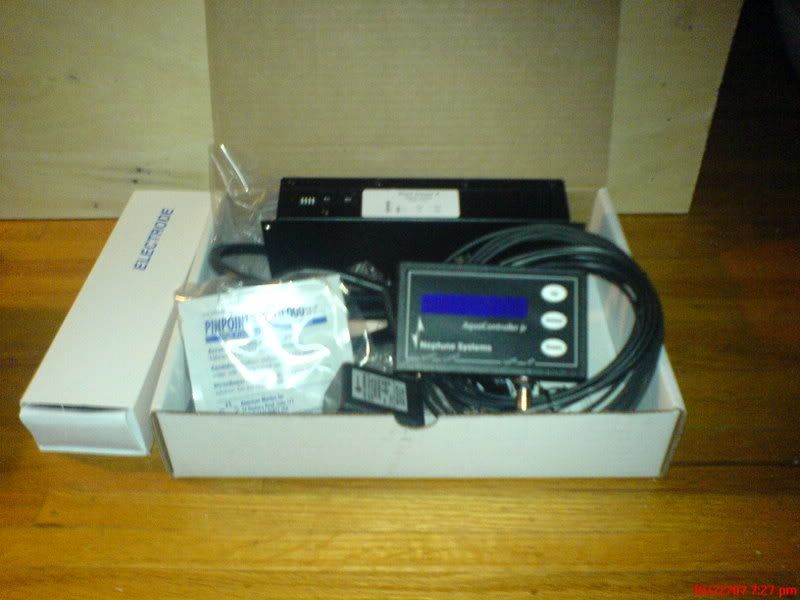
|
|
#2
10/30/2007, 12:15 PM
|
|||
|
|||
|
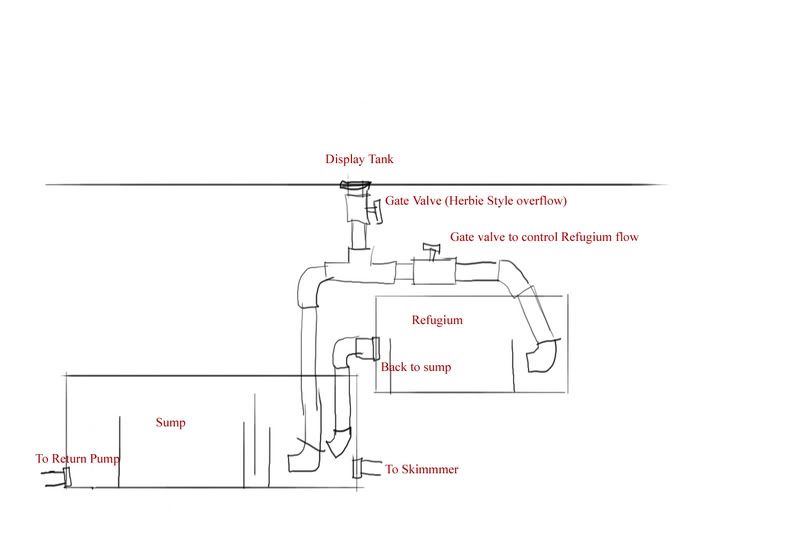
This was the first plan for the plumbing I think. Things have changed a little since then but not too much. I am going with a "herbie" style overflow and a separate sump and refugium. After a bit of a drilling mishap, I am now using rubbermaid sump and refugium. The glass cracked when I was drilling
|
|
#3
10/30/2007, 12:17 PM
|
|||
|
|||
|
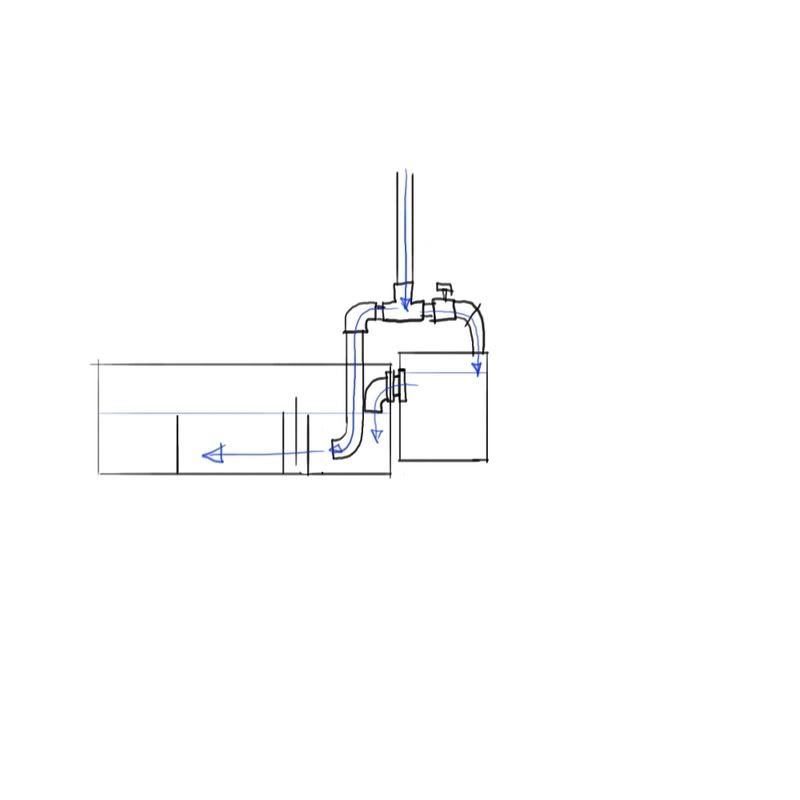
The big difference now, is the return is on the right side of the sump and the refugium drains into the return of the sump.
Heres a few pics of one of the Puffers and eel (both are much bigger now though!): 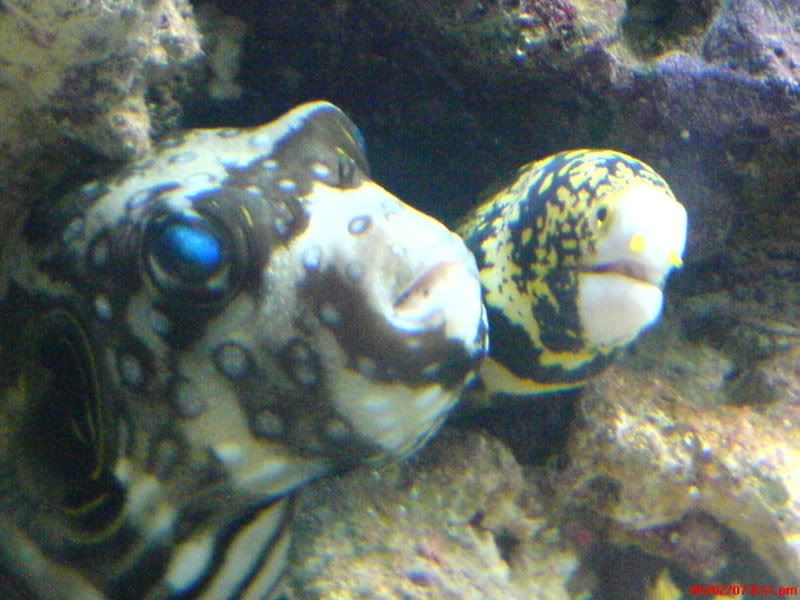 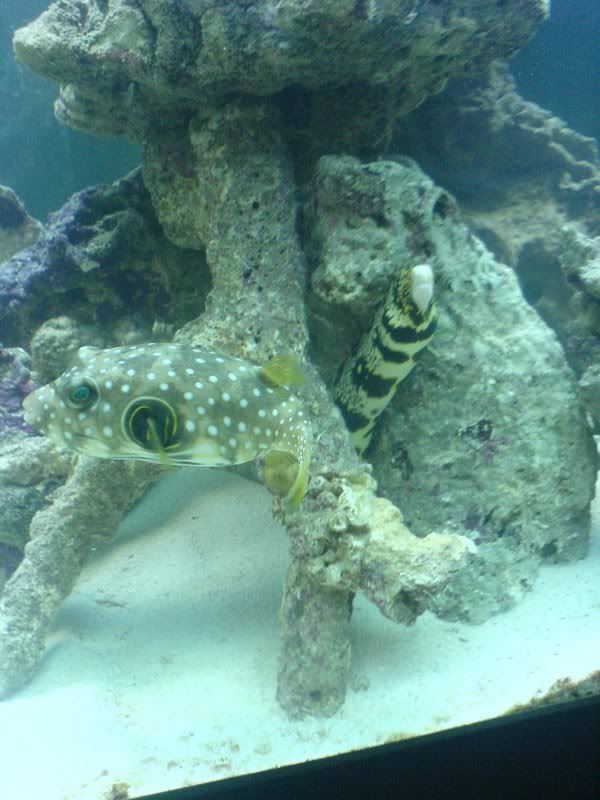 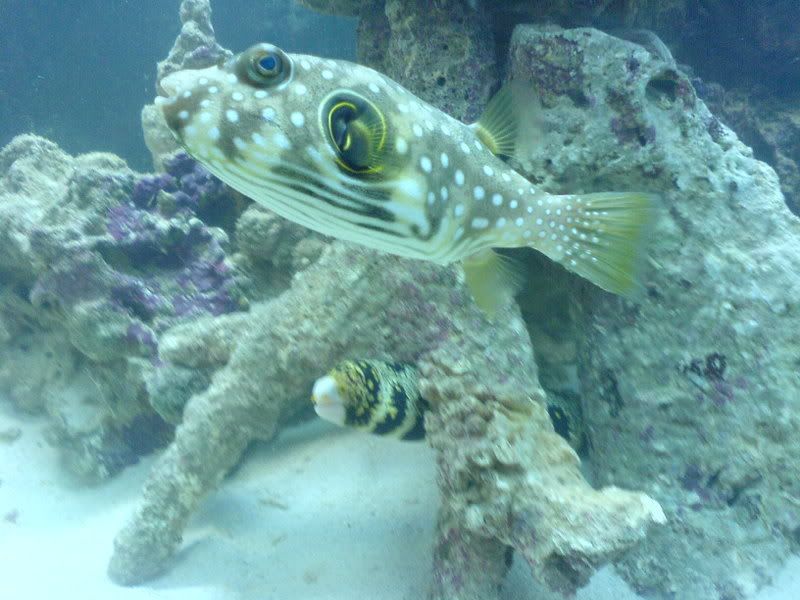 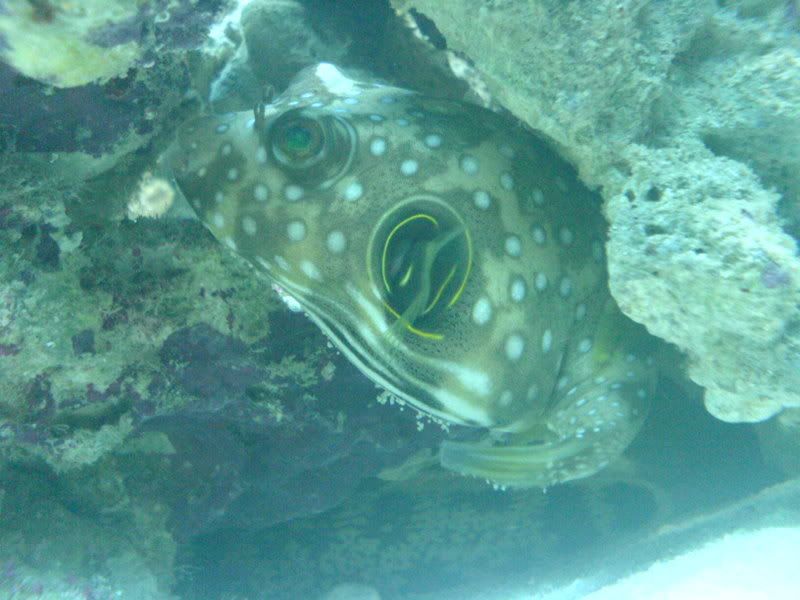
|
|
#4
10/30/2007, 12:19 PM
|
|||
|
|||
|
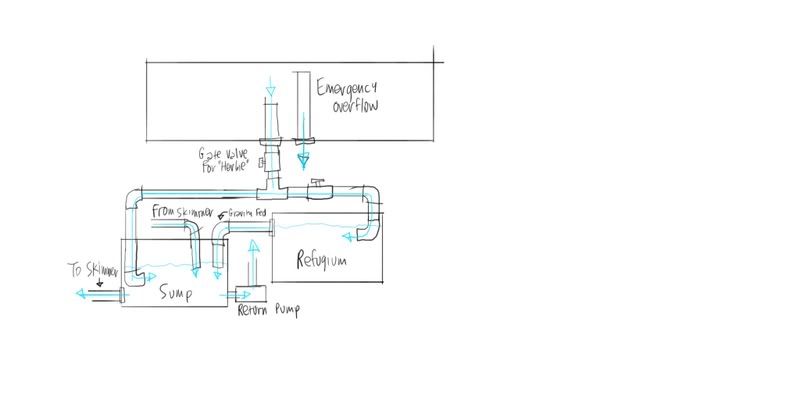
Found this...An updated version of the plumbing. This is MUCH closer to how it will be:
|
|
#5
10/30/2007, 12:22 PM
|
|||
|
|||
|
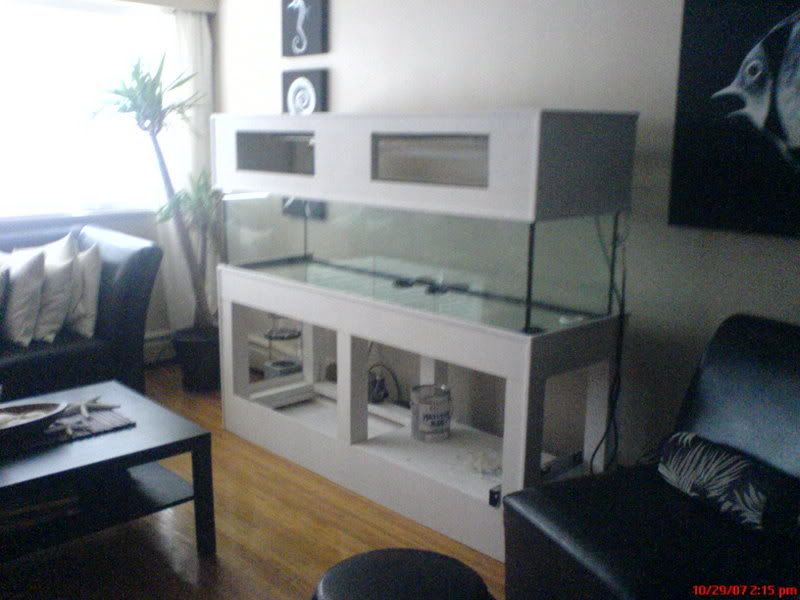
Heres where Im at now. I have the stand and canopy skinned and primed, ready for paint. It will be white, so will look much the same as it does primed. Heres a pic:
 I also wired and mounted the T5's which are much easier than I thought! They are really, really bright but my camera does not pick up the brightness much: Actinics: 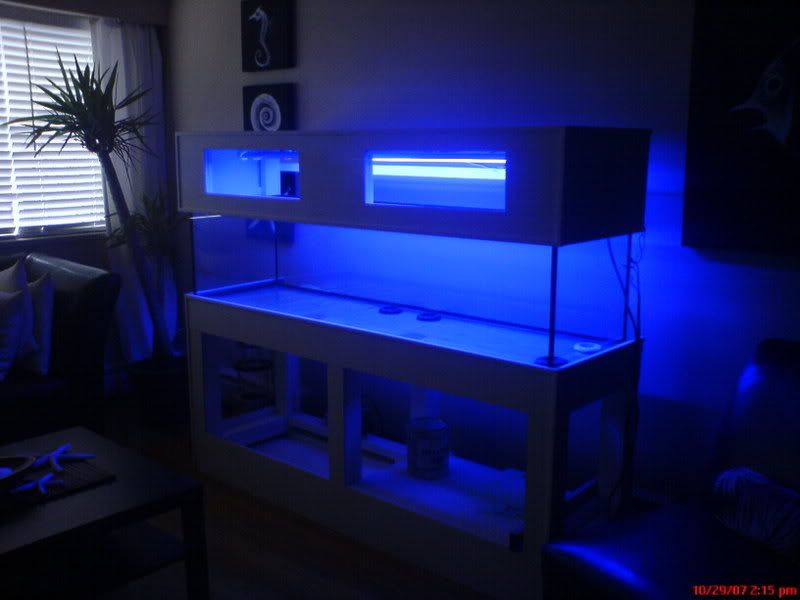 Daylight/Actinics:   
|
|
#6
10/30/2007, 12:24 PM
|
|||
|
|||
|
Glad to see it's coming along. I remember back when you first mentioned the scale back plans.
I'm using rubbermaids sumps as well ;D
__________________
"Why is the rum always gone?" |
|
#7
10/30/2007, 12:27 PM
|
|||
|
|||
|
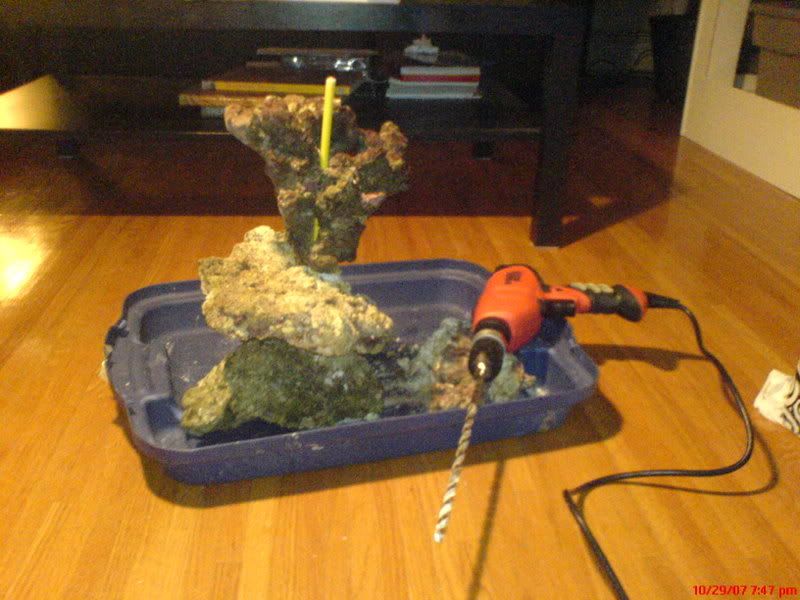
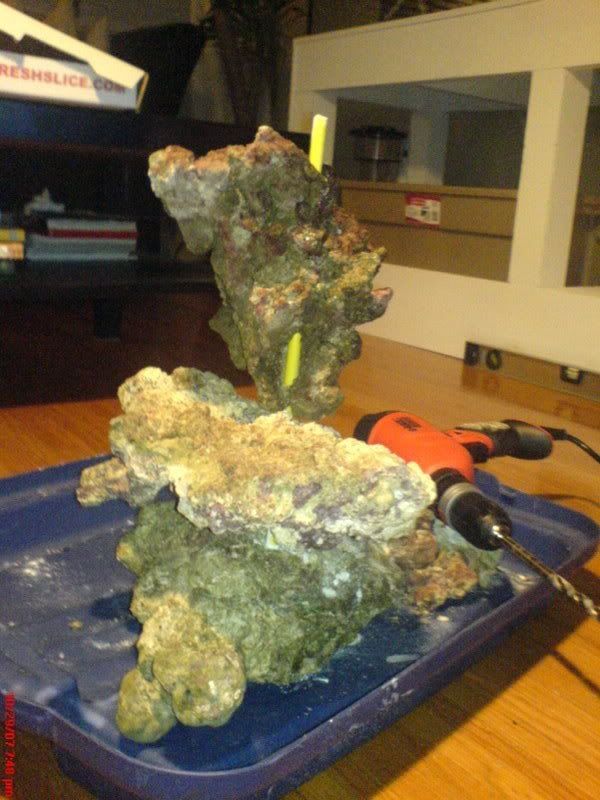
Last night I wanted to see how easy making LR pillars would be. I am using 1/4" fiberglass from "parking flags" and a masonry drill bit. I had some extra dried out LR laying around and thought I would give it a shot. The LR was quite easy to drill and the rods are WAY stronger than I though. I drilled about 1/3 of the way through the bottom, heavy rock and then all the way through all other rocks to be stacked ontop. Insert the rod in the base and slide the rest in. Theres no way the rod will break or bend at all and no way this thing will fall over. Works great! I have to paint them black with krylon but for now I left them yellow so you can see the rod easily. In this pic the rod is a bit long too but I will cut them to size when I use the LR that will actually be going in my tank.
|
|
#8
10/30/2007, 12:33 PM
|
|||
|
|||
|
Quote:
Im downgrading though, knowing that I have to give them up if they get way too big for the tank or are unhappy. Like I said above, this is about the best dimensions I could think of for around 110G or so. How are the rubbermaids working for you? I love how easy they were to drill and fit bulkheads! |
|
#13
10/30/2007, 05:17 PM
|
|||
|
|||
|
Quote:
|
|
#14
10/30/2007, 05:21 PM
|
|||
|
|||
|
Quote:
Basically I am going to paint the rods black with Krylon and then its just a matter of drilling the LR and sliding it on the rods. Doesn't get any easier. These pillars are only about 19" though because its a shallow tank. If they were going to be much higher I may have used thicker fiberglass rods. I am going to have two pillars that reach right to the surface of the water and one smaller one. I want less LR in the display than normal. The rest of the LR will go in the sump. I have indeed named my puffers and eel. With the help from my little brother actually. I named the Stars and Stripes "Crush" after the surfer turtle from Finding Nemo...He just seems to have that laid back surfer attitude and if he could talk I bet he would sound just like a surfer! He also crushes shells so easily. It just fit. My Porcupine Puffers name is "Grrrr". He always seems angry but in a cute way. The eel was named by my little brother, "Eeli"...Yeah real original but I actually thought it was pretty funny. Last edited by justinpsmith; 10/30/2007 at 05:30 PM. |
|
#15
10/30/2007, 05:23 PM
|
|||
|
|||
|
Quote:
|
|
#16
10/30/2007, 05:26 PM
|
|||
|
|||
|
Quote:
|
|
#17
10/30/2007, 06:58 PM
|
|||
|
|||
|
Some pictures I owed...
   Again, sorry about the crappy quality but Im working with a 3mp phone here! |
|
#18
10/30/2007, 07:07 PM
|
|||
|
|||
|
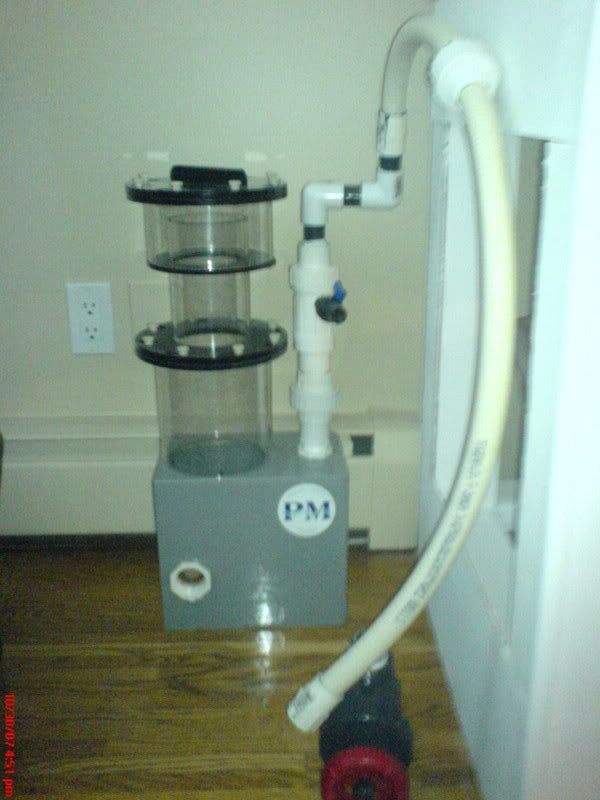
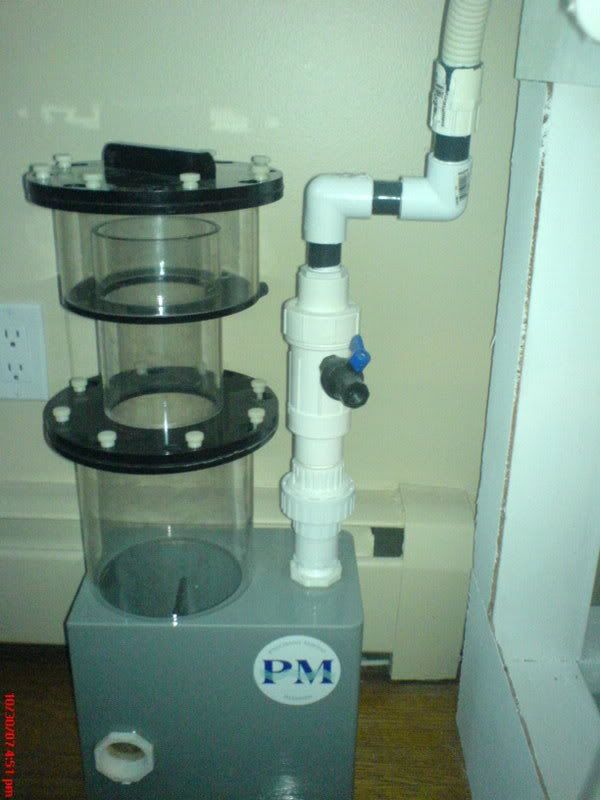
Now for a few work in progress plumbing pics. I have the overflow return to refugium and sump pretty much dry fitted and ready to cement as long as I (or anyone else for that matter) do not see issues with it. Basically the "herbie" overflow is controlled by the 2" gate valve right under the bulkhead there and then the return tees to the refugium (right) and sump (left). The refugium is reduced down to 1.5" flex PVC and flow is controlled with a 1.5" ball valve. Right now I only have the 1 2" union but I may add another. The sump drain will not be left like that, it will have PVC running down into the sump, Im just holding off on that at the moment. As you can see in the first pic, the overflow is not built yet. I want to get the plumbing worked out and then I will go buy the glass for it. I still need to build the emergency drain but will not do so until I build the overflow so I know the height that is needed. The emergency drain will just go into the sump but water will fall a bit, splashing to let me know that for whatever reason, the emergency drain has been needed.
Anyways, let me know if you catch anything I miss... 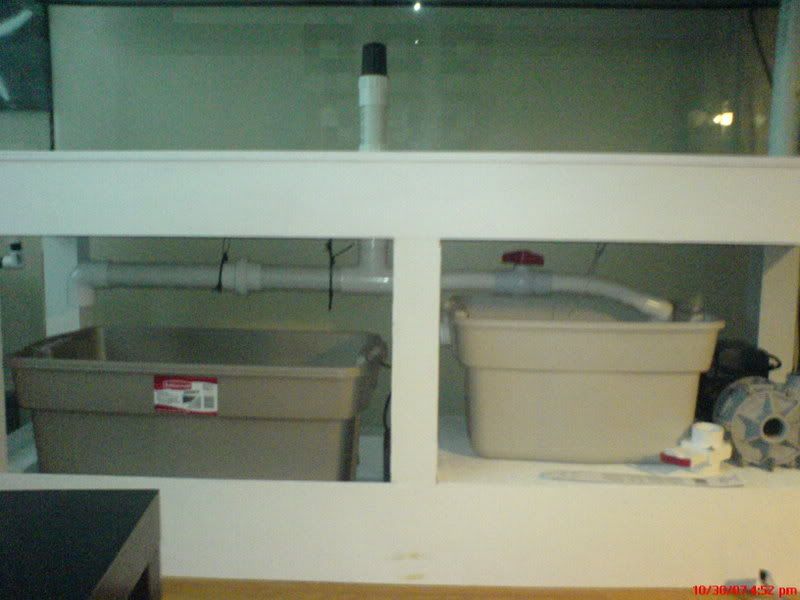 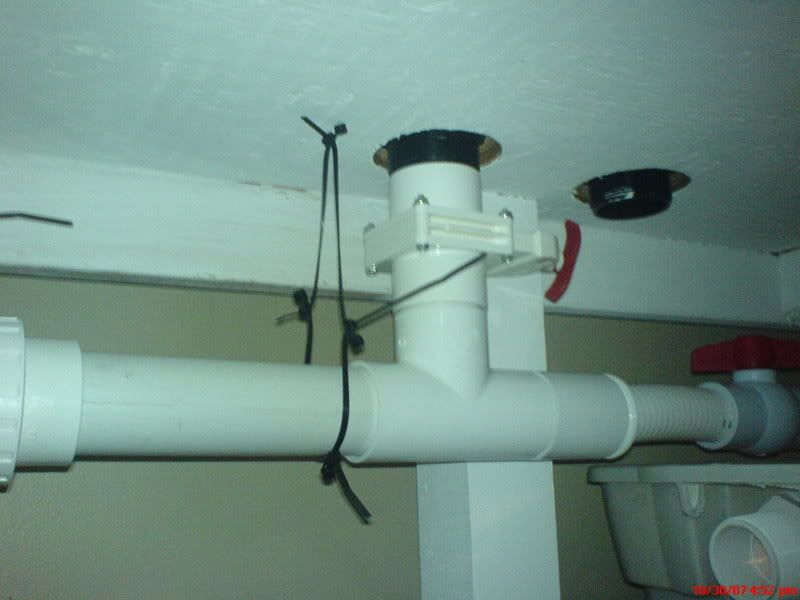 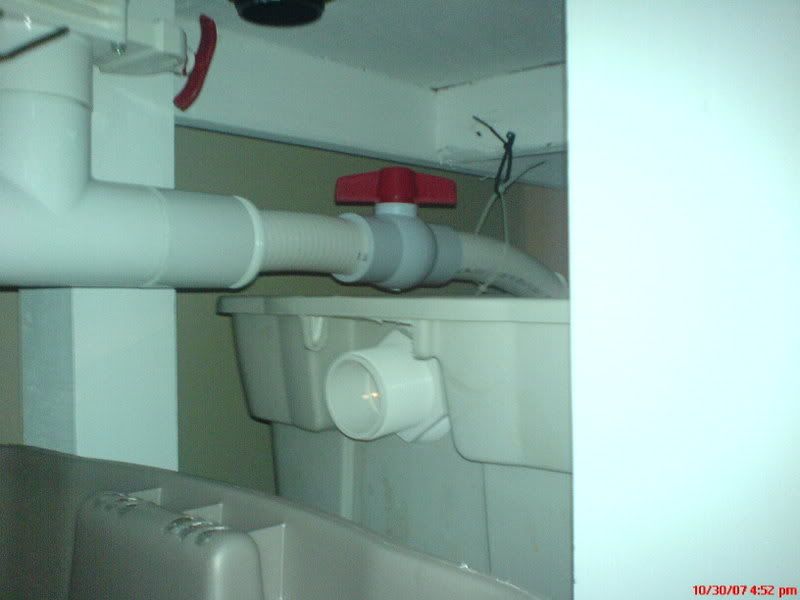
|
|
#19
10/30/2007, 07:15 PM
|
|||
|
|||
|
I also kind of started to think about how the closed loop would be plumbed. Still not sure yet but I am trying my best to avoid over the back! I think I will go through the extra bottom bulkhead I have and then up to the eurobracing. I took a picture of how I think I will have the return get up to the top. It will be painted black and also have a rock column in front of it, so it will not look too noticeable I don't think.
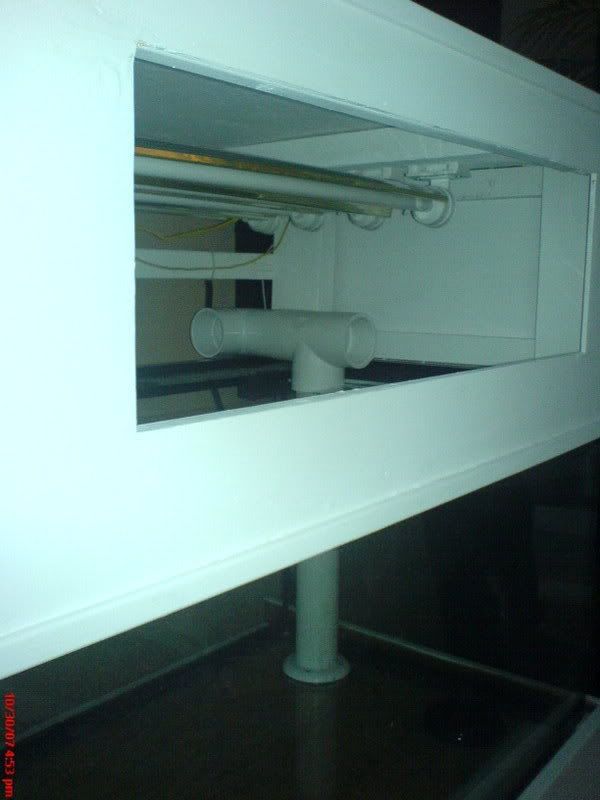 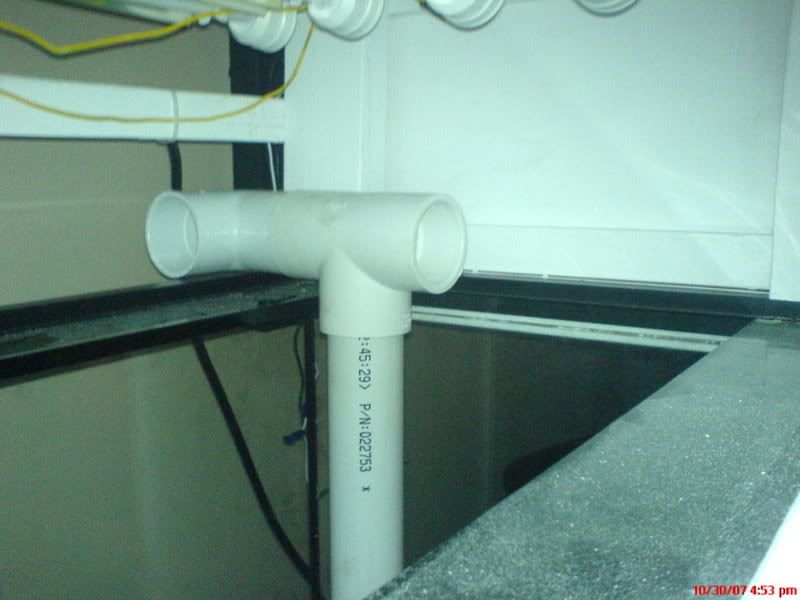 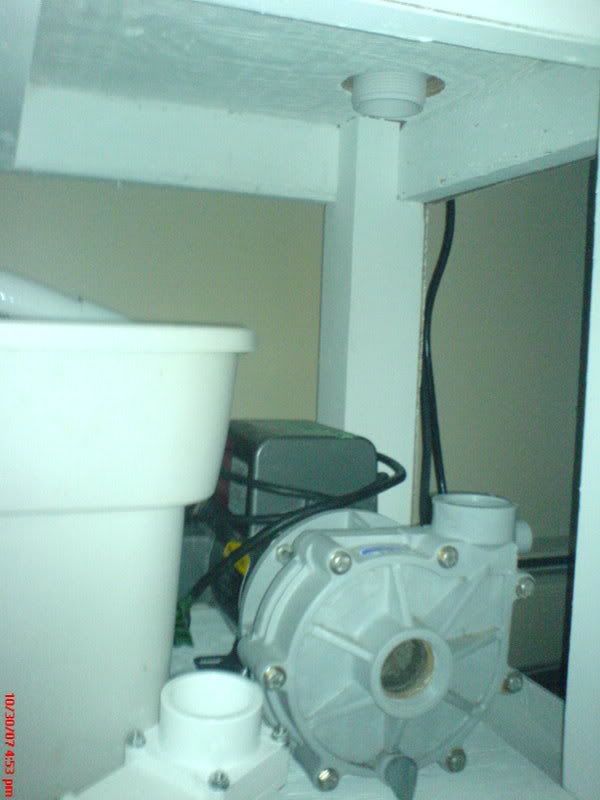 I guess the one thing that may happen is that the flow on the left side will be much weaker because the return would be on the right side. BUT the mag 24 return from the sump will be on the left, so I think that will even it all out. What do you think? Im also wondering if I do it this way how to have the outlets. Im thinking about 6-8 but Im not sure. Its a big 6000 GPH pump, so I think it could easily handle 8. The head loss is just under 5' and no 90's until it hits the top "t". The outlet of the pump will be directly below the bulkhead. What would you do with the 2" outlets? Leave them just as 2" 45's or 90's? I do not want to restrict a lot of flow coming out of them. Im kind of lost right now on this... |
|
#21
10/30/2007, 07:20 PM
|
|||
|
|||
|
Quote:
Actually I have a 33G with a single Green Spotted Puffer and his name is "Don Juan" because we thought he seemed like a suave, cool, lover fish! He had a "harem" of black mollies when he was growing up in brackish water and never killed any even though they have a bad rep for killing tankmates. We figured they must have been all females...LOL |
|
#22
10/31/2007, 07:35 AM
|
|||
|
|||
|
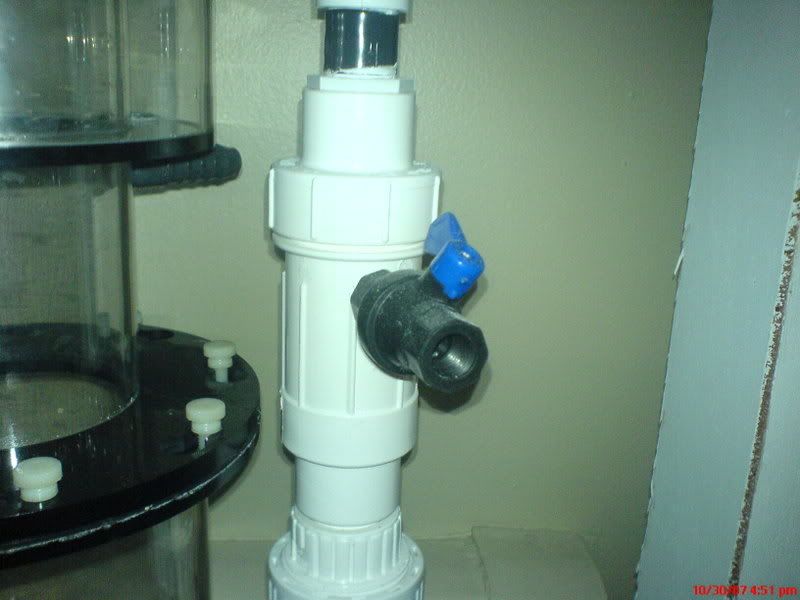
Thanks for the pics! So you "modded" the stock venturi that came with the bullet? Does the water coming in at that height have a beneficial effect?
Is the Venturi plugging into a check valve? or something else? where did you get the idea? Just curious, as I have a Bullet I and and interested in what you did. 
__________________
It's ILLIE!!!!!!!!!!! |
|
#23
10/31/2007, 12:25 PM
|
|||
|
|||
|
Actually in the pictures the flex PVC is just angled up for some reason, it does not come in at that height. Its lower. Its really not much different than the original. Its just that now I can easily take apart the chamber the venturi is in and clean it. Before I could not even clean the venturi! The idea is from a guy on my local form. I will take some pics for you of it all taken apart.
|
|
|


 Linear Mode

