|
|
|
|||||||
|
|
Thread Tools | Search this Thread | Display Modes |
|
#26
 10/24/2007, 02:10 PM
|
|||
|
|||
|
just wandered...has ur eel ever gone for the puffer or the other way round ??
|
|
#28
10/24/2007, 09:03 PM
|
|||
|
|||
|
Quote:
|
|
#29
10/24/2007, 09:05 PM
|
|||
|
|||
|
Quote:
|
|
#30
10/24/2007, 09:06 PM
|
|||
|
|||
|
Quote:
|
|
#31
10/24/2007, 09:07 PM
|
|||
|
|||
|
Quote:
|
|
#33
10/24/2007, 09:28 PM
|
|||
|
|||
|
Those are Gate Valves. They are made here locally and I thought I would give them a shot. They are suppose to be pretty good. I have never seen them like this before though. Seem well made.
I will post pics soon. I had a bit of a set back with drilling my sump...Going to be a change in plans now. It cracked pretty badly. |
|
#35
10/25/2007, 12:03 AM
|
|||
|
|||
|
I need a bit of quick help with the plumbing. Things have changed...I tried drilling my sump and it cracked. I am just going back to my original idea of using rubbermaid containers for sump and refugium. I am planning a "herbie" style overflow which I want to tee off and have about 20% of the flow go to the right to the refugium and the rest to the left sump. The skimmer will take water from the sump and return it there was well. One problem with the rubbermaids, is sectioning it off or making baffles. Will it matter that the skimmer is taking water from the container and returning it to basically the same container just on the other side? A friend said no, its the same as if I had baffles anyways but Im not so sure.
My second concern is the refugium which will gravity feed back to the sump and return pump. In the drawing I drew the refugium drain sraight across to the sump, in reality I think it should actually be on an angle down. What do you think? Im also worried about the refugium being able to overflow. It seems like it may be hard to get the levels right in this case. Anyways, here is the messy quick drawing. There will be stuff like unions of course but I did not draw in everything. Its just for an idea. I really hope it will work! 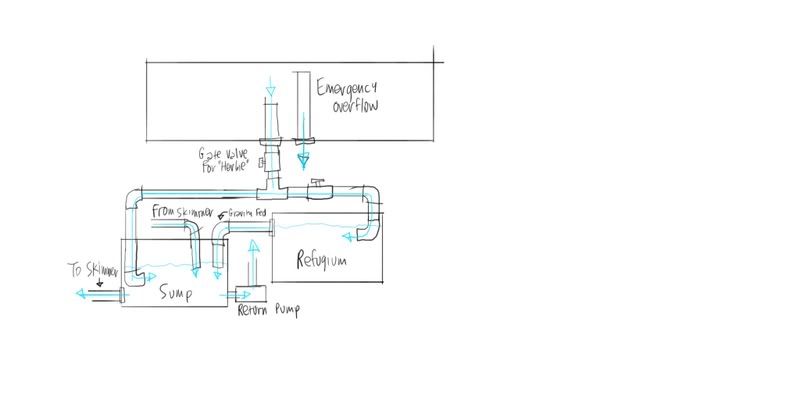
|
|
#36
10/25/2007, 12:37 AM
|
|||
|
|||
|
1. Having the skimmer dump water back into the same location is not terrible as long as water is flowing through there. Since you have a beckett skimmer, it will always process way more water then the water draining from your overflow, in most case. The only thing i'd be concerned about is the amount of microbubbles going back to the main tank. So i'd probably have the skimmer output as far as possible from the return and hope they rise up prior to reaching the return pump.
2. My design is very similar to yours, in the sense that i have two tanks connected to each other. One for sump and the other is refugium. How i connected mine is having a lateral tube running across from one side to the other. The way i adjust the height in my refugium is by having a vertical PVC pipe where water flows into it from the top and through the lateral tube. Picture below is very old but it gives you an idea on how they are connected. By law of physics water from both sides will equalize. The only thing that is missing in the pic is the vertical PVC pipe i installed on the right side. 
|
|
#37
10/25/2007, 01:34 AM
|
|||
|
|||
|
1. Well the water will certainly be flowing through fast because I have a pretty big return pump for a relatively small sump. I am also working on a small baffle type container for the skimmer return to take care of micro bubbles.
2. Is it better to have my sump and refugium plumbed like that at the bottom rather than top? I don't remember why I chose the top but there was a specific reason... |
|
#38
10/25/2007, 07:55 AM
|
|||
|
|||
|
Quote:
__________________
It's ILLIE!!!!!!!!!!! |
|
#39
10/25/2007, 10:55 AM
|
|||
|
|||
|
Ok, well when I get home from work tonight I will take a quick picture. I started the skimmer plumbing last night actually, so I will snap a few pics of all the plumbing too.
|
|
#41
10/25/2007, 12:04 PM
|
|||
|
|||
|
Sure no problem! Anyone have any plumbing advice based on the drawing there or the idea in general?
|
|
#42
10/25/2007, 12:12 PM
|
|||
|
|||
|
Quote:
2. I think your way is usually better. The only reason i did mine that way is because i didn't want to have a horizontal bar running mid height in the middle of the cabinet (my return and CL pumps are in between so that pipe would somewhat obstructing the plumbing) and also helped me get a little more total water volume I just wanted to show you that having horizontal bar will work to move water from the fuge to the sump. Last edited by gabe3d; 10/25/2007 at 12:17 PM. |
|
#43
10/25/2007, 12:12 PM
|
|||
|
|||
|
the way your returns are going into the sump, you may want to use filter socks to reduce the amount of microbubbles, as the output is dumping right into the intake area, which would be very bad!
 maybe I am reading it wrong though...
__________________
It's ILLIE!!!!!!!!!!! |
|
#44
10/29/2007, 10:00 PM
|
|||
|
|||
|
I have the stand and canopy skinned now and ready for doors and paint. Its all primed and ready to go. The doors will be the same 1/4" plywood but instead of hinges, I am using magnets. Just easier to deal with and I like to be able to remove the doors completely!
Here are a few pics of the stand and canopy as well as the lights. They were really easy to wire and mount too. They are 4x80watt T5's. Im really happy with how bright the Geisemann bulbs are! The pics do no pick up the brightness at all for some reason. Maybe its the bad camera phone! The stand and canopy with be painted white, so will end up looking similar to how they look primed. 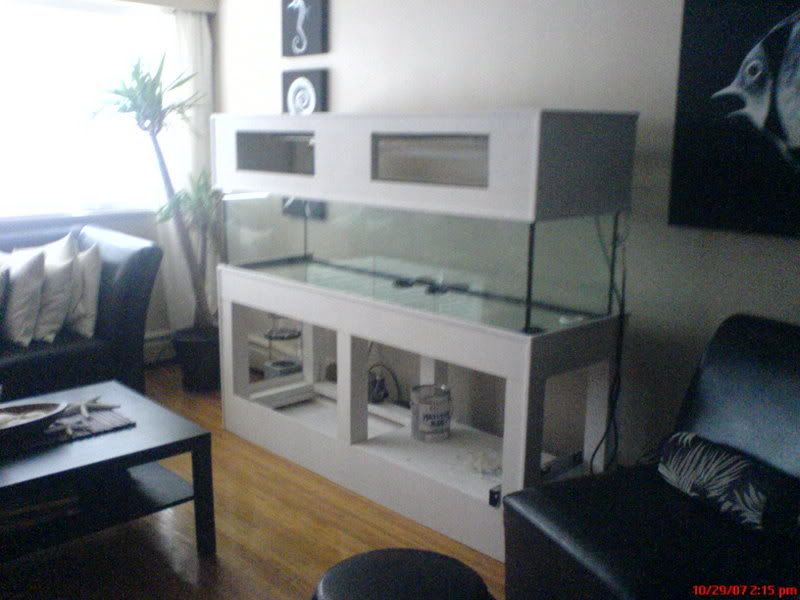 Actinics: 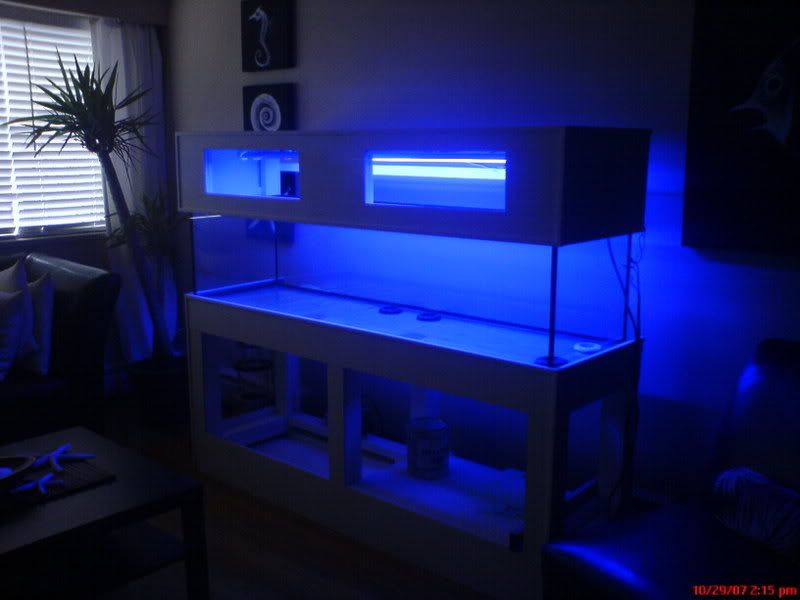 Daylight/Actinics:   
|
|
#45
10/29/2007, 10:03 PM
|
|||
|
|||
|
I also got around to "testing" how the fiberglass rods will work for LR pillars today. I had some dried out LR laying around, which I drilled and it worked out very well. Theres no way this thing could fall or tip over!
The rod is still too long and yellow but I will be painting them black with krylon to hide them a bit. Heres is how the test column came out: 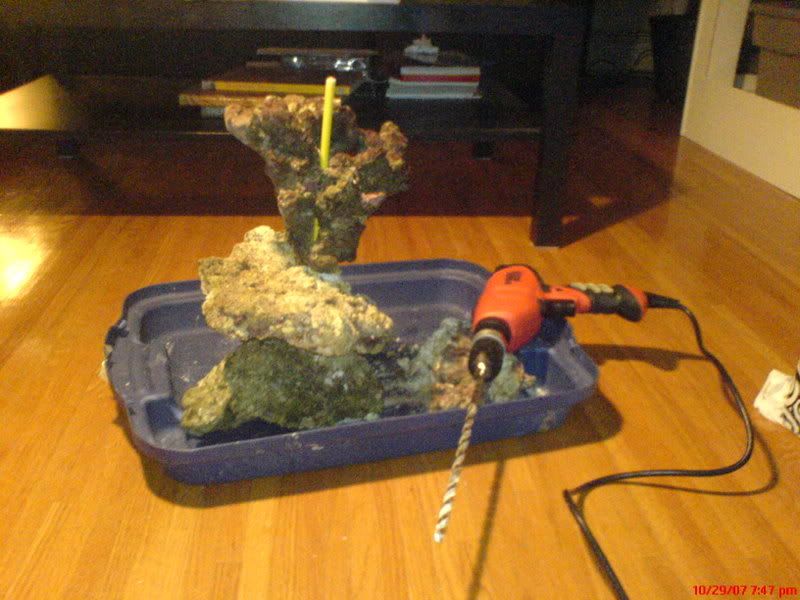 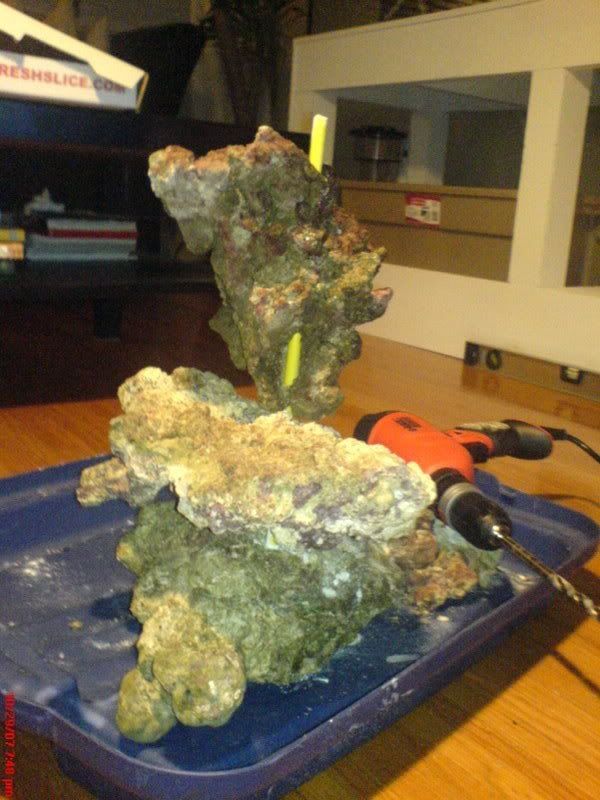
|
|
#46
10/29/2007, 10:36 PM
|
|||
|
|||
|
nice pillars. seeing you set up your tank makes me want to set mine up already. of course i cant because $, but i want to so bad. i hope you get the plumbing figured out soon. im probably going to do mine like yours too
__________________
let me get one |
|
#47
10/29/2007, 10:52 PM
|
|||
|
|||
|
Yeah its been quite slow for me too because its costing so much! I have had to buy a few things a month when I can. I have actually had some of the stuff for like 6 months now just sitting around!
I figured, I would do this tank slow but right rather then faster and cheaper. Although I have had to cut back on some stuff anyways just to get going. One set back was when I cracked the sump drilling it. Im going back to my first idea of using Rubbermaid containers and Im actually happier with how easy they are to work with so far. I will post some pics tomorrow of my plumbing progress tonight! What size are you setting up? |
|
#49
10/29/2007, 11:47 PM
|
|||
|
|||
|
Rock was VERY easy! The rods are 1/4" so with a 1/4" masonry drill bit and patience, it went smooth. Actually the heavy rock at the "base" was kind of tough but I only had to drill about 1/3 of the way down. The top rock there is very light and "branchy" and needed to go very slow because parts were crumbling.
All in all, it went easier than I thought though. Theres no way they could be pushed over in the tank either. The fiberglass is WAY stronger than I thought. |
|
#50
10/30/2007, 12:50 AM
|
|||
|
|||
|
im going to set up a 46 bow so its not quite as big as yours. im probably going to do a 40 as a sump/fuge. or some rubbermaid stuff. it seems to be popular in this hobby. but ya, its acrylic so i can drill anywhere, thats why im trying to get ideas of plumbing
__________________
let me get one |
|
|


 Linear Mode

