|
|
|
#51
 10/30/2007, 03:03 PM
|
|||
|
|||
|
For actinics i'm using pacific coast bulbs. they are the cheapest and last a good long time. i may try the aquamedics or the geisman (<-- spelling) next time around.
__________________
I'm not as think as you stupid i am |
|
#52
11/11/2007, 10:42 AM
|
|||
|
|||
|
Thank goodness for long weekends. I have made some progress on the stand over the last few weeks, but I have been holding off on the pics until now. Enjoy!
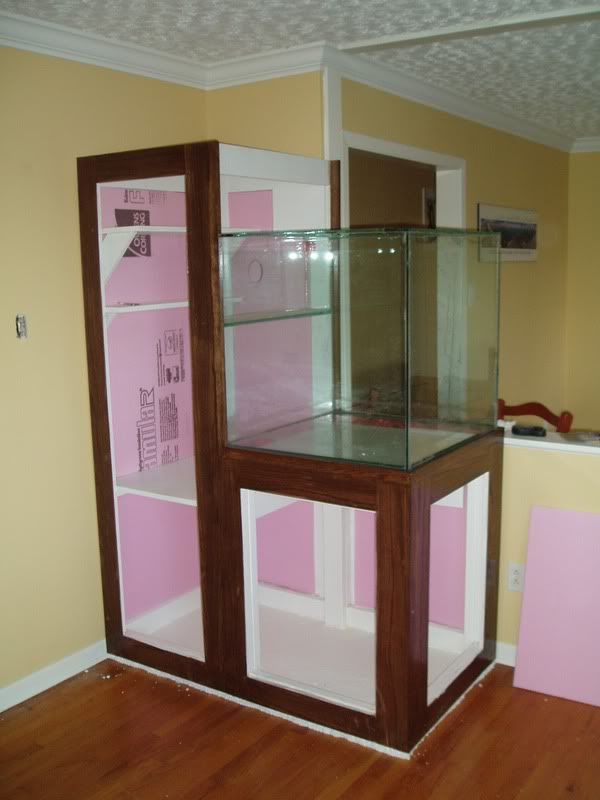
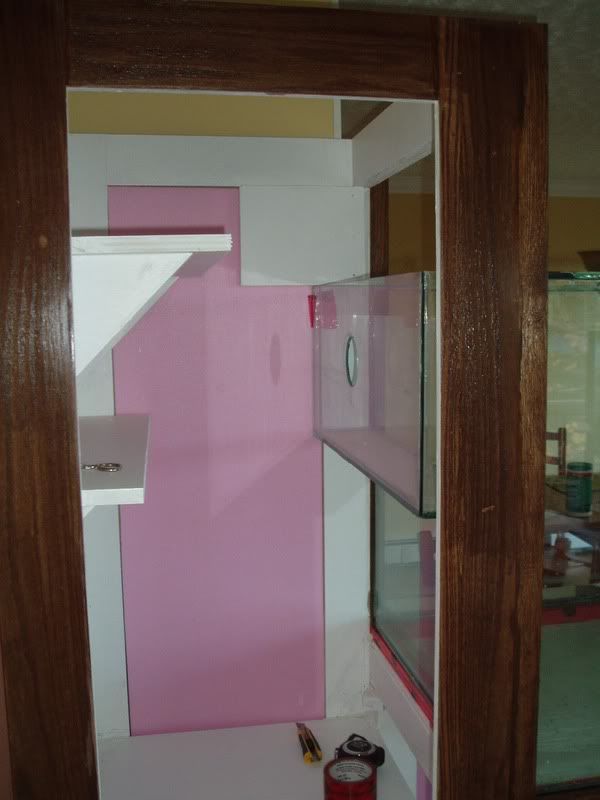
Back to the stand now, I had a chance to do some work on it, and Im happy to report that its just about finished. So, when I left off, I had just finished up the framing for the facing that will cover the two sides of the tank stand. I finished up the framing for the front of the stand (sorry no pics), and I attached everything together. The meat and bones of the stand is the spruce frame, and the facing is all ¾ oak plywood, which looks great and has allot of strength in itself. I simply glued and clamped the oak plywood to the spruce stand. For the corners I use solid oak to attach the two plywood facings together with dowels. Here is a picture of the front right corner of the stand. 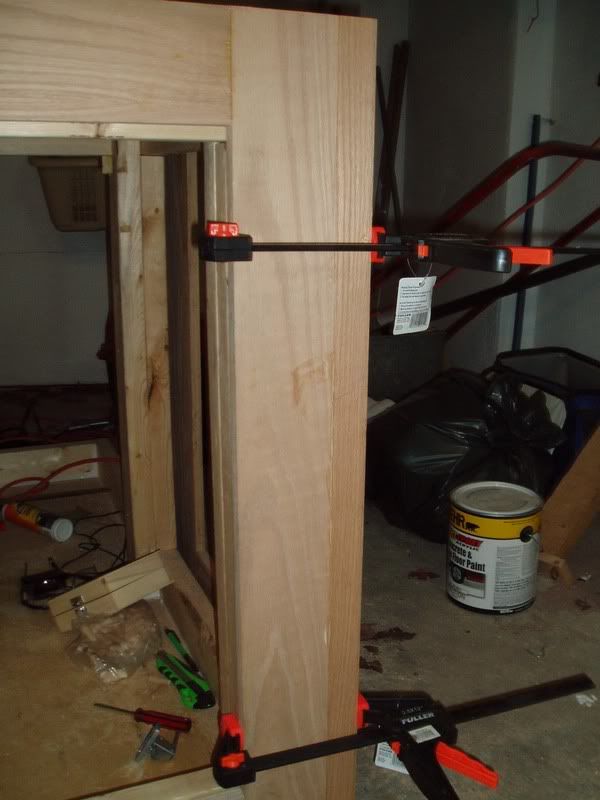 I moved operations in to the living room and the tanks future home. Here is the big picture, as you can see it will be visible from three sides: 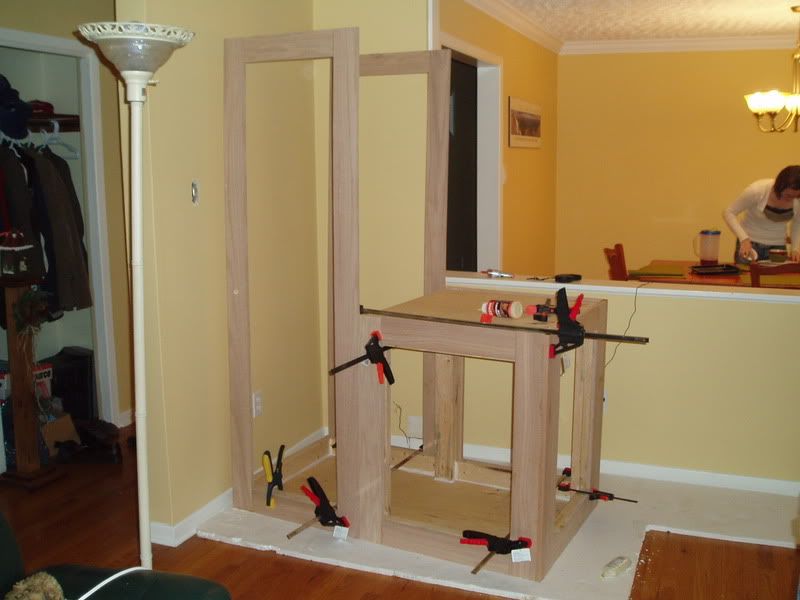 A few days later and I glued the top together. This gave the facing frame allot more strength, but it was still a little flimsy. I also added some plastic wood to fill tiny gaps between pieces of wood of the facing, as well as my booboos. 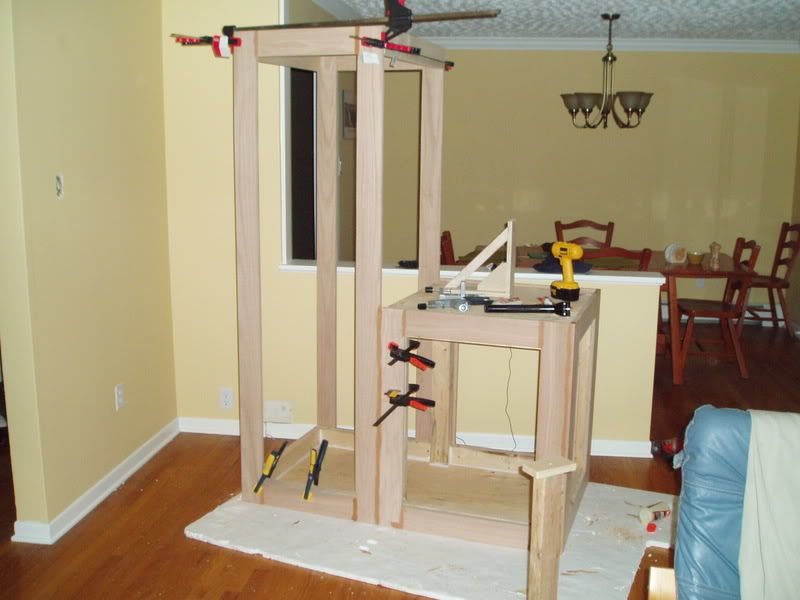 and the front 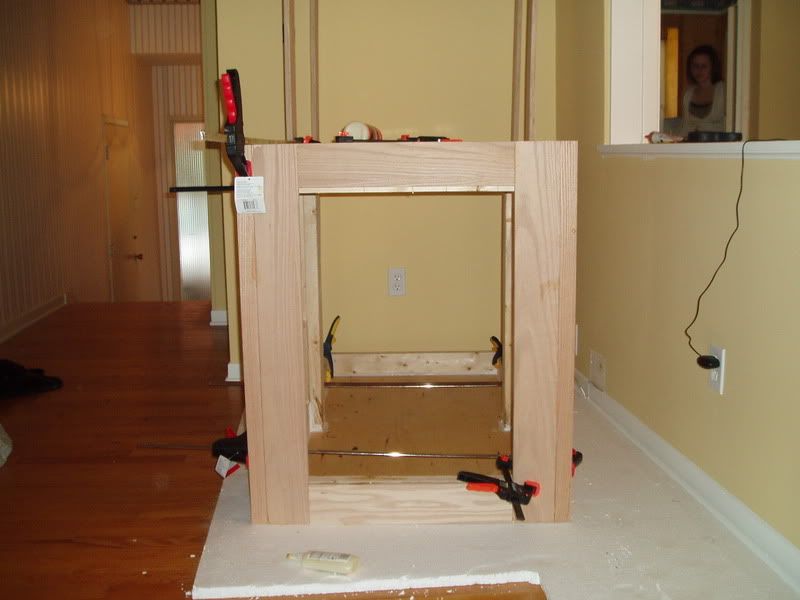 A few days later I added some shelves and some braces to firm up the facing frame. Its solid as a rock now. You can probably start to see what I am thinking for the sumps. I will have one holding my skimmer and CA reactor on the large shelf to the left of the main tank. just below that is where the sump/fuge will go. I used birch plywood for the shelves, and I think there is a little pine thrown in there as well that I had left over from another project. 4 trees represented in this stand so far. 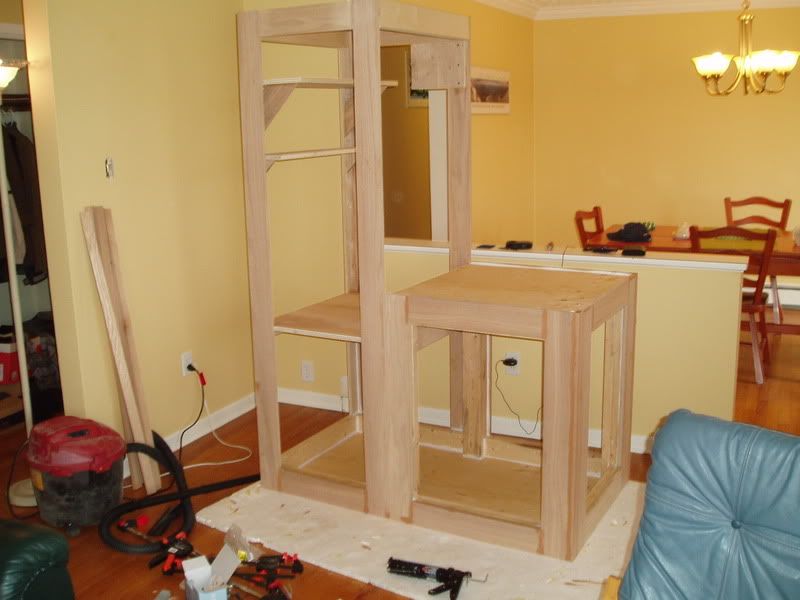 shelves from the front: 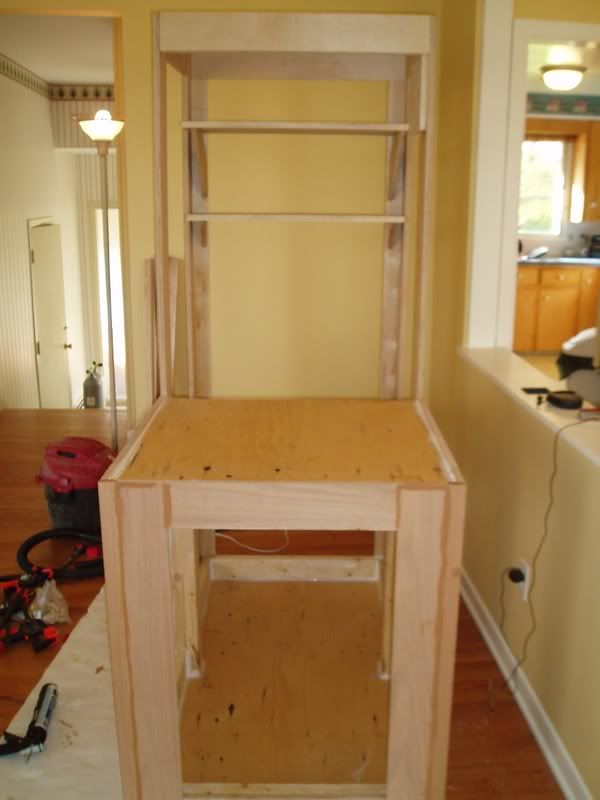 and a shelf close up. The bigger one on top will be where my MH ballast and ozone reactor sit. The smaller one will be for fish food and water additives. Plenty of storage in this stand, like a fish pantry if you will. 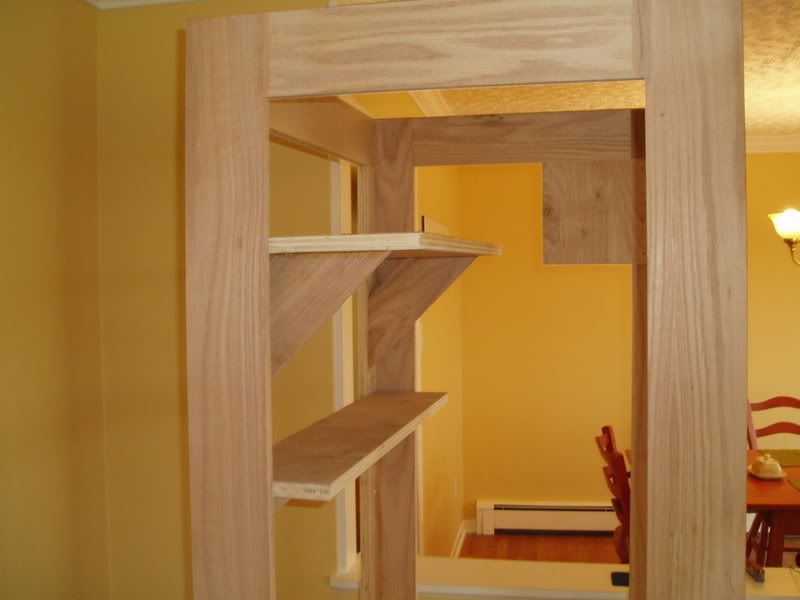 Finally I calked all the seems between the spruce frame and the oak facing. I dont want water to splash in to the little cracks and slowly rot the stand from the inside out. I will paint with my epoxy water sealant paint when the kalking dries a little bit. I think I am going to paint the entire inside of the stand to water proof it and protect it from humidity. The outside I will use a nice dark stain with a semi gloss varnish. Not sure if Ill get around to that this weekend, but Ill be sure to post lots of pics. 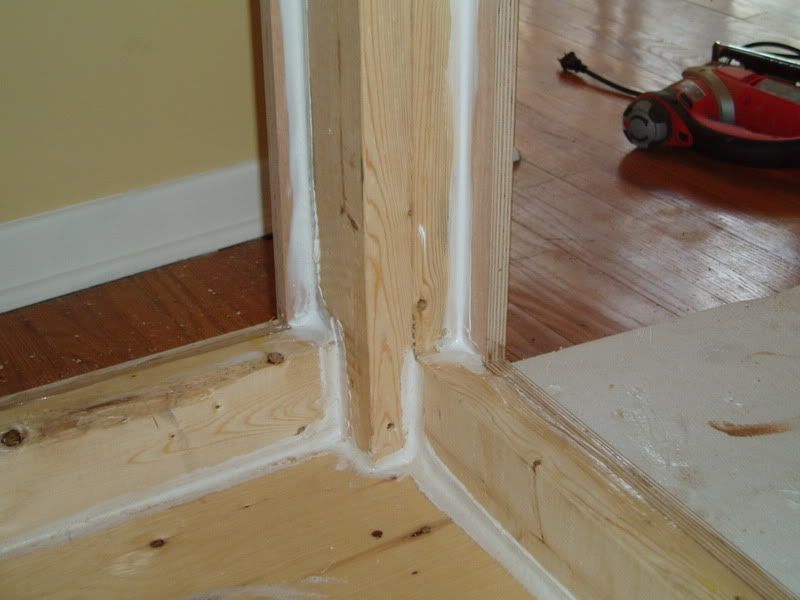
__________________
I'm not as think as you stupid i am |
|
#54
11/11/2007, 11:21 AM
|
|||
|
|||
|
nice work so far. dont oftern see a build thread where the whole lot is built !
|
|
#55
11/14/2007, 07:06 PM
|
|||
|
|||
|
I cant believe how long this stand is taking
when I was planning this out in my head I didnt think it would take this long.. oh well, I keep telling myself it will be worth it. and it sure beats studying for my botany mid-term.
I got the epoxy painting done (the white on the interior) and I put some trim pieces around the edges. 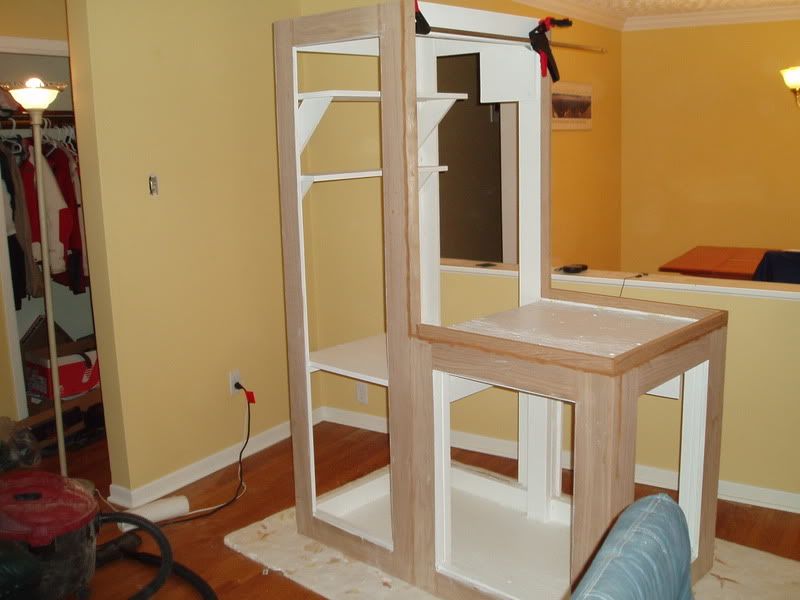 Here you can see some of the plastic wood I used to cover up my booboos, as well as the Styrofoam that the tank will sit on. 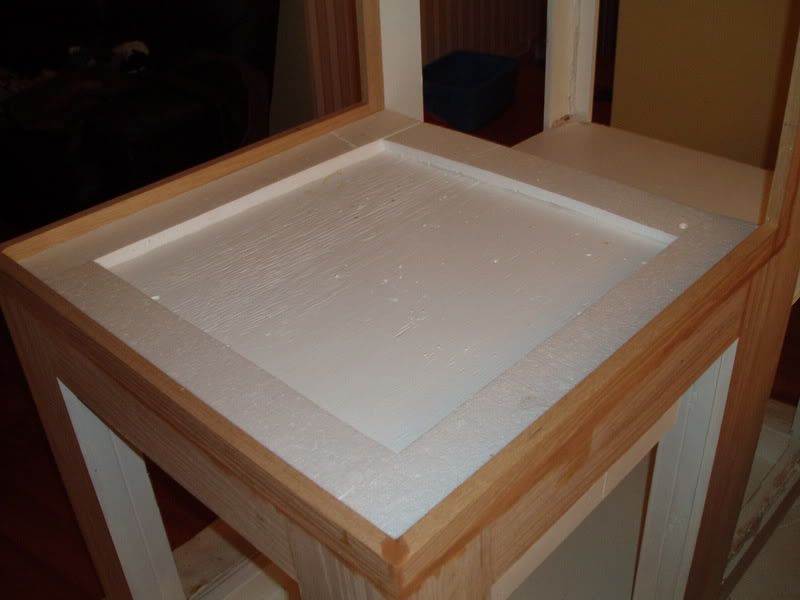 thats all for tonight, hopefully I will get the plastic wood sanded off tomorrow and start the staining.
__________________
I'm not as think as you stupid i am |
|
#56
11/14/2007, 10:07 PM
|
|||
|
|||
|
Tanks coming along great! The girl in some of your pics is a looker too!

__________________
40B Mixed Reef 100% Captive Grown Corals See, that's the trouble with the world today. Not enough danger to kill off stupid people before they get old enough to breed. Bring back lawn darts! -PrivateJoker64 |
|
#58
11/15/2007, 08:29 AM
|
|||
|
|||
|
Quote:
Quote:
__________________
I'm not as think as you stupid i am |
|
#59
11/15/2007, 12:19 PM
|
|||
|
|||
|
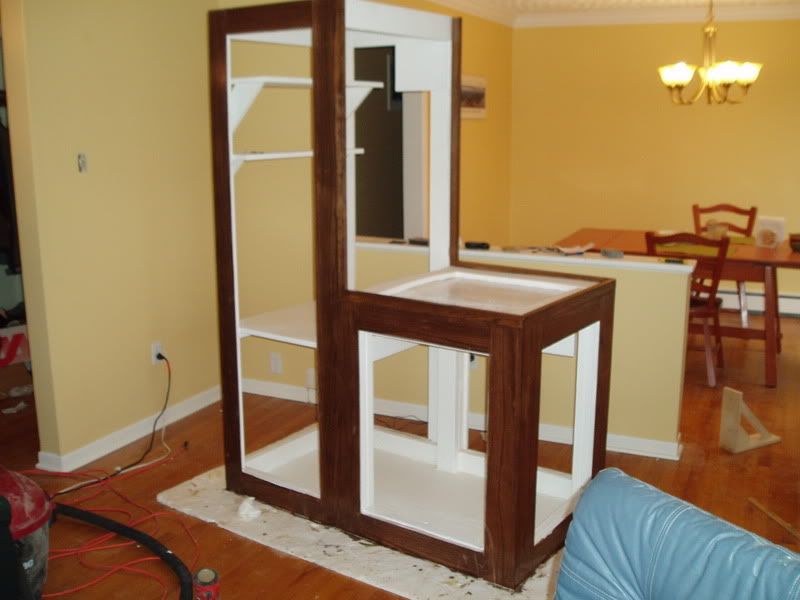
Finished the staining and the varnishing. I used three cotes of semi gloss exterior varnish and two applications of a dark walnut stain. I dare say the stand is about finished, aside from the canopy and doors.
__________________
I'm not as think as you stupid i am |
|
#61
11/17/2007, 01:37 PM
|
|||
|
|||
|
Heres the update for today, I cut some styrophome insulation out and fitted them in to the spaces in the stand that will not be covered by doors (right away), and I GOT THE TANK UP ON TO THE STAN! It was a tight fit. I want to say that it is due to my superior measuring skills, but I know it is mostly luck
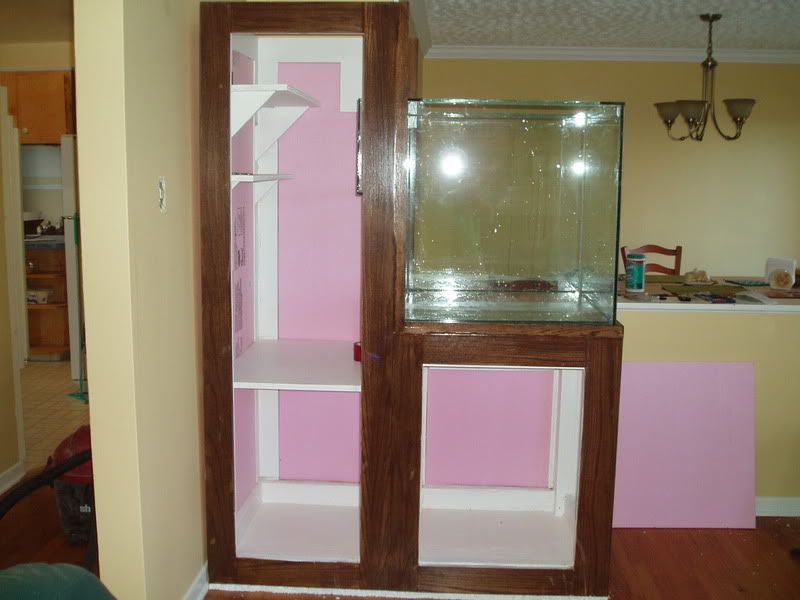   There has to be at least one picture on every tank thread of a family member or pet sitting in the tank. My parrents little dog came for a visit. She won't make that mistake again. 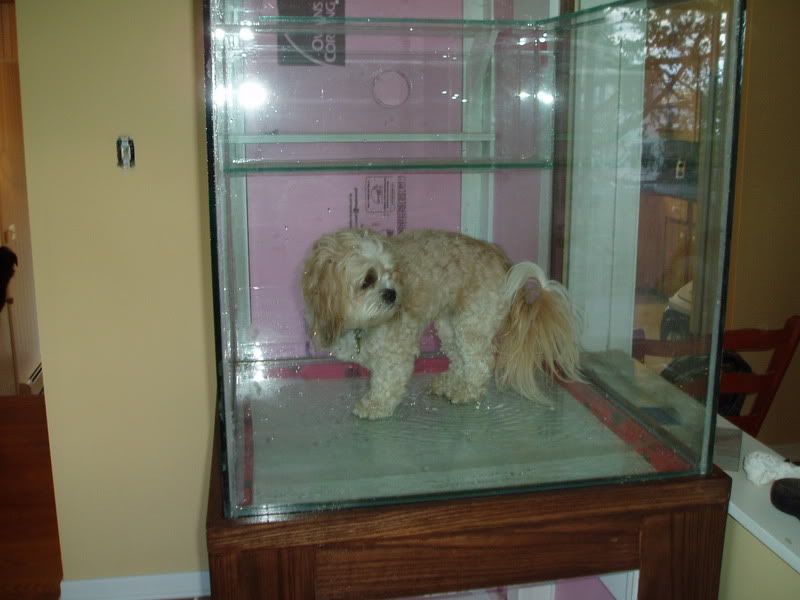
__________________
I'm not as think as you stupid i am |
|
#62
11/17/2007, 02:24 PM
|
|||
|
|||
|
ok, and correct me if I am wrong, but 28x28x28 is only about 67 gallons with 3/8 glass. 29x29x29 would be 76. How are you figuring 99 gallons?
__________________
Aquapod 24 HQI Starting 20L frag tank Waiting to setup 40B |
|
#64
11/17/2007, 08:23 PM
|
|||
|
|||
|
nope, it works out to about 99 gallons... check your math. I am including the overflow box in that figure. the tank itself is about 95 gallons. also, its 72cm cubed, which works out to about 28 1/4"
__________________
I'm not as think as you stupid i am |
|
#65
11/18/2007, 12:25 AM
|
|||
|
|||
|
Well I have used 5 calculators now, 2 have said 76 gallons, and 3 have said 99 gallons. But the higher 3 didn't account for glass thickness
__________________
Aquapod 24 HQI Starting 20L frag tank Waiting to setup 40B |
|
#66
11/18/2007, 02:05 AM
|
|||
|
|||
|
Quote:

__________________
To stay young it requires unceasing cultivation of the ability to unlearn old falsehoods |
|
#67
11/18/2007, 08:14 AM
|
|||
|
|||
|
Quote:
Well said hehe!!!  Tank is coming along REAL NICE!!!
__________________
Say hello to my little friend... |
|
#68
11/18/2007, 10:17 AM
|
|||
|
|||
|
Haha, I wasn't trying to be man, sorry to the OP if he thought that, I was just thinking that 28x28x28 seemed small to be 99 gallons.
I LOVE the tank though, and the dog pic is great.
__________________
Aquapod 24 HQI Starting 20L frag tank Waiting to setup 40B |
|
#69
11/18/2007, 07:51 PM
|
|||
|
|||
|
here's the calc I use. you'll have to account for the glass thickness yourself. either way its up there above 90, below 100...i don't care much about volumes either.
__________________
I'm not as think as you stupid i am |
|
#70
11/25/2007, 12:00 PM
|
|||
|
|||
|
Great looking cube, I'm planning something similar so this is nice to see.
How much shorter is the back pane of glass for that external overflow? I was planning maybe 1/2" shorter but that looks to be a bit more. |
|
#72
11/25/2007, 04:21 PM
|
|||
|
|||
|
Thanks guys
my back pain is actually 5 cm (about 2 inches) shorter than the front and sides. I am planning on making some acrylic teeth that will rais the water level abother 2-3 cm. maybe more if i decide. I would make your back pain atleast an inch lower, water is cohesive so the actual water level is alwais a little higher than what it flows over.
__________________
I'm not as think as you stupid i am |
|
#73
11/25/2007, 06:14 PM
|
|||
|
|||
|
I still havent decided if I want to do an external overflow or internal. I'm leaning towards internal right now simply because it will be easier to level. Meaning I can fill the tank and mark the water line and fit the overflow to that.
How is it all coming along? Any new pics? |
|
#74
11/26/2007, 12:13 PM
|
|||
|
|||
|
yea that's true. I haven't made any progress, been pretty busy with some other stuff. I should start the sump soon I hope, then I will finish the lights, do all the electrics and get water in to the system.
__________________
I'm not as think as you stupid i am |
|
#75
12/04/2007, 07:23 PM
|
|||
|
|||
|
Finally made some progress. I had a somewhat catastrophic equipment failure at the old place, and I decided I couldnt procrastinate any longer. It is time to start making the effort to get the fish and corals settled in their new home, so I began the move. The sump and canopy are not finished (or started
) yet, but I think everything will be just fine in the main display tank for a while until I can get all the building done.
The RO/DI found its new home in my laundry room downstairs. 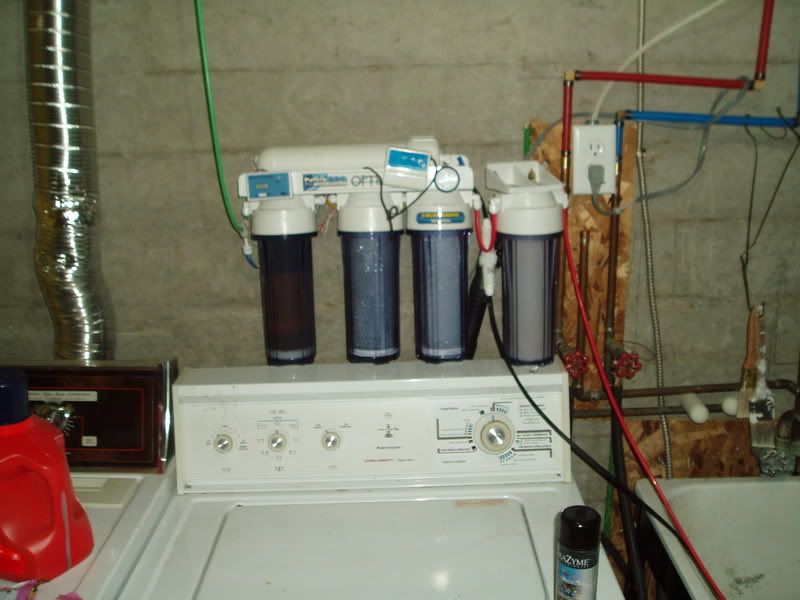 Here is the line running through the floor braces where it pops up right under the tank. 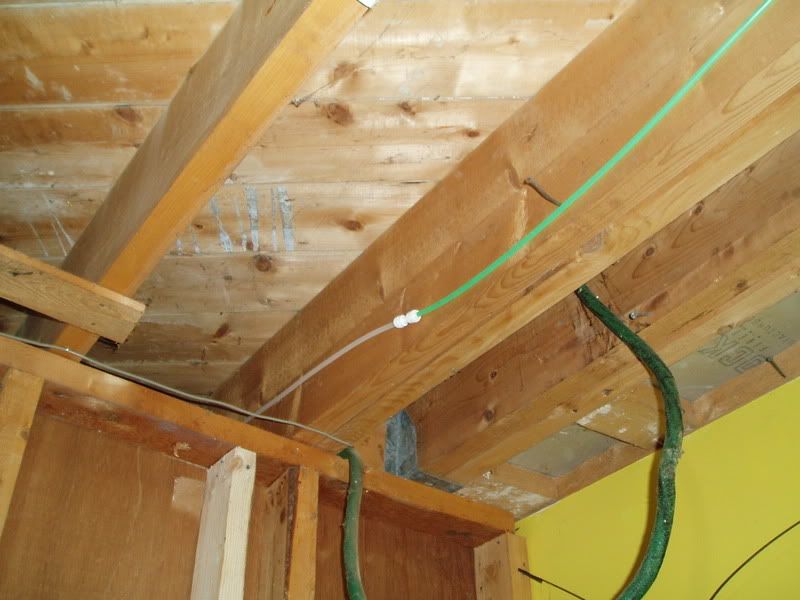 here is the first load of equipment I brought from the other tank (which is set up at my parents house about a half hour drive away). As you can see I have some water from the old tank, my salt, my CA reactor equipment and my old sump. I wont be re-using this sump but I brought it anyway. 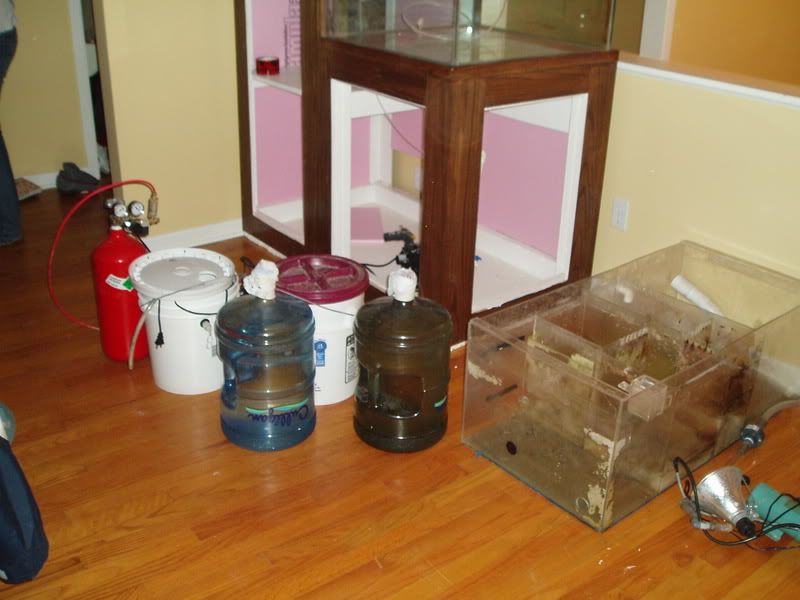 here is the first trickle of water from the RO/DI. I think its going to take a long time to fill my 99 gallon tank. 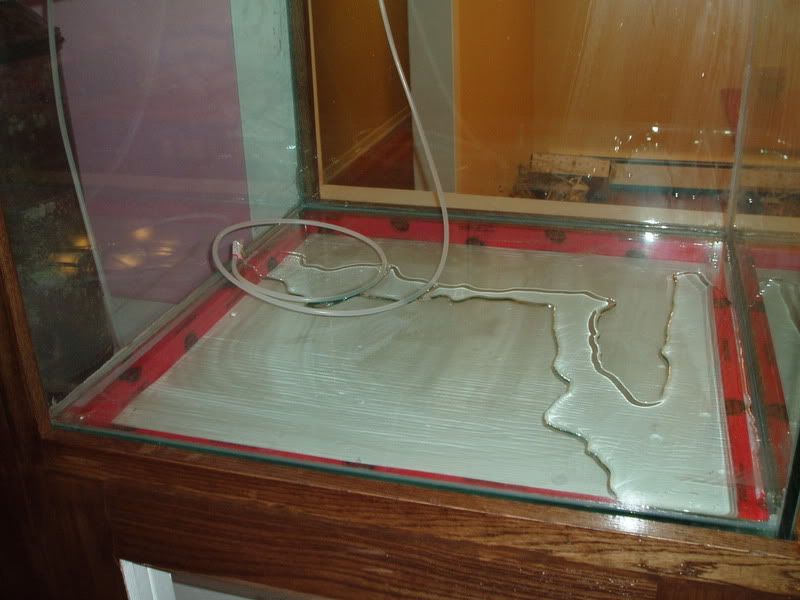 this is 30 cups of salt, which I figure to be about 60 gallons worth. its amazing that this is the amount of salt that is dissolved in the water.  thats all for now. I will start working on the electrical odds and ends tomorrow.
__________________
I'm not as think as you stupid i am |
|
|


 Linear Mode

