|
|
|
#1
 12/28/2007, 09:34 PM
|
|||
|
|||
|
Window to a reef - 75 gallon build thread
Well I figured it's about time I started a build thread, so here we go.
In March 2005 my wife and I moved. The place my wife picked out, we had couldn't keep my cat, Trogdor. We made a deal that Trogdor would stay at my inlaws if...I could set up a fish tank. My wife agreed. I decided on a 55 gallon reef, however picked up a 75 gallon AGA on sale for $299. After consulting with my LFS, I had my plan! A Prizm HOB skimmer, two Maxi Jets and a Fluval 404! But first I had to buy a book...the back of the book mentioned a website by the name of Reef Central. So I checked it out...and my wife would regret agreeing to the fish tank ever since. Now that you know the background, here is where we are at. I have the 75 gallon tank, drilled for a overflow and closed loop. I have a DIY stand and matching canopy, 2x175 Watt Metal Haliades and 2 x 40 Watt HO (one white, one acintic) for dawn dusk. I also have a unique sized sump. It was a hold Hagen tank (45l x 16w x 15h) converted into a sump with a large refugium. I currently have a Mag 5 return. Thru work I was given $1500 worth of gift cards to fish.com. With them, I am ordering a ASM G3 Skimmer, 120lbs of Carib Alive Fuji Pink, Kent Marine RODI and some random goodies. First weekend in Febuary I will be getting my Live Rock and next weekend my Dart should be here for the closed loop! Before we get to the pics, I want to share some tanks that have inspired me and I hope my tank will turn out like theirs. Nano Gurls 75 Gallon hcrk 800 gallon Reef Window Travis Stevens 75 Gallon Reefing on a Budget Can't say enough about Melev As you can see from the above threads, my overall goal for the theme of the tank is a 75 gallon "window" into the Ocean, done on a budget, with lots of DIY, mixed reef with SPS and eye catching fish with cool names  Now for the pics... Here is the stand with a 15 gallon tank I was going to use as a sump. 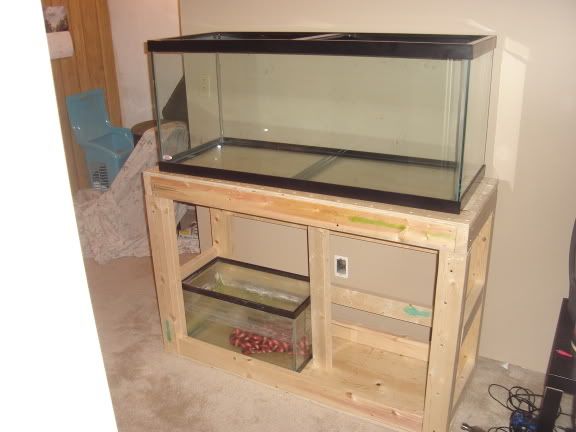 A close up of the stand, showing the support 2x4's 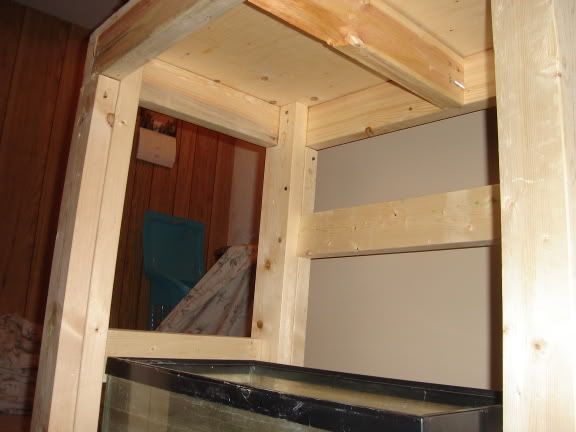 Stand painted with "skin" 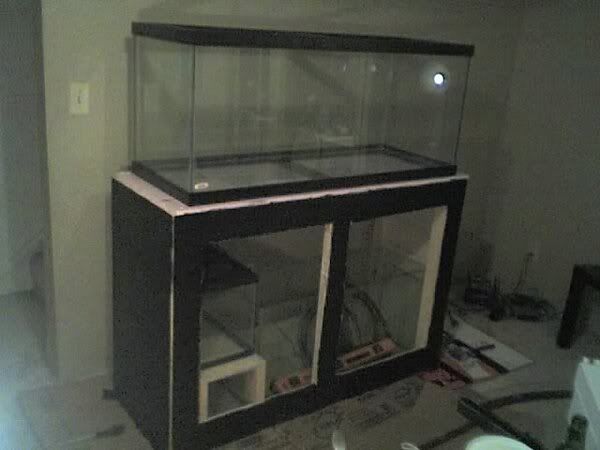 The finished product, with molding and Canopy. 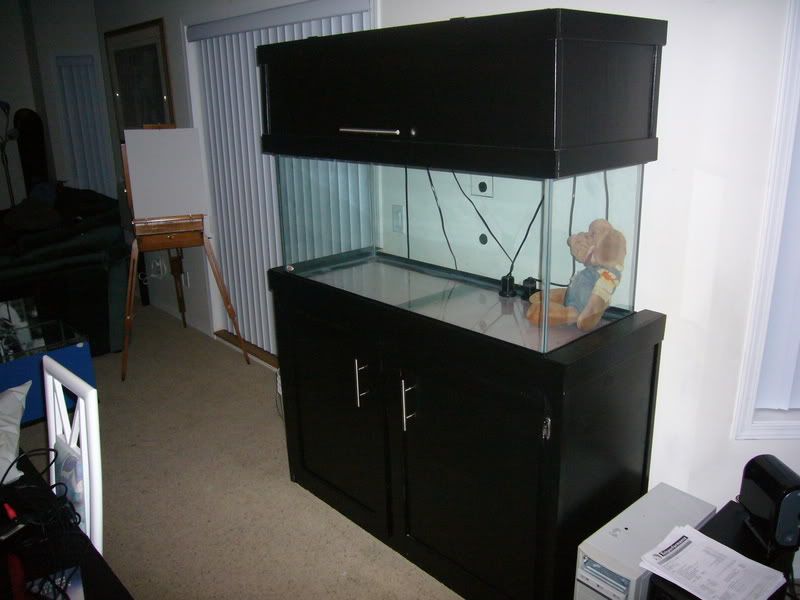 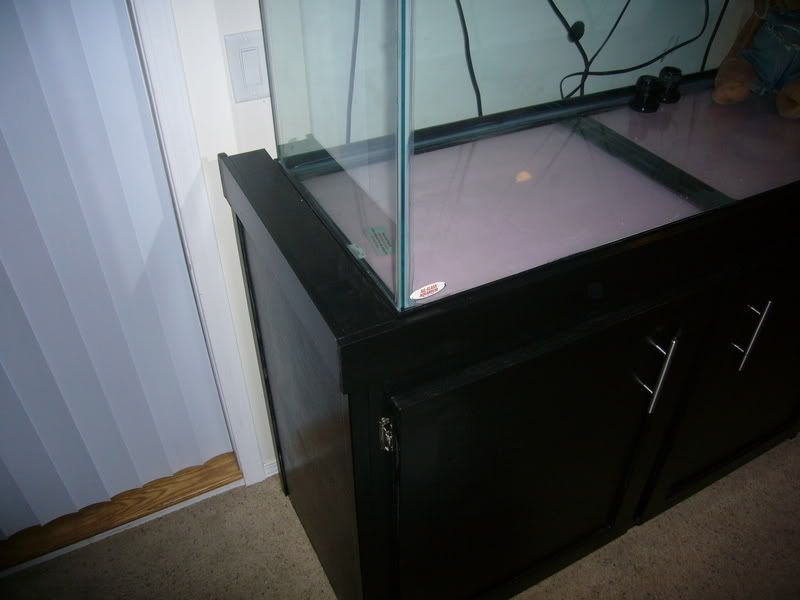 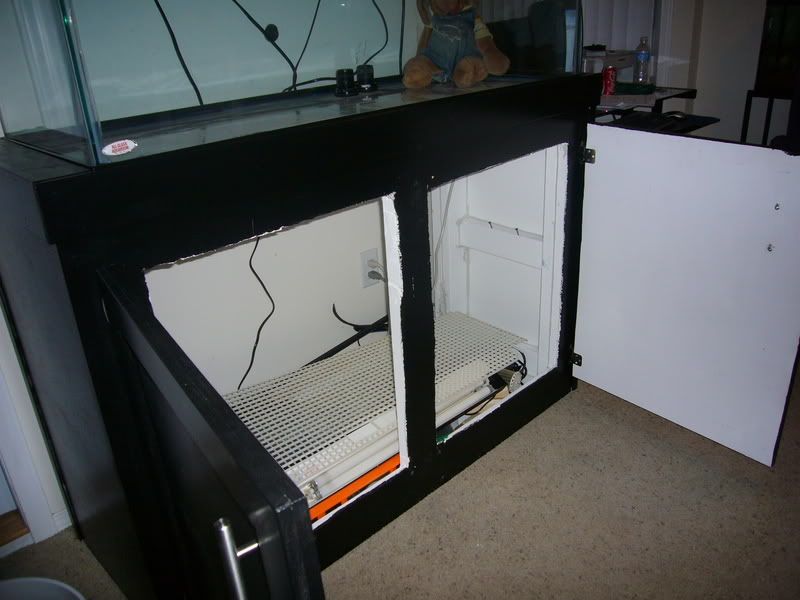  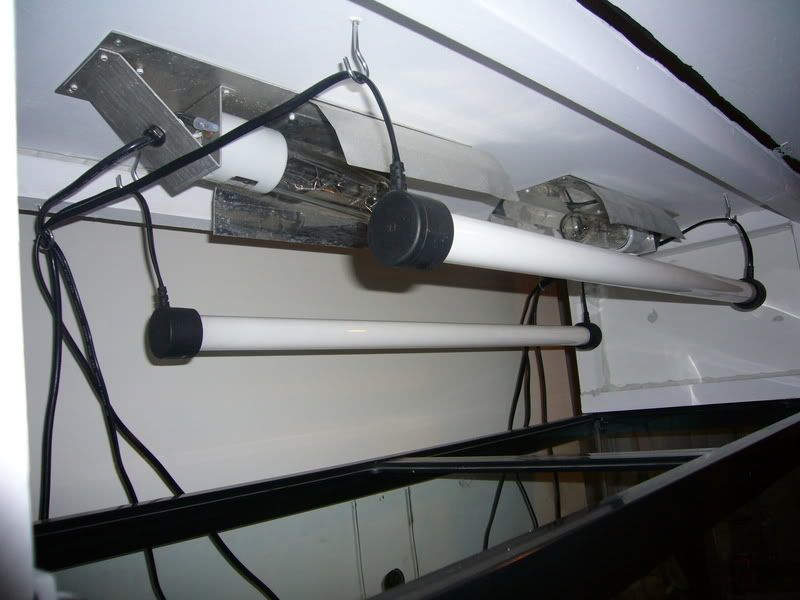 That's all for now. I have more pics of the sump and plumbing for tomorrow. I also have some more pics of the tank with the back painted black. I'll also have more details on the stand and canopy tomorrow. Enjoy!
__________________
It's not how much is costs that matters, it's how much you told your wife it costs! |
|
#3
12/29/2007, 03:24 PM
|
|||
|
|||
|
Well I don't have my camera with me today, so no pics. I want to give a run down of my stand and canopy.
The stand is made with 2x4's. I took two 2x4's, notched one of them enough for the frame to sit on and then glued/screwed them together. When all four where done, the frame, was put on top and glued/screwed. A 1/2" sheet of plywood was used for the top of the frame. I have a 3" overhang on both sides of the take for a ledge. I like the idea of having some where to place things while working on the tank (fish food, nets, beer etc.). The stand is skinned with 1/4" plywood. I have two large 24" x 30" doors which gives me easy access into the front of the sump. Finishing is done by a gloss black paint, corner molding and baseboard used as trim. The handles really finish it off, I have two 8" nickel handles for the door and a 10" handle for the canopy. Inside of the stand is sealed with a white sealer and every edge is siliconed. The canopy is framed with 2x2's and skinned with 3/8" plywood. The top of the canopy is 1/2". I wanted a thicker plywood for extra durability. The inside of the canopy is again sealed with white sealer and siliconed on all edges. The canopy houses 2x175 Watt Metal Haliades with 14k Hammy's. The dawn/dusk is done by 2x40 Watt HO bulbs. In the future, once I start getting SPS heavy, I will upgrade to 4 T5's. Mounting the HO bulbs presented a challenge. The kit they came with was just the ballast, wires and end caps. Knowing that they won't stay forever, I just screwed some hooks into the Canopy and hung the wires on them. They don't look the greatest, however will do the job.
__________________
It's not how much is costs that matters, it's how much you told your wife it costs! |
|
#4
12/29/2007, 03:27 PM
|
|||
|
|||
|
Question on overflow
Currently the overflow I have (not siliconed in yet) is 6"x6"x6". Is this a good size or is it too long? The tank is 18" wide, so it that section I'll be blocking 1/3rd of the light. I read off someone re-doing their overflow for this reason and don't want to be in that spot. What are your thoughts?
__________________
It's not how much is costs that matters, it's how much you told your wife it costs! |
|
#5
12/29/2007, 03:38 PM
|
|||
|
|||
|
looks good so far. any updates on it?
__________________
Fish is what it's all about |
|
#6
01/05/2008, 06:51 PM
|
|||
|
|||
|
So, yesterday I received my Dart for the closed loop, however won't be plumbing it until next weekend.
That said, I did silicone in my overflow. It is a 6x6x6 overflow box, painted black with Kylon Fusion. I also took some pictures of my sump. My sump fills the entire stand, so I need somewhere to put the Dart. There is no room behind the stand, so that leaves onto of the sump. In the far corner of my fuge, I have uit placed now. It should work, and most of the light will still get in. What are your thoughts? Here's two of the overflow 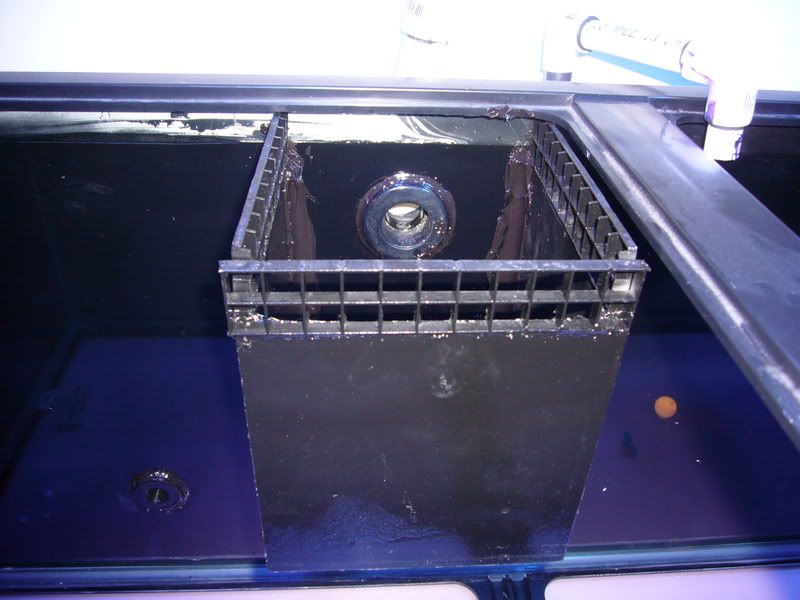 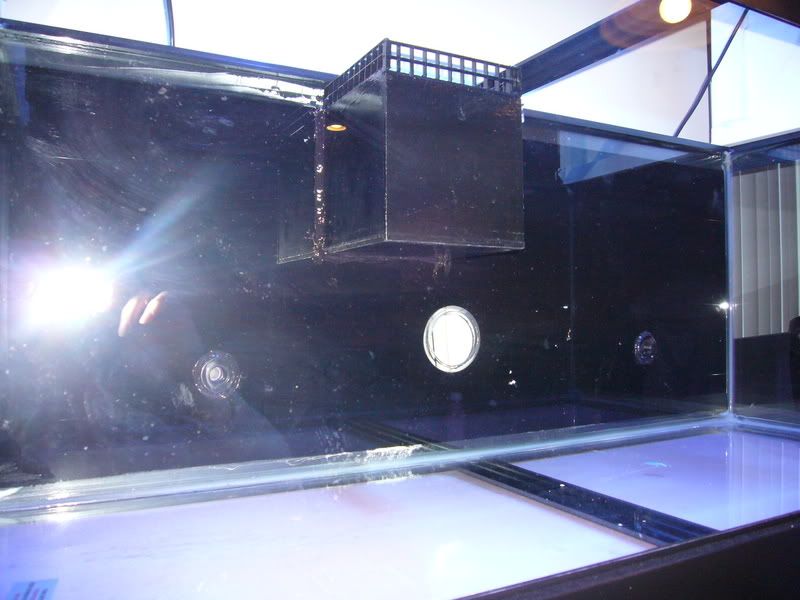 Sump: 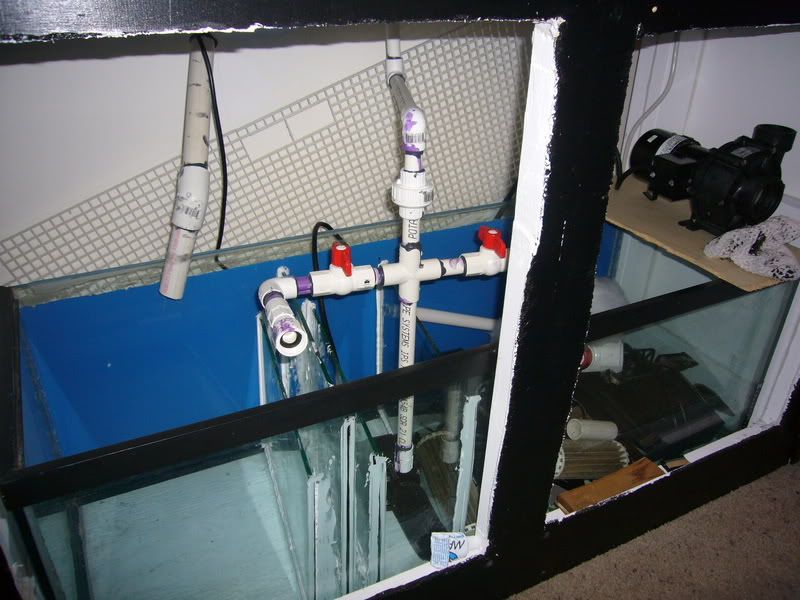 Dart: 
__________________
It's not how much is costs that matters, it's how much you told your wife it costs! |
|
#7
01/05/2008, 07:09 PM
|
|||
|
|||
|
looks good man....
|
|
#10
01/06/2008, 12:11 AM
|
|||
|
|||
|
I figured I would upload some pics of my 33 gallon planted. I know it isn't a reef, but is keeping me sane until the 75 is set up.
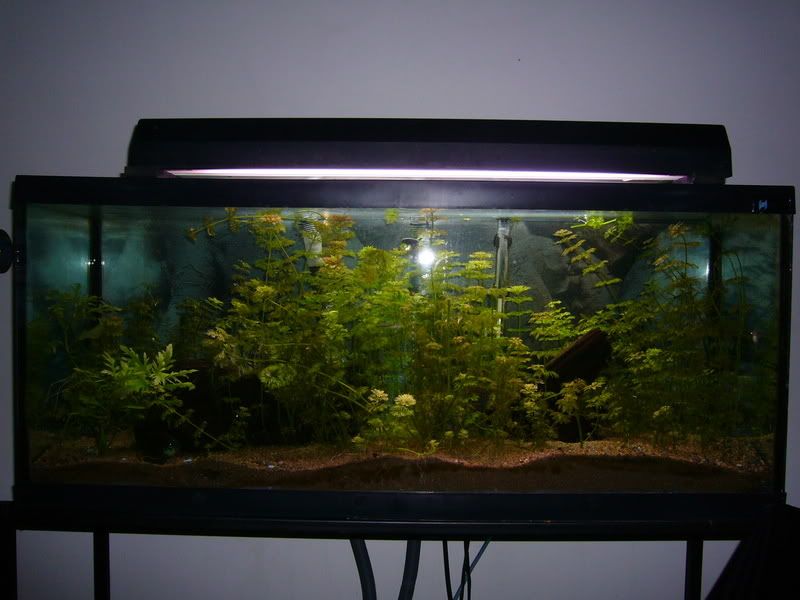   It's a 33 with 2 24" NO Lights, a Fluval 304 and a DIY CO2 unit. I have play sand, drift wood and various live plants. For fish, I have four autocats, 5 Convicts, 1 Black Convict and a Jack Dempsy. I saved the 5 concivs from a Toilet, someone at work was going to flush them as their fish had babies. I got them when they were about 3/8" long. They are about 1 1/2 - 2" now. Im hoping to breed a hybird between the Black Convict and regular Convict, however have had no luck yet.
__________________
It's not how much is costs that matters, it's how much you told your wife it costs! |
|
#11
01/06/2008, 02:10 AM
|
|||
|
|||
|
What you will find is the internal overflow box will block light. I've got a smaller overflow box mounted in a similar fashion and find myself wanting to mount frags to the back glass but cannot due to the large shadow cast by the overflow.
If I had it to do over, i'd devise a way to install an external overflow. |
|
#13
01/06/2008, 09:23 AM
|
|||
|
|||
|
I think 75's are awesome starter reef sizes. They have great dimensions for interesting aquascapes. You've clearly done your homework. Nice build so far! Keep us posted!!!
__________________
....love to prove that, wouldn't ya. Get your name in The National Geographic.... |
|
|


 Tagging along!
 Linear Mode

