|
|
|
#26
 07/10/2007, 11:37 PM
|
|||
|
|||
|
Great! You might consider some quick disconnnects on the wires for the ballasts - From what I can tell there are usually three wires per ballast. That way it would make it easier if/when anything needed to be moved and disconnected. Hellolights just got some more three wire connectors when I checked the other day. They seem to be on top of things there. I had a T5 retro set on one line item and then a MH retro on another. Checked back a day or so later and sure enough they had a T5/MH combo that actually worked out to be about $15 cheaper per set. I'm just trying to figure how I'm going to finance the $760+ there and $650 at MD and who knows where else for all the other things like ATO, wood, piping, misc. Ouch... A local reefer in Sac has the best RC call name I can think of 'BudgetYourself"...
Keep up the good work! I agree canopy looks great but I was totally expecting you to live up to your call name with some cool color options like the car near the top. What a canopy without flames?
__________________
"I wouldn't say I've been missing it, Bob." |
|
#27
07/11/2007, 06:23 PM
|
|||
|
|||
|
Quote:
Quote:
well i dont have a choice since the duel balest and the single balest that i do have the guy i got them from cut all the cords. its sucked but i payed 200 for both with 3 175watt 14k's. so i still made out good. i hate to say it but i will first try to make my own refectors for the halides. ill start with one and if it works i will 2 more. i see you are looking at a auto top off, well i have a good way of doing it, but u and everyone else will have to wait till i get down to the basement go put it together. i think it will be for under $40 even. i too am on a budget and its tight but i have almost every thing for it that i have ben gathering for about 6mths now. its was a long wait. and thank you for the complament on the stand, and sorry my wife said "no flames! i dont care if it would look cool! no flames!" |
|
#28
07/16/2007, 10:27 PM
|
|||
|
|||
|
well here it is my new sump
 i decided not to drill the 55gal i had for a sump cuz i read so many posts on drilling tanks and alot of the shatered tanks where 55gal tanks. i didnt want to replace or take a chance on replacing a panel on a good 55. i think a sheet of glass would have ben like 40-50 bucks. this 100gal rubbermaid stock tank cost me only like $72. now i will have more water volume and more room for live rock for filtering and soforth. this thing barly fit trough my back door! and the door to the back room of our basement was about 4 inches smaller than this tank. thank god for plastic that bends! the sump will sit on a stand about 2-3 feet in the air so that i may get it level and get more ghp out of the mak4. i dont want to get it much more higher do to the ceiling in the basement being about 6 feet. dont want to much water problems on the floor above. |
|
#30
07/20/2007, 08:02 PM
|
|||
|
|||
|
i got it and sent u the same (by the way it was a pm.....
 ) )
|
|
#31
07/23/2007, 10:05 PM
|
|||
|
|||
|
well as u will see i have ben busy with the tank. first off was the fun part
 DRILLING THE TANK! i did change my mind on how many inlets for the closed loop after i took the pic. i think 1 will doo just fine. i did 2 1" for the calflo and 1 1.5" for the closed loop ran by an amp master. these where my first holes to ever drill and it was alittle nerve racking on the first one but got easyer. here is the layout DRILLING THE TANK! i did change my mind on how many inlets for the closed loop after i took the pic. i think 1 will doo just fine. i did 2 1" for the calflo and 1 1.5" for the closed loop ran by an amp master. these where my first holes to ever drill and it was alittle nerve racking on the first one but got easyer. here is the layout sorry i forgot to take pics after i drilled the holes but i think you all know what they look like after drilling is done. next on the list after dtilling was the calflo. i made it out of 1/8 glass. i did dbl up the bottom so it will give the tank better suport withe the holes drilled in it. since the front was 1/8 i used 1/8 glass cross braces to keep the 3' of 1/8 glass from flexing. it worked realy well! the dementions of it is 5" top to bottom, 3.5" to the back and 3'long. i made it so deep so i can get the bulk heads in and put in 1" 90s in or out when i want to. sorry again for not taking a pic after i put it on but in the second pic from now u will see it. i wanted to hide it because it is kinda unsightly. so what i did is stir up some diy live rock and had fun building 2 towers to go up to the calflo and also to kinda hide the closed loop inlet. after i did that i took some black pond foam and went along the calflo to tie the 2 towers togeather to creat a cave efect. i have read many people doing this but i dont ever recall reading that they put crystal salt on it befor it expands so it will give live rock texture. so i tryed it and it turned out realy nice!i used a garbage bag under the calflo rolled up so i could put some pond foam driping down twards the bottom of the tank to get a better cave efect(tank was on its back at this time). i did have 2 problems with this though. problem 1: the cement mix stuck to the glass (note to self put plastic wrap down first!) the easy fix was to just leave it there and cycle it in the tank for a month wile i work on other things for the setup. problem 2: not as bad but i guess i didnt clean the glass good enough cuz the foam didnt cling to it like i was thinking it woud. it pulled away about 1/2 in some spots so i stuck more in those spots and it pulled again but only 1/8" so i just put some black sylocone in the crack and good as new. now on to the pics! this is of the salt on the foam befor water hit it.  heres the calflo. i need to trim some of the foam and put more sylocone down to smooth it so i get abetter skim off the top  here it is with some water in the tank  ill get a good close up of the foam tommorrow. the tank got cloudy when i thought of taking a pic of the foam. when here is the amp master running a teporary closed loop. boy these things are quite! barly here the thing pushing about 2000 ghp  i will have a om super sqirt running the closed loop with some blow off returns below the squirt for some steady flow from the closed loop. i have something inmind for that too so just stay tuned in the next few days. plus you will find out why i left some of the back of the tank not painted soon also(u can see it next to the closed loop return pic.) |
|
#32
07/23/2007, 11:40 PM
|
|||
|
|||
|
Looking good. I understand I'm trying to take pics to begin my thread but it's slow going and I keep forgetting to take some pics myself.
Looking good!!! I was planning on installing either my own internal or external overflow glass boxes and was curious as to how to hide them. I'd like to see that when it has water in it too.
__________________
"I wouldn't say I've been missing it, Bob." |
|
#33
07/24/2007, 10:59 AM
|
|||
|
|||
|
That whole tanks set up the black faom the tank stand and how you did the canopy with the shocks. Vary impressive great workmanship you have given me some ideas for my future tank. you got skills good job ! Can't wait to see it completed with the tank full of water
__________________
United states Coast Guard |
|
#34
07/24/2007, 03:05 PM
|
|||
|
|||
|
Neat, subscribed. I love your background. I made one similar on my new 240G reef, click the lil house to see. Are you going to use enductors on your closed loop?
__________________
"One thing vampire children have to be taught early on is, don't run with a wooden stake." - jack handy |
|
#35
07/24/2007, 04:51 PM
|
|||
|
|||
|
Nice setup. If the tank isnt in its final resting place, i would suggest moving that pump up a bit. It looks like the stand extends far enough back that you could build a little "stand" right by the inlet of your CL. You wouldnt think it, but that short distance will make a noticeable difference.
|
|
#36
07/24/2007, 05:43 PM
|
|||
|
|||
 Awwww.... man. If someone did that to my car I might have to kill 'em...lol. The tank looks cool though.
__________________
"If at first, the idea is not absurd, then there is no hope for it" -Al Einstein |
|
#37
07/24/2007, 06:05 PM
|
|||
|
|||
|
Quote:
Quote:
|
|
#38
07/24/2007, 06:12 PM
|
|||
|
|||
|
to each their own, hahn.
|
|
#40
07/24/2007, 07:23 PM
|
|||
|
|||
|
like i promised here are some nice pics of the foam after the salt melted away.
just foam  foam and diy live rock.i think its hard to tell the differance, what do u guys think?  and the other side 
|
|
#41
07/24/2007, 07:27 PM
|
|||
|
|||
|
Quote:
|
|
#42
07/24/2007, 09:54 PM
|
|||
|
|||
|
First off... love the car, awsome work!
Now... as far as a reef related question... what kind of foam did you use/method with it. I love the idea you have there. I am soon to start on my 125 and i am thinking of going that same route.
__________________
As long as everyone does what I say, when I say to do it, my communication skills are just fine!!!! |
|
#44
07/25/2007, 08:08 AM
|
|||
|
|||
|
im jumping on to this thread!!
and alhtough that car isnt really my thing, BEAUTIFUL paint job! i can without a doubt tip my hat to that! ...now, to find a hat tipping smiley face... oh well  oh, and nice tank setup too!
__________________
dont mind the typo's. i know they're bad... |
|
#45
07/25/2007, 10:00 AM
|
|||
|
|||
|
The rock looks good.
Quote:
|
|
#46
07/25/2007, 10:51 AM
|
|||
|
|||
|
steve... sent you a pm
__________________
As long as everyone does what I say, when I say to do it, my communication skills are just fine!!!! |
|
#47
07/26/2007, 01:21 PM
|
|||
|
|||
|
Yeah, that car is sick. Good job!
And nice looking stand, too.
|
|
#48
07/26/2007, 04:47 PM
|
|||
|
|||
|
Did you make those corner wood details? If not, where did you get them?
Looks great!
__________________
150 Gallon Cuttle-Farm reef Click on the Red house to see my Cuttle Reef! |
|
#49
07/26/2007, 05:12 PM
|
|||
|
|||
|
Let us see a FTS , with the tank on that awesome satin black stand . Ted
__________________
Grow your own save the Reefs |
|
#50
07/26/2007, 07:12 PM
|
|||
|
|||
|
Paradox009
all the trim was from menards. the only thing i dint get from there was the extra plywood to make the side tables. reefrubble do to the location of the tank, i should say is what direction it is faceing i am unable to do a good full tank shot. i have the front of the tank now facing a wall and not enough room in between the 2 to get a good shot. all my plumming is well ofcourse in the back and im doing test fits so i need the room to work even though its in the garage still. now i will be showing all u how i did the foam on the calflo but in small scale and not on glass. first the can of stuff i used i got from home depot in the pond area out side. 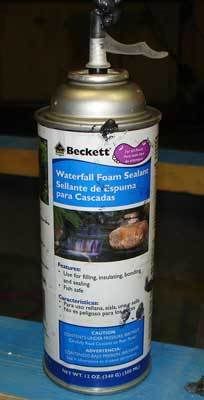 well make your wall in your tank or where ever your doing it but dont take your time this stuff gets a harder shell on it in about 5 min or so. next put some crystal water softner salt on it. you can push some of it down but dont push it all the way in so its coverd by the foam. is should look like this. like i said this is a sample peice for me to show u so its not going in my tank. 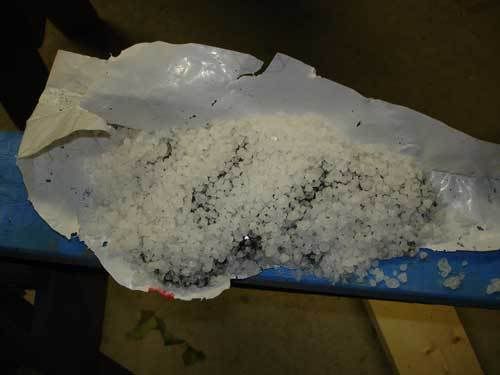 after it expands it will look kinda like this 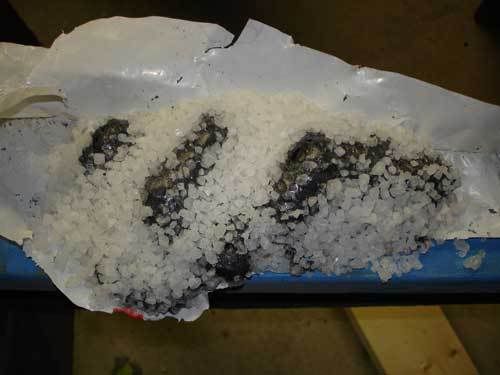 after the foam has dried wipe off the loose salt. yet another pic 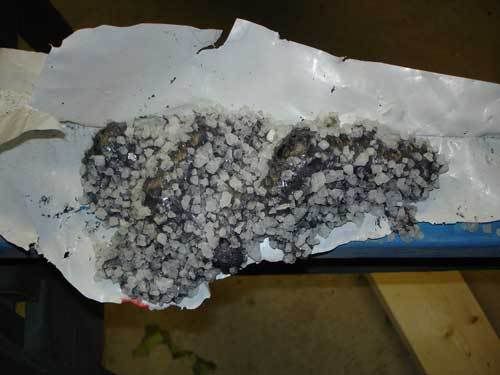 now here in the next step is where you will see what u got. rinse off the salt so it desolves off the foam. you will be shocked at what u get. this is what i got on the sample. 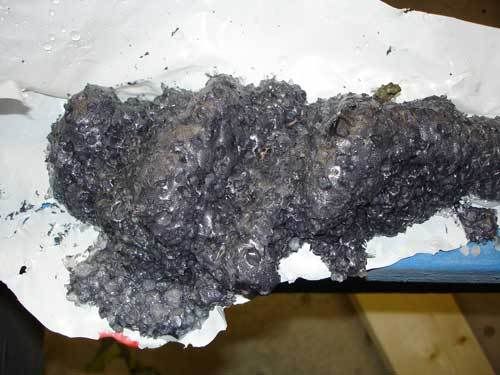 now the close up 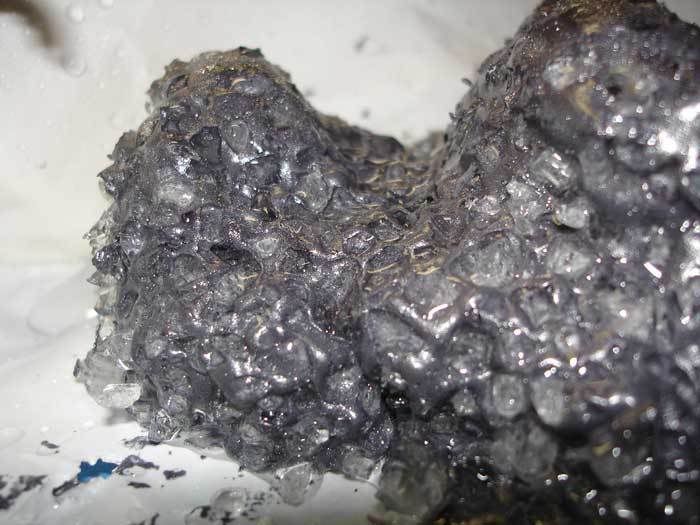 now what do u all think about the foam idea. |
|
|


 Linear Mode

