

|
|
|
#276
|
|||
|
|||
|
Very nice tile work. I'm a little surprised that you had hot water for anything else, but all that is water under the kitchen ...er bridge now.
Tony
__________________
The little red house = my web page |
|
#277
|
|||
|
|||
|
yeah...now its time to get some water in my dining room....
__________________
Paul W Whitby Ph.D President Central Okla. Marine Aq. Soc. |
|
#278
|
|||
|
|||
|
Step One completed, the sump is moved and im now working on getting the stand level and supported across the concrete slab.
I guess another couple evenings work remain on that project then its time to begin trimming the stand out for the wooden cabinetry and the wood top ready for the stand. P.
__________________
Paul W Whitby Ph.D President Central Okla. Marine Aq. Soc. |
|
#279
|
|||
|
|||
|
Update
How are things going?
Is progress going to slow down abit? You know with you being 40 and all. Just kidding. I've been there for 8 months now and personally I think it stinks. It seems like I have to cover up my wisdom every 3-4 weeks instead of every 6 weeks like the box says. Anyway hope you had a Happy Birthday. Lori
__________________
Will do TAXES for coral!!!! |
|
#280
|
|||
|
|||
|
Woohoo. Good job on that leak. I had that same occurence just a few years ago. Took much more digging than that.
__________________
The worst thing about an unwritten law is that you don't know where to go to erase it. |
|
#281
|
|||
|
|||
|
if it wasnt for the fact we had a LOT of ice and snowy stuff....it would have been on that stand this weekend.
I finally have all the equipment I need, the plumbing, the OceansMotions 4 way and the sequence pump. The Skimmer should be in this week....wooohooooooo. All downhill from here.
__________________
Paul W Whitby Ph.D President Central Okla. Marine Aq. Soc. |
|
#282
|
|||
|
|||
|
This is pretty exciting. Once that skimmer arrives, it's going to go quick. You're going to need your own dedicated photographer so we can fulfill our update addiction.
__________________
Travis Stevens |
|
#283
|
|||
|
|||
|
Quote:
 I am worse then a woman when it comes to this dang tank⦠I am worse then a woman when it comes to this dang tankâ¦
__________________
Shawn |
|
#284
|
|||
|
|||
|
well I have my ideas for the water flow sorted out. The OM unit will feed 4 returns behind the rocks and 4 returns under and to the front of the rocks. The main sump returns will feed down above the rock, this will then creat a rolling action in the tank along its length that will blow stuff from under the rock and keep it suspended.
at least thats my hope.... P.
__________________
Paul W Whitby Ph.D President Central Okla. Marine Aq. Soc. |
|
#285
|
|||
|
|||
|
I have an old 54 lb thrust trolling motor we could put in there to help with the circulation!!
You could even leave the foot controller on to direct the flow!!
__________________
Steve Callaham Nobody important |
|
#286
|
|||
|
|||
|
Now that would be cool....
__________________
Paul W Whitby Ph.D President Central Okla. Marine Aq. Soc. |
|
#287
|
|||
|
|||
|
the idea is to start with one pump and one OM unit, for now.....
Each bulkhead will be fitted with a union and ball valve. That will allow me to take half of the outputs and add another OM and pump at a later date...if I think its needed. Doing this I should be able to hide all the pipework behind and under rockwork and have no extra pipes/pumps etc in the system.
__________________
Paul W Whitby Ph.D President Central Okla. Marine Aq. Soc. |
|
#288
|
|||
|
|||
|
Quote:

__________________
Shawn |
|
#289
|
|||
|
|||
|
thats probably what I will be doing Shawn.
P.
__________________
Paul W Whitby Ph.D President Central Okla. Marine Aq. Soc. |
|
#290
|
|||
|
|||
|
Its photo update time for any who have been following along.
The floor my stand will sit on is uneven, infact there is an approx 1/2-3/4 inch bow to it under the middle of the stand. To overcome this we decided to cut a wooden subframe to the contours of the floor. For this we decided on 4x4 timber. Step 1....make the frame. The frame was made to sit exactly under the stand with 3/4 inch all the way round the edge of the steel. The subframe was built on top of the stand using the flattest and squarest timber I could find. 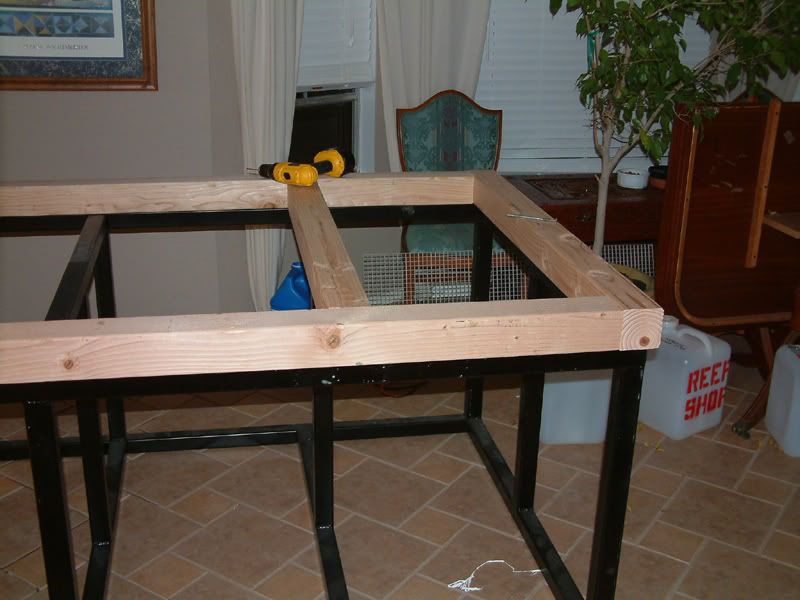 I used the top of the stand since I knew that was absolutely flat. The subframe was assembled with lagbolts (5 1/2 inch) sunk into the wood. 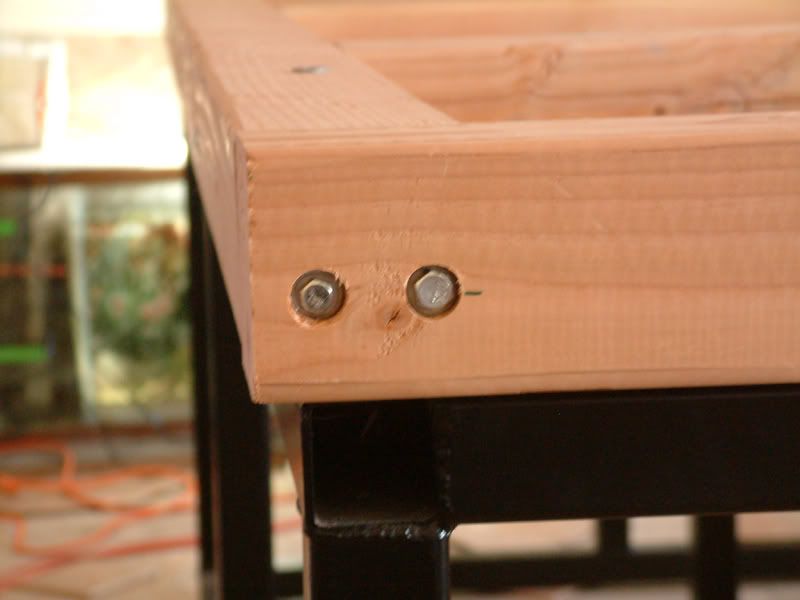 The whole thing was assembled to a solid construct. 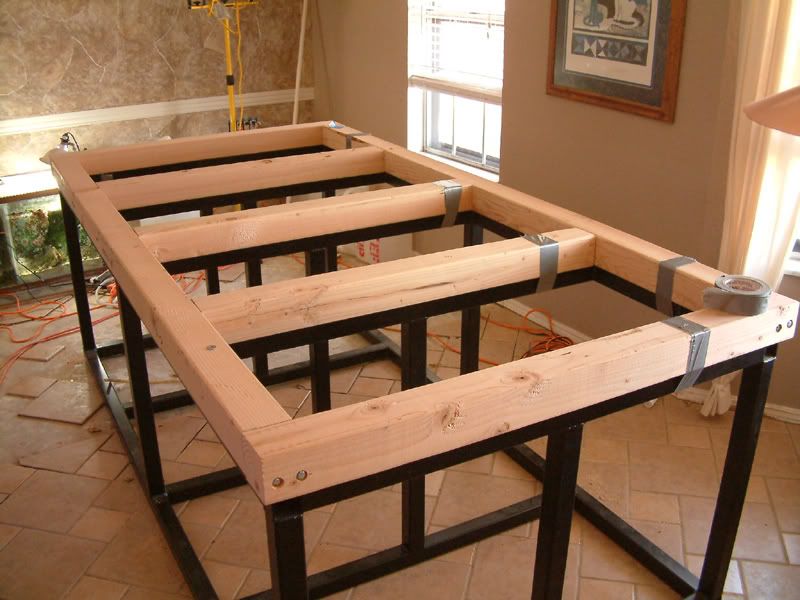 Once built, it was time to get it marked ready for cutting... continued....
__________________
Paul W Whitby Ph.D President Central Okla. Marine Aq. Soc. |
|
#291
|
|||
|
|||
|
Quote:
__________________
Shawn |
|
#292
|
|||
|
|||
|
Step 2:
Marking. The assembled subframe was lifted from the stand and placed into position on the floor. Using washers it was leveled all the way around so that it was flat in all directions. Care was taken to ensure that it was positioned exactly. 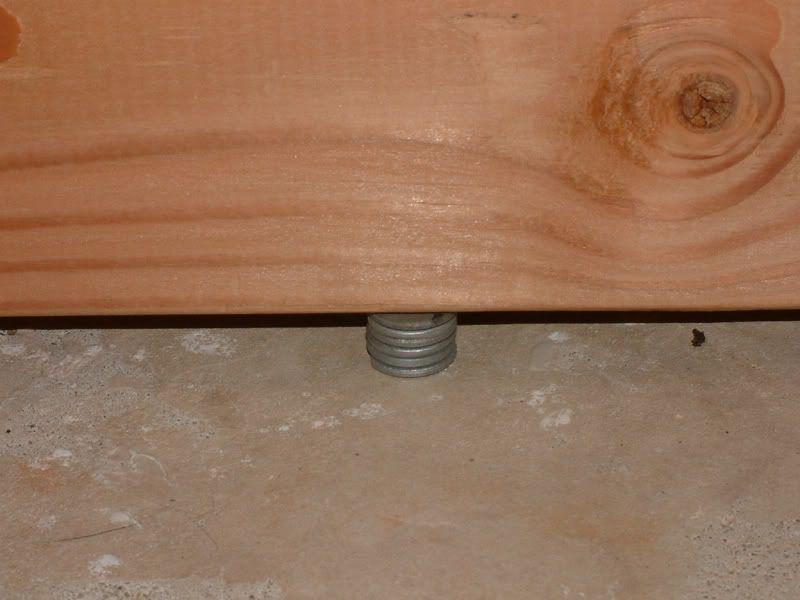 once levelled a pen was taped to a small block of wood. This was then run over the ground and the shape of the ground traced to the wood. 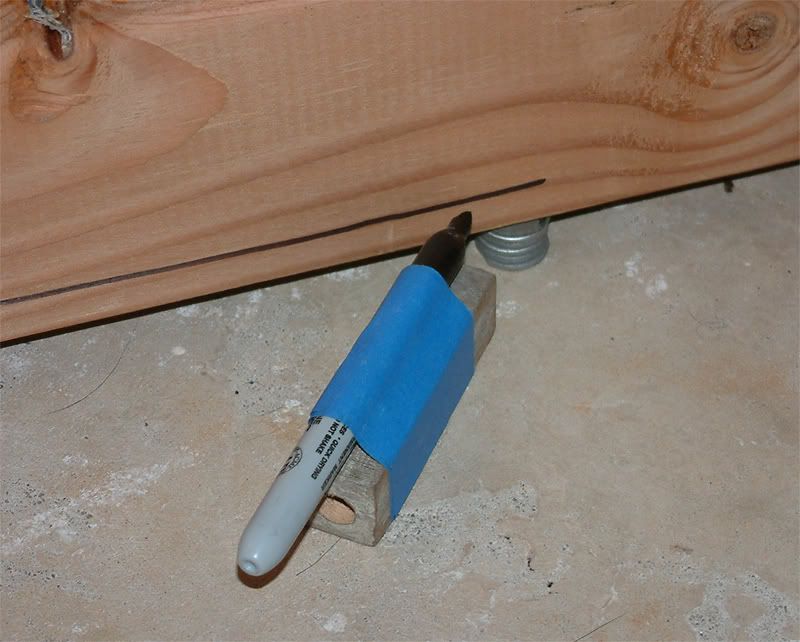 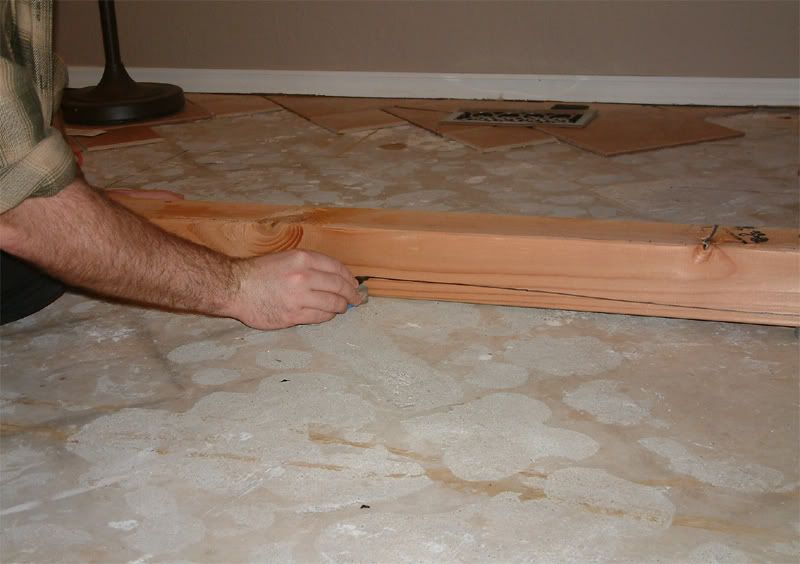 hopefully, in the last pic, you can see that the line drawn on the wood is not straight. It actually is the exact shape of the floor. This was repeated all the way around the wood on both sides. Step 3. Cutting. Once the floor profile was marked, all the wood was marked to ensure it went back together properly. Alll the lagbolts were removed and the wood was cut using a bandsaw. I used a 9 inch model from LOWES. Where the marks were different on both sides the shortest cut was taken. Then the whole thing was put back together on top of the stand. Areas where the 2 sides were different were sanded down with a belt sander to make the edge level with each drawn line. The subframe was then laid back on the floor. Fortunately it was a pretty tight fit to the floor, did not wobble and was still pefectly flat.
__________________
Paul W Whitby Ph.D President Central Okla. Marine Aq. Soc. |
|
#293
|
|||
|
|||
|
Step 4. Painting
The next step involved a lot of bribery. Lynn began painting the stand to waterproof it. 2 coats of Kilz then 4 coats of a heavy duty exterior waterproof paint. 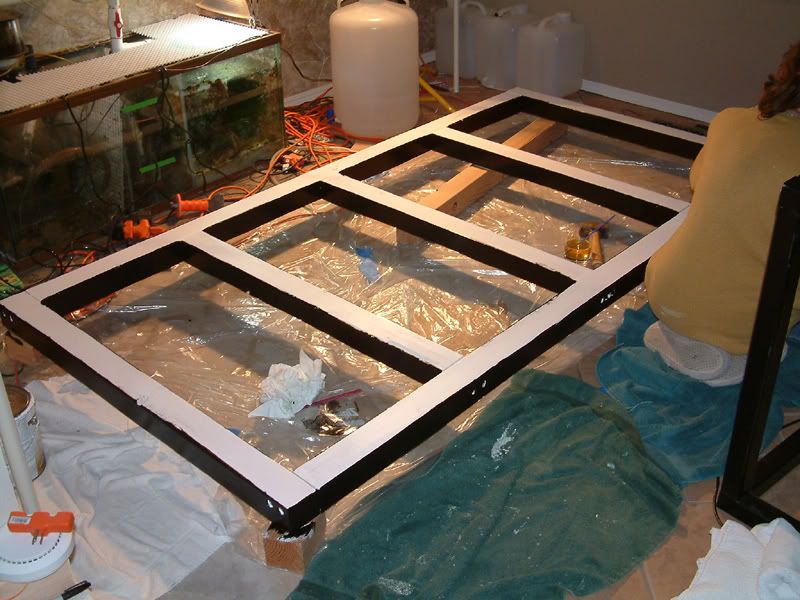 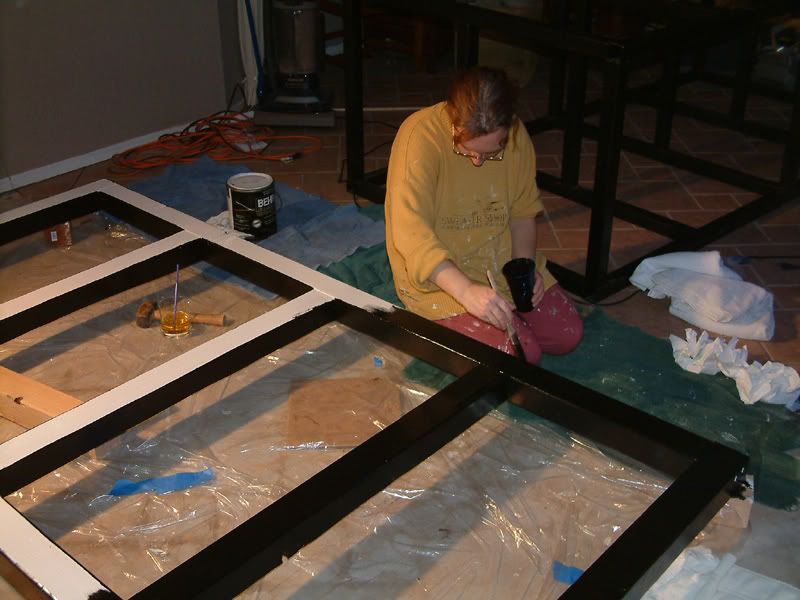 Once that had dried sufficiently it was time to relay it. Since there is no way the cut subframe could match the floor exactly I cut strips of 1/2 inch foam insulation to run under the subframe. These were laid down and the subframe laid ontop. 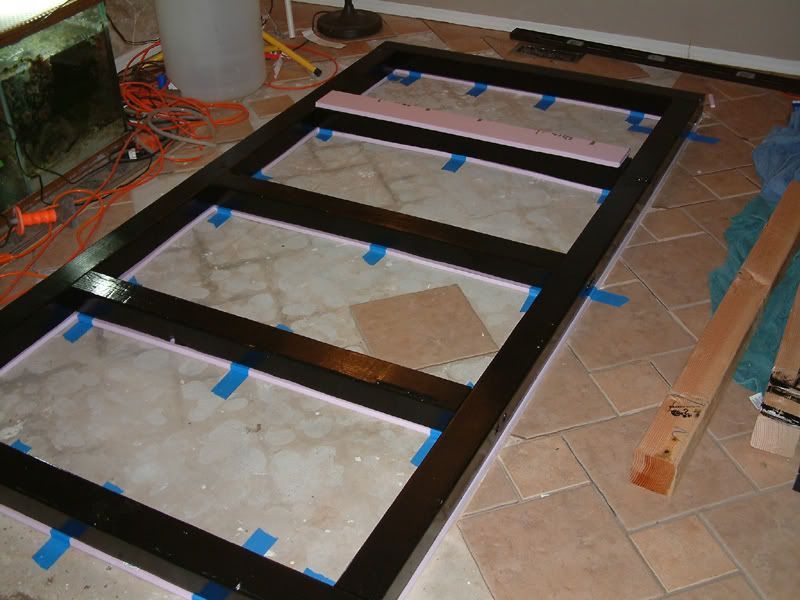 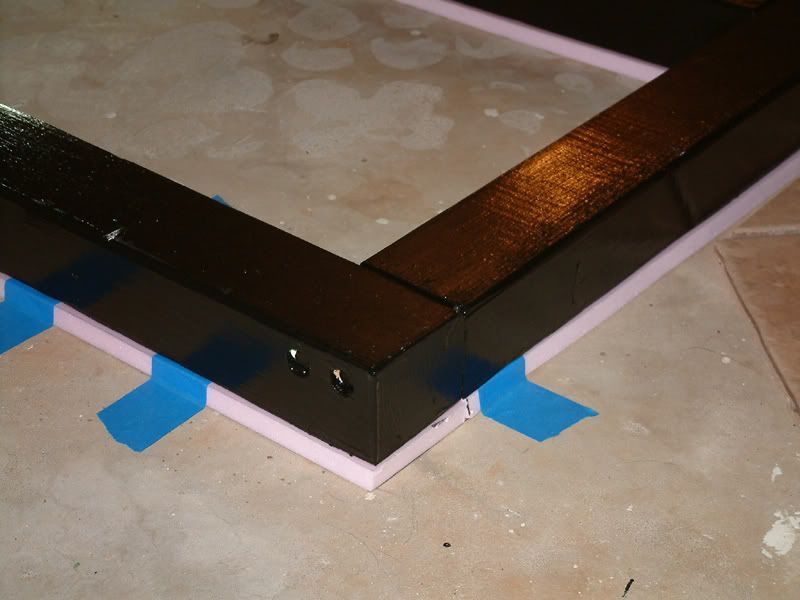 The steel stand is now sitting on top of this subframe. It is absolutely solid. It is also completely level. Currently I am (well Lynn is) painting the plywood top of the stand ready for the tank to come inside. More updates soon......I hope Paul.
__________________
Paul W Whitby Ph.D President Central Okla. Marine Aq. Soc. |
|
#294
|
|||
|
|||
|
Quote:
Paul.
__________________
Paul W Whitby Ph.D President Central Okla. Marine Aq. Soc. |
|
#295
|
|||
|
|||
|
Quote:
__________________
Shawn |
|
#296
|
|||
|
|||
|
It really was. In just that one spot unfortunately. That picture makes it looks so bad...I chuckled. It doesnt feel that bad in reality, but you can see the issue I had.
I thought this would be a useful "how to" for anyone with bad shaped floors. P.
__________________
Paul W Whitby Ph.D President Central Okla. Marine Aq. Soc. |
|
#297
|
|||
|
|||
|
That was a very clever solution to a tricky problem. Well done!
|
|
#298
|
|||
|
|||
|
Paul - what's up with the pink foam insulation underneath the stand? What are you trying to accomplish with that?
(Serious question - not sarcastic - and I have ideas, just want to hear specifically and in a little detail)
__________________
Paul Thompson Downley, Buckinghamshire, England RK: Where only bad things happen fast... CRAZY 4 the CRASE - Oct 13, 2007 Conf for Reef Aquarists and SW Enthusiasts Google it - Search for: craseokc |
|
#299
|
|||
|
|||
|
Quote:
__________________
Paul W Whitby Ph.D President Central Okla. Marine Aq. Soc. |
|
#300
|
|||
|
|||
|
You can go out to most construction sites after it rains and see puddles on the low spots in the slabs of the new houses.
As usual you appear to have followed a sound path to a long term solution - I would've probably put it up hoping the weight would flatten out the concrete (ok maybe not). Tony
__________________
The little red house = my web page |
|
|