|
|
|
#76
 01/23/2007, 11:51 AM
|
|||
|
|||
|
Tonight I will start running the rest of the RO since the silicone on the baffles will have had the recommended 48 hours to cure. I only need about 30 or so more gallons, so I will probably start everything up tonight!
This also brings up a question. How can I mix my salt in all this water? Can I just put the salt in the main display and let the return pump (not skimmer pump) run and let it all mix up?
__________________
-Josh- |
|
#77
01/23/2007, 03:12 PM
|
|||
|
|||
|
Do NOT use the ball valve on your drain. Too much room for failure should something get caught in it. I crashed a tank in the past and this was partly to blame. If you put the ball valve there to try to quiet down the water, then just look into a Durso standpipe.
For the first fill you can fill the tank with water, then add salt to the display or sump and it will mix up just fine. Don't put any live rock or anything in there for at least 48 hours after you add the salt. The water will be very caustic. |
|
#78
01/23/2007, 03:27 PM
|
|||
|
|||
|
Ok thanks. The reason I have the ball valve on the drain is in case I have a problem with my sump. If I need to emtpy it as much as possible I figure I'll close that ball valve and pump what I can into the display so I can remove the sump. Then once everything is back up and running, open it back up and turn the return pump back on. I have it closed in my picture so it was easy to add the straping, but planned on having it wide open once everything is going. I guess it was more of a precautionary measure just in case. Thanks for the advice though, because I could see myself pondering closing it if it was too loud!
__________________
-Josh- |
|
#79
01/24/2007, 12:07 PM
|
|||
|
|||
|
Well I've run into a minor issue with my bulkhead. I've just hand-tightened it because I've been told by some that over-tightening it will actually cause it to leak from the seal. Well I did just this and it has a slow leak. It's not a huge deal since the overflow is over my sump, and the leak just very slowly drips into the sump, but I'm wondering if I shouldn't try tightening it more? I did put a little more muscle into it and it did slow the drip, but I'm afraid of over-tightening it. Has anyone else had similar experiences with this??
__________________
-Josh- |
|
#80
01/24/2007, 12:29 PM
|
|||
|
|||
|
Bulkheads can be finicky, that is why I prefer the Sch 80 bulkheads. They usually have the thicker and softer gasket that seats better. If you are getting drips then I would unscrew it and screw it back togher a few times until you get it to seat right without dripping. You may need to use a wrench just to give it an extra 1/8 of a turn but do not overdo it.
|
|
#83
01/24/2007, 09:07 PM
|
|||
|
|||
|
I have a few updates. I've gotten the tank completely filled, and have everything up and running. I'm seeing a few micro bubbles, not sure if there is too much flow in the sump, or if this is a little breaking-in going on, but hopefully it's not a big issue. I have a few pictures of the progress as well.
Here is the sump up and running 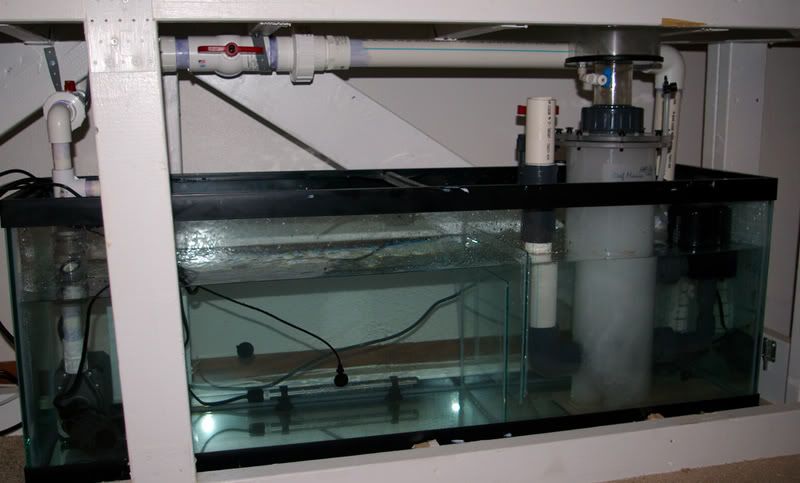 This is a close-up of the skimmer in action. There's already some brown junk rising up the collection cup (dust and what not from setup I'm assuming). 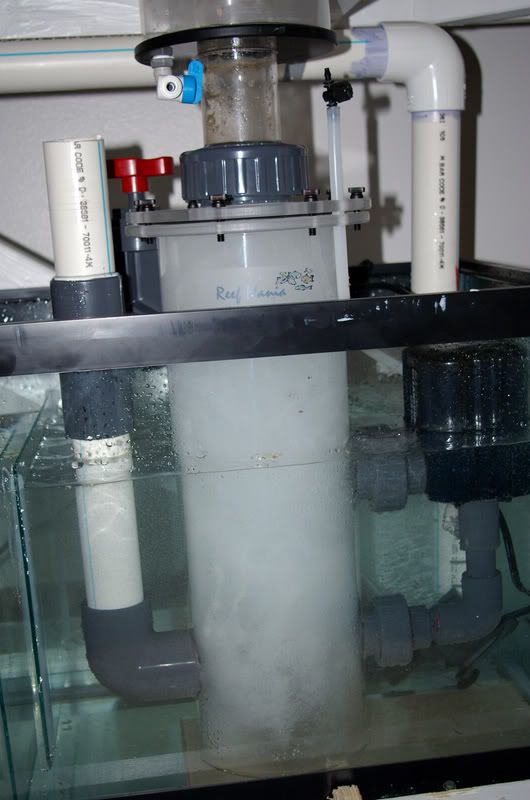 Finally I have a picture of the penductors doing some work. There are doing pretty good and moving some water. 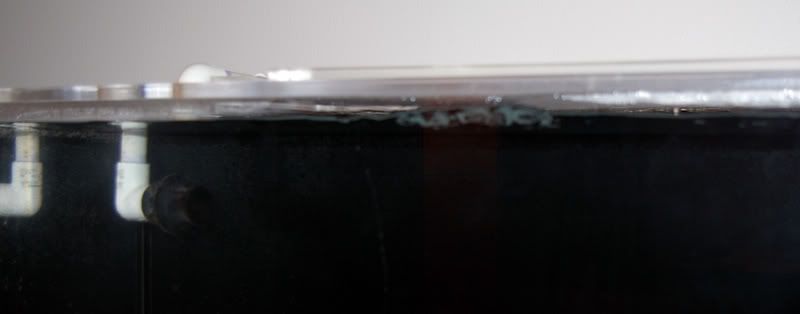 I actually ran into a really good deal on a few lightly used Sea Swirls here on RC and plan on installing those as soon as they come in. The previous owner of the tank already has holes drilled in the top where he had his Sea Swirls installed, so hopefully it all works out just fine. The only thing I'm worried about is my DIY canopy and large fans on either end. Hopefully all the plumbing from the SS will clear everything and settle right in *crosses fingers*.
__________________
-Josh- |
|
#86
01/26/2007, 02:07 AM
|
|||
|
|||
|
Thanks guys. I'll be picking up my LR and LS this weekend. I won't have a ton of LR but a little bit to get me started. I have some really unique stuff that my LFS sells that I haven't seen ANYWHERE else. Even with all the online vendors I've never seen stuff like this. Stay tuned!!....
__________________
-Josh- |
|
#87
01/26/2007, 02:28 AM
|
|||
|
|||
|
Boy, that tank is a poster-child for T5s... I love the dimensions... I was doodling today and drew a 8-10'x18"x18" tank... thinking how cool a narrow and long tank would be, and how cool it would be to run it with nothing but eight to twelve 54wattT5 bulbs.
Oh, and a Tunze Wavebox...lol... can you imagine that wave!?!?!
__________________
"If at first, the idea is not absurd, then there is no hope for it" -Al Einstein |
|
#88
01/26/2007, 10:01 AM
|
|||
|
|||
|
I love your signature on your message, because a lot of people think the dimensions on this tank are absurd! I'm more then happy to have a tank totally different then what people are used to seeing. My fish will love the length for swimming too! I'm sure it will be a challenge when I start stocking corals but that's half the fun isn't it?
__________________
-Josh- |
|
#89
01/26/2007, 10:18 AM
|
|||
|
|||
|
you will be just fine, i like the dimensions, forget conventional go for what works for u
|
|
#90
01/26/2007, 12:54 PM
|
|||
|
|||
|
Its no more odd than stocking a bunch of 50g breeder tanks. Okay, so you may not be able to do boulders like in a 4'x2'x2' type tank, but you can do other things.
My introduction to the hobby was through nanos, and I love that close-up detailed viewing time that is hard to get with a tank that is 24-30" wide. To me, its all about being able to see the little critters buzzing around more than that large colony of millipora and a school of tangs. This is why even though I am setting up a 48x30x18"h tank, I also started a 5g desktop nano... to keep my 'perspective'. It was either that or the 96x8x10"h super-stretch railing tank that I made. Its so long and narrow that I had to make the rocks myself a-la aragacrete. That way I was able to make the rocks long and narrow with specific coral nesting spots built in. Otherwise that tank would be impossible to stock. I was thinking that a long aragacrete background wall for a tank that is long and narrow would be a great way to get some of the tank depth back. That way, rather than having a rock structure stacked up that takes anywhere from 6-12" of your slim tank's depth, the rock can be snug against the back wall of the tank, only taking up a few inches. This has several advantages... More open area = more flow Rock against back wall means fish and critters are forced out into the open more... fire shrimp cant hide behind a boulder all day. Rock against the back wall means no more need for a painted black back... the background IS the rock. Ive done this on a smaller scale for my 5g and a 40g Breeder, and the results have been impressive. My 5g desktop has more open-space in it than a 10g I used to have because the rock in integrated into the sides of the tank. Just an idea you might want to try with the 'stretch' tank.
__________________
"If at first, the idea is not absurd, then there is no hope for it" -Al Einstein |
|
#91
01/26/2007, 06:05 PM
|
|||
|
|||
|
Do you have any pictures of your projects? I think I have an idea of what your talking about, but can't totally put it into perspective since I'm not exactly familiar with the medium that you are using. Sounds like an idea for maybe breaking up parts of the tank...
__________________
-Josh- |
|
#92
01/27/2007, 01:18 AM
|
|||
|
|||
|
You mean the aragacrete walls, sure. Give me till tomorrow to dig up some pics.
__________________
"If at first, the idea is not absurd, then there is no hope for it" -Al Einstein |
|
#93
01/27/2007, 09:32 PM
|
|||
|
|||
|
Well after 150 lbs. of LS and around 70 lbs. or so of LR, my tank is starting to look more like a reef. I ended up going with a DSB in my sump, and around an inch in the rest of the tank. I had contemplated going BB, but love the look of the sand and I'm very happy with how it turned out. I believe my LFS calls the LR Gap Island if I'm correct. He refers to it as Lego's of the ocean, and I couldn't agree more. It has lots of branching that allows you to somewhat lock it into place and make a sturdy structure.
I decided to start out with 2 islands on either side of the overflow. I may incorporate something different in the future, but for now I'm pretty satisfied with how it looks. Below are picture of the setup. The water is still pretty cloudy, but I couldn't wait to take pictures for an update. Here is a full shot of the tank.. 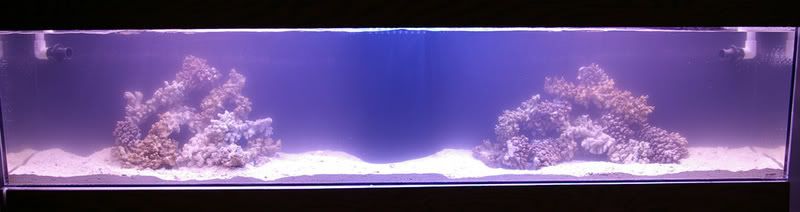 This is a closeup of the left side.. 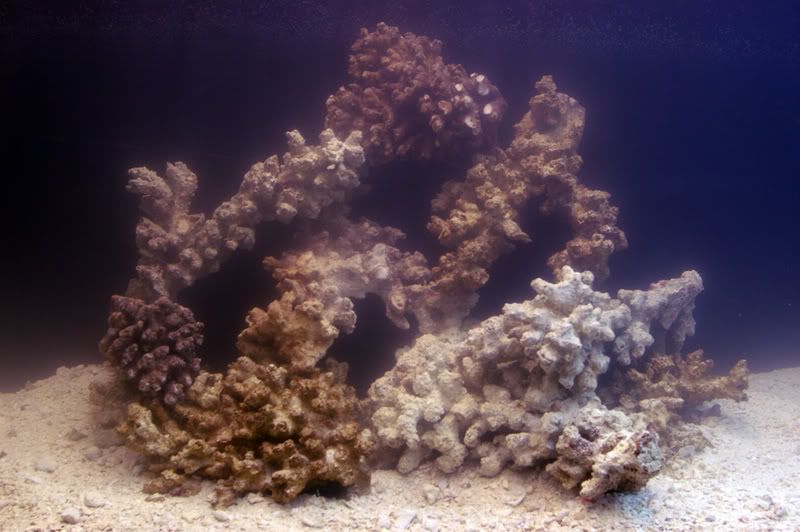 Here's a closeup of the right side.. 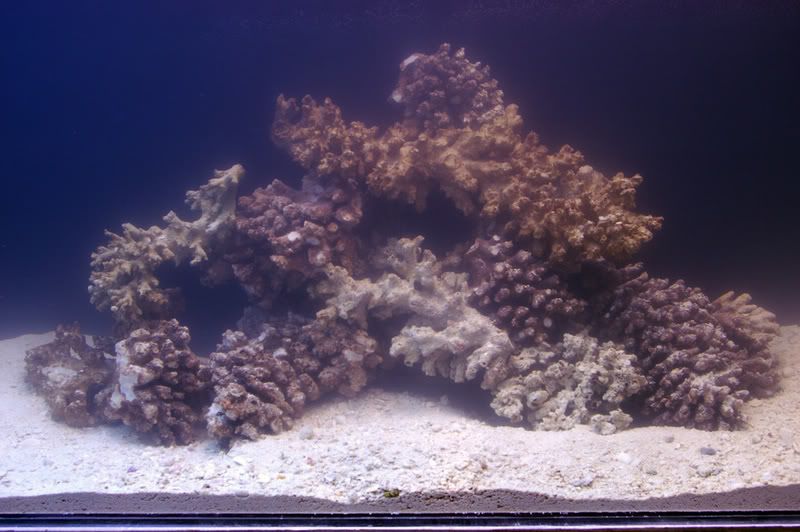
__________________
-Josh- |
|
#94
01/27/2007, 09:35 PM
|
|||
|
|||
|
Here is a shot of the right from the side..
 Here is a shot of the left from the side.. 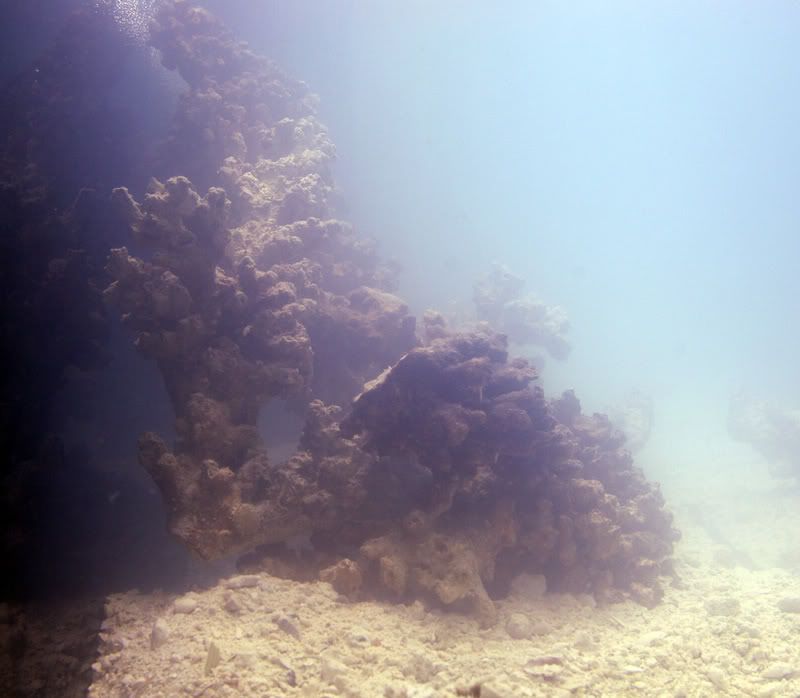 I also took a few angle shots to try to give an idea of the awesome caves you can make with this rock. Here is an angle of the left side.. 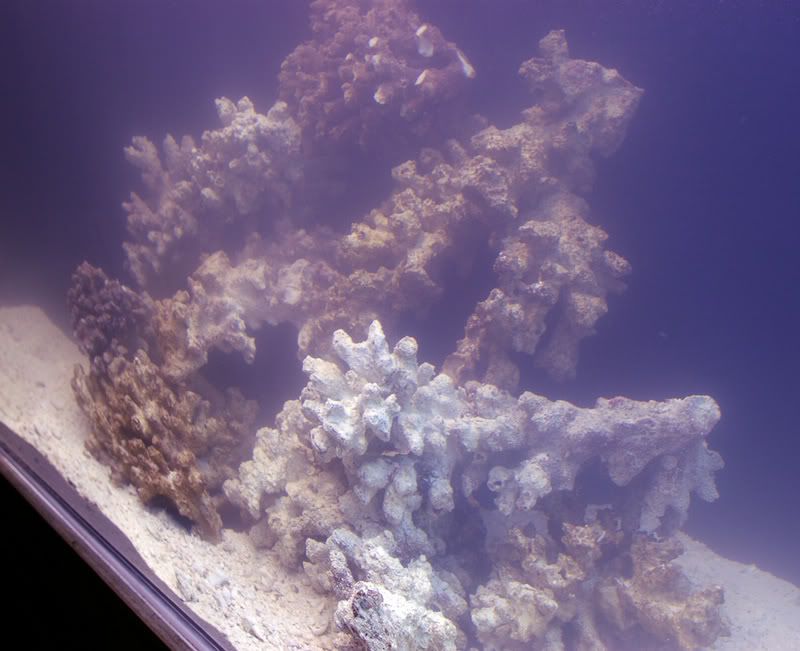 Finally, here is an angle of the right side.. 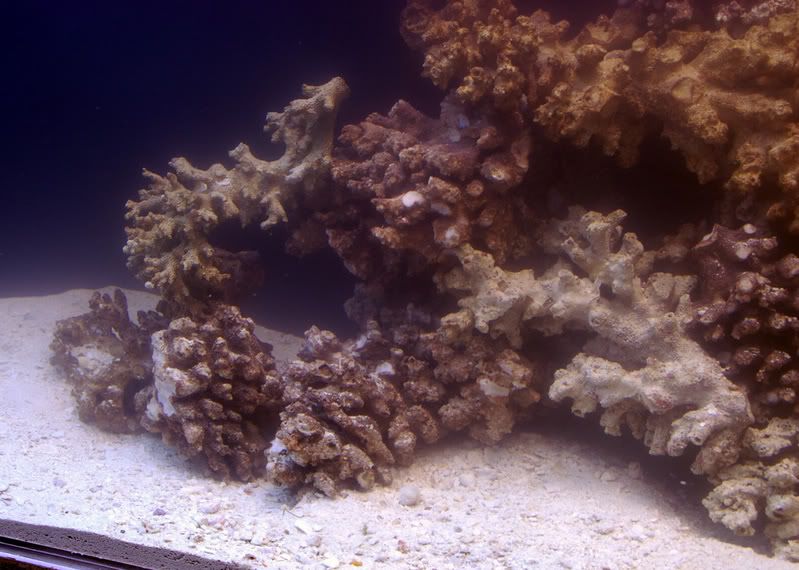 The pictures don't totally do the caves and hiding places justice, but give you an idea of the depth of work you can do with this rock!!
__________________
-Josh- |
|
#95
01/28/2007, 03:34 PM
|
|||
|
|||
|
Just thought I would post a few more pictures since the water cleared up. This will give you a little better idea of the rockwork..
Here's the left side.. Here's the right side.. It's coming along!! I did have one question for you skimmer guru's out there. I know that I've been told you need to give a skimmer time to "break in" and I'm just wondering with your experiences how long this normally takes? I've noticed that the neck of my skimmer is getting a little brown, and I'm wondering if I shouldn't have my water level higher because I can't see any bubbles in the neck so they can burst in the collection cup..
__________________
-Josh- |
|
#96
01/28/2007, 03:39 PM
|
|||
|
|||
|
Skimmer break-in is due to when you get a new skimmer, the oils on the plastics take a bit to break-down. Also, arylic has a static charge to it that disrupts the bubble formation.
Normally, this can take a couple days or up to a week. You can speed it up by running the skimmer in a hot bath of freshwater, possibly with a mild acid like vinegar. This removes alot of the residue and can speed things up. From what you have said though, I am thinking that you need to raise the water level since you are getting brown skimmate deposits too low in the skimmer.
__________________
"If at first, the idea is not absurd, then there is no hope for it" -Al Einstein |
|
#98
01/28/2007, 07:28 PM
|
|||
|
|||
|
I've been trying to adjust it a little to get the level a little higher. These things are kind of finicky. I thought I had it set perfect and came back 10 minutes later and it had overflowed quite a bit. Is this something I will need to adjust quite a bit, or just part of the breaking in period?
Also, the air line for the recirculating pump has a little black valve on it to control how much air the pump is getting. I was thinking there wasn't really quite as many bubbles as I had anticipated, so I took the valve off to see if it was clogged or something, and about 10 seconds after I took it off there was a night and day difference in the number of bubbles. With the valve completely off there were WAY more bubbles. My only complaint is that the air line seems to make a gurgling noise now. It's not a huge deal and when I'm not close to the skimmer I don't notice it, but is the valve something I need to leave on, or is there a different one I can get to allow more air for more bubbles? Thanks guys!!
__________________
-Josh- |
|
#99
01/28/2007, 07:42 PM
|
|||
|
|||
|
Hoover, When you are changing the water level in the skimmer with the gate valve, 1/8 to 1/4 turns make a big difference. The skimmer will not respond instantly. It will take a few seconds.
It sounds like the water level inside is a bit low, if the bubbles are only in the neck. Do this to start. Turn off the OR pump. Close the gate valve until the static water level is just below the keyhole flange. Then turn on the OR pump. Wait and see how high the bubbles rise. Then you can open the gate valve slightly to lower the bubbles. Once you get if set, you will be good. Eventually you figure out where the sweet spot is. The airline valve: If you use is it, make sure it was wide open to start with. Then you can close it off or time to tighten your bubble pattern. Also, just make sure there was nothing in the air valve. FYI some people like to use air valves some like it wide open. Hope that helps.
__________________
Thanks Bob |
|
#100
01/28/2007, 08:56 PM
|
|||
|
|||
|
You can ditch the valve and make a 'muffler' for the airline instead. Take a 4-6" piece of 1/2"-3/4" PVC and two endcaps. Drill a hole at each end of the pipe, right where the PVC caps meet the holes. The one hole matching the OD of your airline, and the other about the same. Then stuff some foam or filter floss in the pipe. This acts like a muffler on a car, and works very well on a skimmer. By pressing the cap on the pipe you can pinch the airline in place, and then at the other end, you can place a valve... thats what I usually do, but in this case, you can leave it off... OR, you can use a larger valve or two?
__________________
"If at first, the idea is not absurd, then there is no hope for it" -Al Einstein |
|
|


 Linear Mode

