|
|
|
#1
 03/02/2006, 12:08 PM
|
|||
|
|||
|
Drilling JBJ Nano Cube
I'm thinking about plumbing my cube into my main tank and going to drill the back. Has anyone done this? Anything I need to know before I go ahead with the plan?
__________________
180 w/ 400W Coralvue dimmable ballast / mini lumenarc reflectors / Reeflux 10K bulbs |
|
#3
03/02/2006, 01:40 PM
|
|||
|
|||
|
A read where a few folks have tried to drill the NCs - some have cracked. I won't be drilling my 12 gallon anytime soon.
Plumbing the NC into your main display is a neat idea, though. If you decide to risk it make sure you post some pics. |
|
#4
03/02/2006, 02:58 PM
|
|||
|
|||
|
The overflow/sump area of the nano is plastic. Why not drill that? It would be a lot safer than drilling the glass. Also, maybe you could do something with the hood. Do some cutouts in the back to get your plumbing into the nano's sump.
|
|
#5
03/02/2006, 03:16 PM
|
|||
|
|||
|
The back is glass although it looks like plastic. It has a very thin laminate / sticker on the back.
I don't have a hood on it, took that off and have a MH pendant.
__________________
180 w/ 400W Coralvue dimmable ballast / mini lumenarc reflectors / Reeflux 10K bulbs |
|
#6
03/02/2006, 03:19 PM
|
|||
|
|||
|
How 'bout that? They sure had me fooled...
|
|
#8
03/02/2006, 06:10 PM
|
|||
|
|||
|
you could run both into the same sump or something wiht a pump, pump waterinto the nano, drill a hole in the hood, run tubes out, get ya mag drive, and run a tube from the tank to the mag, then outhe other end tothe main tank
__________________
~Mike An escalator can never break. It can only become stairs. There would never be an "Escalator Temporarily Out of Order" sign, only "Escalator Temporarily Stairs. Sorry for the Convenience." |
|
#9
03/02/2006, 11:40 PM
|
|||
|
|||
|
The nano will be plumbed to the sump for my 75. I plan on making a 3/4" Durso for the nano and having that run into my skimmer compartment in the sump. I'll use a Mag 5 for the return for the nano in the same compartment as my Mag 12 that returns to the big tank.
I've got a couple of snags that I need to work out. I don't think I can get enough water into the back section of the nano to supply the durso and the return. I think I may have to go old school and dremel the back as an overflow. A full horizontal overflow all the way accross!! This should be enough to make it work. Another problem is securing the return pipe. Obviously this needs to be full proof or I'll have the entire 75 with sump on my floor in less than an hour.
__________________
180 w/ 400W Coralvue dimmable ballast / mini lumenarc reflectors / Reeflux 10K bulbs |
|
#10
03/02/2006, 11:44 PM
|
|||
|
|||
|
I drilled two holes in my nanocube no worries
|
|
#11
03/02/2006, 11:51 PM
|
|||
|
|||
|
Nice! Could you give me some details on how you drilled, where on the cube and what do you think?
__________________
180 w/ 400W Coralvue dimmable ballast / mini lumenarc reflectors / Reeflux 10K bulbs |
|
#12
03/02/2006, 11:57 PM
|
|||
|
|||
|
Forgot a couple of questions. What size holes did you drill?
__________________
180 w/ 400W Coralvue dimmable ballast / mini lumenarc reflectors / Reeflux 10K bulbs |
|
#13
03/03/2006, 02:39 AM
|
|||
|
|||
|
Hi newschool04- I have drilled 6 different holes in my 2 different cubes I had one cube for 18months and some scratchs in the glass developed from using a razorblades to scrape the glass clean, & coral gravel in the mag cleaner. I saw @ the LFS a hood-less cube for $15 bucks. I could'nt resist!
I used a cone shaped diamond bit on highest RPM= 30,000 using a black&decker rotary, with a film of water to keep things cool. I switched to a ball bit after I eched out a deep ring where I wanted the hole, to make the ring deeper. then back to the cone bit to punch through and finially the cylinder bit to cut out the ring. be sure to line up the bulkhead fitting leaving room for the flang and the back nut. The plastic rim can't touch the fitting or the seat won't be right and do not over tighten the nut, hand tight is all that is needed. Hope this helps! |
|
#14
03/03/2006, 03:00 AM
|
|||
|
|||
|
Thanks a lot abernaka! What size holes did you drill, what sized bulkheads? Did you use silicone with your bulkheads?
__________________
180 w/ 400W Coralvue dimmable ballast / mini lumenarc reflectors / Reeflux 10K bulbs |
|
#15
03/03/2006, 10:58 AM
|
|||
|
|||
|
if you pull the sticker off the back is the overflow area visible...is the glass clear?
|
|
#16
03/03/2006, 09:06 PM
|
|||
|
|||
|
Quote:
|
|
#17
03/05/2006, 01:30 PM
|
|||
|
|||
|
new School04
new school04,
I originally used bulkhead fittings that 3/4"pvc slipped into the rear of the fitting. I then went to a 3/4" by 1" tee, to get the drains to flow fast enough, however this was still not enough I still had to reduce the ball valve on the pump return line about 10% keep the aquarium from overflowing. So on the new cube I am using a SCWD current switcher thing"love it" and a RIO 2100 with 4' of lift. It has One return that is in the bottom of the tank that is 2" drain pipe and two 3/4" returns through the squid SCWD thing. 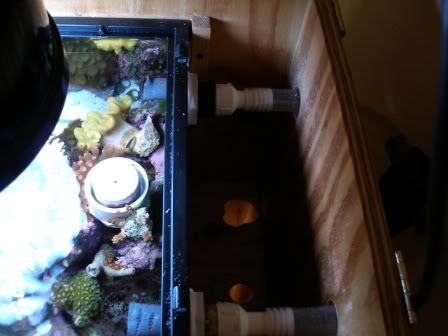 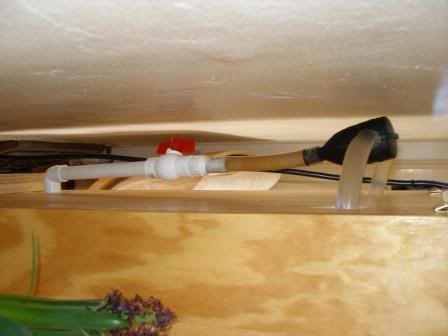 
|
|
#19
03/06/2006, 09:51 AM
|
|||
|
|||
|
abernaka, is that a stockman pipe you are using? I am planning on building a durso pipe with the 90 degree in the first compartment connected to the durso pipe on the outside in the back. I should get about 500 - 600 gph through it I would think.
__________________
180 w/ 400W Coralvue dimmable ballast / mini lumenarc reflectors / Reeflux 10K bulbs |
|
#20
03/06/2006, 12:50 PM
|
|||
|
|||
|
Newschool04
It's like a stockman but the inlet is from the top to surface skim. I played conect the pipe in homedepot way too long. If I could fo it again I would use a external overflow an a stockman stand pipe.
I have to first suggest that you rip out that plastic divider in the back, it takes up so much room and you'll be amazed how much bigger the tank is, 20% larger with the in-tank filter/divider removed. Additionally if you are going to plumb it into your sump it will not serve that much of a fuction. The stand pipe is for a sink drain.It screwed into the 2" drain/ bulkhead perfectly. The stand pipe has a 1 1/4" endcap/ male adp. that slips over and a 1" end cap to keep the gargle noise down. I made many holes with the rotary tool to get the flow right. It goes into a 2" drain pipe out the bottom of the tank and into a 10g sump, with a dsp& phelum. hope this helps! |
|
|


 Linear Mode

