|
|
|
#1
 01/06/2006, 11:17 AM
|
|||
|
|||
|
After several months (almost a year) of planning, I've finally decided upon the specifications and designs of my future tank. This will be my second tank.
Note: I previously had a 66g Reef, that I really liked and hated at the same time, since it required a lot maintenance from my part and I didn't have all the equipement proper to running a successfull Reef. My shamefull tank finally died (litteraly) 2 years ago, when the building beside my place caught fire and my place (a small loft) was completely smoked and baked. Luckily the fire didn't spread to my place, but the tank did take a beaten...  Anyways, I'm now ready to start my second tank. I've read pretty much everypost I could read in the large tank section of this forum and I've learnt quite a bit ! Since I'm limited in space (I live in a small 900 square feet loft), my tank won't be as big as I would have wished it to be  but still it should be great for the time being (can't wait to move in a house but still it should be great for the time being (can't wait to move in a house  ). ).Here's a brief description of the tank I'm planning: The tank will be made out of 1/2" Starphire glass for the front and side panels and 1/2" regular glass for the back and bottom panes. The tank has a central-external overflow. The tank will be euro-braced with 6 x 1" holes in the top for a closed-loop. There will be 2 x 1.5" holes on the back-side of the tank for the input to the closed-loop, that will be feeded by a Sequence Dart pump. The overflow has 2 x 1.5" holes that will feed the custom sump placed in the stand beneath the tank. A 4-way oceansmotions will compose the closed-loop and feed the 4 x 1" corner holes on the euro-brace. The 2 x 1" back holes on the euro-brace will be for the return from the sump. I'm keeping the 2 x 1" holes unused in the front for a possible upgrade in the future. Please feel free to comment my plans ! 3D view 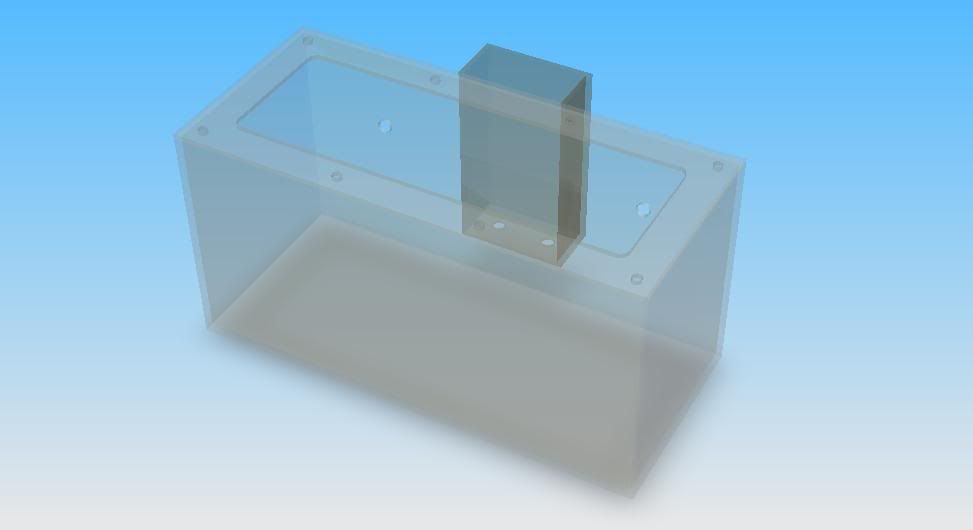 Top view  Side view  Front view  ISO view  
|
|
#2
01/06/2006, 03:16 PM
|
|||
|
|||
|
For lighting, I'm planning on using 3 Nova II pendants from Giesemann.
 They will be placed over the tank with the following configuration: From left to right: 150 watts - 13k 150 watts - 14.5k 150 watts - 13k |
|
#3
01/06/2006, 03:52 PM
|
|||
|
|||
|
I think your plans look great and you've thought this through.
I don't believe you will need three halides though, not on a 4' tank. I would also consider 250 watt halides if your tank is 25" tall, you'll have better light penetration which will be beneficial if you decide to keep high light needing specimens in the tank.
__________________
Somebody once said that if you put an infinite number of monkeys at an infinite number of typewriters, eventually you'd end up with the complete works of Shakespeare. My other computer is your MAC. |
|
#4
01/06/2006, 04:06 PM
|
|||
|
|||
|
thanks thrlride,
Currently, I already have two 150 watts pendants in my possession from my previous tank. I'm considering adding a 3rd pendant 250 watts in the middle, like you say. I made a mistake in my 2nd post and put it in as a 150 watt pendant. 3 pendants is quite a bit, I know but I'm thinking of creating a sun rise and fall effect, same as the sun comes up in the east and goes down in the west.So in the morning when the halides come on, the first halide on the right (150 watts) would come on and after a certain period of time the middle (250 watts) would fire up...you get the idea ! So I would only have 2 pendants on, the most of the time and during a short period of the day the full 3 pendants would be on, to simulate noon time ! 
|
|
#5
01/06/2006, 05:14 PM
|
|||
|
|||
|
Your setup sound's nice. Are you building the tank your self or is someone building it for you? Also what kind of skimmer are you going to use?
Kakan
__________________
Remember, if the women don't find you handsome they should at least find you handy. {Red Green} |
|
#6
01/06/2006, 06:08 PM
|
|||
|
|||
|
Congrats on the new tank! Are you planning on having a DSB or a bare-bottomed tank? It seems like the Dart is going to be creating a LOT of flow (like 20 x water volume in addition to the return?) in a 110, but I'm not an expert on the subject.
__________________
You cannot use reason to change the opinion of a person that did not use reason to form their opinion in the first place. |
|
#7
01/06/2006, 07:28 PM
|
|||
|
|||
|
Quote:
For the skimmer it's going to be the H&S 150-F2001 I'm also interrested in the H&S 150-F2000IA Calcium Reactor. |
|
#8
01/06/2006, 07:31 PM
|
|||
|
|||
|
Quote:
But, once the tank is setup I will be testing the flow to see if it's too strong. For the return pump, I'm planning on something very small, that doesn't produce much sound and doesn't use much energy. |
|
#9
01/17/2006, 07:18 PM
|
|||
|
|||
|
I've been working lately on my design, just to see if everything will fit nicely together, especially the lights. My tank has been ordered !
Here's some 3D views of what it should look like with the stand and canopy:   I'm also working on the design, to see how the plumbing will go. I'll update soon on that subject. Funny thing is that I seem to have crashed http://photobucket.com/ while uploading my images: Warning: mysql_connect(): Can't create a new thread (errno 12); if you are not out of available memory, you can consult the manual for a possible OS-dependent bug in /apache/htdocs/src/connection.php on line 26 A database error has occured: 
|
|
#14
01/18/2006, 01:50 PM
|
|||
|
|||
|
Very impressive Ginzo! Cant wait to see the progression of this project! i just turn on my Oceans Motions on my cube and let me tell you something, the flow i am having in incredible!!!! Amazing flow, i can see some nice waves. Anyways, just to tell you i am very impress with the flow i am having. I will put some pictures pretty soon on my thread in the FO section: http://archive.reefcentral.com/forum...5&pagenumber=1
__________________
Richard |
|
#16
02/22/2006, 03:13 PM
|
|||
|
|||
|
Yay ! Finally, some pics to show off !
Derek from Miracles just sent me some pics of my tank in construction, it's still missing the Euro-brace, but that should be added soon. Not sure about the white bulkheads  , anybody have an opinion on this ? Wondering if they should be changed to black/grey instead. , anybody have an opinion on this ? Wondering if they should be changed to black/grey instead. 
|
|
#18
02/22/2006, 09:30 PM
|
|||
|
|||
|
Some more details about the tank (don't think I had previously posted them):
Tank specs: 49 1/2" x 22" x 25", all edges machine polished, clear silicone with no black sidings, 5/8" tempered bottom, 5/8" tempered back with 1 notch 1 1/2" x 16", 1/2" starfire front and ends, black vinyl on 3 sides to block view into external overflow from back. 1/2" tempered eurobrace all around. External overflow specs: 5" x 18" x 5" x 21" high Extra: Custom 1/8" acrylic cladding over entire back panel, teeth routered where notch is located and 2 holes to match back glass. |
|
#19
02/22/2006, 09:39 PM
|
|||
|
|||
|
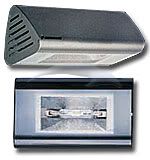
I've also pretty much decided going with the Bubble King 300 Internal for my skimmer. (It's way overkill, but it's going to be worth it when I decide to upgrade to 300 gallons and more in the near future)
I might change my mind and go with the Deltec AP-702 in the end, but I think I might have a problem with it's dimensions...and at that price, why not get the BK ! I like the internal skimmer, since I plan on having the biggest sump I can possibly fit in my cabinet and not having to worry about the skimmer going crazy and overflowing on my floor ! Here's the kind of setup I'm looking at reproducing, nice and clean with all my equipement in the sump: 
|
|
#20
02/22/2006, 11:26 PM
|
|||
|
|||
|
Form an H&S 150-F2001 to a Bubble King 300 That's going to be one clean tank. Definitely a good idea to plan for the future. You tank is looking great. Do you have someone building your sump and stand for you? Also I noticed in your sand plans the top opens to the front is that going to leave you enough room to access the tank? Keep us updated. Kakan
__________________
Remember, if the women don't find you handsome they should at least find you handy. {Red Green} |
|
#21
02/23/2006, 08:26 AM
|
|||
|
|||
|
You tank is looking great. Do you have someone building your sump and stand for you? Also I noticed in your sand plans the top opens to the front is that going to leave you enough room to access the tank? Thanks ! Actually, the stand is already built. It's sitting in my father's garage, because I don't have anymore space at my place. The stand was built by me and my father. I'll try to get some pics of the stand soon. The BK300 should be sweet ! But pricey ! 
|
|
#24
03/02/2006, 11:38 AM
|
|||
|
|||
|
Quote:
During the wait, I'm debating on the equipement I'm going to get for my tank.
|
|
|


 Linear Mode

