|
|
|
#51
 02/24/2007, 11:25 PM
|
|||
|
|||
|
It looks like you're going to have a nice clean setup, looking forward to some new pictures.
Felix
__________________
"The only thing that interferes with my learning is my education." - A. E. |
|
#53
02/25/2007, 12:04 PM
|
|||
|
|||
|
Quote:
__________________
J.R. |
|
#54
02/25/2007, 01:13 PM
|
|||
|
|||
|
Oh, i didnt pay too much more than that, about $30 if memory serves, but that included shipping. They were on clearance at marinedepot and they only had 2 left (I'd been watching it, and when I saw it on clearance I had to pull the trigger), and it comes with a number of grey PVC fittings, so that's a bonus.
But thanks for looking out for me, J.R.!! I've never been to that savko website, so I'll be sure to waste my time and money there before it's all said and done. Chris
__________________
You don't win friends with salad. The red house. Click it!! |
|
#55
02/25/2007, 01:25 PM
|
|||
|
|||
|
savko is great for all your plumbing needs. i buy everything i can from there since they're cheap. the only time i go to lowes is if i need something quick and last minute or in an emergency. if i'm planning an install, i plan everything out and then buy from savko. true-union ball valves make plumbing and maintenance a dream. they're about half price from savko than if you buy local. everything i do now has threaded true-union ball valves on the input and output. need to clean your pump? close 2 valve, pull the pump out with only a couple drops of water, clean it, reinstall and open valves. no need to drain your sump or anything. true unions are the secret to maintenance heaven!
(sorry if you already know all this)
__________________
J.R. |
|
#56
02/25/2007, 03:06 PM
|
|||
|
|||
|
Well, sounds like your speaking external pump, or closed loop, which I've never used. So it's definitely a good nugget of information. With the mag drive pumps, I've used them submerged with the plumbing over the sump, and so have always been able to just pull the plug and pull it out without worry about water spilling. For this tank, the overflows will not both be over the sump, so I may need to look into this.
I'll go a head and draw up my plumbing, which is pretty simple, and post the pictures. Maybe you'll be able to help me make some wise decisions!
__________________
You don't win friends with salad. The red house. Click it!! |
|
#57
02/25/2007, 04:28 PM
|
|||
|
|||
|
Alright, so here's a quick drawing of what I've not thought through entirely. What I'm intending is to use a Mag 18 for the return, which has a 3/4" output. The first part there inline is a bushing to increase the output to 1.5", then traveling up is a valve (true-union, per electric130's recommendation for ease in removing the pump), then a "T" which steps the 1.5" down to 1", where I'll screw in some hose barbs to use tubing until it gets to the 1" return line in the overflow box (I'm still going to just use the loc-line when it gets to the tank for now).
The drains are 1.25", where I'll use PVC all the way, again with a ball valve but this time to really control how much water goes to each section of the sump (left side return is refuge, right side is where most of the water will go, into the skimmer section). At 1.25", I should be able to handle ALL the return through just one side (should be around 1000 gph, at best), so that shouldnt be hard direct water to each section. So, now, recommendations, please! I'm very interested in keeping things simple, so keep that in mind. Also, I want to use soft tubing to keep vibration noise from the Mag 18 down, which currently works pretty well on my 58. Let me know if this is a bad idea. Thanks for your help!! 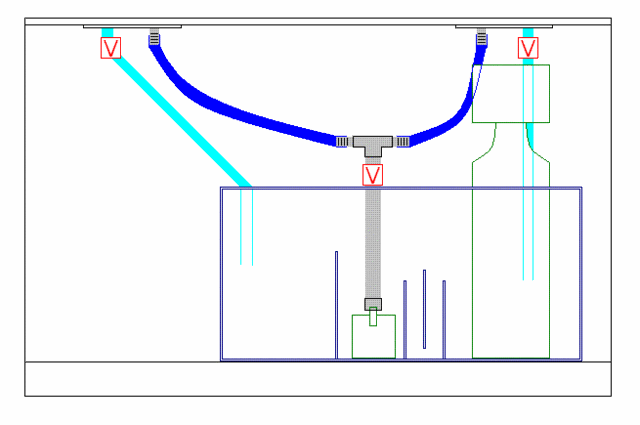
__________________
You don't win friends with salad. The red house. Click it!! |
|
#58
02/28/2007, 03:23 PM
|
|||
|
|||
|
First, I'm dying for plumbing advice, so feel free to expound on my drawing above.
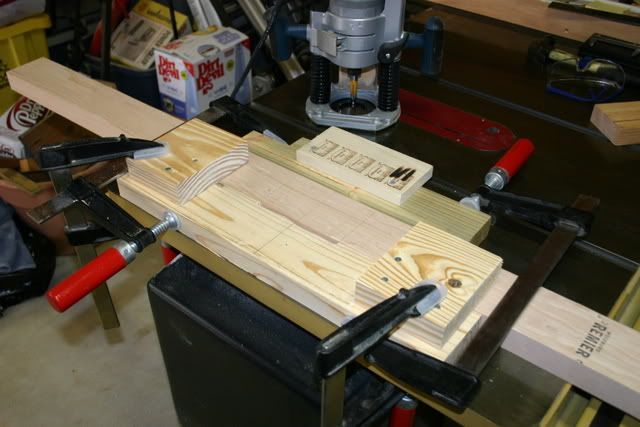
But second, and probably more exciting, I have pictures to share. I started building the stand, as mentioned, so I thought I'd provide some shots of the work. The stand is probably a little over-designed, but what would you expect from a couple of engineers. The first shot here is a drawing of the stand to give an impression of what cuts we're doing later on. Specifically, the 2x6s and 2x4 will overlay to add a little support in case of lateral shear (the blue part of the picture). The yellow boards are 2x4s, and the greenish ones are 2x6s. There is also an extra 2x6 on the sides to provide support in case of shear in the front-to-back direction. 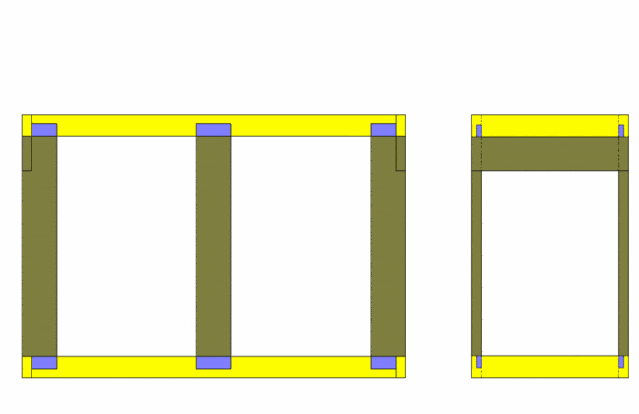 But to get started, we cut all the boards to approximate length and spent the time to joint and plane them. Here are a couple shots of that in work. 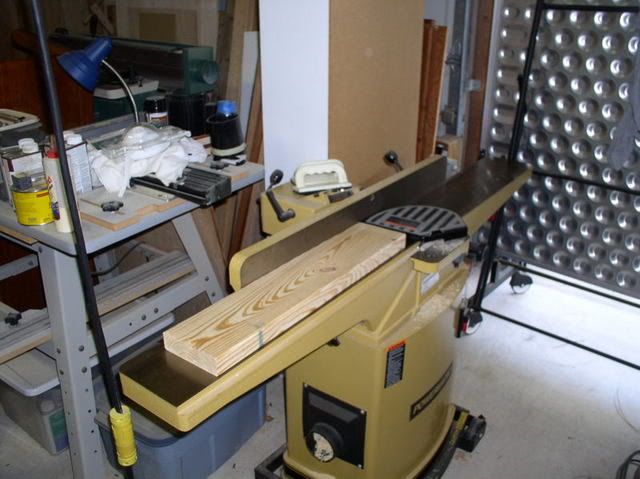 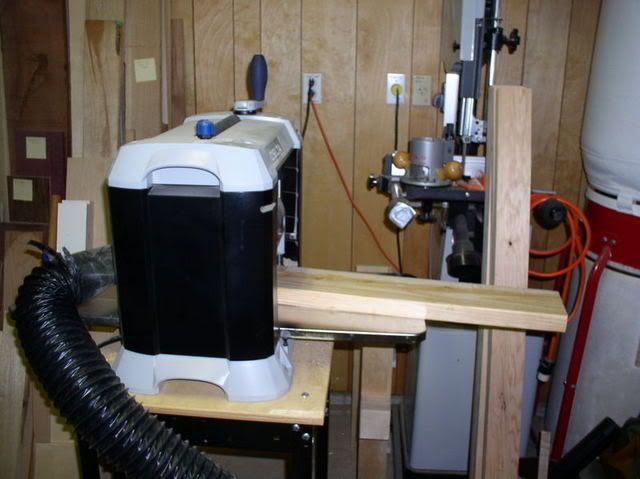 Once that was done, we worked with the vertical 2x6 supports. We needed to cut out the section that overlaps, and to do so we used the table saw. We started by making a cut 3/4" deep 2" from each end of the board. Here are all the boards after we made that cut. 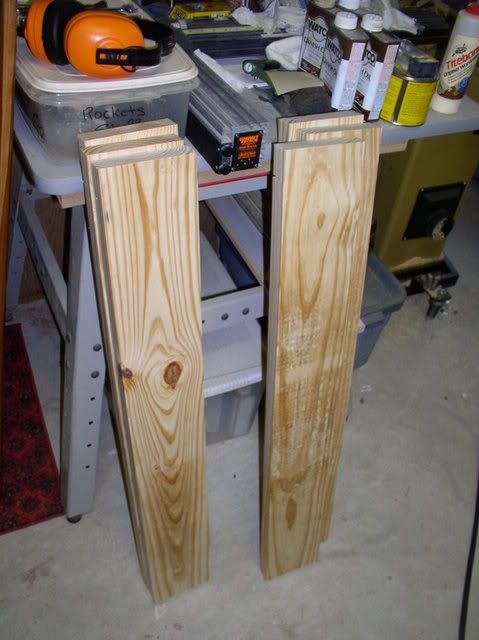 Next we used a sweet jig to cut the perpendicular edge 2" high, but 3/4" from the end of the board. Here is an example cut. Before 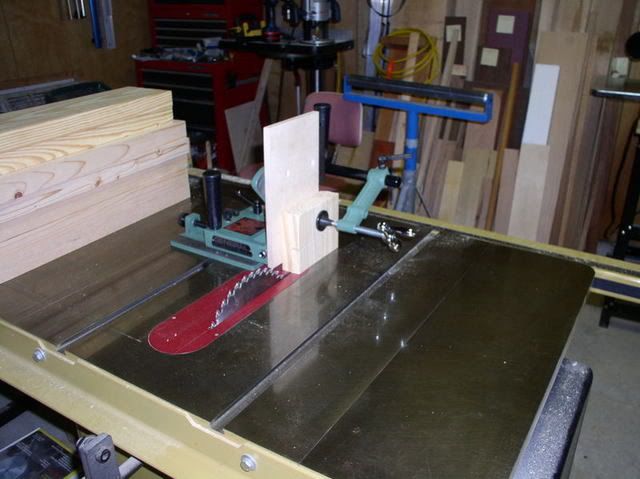 And after 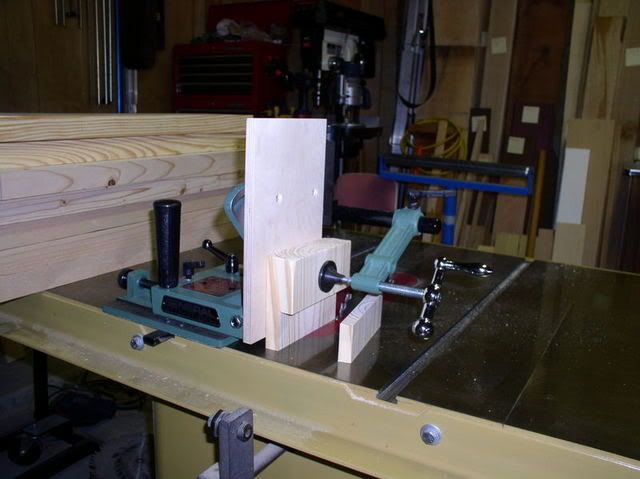 You can see how it removes that section of the board. This next shot is me knocking out one of the 2x6s. 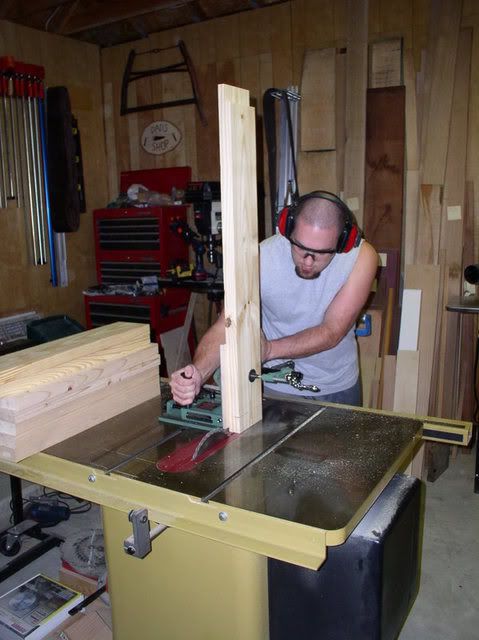 And finally, here are 5 of the 6 boards cut. 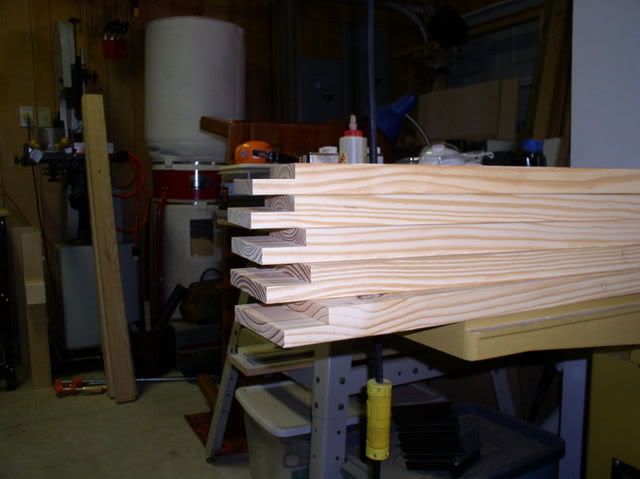 After that we started building a jig to make the corresponding joint on the 2x4s, but it took a while and we didnt finish. I imagine we'll get more done this weekend or early next week. Hope you enjoy the pictures!
__________________
You don't win friends with salad. The red house. Click it!! |
|
#59
02/28/2007, 08:03 PM
|
|||
|
|||
|
Looking good! Can't wait to see more.
__________________
Somebody once said that if you put an infinite number of monkeys at an infinite number of typewriters, eventually you'd end up with the complete works of Shakespeare. My other computer is your MAC. |
|
#60
02/28/2007, 09:52 PM
|
|||
|
|||
|
Quote:
__________________
J.R. |
|
#61
02/28/2007, 09:52 PM
|
|||
|
|||
|
Quote:

__________________
J.R. |
|
#62
02/28/2007, 09:55 PM
|
|||
|
|||
|
Quote:
__________________
J.R. |
|
#63
03/01/2007, 08:48 AM
|
|||
|
|||
|
Quote:
__________________
You don't win friends with salad. The red house. Click it!! |
|
#64
03/04/2007, 08:19 AM
|
|||
|
|||
|
I have more pictures. First, here is the jig that we finally got to work.
 And then after we routed out a piece of wood. 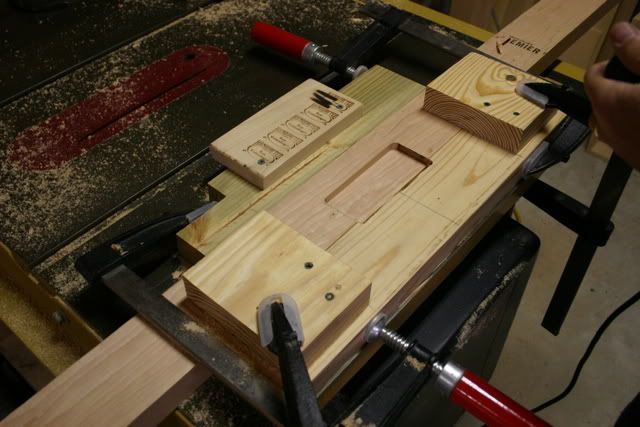 We did the same thing on the end pieces. 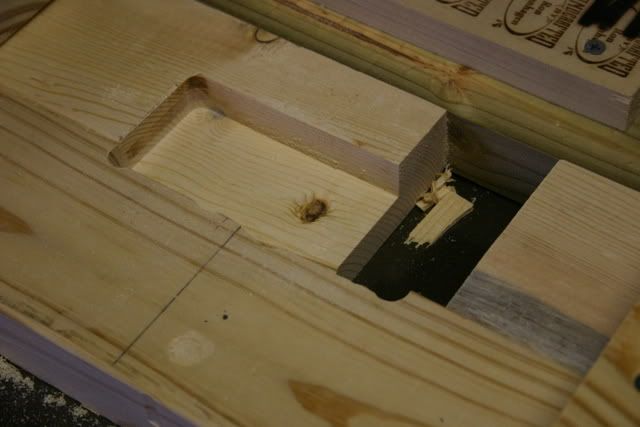 And then we notched all the 2x6s to create room for the front-to-back 2x4s. 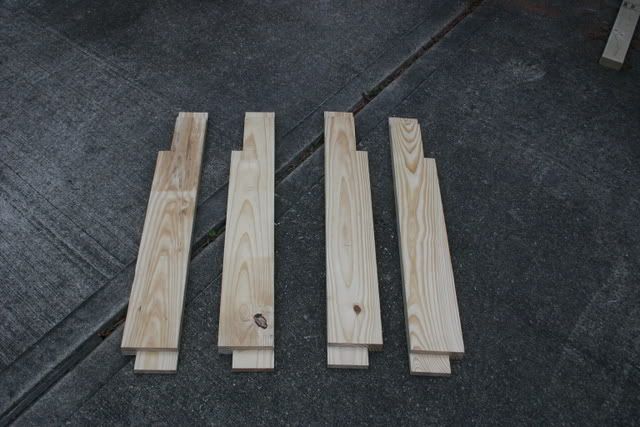 And then fitted it together. Nothing that exciting, but it's starting to take shape. Probably start gluing stuff on tuesday. 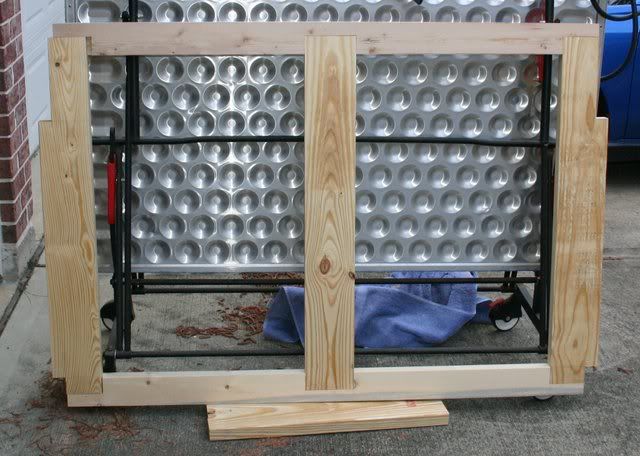
__________________
You don't win friends with salad. The red house. Click it!! |
|
#65
03/16/2007, 08:21 PM
|
|||
|
|||
|
Many much pictures!!
Here is the front side glued. 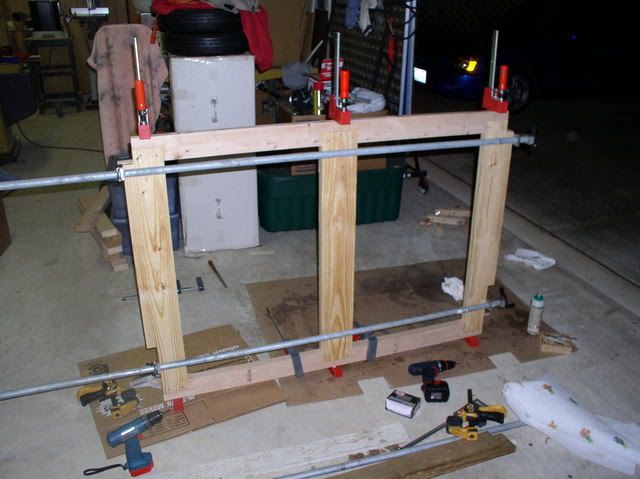 Back side glued and clamped to make the diagonal measurements equal. 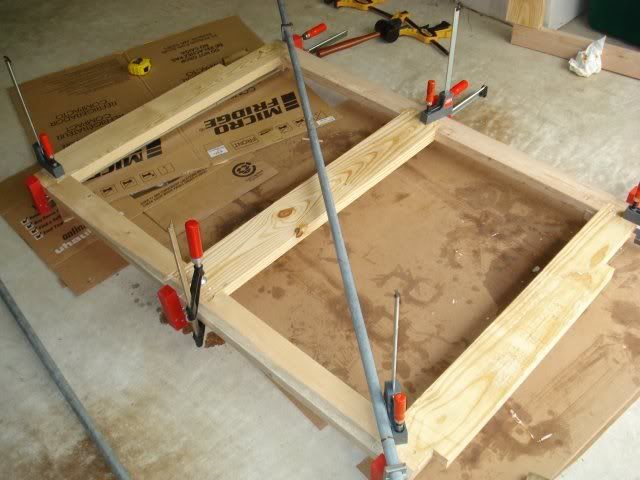 Both of these are done, and hopefully Tuesday I'll get them attached with the two foot 2x4s. We also made it to Houston Hardwoods and got a large amount of wood for various projects in the works. I picked up about 50 board feet of 4/4 red oak. Here is a shot of the selection (all types of wood).  And the 50 board feet for me.  Hopefully I'll get started on the facing and canopy soon. Anyways, there's more write-up in the red house if you so desire to read it. Thanks for looking!!
__________________
You don't win friends with salad. The red house. Click it!! |
|
#66
03/16/2007, 11:27 PM
|
|||
|
|||
|
soooo.......are you building a house or a stand?
j/k looks awesome!
__________________
J.R. |
|
#67
03/17/2007, 07:23 AM
|
|||
|
|||
|
I'm building a house for the fish! Obviously this is quite overdone (borderline ridiculous), but I've got the tools available and it's fun to do.
__________________
You don't win friends with salad. The red house. Click it!! |
|
#68
04/03/2007, 11:07 AM
|
|||
|
|||
|
So last week we finished putting the stand together. Last piece (should be done this afternoon) is to put the plywood on the top and on the floor of the stand for the sump. Hopefully it won't take that long. After that, I'll get started on the oak skin. Here are a few shots of the stand, but it's upside down.
Screwing in the last support  top joint  bottom joint  But as mentioned, the stand is upside down when these pictures were taken. I'll try to snap some better pictures later today.
__________________
You don't win friends with salad. The red house. Click it!! |
|
#69
04/10/2007, 11:33 AM
|
|||
|
|||
|
Looks good Chris - lets see some more photos!
|
|
#70
04/10/2007, 05:12 PM
|
|||
|
|||
|
You're the boss, Peter. Here is the front of the stand. It's not yet attached.
 And the sides (the doors will hide the pine 2x6).  Here is all the wood ready for making panel doors.  And I started on the canopy frame. Not that exciting.  More to come next week.
__________________
You don't win friends with salad. The red house. Click it!! |
|
#71
04/15/2007, 08:29 PM
|
|||
|
|||
|
Question for the woodworkers or those who have built similar stands. What is the best means of attaching the oak to the pine? I'm concerned about gradual and inevitable warpage (especially considering that this is being constructed outside in Houston, the humidity is much higher outside than in, and I expect some swelling has taken place). I prefer to glue the pieces together, but I'd hate to see something crack or otherwise break down. How did or would you guys do it?
__________________
You don't win friends with salad. The red house. Click it!! Last edited by crvz; 04/15/2007 at 08:35 PM. |
|
#72
04/15/2007, 09:40 PM
|
|||
|
|||
|
can you move it inside for a couple of days before gluing it up? ALso, if it's been cool there (like it has been here), you may not have a problem just going ahead and gluing.
I wouldn't worry about it personally... |
|
#73
04/15/2007, 10:36 PM
|
|||
|
|||
|
Looks like you have a promising stand going there. Also from the pictures it looks like you have some really nice tools. I used to live in The Woodlands just outside of Houston and man was it humid there.
__________________
GLORY! GLORY! Man United Click the Red House. |
|
#74
04/19/2007, 08:18 AM
|
|||
|
|||
|
Quote:
I glued the canopy frame together. Here are 2 pictures. 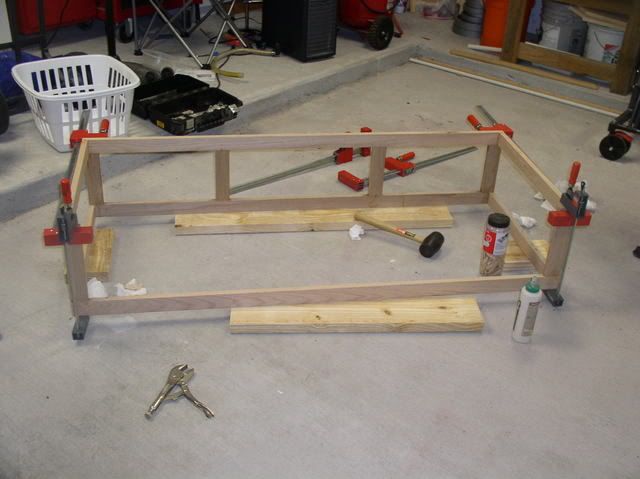 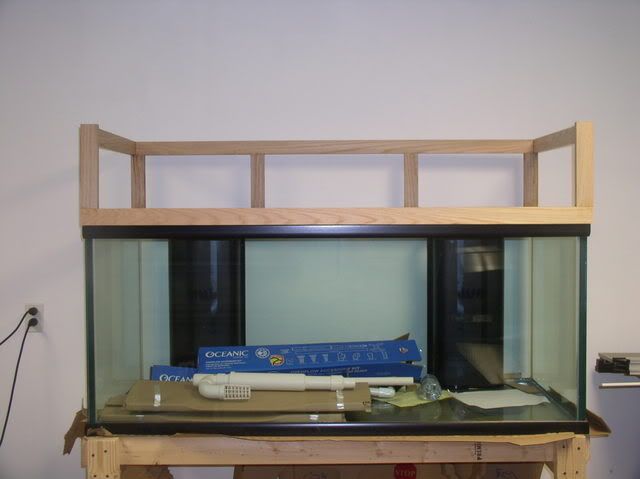
__________________
You don't win friends with salad. The red house. Click it!! |
|
#75
04/19/2007, 08:30 AM
|
|||
|
|||
|
It's coming together...
DId you only glue or are you brad nailing or screwing also? |
| Thread Tools | Search this Thread |
| Display Modes | |
|
|


 Linear Mode

