|
|
|
#101
 09/02/2007, 06:23 PM
|
|||
|
|||
|
Thats a great idea tbone! I like that you can tilt it.
|
|
#102
09/02/2007, 09:25 PM
|
|||
|
|||
|
Thanks for the rapid feedback. How far off the top of your tank will the pendant rest, about 4" I'd guess? And lastly, based on the relative ease of raising/lowering the pendant, are you going to rely on the stock mechanism for this, or will you be modifying it in any way?
__________________
The Dude abides |
|
#103
09/02/2007, 11:12 PM
|
|||
|
|||
|
Quote:
For now, I don't have any plans to modify the hardware. However, there is one drawback to the stock hardware which I'd like to find a solution to: You need to raise/lower each side of the fixture independently...i.e. If I raise the fixture to service the tank, and subsequently relower the fixture, it takes some "fine-tuning" to get the fixture level. I wish there was a way to raise the entire fixture as an entire unit. Right now, I'm considering screwing in some small, wood blocks to my framing as a reference point. This way, I can easily lower the fixture to the correct height each time. |
|
#104
09/03/2007, 05:44 AM
|
|||
|
|||
|
Quote:
.. or marker the steel cable at that point. |
|
#106
09/03/2007, 11:27 AM
|
|||
|
|||
|
I must have audited the Steel Cable 101 course in college. What does it mean to "marker the steel cable?" It must be some way of identifying a specific point on the cable, I'm just not aware of the 'marker' technique. Sorry for the sophomoric question.
__________________
The Dude abides |
|
#107
09/03/2007, 11:38 AM
|
|||
|
|||
|
Quote:
1) Finalize the fixture height and make sure it's level 2) Take a Sharpie and "make a mark" on the cable just above (or below) the hardware. |
|
#108
09/03/2007, 11:45 AM
|
|||
|
|||
|
Wow do I feel silly. I was envisioning some type of crimping technique or something else to prevent the fixture from sliding below a certain point. The Sharpie sounds much simpler. I guess it doesn't always have to be complicated to be elegant, right?
__________________
The Dude abides |
|
#110
09/03/2007, 02:06 PM
|
|||
|
|||
|
I think that tilting feature is really cool. I noticed one of the TOTM threads a few months back... the guy had his MH lamps toward the front of the water and then tilted back to face the coral. This might really help prevent corals and clams on the lower areas from getting shaded from higher up neighbors. Probably looks cool too.
|
|
#111
09/03/2007, 02:42 PM
|
|||
|
|||
|
LOL! You guys are funny. Thats exactly what I meant.
|
|
#112
09/06/2007, 10:24 AM
|
|||
|
|||
|
Plumbing's Done - Ready for H2O!
So I finally had the tank plumbed, and boy was it a tight fit under the stand!
Complete Plumbing Pic - I lined the bottom of the stand with pondliner. It's secured to the steel stand via Velcro. This should hold any small leaks, etc. I CAN'T have any water flowing under the kitchen cabinets.: 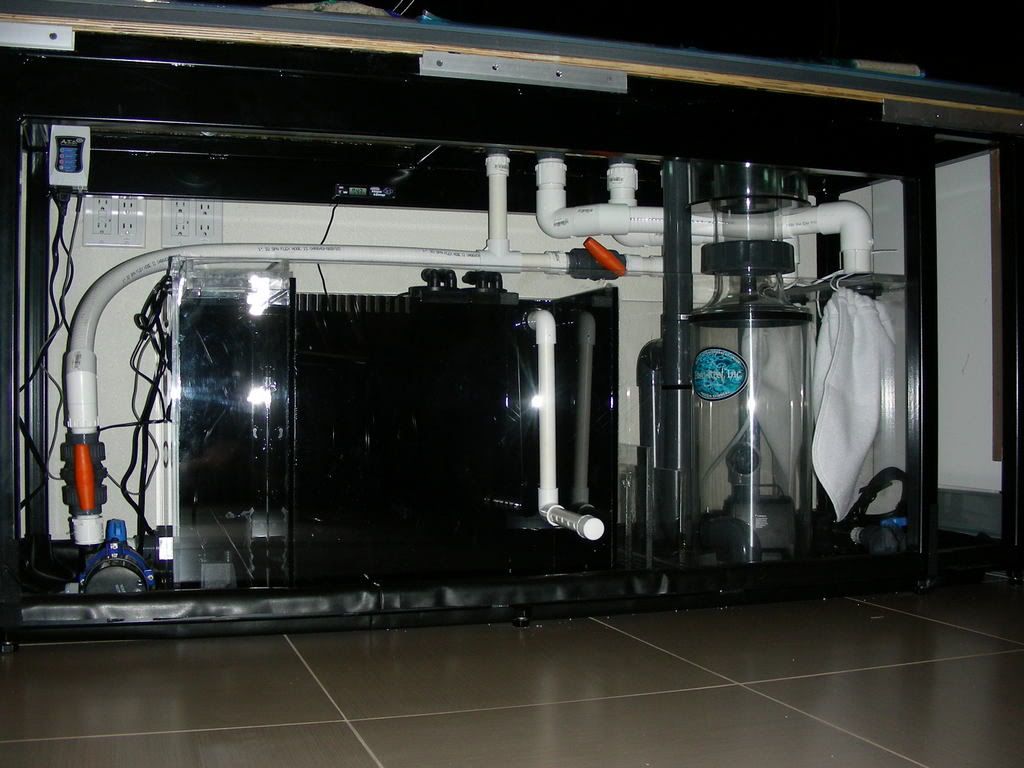 Tight Fit - notice the clearance between the skimmer top and bottom of the stand? 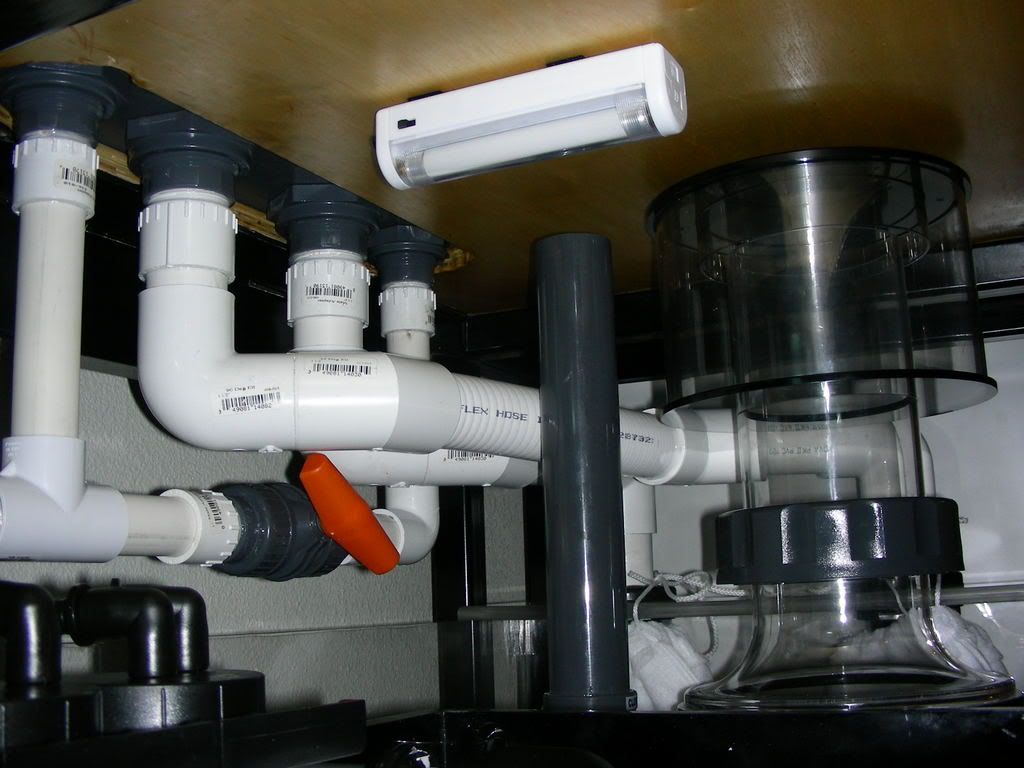 My return pump - had to plumb it with a 90 - no room to plumb it in-line =(  My water-change pump: 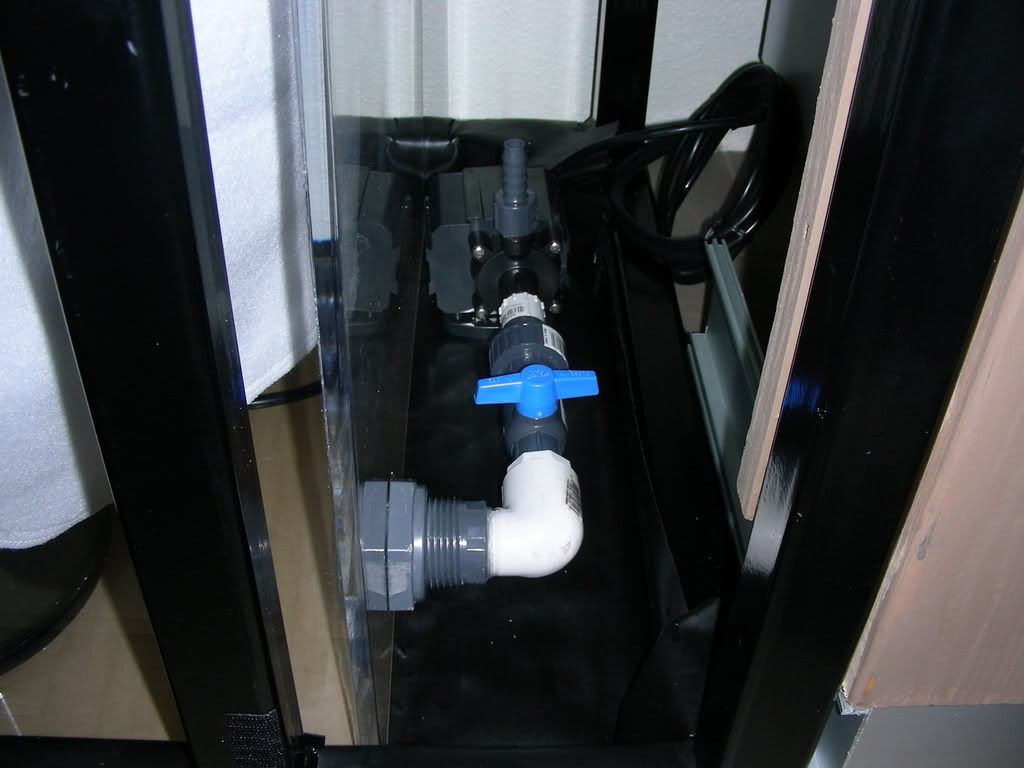 FTS - I have 80 pounds of sand. Do you think I need to buy another 20-pound bag? I only want a thin layer (~1"), which will be vacummed regularly. Not sure if the 80 pounds is enough. 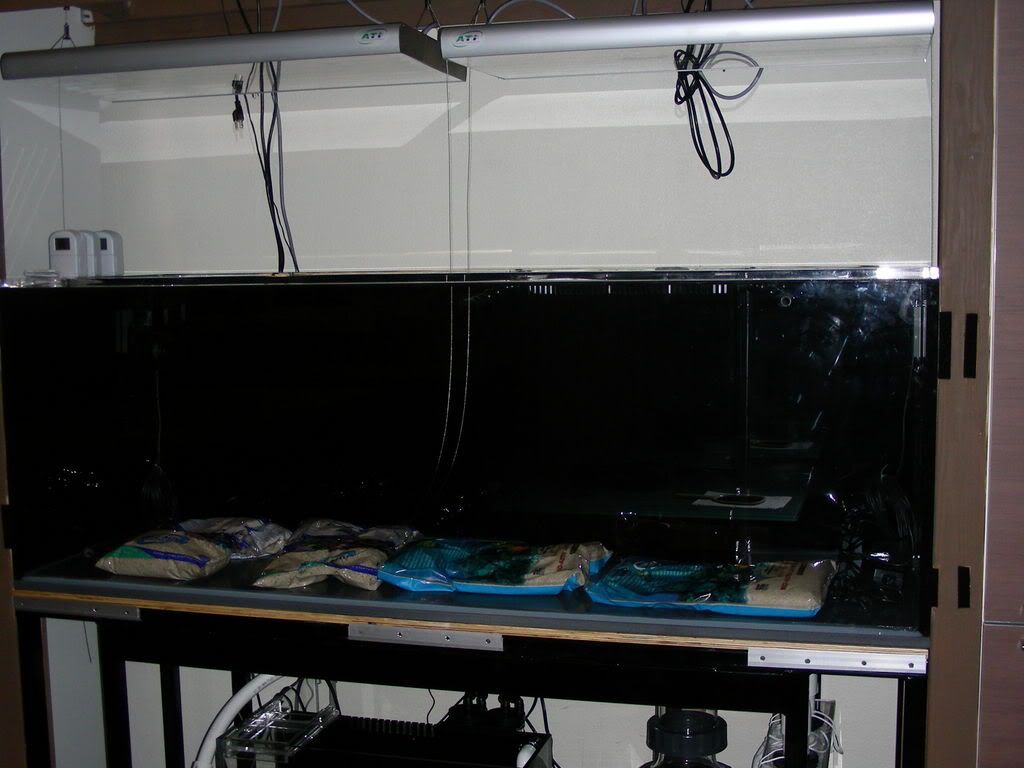 Off to cleaning up the wires and looking for live-rock... |
|
#113
09/06/2007, 11:59 AM
|
|||
|
|||
|
YOu probably do need another bag, based on that picture. Of course, you can always add it later as that product is very clean. I'm about to add a few to my reef in the very near future.
Regarding your collection cup, I would attach something very thin to the area above the cup. Saran Wrap comes to mind, but it is pretty getty. Maybe some of that super thin cutting board material. The reason is the moist air coming out of the vent holes will be blowing on the wood 24/7. With something there, you can wipe it off from time to time. That skimmer just barely fit. 
__________________
Marc Levenson - member of DFWMAS |
|
#114
09/06/2007, 12:27 PM
|
|||
|
|||
|
I'm going to pick up another bag after work today, and go from there. I agree with protecting the area above the skimmer. My friend already mentioned that and is going to bring some sort of contact paper over for that purpose. In the meantime, I've already stained the plywood for some protection against moisture.
Yes, the skimmer barely fits, but my stand has levelling feet which can raise the stand if I wish. Should I raise it before I fill the tank with water? |
|
#115
09/06/2007, 01:05 PM
|
|||
|
|||
|
I like your water change pump. Another option if you want to use that space in the stand would be to put a T after your return pump, and the side of the T could be used to drain the sump during water changes.
If you're going to raise the feet you should do it before filling the tank. And since you have a PVC bottom, you might want to put the LR in place before adding the sand. You may be surprised to see that you already have enough sand for your 1" substrate layer.
__________________
The Dude abides |
|
#117
09/06/2007, 02:13 PM
|
|||
|
|||
|
I would raise it up, and probably add some inserts here and there to help support the stand in more areas than only where the feet are located. They don't have to be more than snug, but enough to reinforce the entire stand if some of the threads were to begin to give way.
Contact paper is great idea!
__________________
Marc Levenson - member of DFWMAS |
|
#118
09/06/2007, 02:17 PM
|
|||
|
|||
|
I'll raise up the stand a bit.
A.G.E. gave me a box of PVC shims when they shipped my tank for the very purpose you've described, Melev. I need to insert some shims where the levelling feet don't exist. |
|
#119
09/13/2007, 09:22 PM
|
|||
|
|||
|
The tank's been filled! Water's still a bit cloudy. Do you think I have enough flow?
 What can I do to prevent the sand from shifting? What can I do to prevent the sand from shifting?On a side note, my skimmer (Euroreef RS250) has a loud pump (Gen-X), and my skimmer's plumbing makes a gurgling noise. Any thoughts? 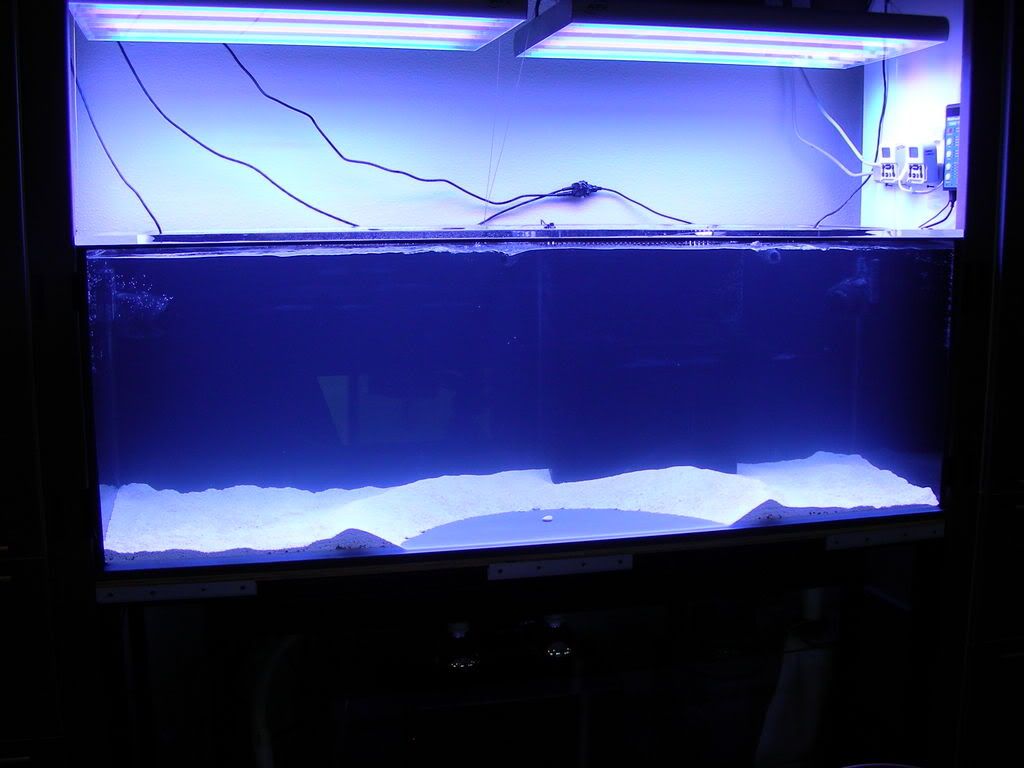
|
|
#120
09/13/2007, 09:44 PM
|
|||
|
|||
|
Quote:
 . Seriously, that will help a lot, and there's no use redirecting your flow until the LR is in place. If sand shifting bothers you at this stage, you could always dial down the pumps or turn off the stream(s), as there's no need for that kind of flow at this stage of the game (other than to be impressed with all of the flow . Seriously, that will help a lot, and there's no use redirecting your flow until the LR is in place. If sand shifting bothers you at this stage, you could always dial down the pumps or turn off the stream(s), as there's no need for that kind of flow at this stage of the game (other than to be impressed with all of the flow  ). It's looking great so far, I can't wait to see how the aquascape looks, especially under those PowerModules! ). It's looking great so far, I can't wait to see how the aquascape looks, especially under those PowerModules!
__________________
The Dude abides |
|
#121
09/21/2007, 11:48 PM
|
|||
|
|||
|
Update - bought 130# live rock today from the LFS - got a pretty good deal, I think. $4/lb for a mix of Fiji and Marshall rock - fully cured, and I got to cherry pick.
Here's my 1st "draft" at aquascaping. I'm aiming for a "2 mountain" look, with a valley in between. I want the left-sided mountain to be longer and the right-side to be small. I also want a more open aquascape...I had way too much rock in my last tank. I ended up with 3 mountains because I had a few pieces of rock that I didn't know what to do with - see small mound on the right hand side of tank. What would you guys change? Do you think I need more rock? Here's what I'm contemplating so far: 1) build left-hand mountain a bit taller? 2) build right hand mountain taller? 3) combine middle and right-hand mountains into a single mountain? With the rock in there, my sand is no longer shifting  . I also bought a new Eheim pump for my noisy skimmer. While my skimmer is very quiet now, output is not quite where it was with the Gen-X pump. The gurgling noise was eliminated simply by angling the drain pipe so that it was no longer submerged under water. . I also bought a new Eheim pump for my noisy skimmer. While my skimmer is very quiet now, output is not quite where it was with the Gen-X pump. The gurgling noise was eliminated simply by angling the drain pipe so that it was no longer submerged under water.here are the pics: Right after adding rock - water still cloudy. Do I need to add some rock to my refugium? 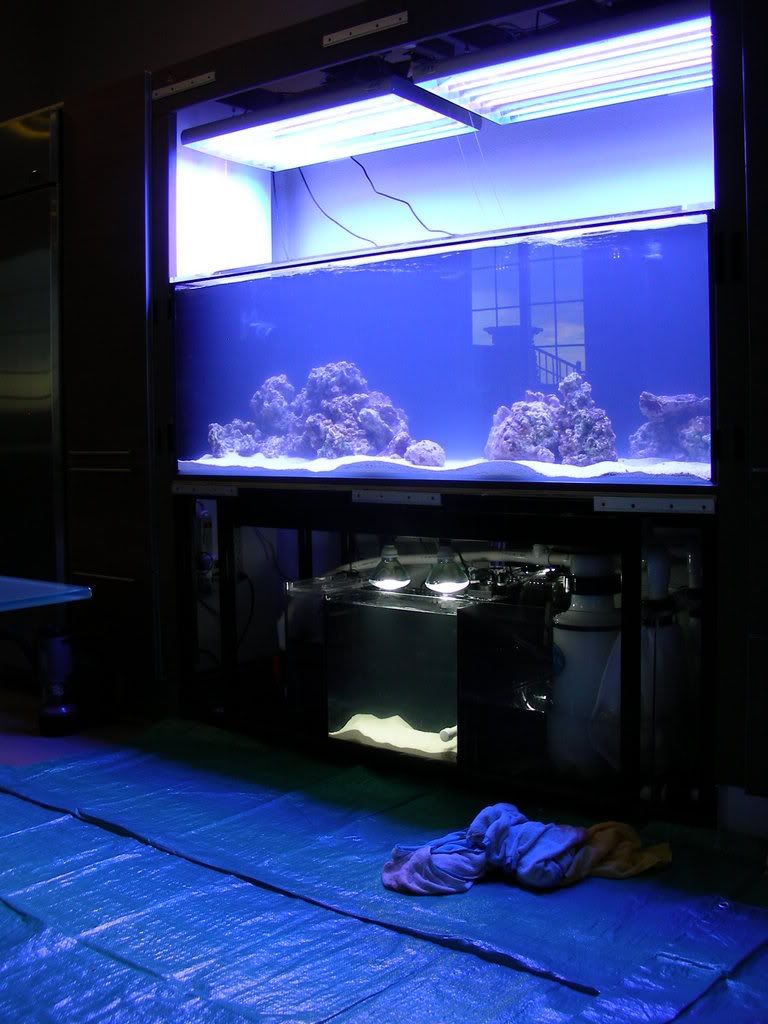 Water clearing up:  Close-up: 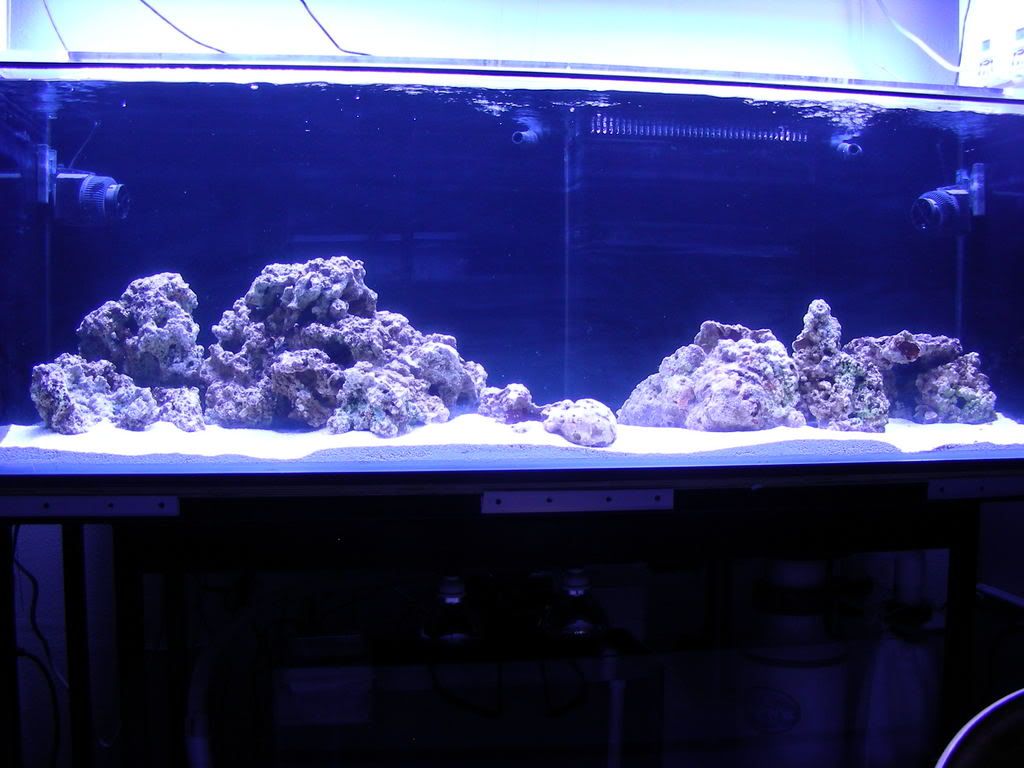 Pic of the valleys: 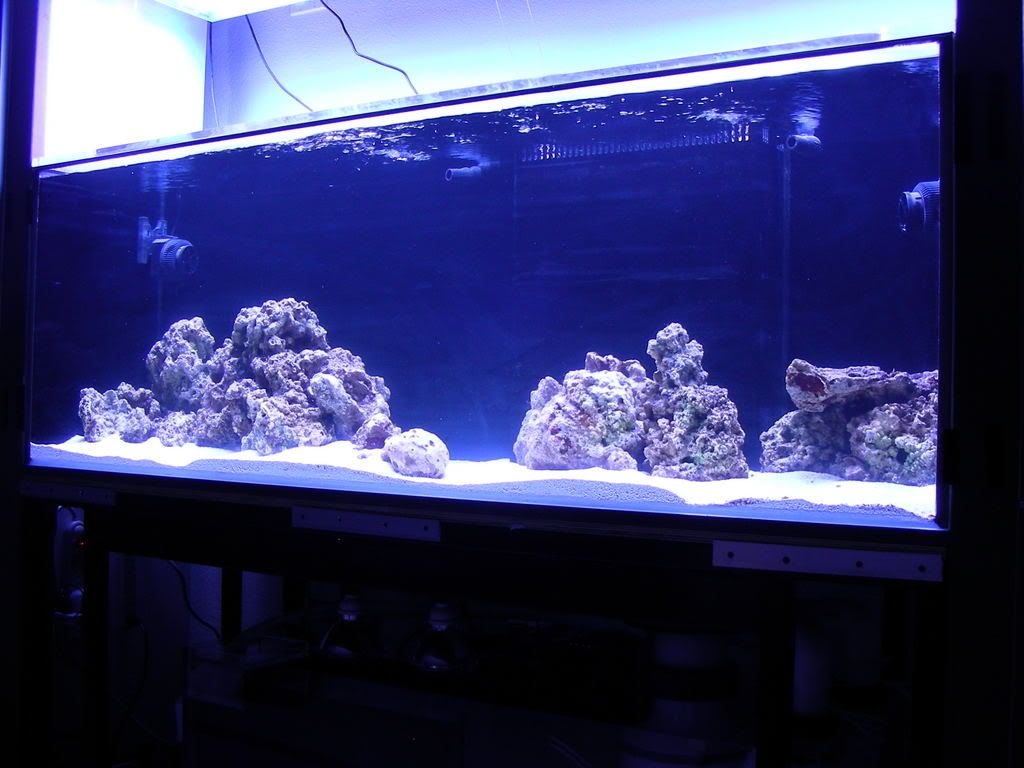
|
|
#122
09/22/2007, 12:50 AM
|
|||
|
|||
|
I like it the way it is now. And no, there is no reason to put any rock in the refugium. If you do, and macro algae attaches to it, you can never use it again without risking that macro spreding in the reef section.
__________________
Marc Levenson - member of DFWMAS |
|
#123
09/22/2007, 04:43 AM
|
|||
|
|||
|
dont change a thing! take a pic without the flash and with the stand in tact
|
|
|


 Linear Mode

