|
|
|
#1
 03/18/2004, 07:46 PM
|
|||
|
|||
|
melev sump/refugium....thumbs up
Recently had melev build me a sump/refugium combination..... What I received exceeded my expectations. Marc is extremely easy to work with, communicate with and responsive to any and all questions. The sump/refugium adds a touch of class to my system.... thanks Marc...
|
|
#2
03/18/2004, 09:51 PM
|
|||
|
|||
|
hey boss, how about a pic of the sump/refugium?
__________________
GO DUKE !! |
|
#5
03/19/2004, 07:55 AM
|
|||
|
|||
|
Here are the pictures Sparatus sent me. I will be putting a webpage with images of the sump before it was installed on my site, and will be including these on the page as well.
The first image is his original sump, squeezed into a corner stand. 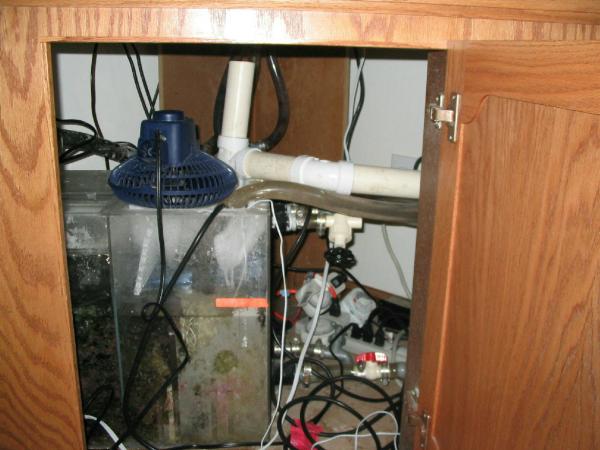 Full tank shot with skimmer sitting on an ice chest! 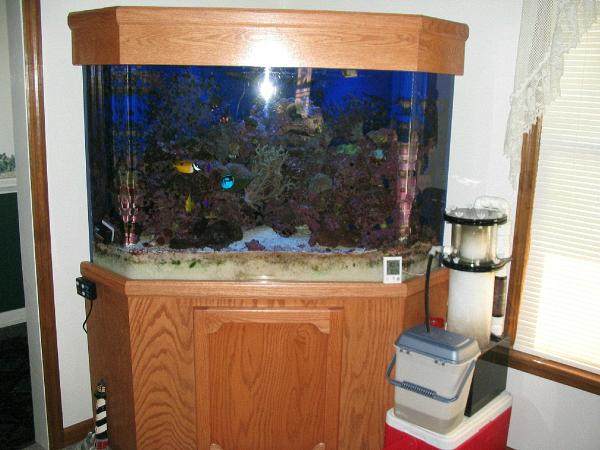 New cabinet to hide sump. It has cabinet doors for access, and the lid folds up as well!! That is very cool, and a great idea. 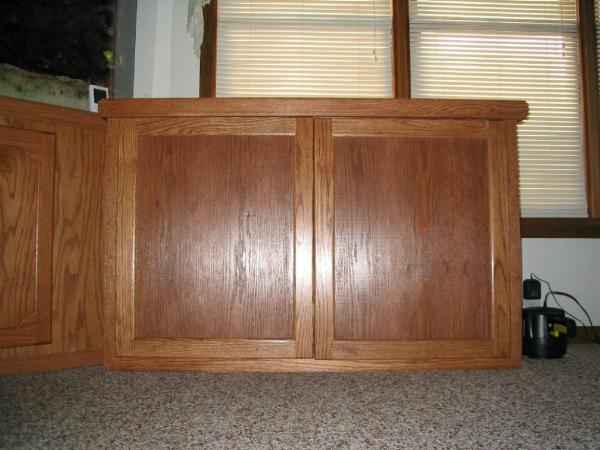 New sump installed. Refugium is dead center. The skimmer is on the right, and water leaves the skimmer section behind the refugium. There is a Live Rock chamber behind the refugium as well, to encourage more pod growth and to break up microbubbles. Water enters the sump and refugium in two separate locations. 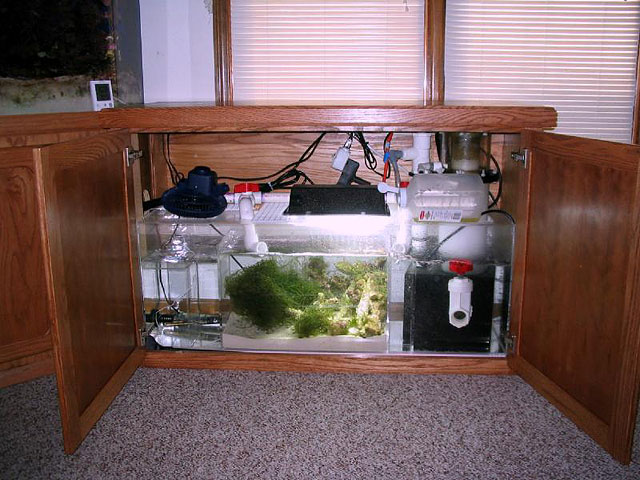 Right side of sump. Aqua C Ev-120, right? The horizontal bottle catches excess skimmate. 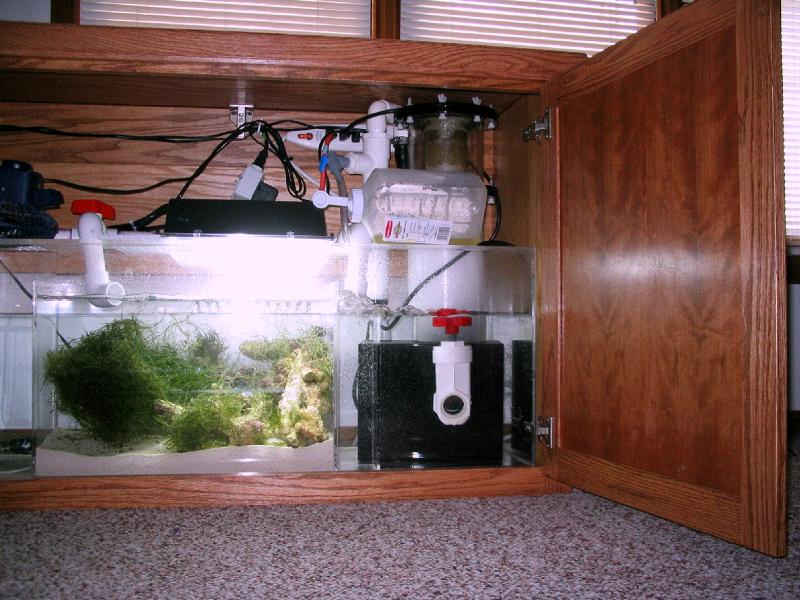 Left side of sump. Pump is external and sucks water out the end to the left of the refugium. There is an additional wall around the drain line to further prevent microbubbles from appearing in the main display, and it is removable. Heaters were put in the return zone, as well as a temp. probe (white wire). 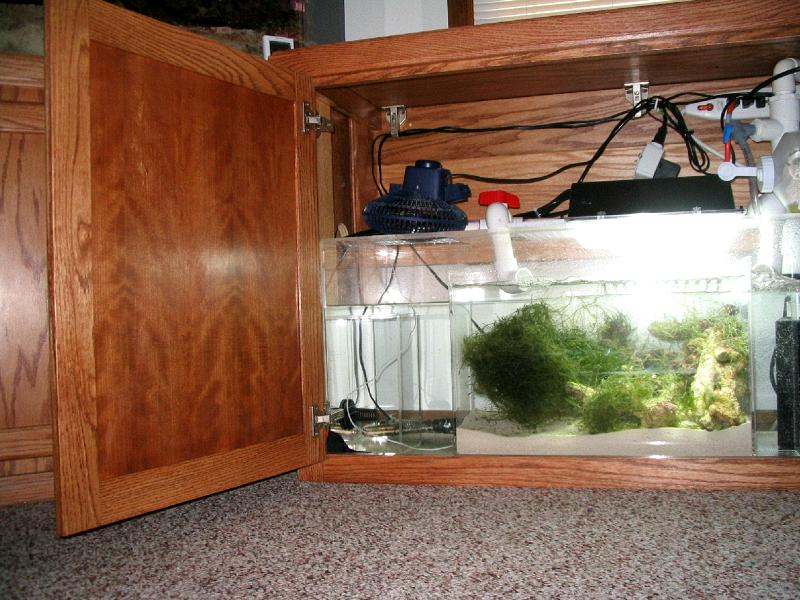
__________________
Marc Levenson - member of DFWMAS |
|
#6
03/19/2004, 08:12 AM
|
|||
|
|||
|
Thanks for the help, Marc...
The skimmer is a DIY Beckett built by Brian Ferguson ... An added benefit to all of this is the accessibility of the drain and return bulkheads and associated plumbing..... With the old sump jammed in under the tank, it was really difficult to work on anything under there if you needed to. It took me no time at all to replace my drain line and run it to the new sump after I'd removed the old one.... Now, as you can see, everything is very easy to access ---- with the lid of that cabinet folding up removing the skimmer collection cup, cleaning the skimmer etc... is a piece of cake... |
|
#7
03/19/2004, 09:14 AM
|
|||
|
|||
|
very nice work..I like the idea of having the lid open up as well as the doors folding out on the cabinet...great job guyz!
__________________
GO DUKE !! |
|
#8
03/19/2004, 08:09 PM
|
|||
|
|||
|
sparatus & melev - It looks great! Do you have the dimensions and water volume? I'm considering melev's model F sump or maybe this one if it's the right size. I'm doing a 150g in-wall and should have a fair amount of space for a sump. I like the idea of having a separate zone for LR and the refugium.
|
|
#9
03/19/2004, 10:14 PM
|
|||
|
|||
|
Somewhere, I've got my sketch... let me see if I can find it right quick.
Here it is, but all the details are altered from that point. The refugium is 20" long, not 24". The skimmer section was 15" wide. I believe the sump was changed to 44 x 15 x 16. 
__________________
Marc Levenson - member of DFWMAS |
|
#10
03/21/2004, 01:33 PM
|
|||
|
|||
|
__________________
Marc Levenson - member of DFWMAS |
|
|


 Linear Mode

