|
|
|
#201
 10/30/2007, 07:41 PM
|
|||
|
|||
|
Lookin good.
I think those vortech motors get pretty warm. Do you have enough clearance and ventilation? Use that fancy jigsaw and cut a big hole for your bulkhead nuts. Someday you'll thank yourself 
__________________
"Not cheap, but silent and absofrickenlutely no bubbles" "Be sure and wear a speedo lest tangs nest in your britches" |
|
#202
10/30/2007, 08:07 PM
|
|||
|
|||
|
Beautiful work! So if we can learn from your choices, you would have chosen birch and do you think it would be a smart presanding and sealing after cutting the major parts? Maybe even sanding and sealing the whole sheets of plywood before cutting?
Once again nice work and quite an inspiration. |
|
#203
10/31/2007, 07:57 AM
|
|||
|
|||
|
Quote:
As far as sanding/sealing before assembling...no, I don't think so. Running saws along the wood panels would have scuffed up the smooth sufaces, wood glue would need to be sanded off in some areas (I'm not even sure wood glue bonds with the sealer, I'm sure it prefers bare wood), and a lot of sanding sealer & sanding labor would be wasted because half of the cabinet doesn't get those treatments. So, it would be one more headache during the build, keeping up with good/bad faces of ply, which panels to seal/sand, etc. In the long run, I think it's less trouble to just do it one step at a time.
__________________
90g reef/29g sump, DIY cabinet, 2x250w MH, 2x54w T5 actinics, ER RS135 skimmer, VorTech pump, 18w UV sterilizer |
|
#204
10/31/2007, 09:20 AM
|
|||
|
|||
|
I'm addicted to Marine Depot....love that website. Just placed an order for an AquaController Jr w/ DC8, two Jager 200w heaters, and a dual R2 moonlight system.
I had the Neptune Systems 2-LED controllable/dimmable moonlight setup in my shopping cart....but the $80 price tag was bothering me. Also, I think I'll want my moonlights on all the time (when the MHs are off, that is) anyway, so the lunar cycle function isn't worth it IMO. Should get these new toys mid next week, hopefully around the time the cabinet is painted and ready to go in the living room. I'll wire up my metal halides, T5s, and moonlights....and get the ACJr hardware mounted in the cabinet along with some standard power outlets from Home Depot for non-controlled devices, such as the UV bulb/pump.
__________________
90g reef/29g sump, DIY cabinet, 2x250w MH, 2x54w T5 actinics, ER RS135 skimmer, VorTech pump, 18w UV sterilizer |
|
#205
10/31/2007, 09:33 AM
|
|||
|
|||
|
Quote:
a) I don't plan to keep them turned all the way up, as they're kinda loud at full power b) The entire side of the tank has 3" of clearance, so there's plenty of space for heat to rise up and away from the motor housing. The unit has an auto-shutoff feature if the temperature gets too high, so if the pump starts turning itself off after everything is in place, then I'll cross that bridge when I come to it. Solution would simply be a fan blowing on the unit from inside the cabinet.
__________________
90g reef/29g sump, DIY cabinet, 2x250w MH, 2x54w T5 actinics, ER RS135 skimmer, VorTech pump, 18w UV sterilizer |
|
#206
11/02/2007, 07:20 AM
|
|||
|
|||
|
I just finished reading through this thread. It's a really great project, you've done an incredible job. I'm looking forward to seeing pictures of the finished project with the stocked tank over the next few months.
Once again, great job! |
|
#207
11/07/2007, 09:36 AM
|
|||
|
|||
|
Given that you are placing this on the second floor...I was wondering if you have any advice on checking for how much load can be placed on second floor aquarium installations. I am contemplating a 135/150 gallon in a bonus room over the garage...
By the way, thanks for such a great and detailed post. I want to do my cabinet like this one, and now I have a receipe to follow! |
|
#208
11/07/2007, 05:00 PM
|
|||
|
|||
|
stan the man
[welcome] |
|
#209
11/07/2007, 07:24 PM
|
|||
|
|||
|
Quote:
 And speaking of modern floors....if your house is 100yrs old, even better. They built houses like fortresses back in the day. Might have to level it out with some shims, however....floors sag over time.
__________________
90g reef/29g sump, DIY cabinet, 2x250w MH, 2x54w T5 actinics, ER RS135 skimmer, VorTech pump, 18w UV sterilizer |
|
#210
11/07/2007, 08:21 PM
|
|||
|
|||
|
Quote:
HTH |
|
#211
11/07/2007, 08:22 PM
|
|||
|
|||
|
I spent last weekend using 320-grit sand paper and a sanding block smoothing out the sanding sealer. I couldn't use my power sander, because it was too powerful and would go right through the layer of sealer. This was a loooooong process....and again I was kicking myself for not using birch plywood in the beginning, which would have saved me from this freakin headache.
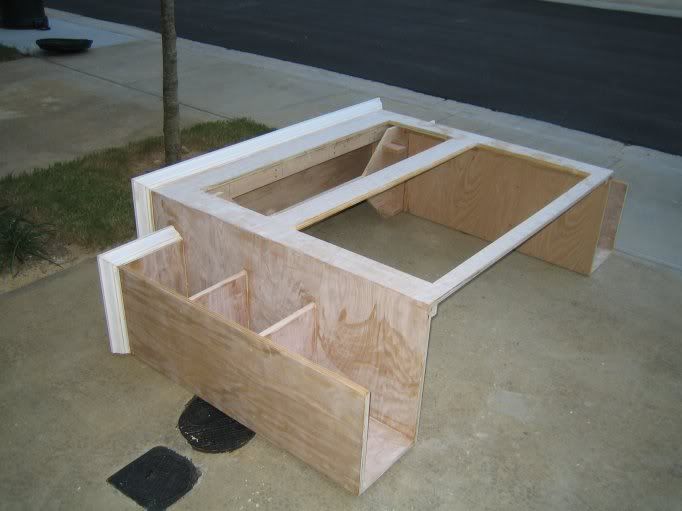 As you can imagine, after all that labor I was sick of dealing with the finishing process...so I decided to take a break from it and work on installing electrical outlets/switches in the cabinet. I purchased all the electrical components at Lowe's. 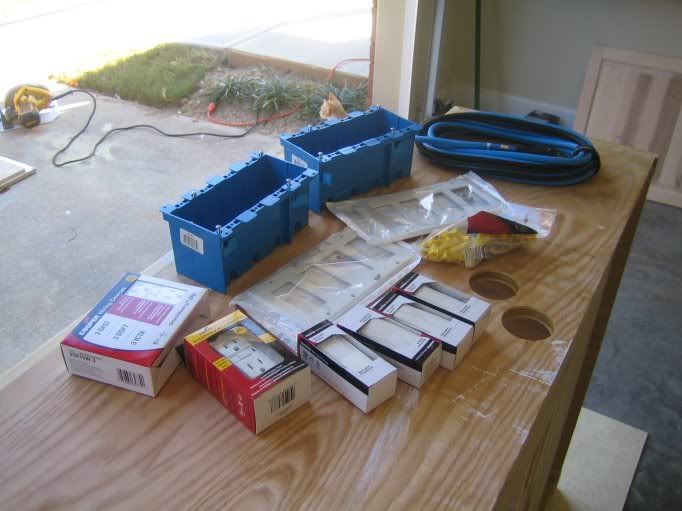 I started by measuring/cutting a rectangular panel to go inside the bottom-left cabinet. Note there is about 3" of space left above this panel, allowing cables and whatnot to run behind the panel and through the hole drilled at the top-back of the cabinet and into the sump area. 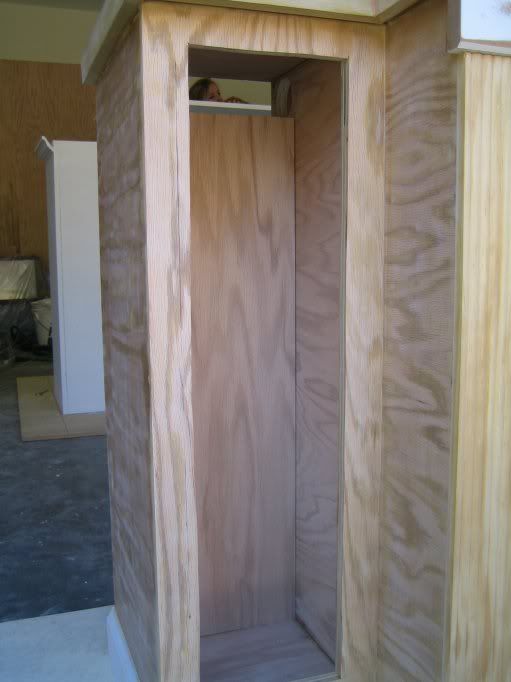 I traced out a hole pattern to cut, to accomodate two 4-gang boxes w/ coverplates. 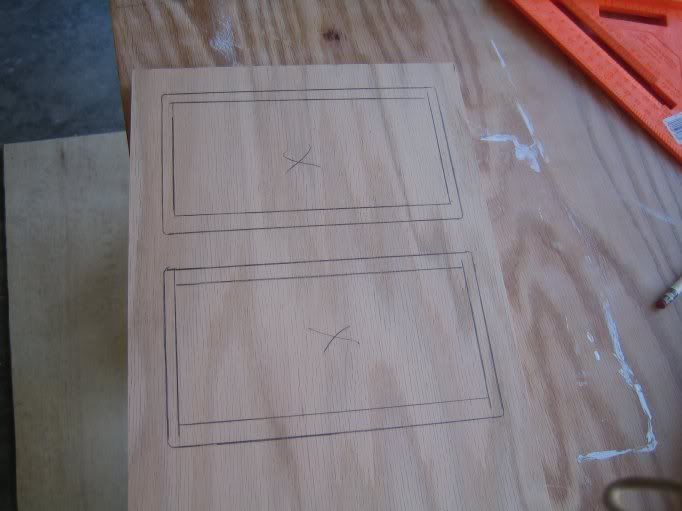 I cut the holes out with a jig saw. 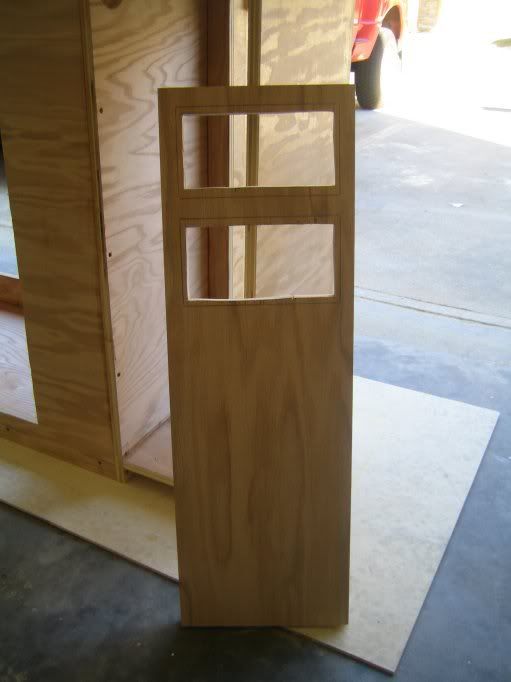
__________________
90g reef/29g sump, DIY cabinet, 2x250w MH, 2x54w T5 actinics, ER RS135 skimmer, VorTech pump, 18w UV sterilizer |
|
#212
11/07/2007, 08:22 PM
|
|||
|
|||
|
I used 12-gauge heavy duty extension cord for the wiring, as it's more flexible and easier to work with than Romex.
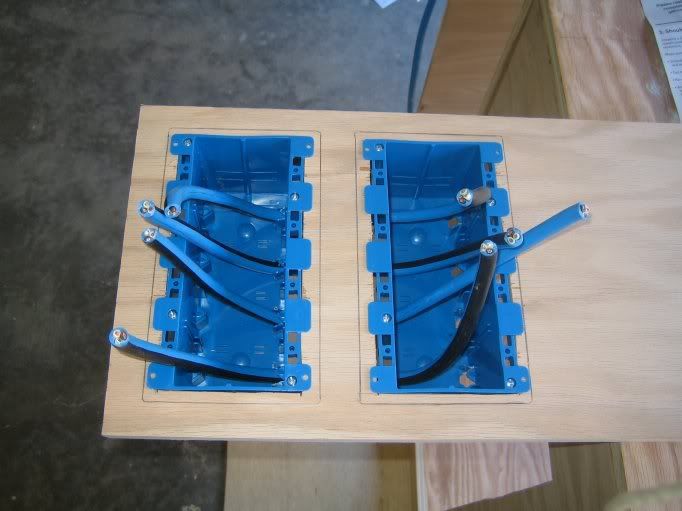 I used four GFI receptacles in case one ever trips, it will only turn off two devices, not everything in the setup. This peace of mind was well worth the extra money, IMO. I only installed 8 outlets because I will be also be using an Aqua Controller Jr with a DC8 module, which has an additional 8 controllable outlets. This gives me a total of 15 outlets to work with (the DC8 module takes up the 16th outlet). This is enough for what I plan on running, with outlets to spare. 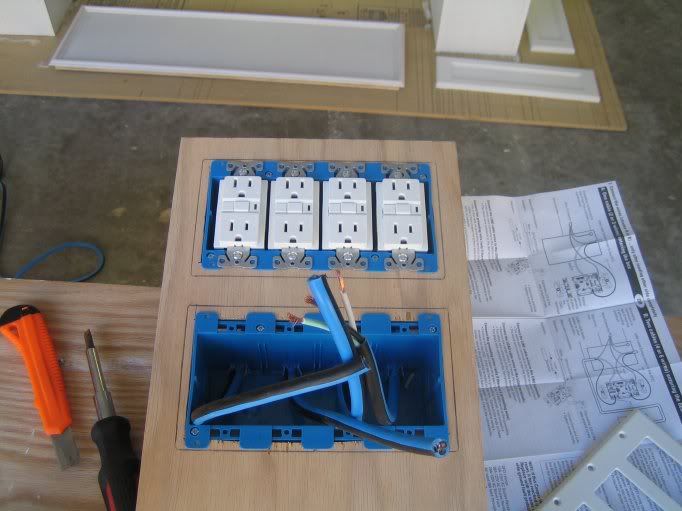 The four GFI outlets are connected to one-way switches, allowing me to turn off devices at the flip of a switch. 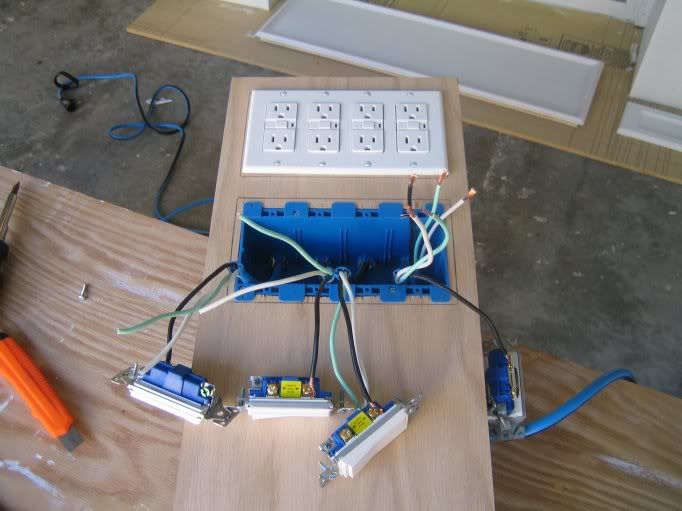 The extension cord is stranded copper, so I had to use wire nuts to connect everything. The completed wiring was a mess! 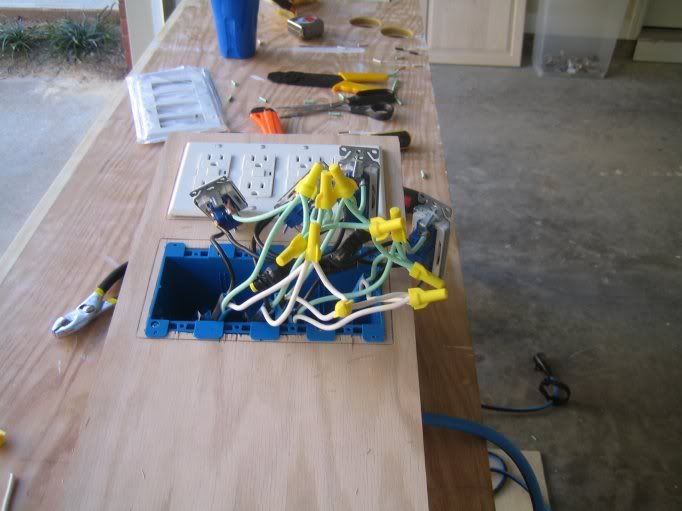 ....but it all fits down into the deep electrical box easily. 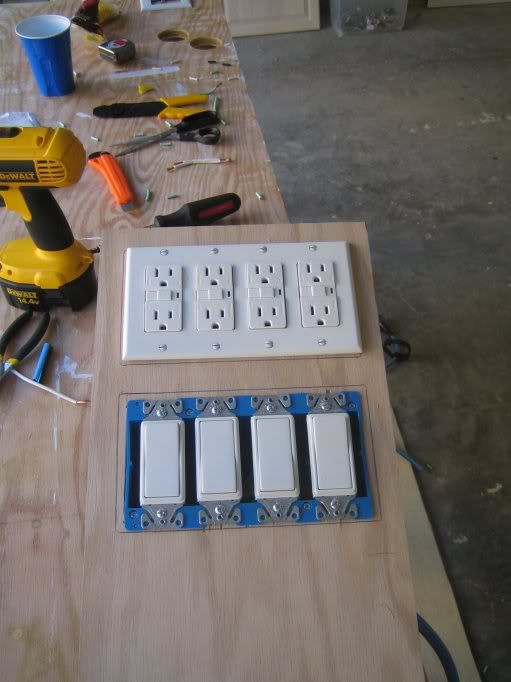 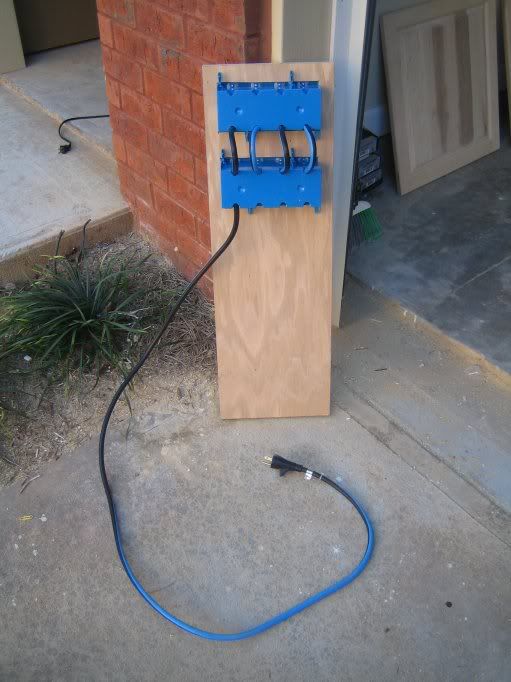 Test fitting everything in the cabinet.... 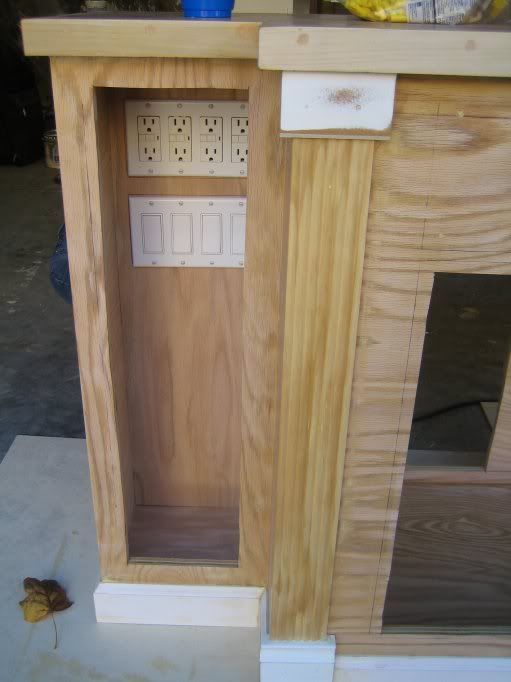 My two IceCap ballasts and T5 ballast will be installed behind the electrical panel, underneath the gang boxes. 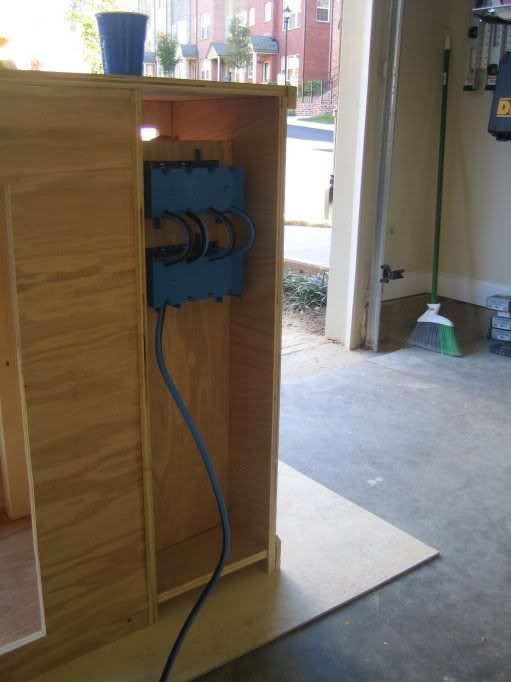 At this point the electrical panel was complete, so time for testing. I used a house fan to check the functionality of each outlet, as well as the GFI test/reset buttons. Everything worked! 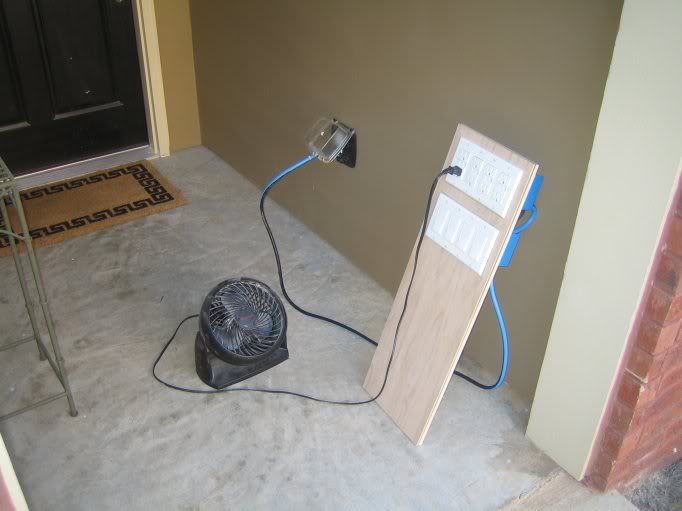 And finally, the painted electrical panel. 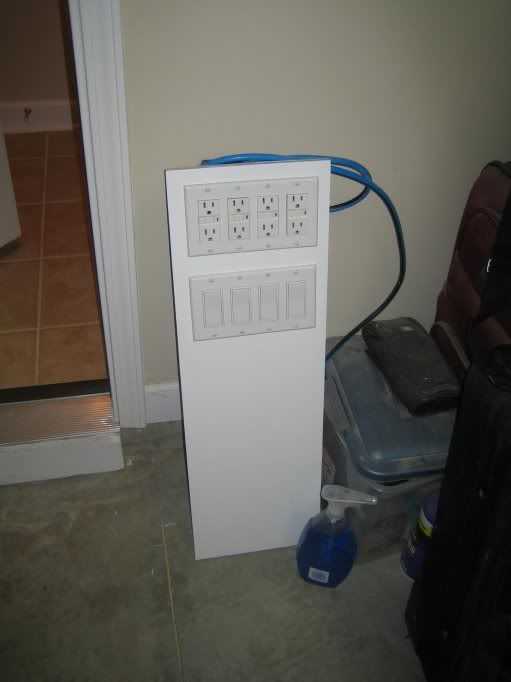
__________________
90g reef/29g sump, DIY cabinet, 2x250w MH, 2x54w T5 actinics, ER RS135 skimmer, VorTech pump, 18w UV sterilizer Last edited by RedEDGE2k1; 11/07/2007 at 08:28 PM. |
|
#213
11/07/2007, 08:35 PM
|
|||
|
|||
|
This week I've been spending an hour or two each day after work priming/painting the cabinet. At this point, everything is finished except the cabinet doors, which have only been primed so far. I'll finish painting them tomorrow (maybe
). Primer 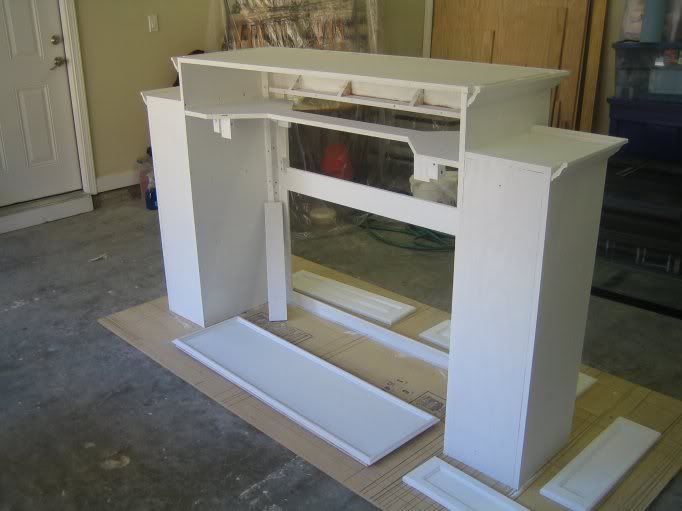 Semi-Gloss Paint 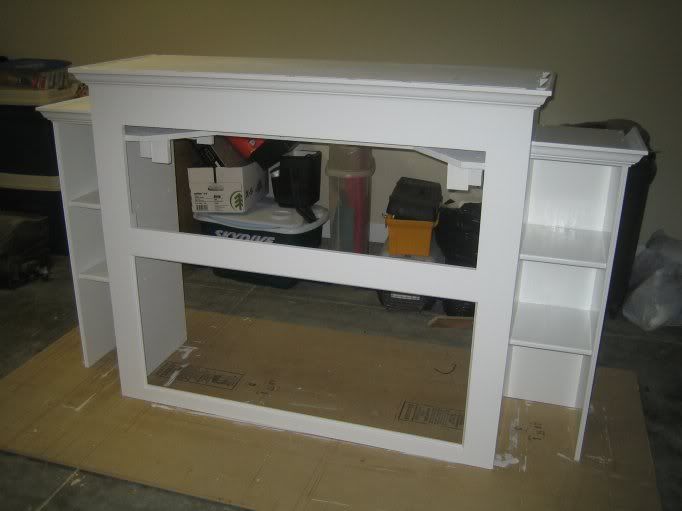 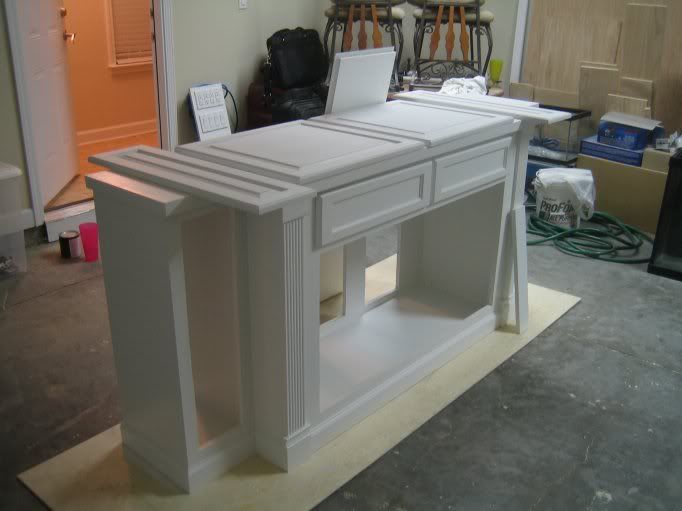 My finishing sequence has been as follows: 1) Power sander, 220-grit 2) Skimcoat entire cabinet with Elmer's Wood Filler (water added) 3) Hand sand, 220-grit 4) Apply one coat Minwax Sanding Sealer 5) Hand sand, 320-grit 6) Apply one coat Sherwin Williams "Pro-Block" acrylic primer 7) Hand sand, 320-grit 8) Apply one coat Sherwin Williams acrylic semi-gloss white paint I will probably add a second coat of paint, but I haven't quite made up my mind yet. At this point I'm just sick of painting.
__________________
90g reef/29g sump, DIY cabinet, 2x250w MH, 2x54w T5 actinics, ER RS135 skimmer, VorTech pump, 18w UV sterilizer |
|
#214
11/07/2007, 08:51 PM
|
|||
|
|||
|
Beautiful paint finish in that last picture.
__________________
If my phaser discharges off by as little as .06 terra watts, it would cause a cascading exothermal inversion. |
|
#215
11/07/2007, 08:55 PM
|
|||
|
|||
|
Man, that's one beautiful looking stand!
Don't feel too bad...I'm painting my house! Hoping to be in your shoes give or take a year, but still planning the tank itself on paper. Think I will stick with a location on the ground floor--easier to reinforce the joists from the crawlspace. My bonus room's walls are actually just knee walls tied into the roof joists, so it'd be pretty tough to change anything. Now I just have to sell my wife on the idea of an aquarium/china cabinet in the dining room... |
|
#216
11/07/2007, 09:14 PM
|
|||
|
|||
|
Toss the china and get a bigger aquarium.
__________________
If my phaser discharges off by as little as .06 terra watts, it would cause a cascading exothermal inversion. |
|
#218
11/08/2007, 09:12 AM
|
|||
|
|||
|
Very nice RedEDGE2k1!
 Your planning and foresight are paying off. Following along makes me want to build another stand! Your planning and foresight are paying off. Following along makes me want to build another stand!Jay
__________________
"Opportunity is missed by most people because it is dressed in overalls and looks like work" - Thomas Alva Edison |
|
#219
11/11/2007, 07:35 PM
|
|||
|
|||
|
The cabinet is now fully painted. Over the last several days, I took my time and finished the cabinet doors, as well as some second coat touch-ups where it was needed.
I put a bead of white caulking around the sump area, to help keep any spills from leaking onto the hardwood floor underneath the cabinet. It's probably hard to see in the picture, but here's one anyway for good measure. 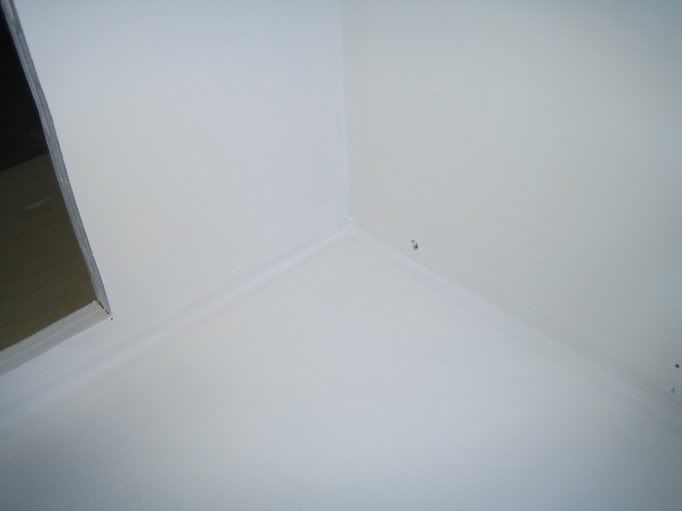 I installed my two IceCap metal halide ballasts to the backside of the power panel. There was no room left for the Advance T5 ballast (it's long and skinny) on the panel, so I attached it to the inside of the cabinet with two screws. Notice the four unpainted poplar blocks behind the panel -- these are the attachment points for the power panel. These blocks are screwed to the cabinet, and the power panel is screwed to the blocks. This will allow me to remove the power panel from the front, if ever need be. 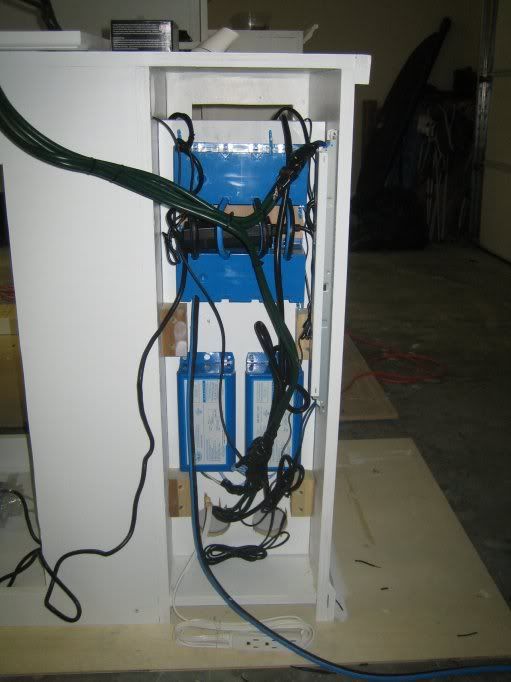 View from the front, showing the array of gadgets. The Vortech controller, DC8, and AquaController Jr all fit nicely. The AquaController is attached with velcro, in case I ever want to remove it for easier use/programming. 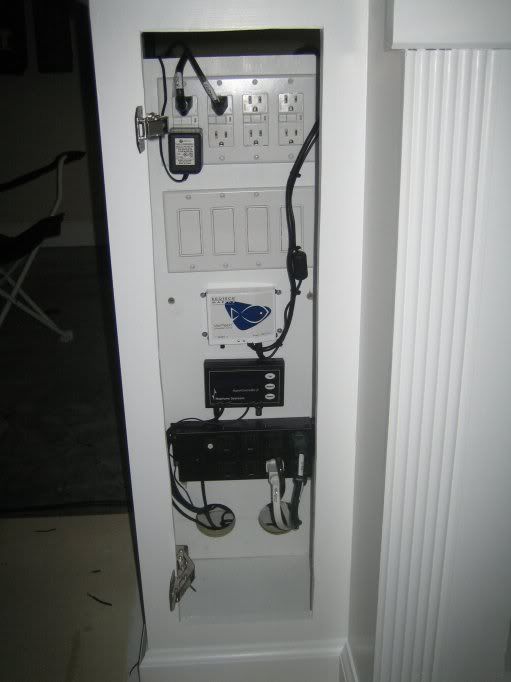 I wired the lights with heavy duty extension cord from Lowe's. I left enough length in the cord to allow the top to be removed without disconnecting the lights. 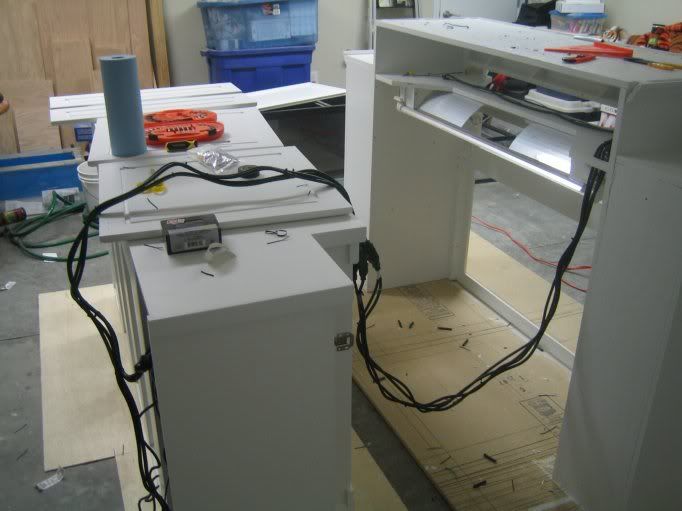 The lights are wired to the ballasts with homemade quick-disconnects -- simply the male/female extension cord ends. This will allow the top section to be removed and totally disconnected from the bottom section without removing the lights, if the need ever arises (moving, etc.) 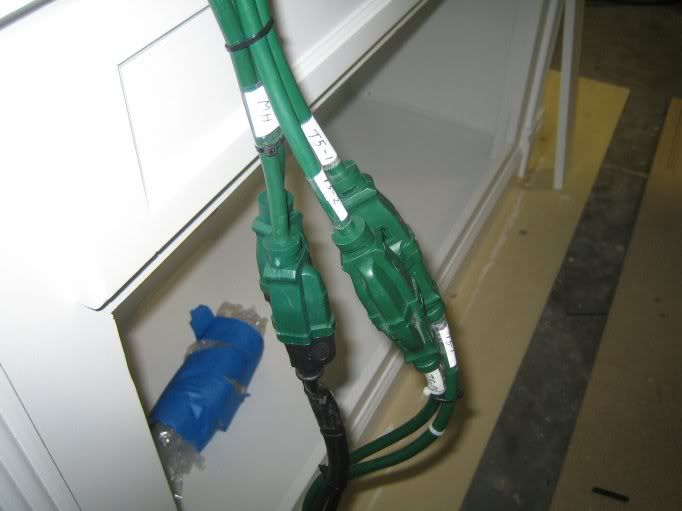
__________________
90g reef/29g sump, DIY cabinet, 2x250w MH, 2x54w T5 actinics, ER RS135 skimmer, VorTech pump, 18w UV sterilizer |
|
#220
11/11/2007, 07:43 PM
|
|||
|
|||
|
Here you can see the layout of the T5s and metal halides. After this picture was taken, I moved the metal halides closer together. For whatever reason, I originally mounted them too far apart. After the correction, the bulb centers are now 1'4" apart, and 1'4" from the sides of the tank....basically, they're now properly centered over each side of the tank.
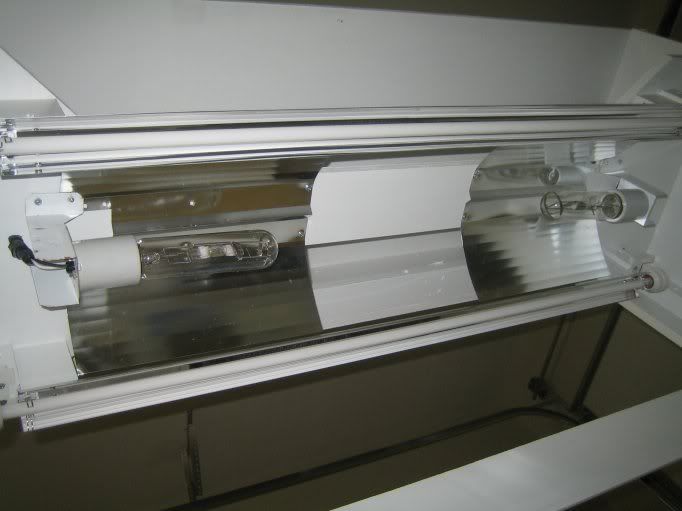 I drilled holes in the light panel and ran wires from the sockets up through the holes. This kept things looking neat. 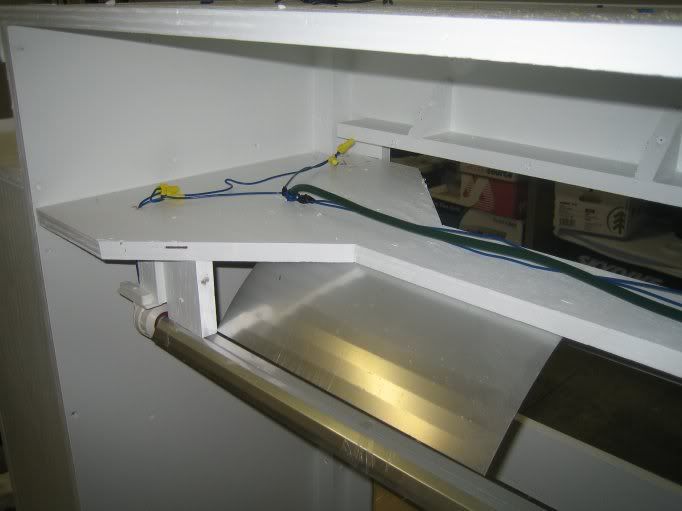 The wires leave the light panel through four 3/8" holes, where they are connected to the extension cords with wire nuts. 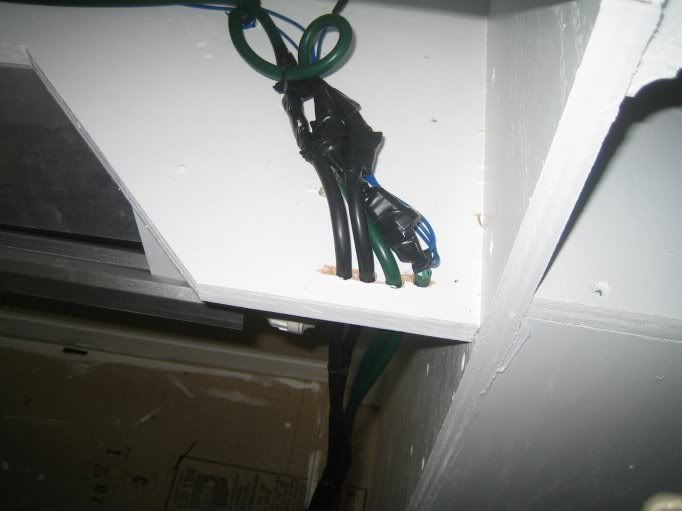 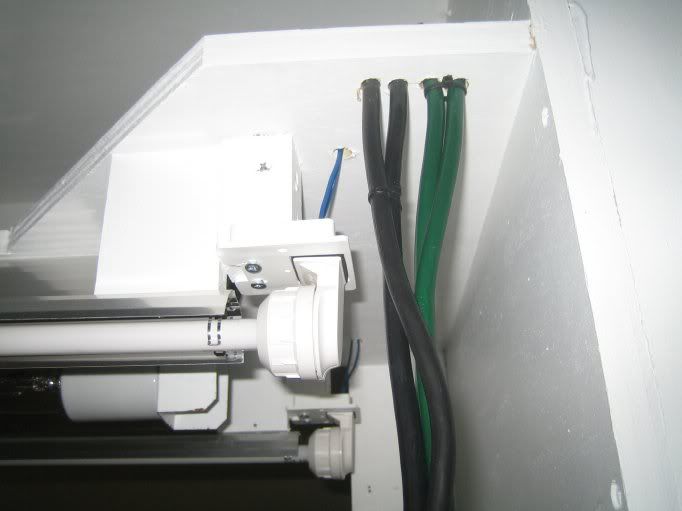
__________________
90g reef/29g sump, DIY cabinet, 2x250w MH, 2x54w T5 actinics, ER RS135 skimmer, VorTech pump, 18w UV sterilizer |
|
#221
11/11/2007, 07:52 PM
|
|||
|
|||
|
2x54w Actinics only
 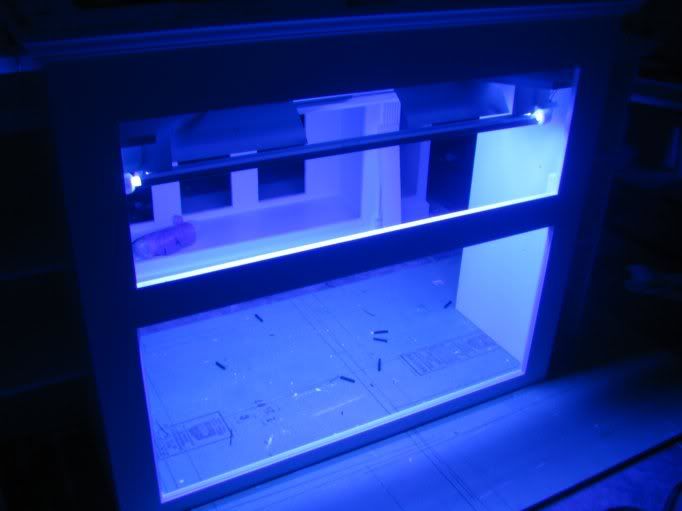 2x54w Actinics + 2x250w AB 10k Metal Halides 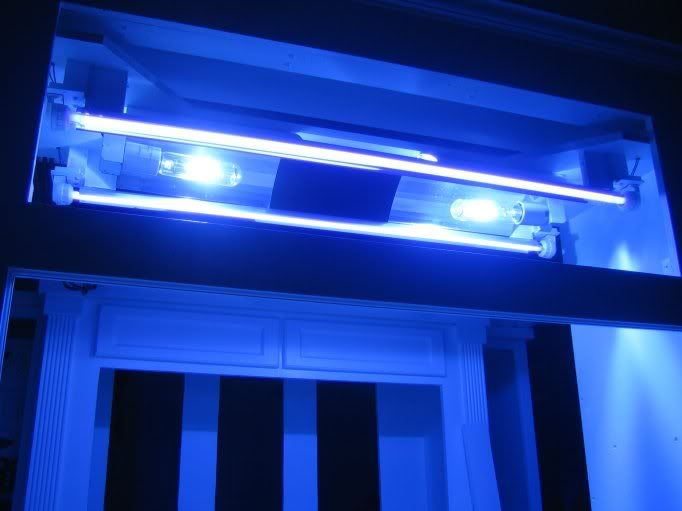 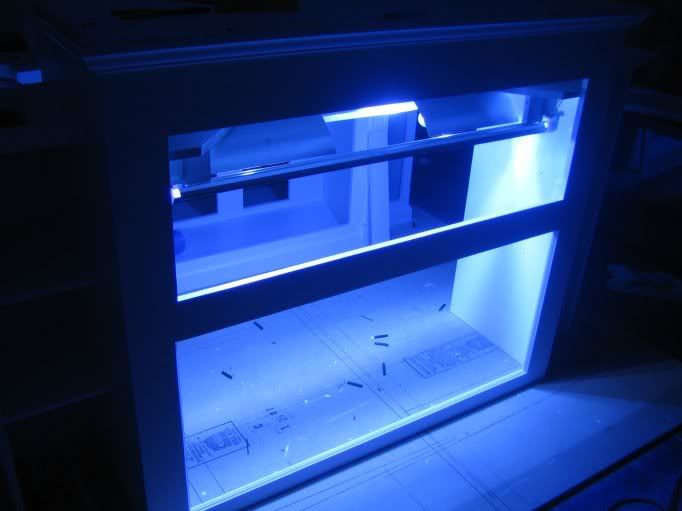 My last bit of work this weekend was getting started on the moonlights. I say getting started, because I ended up calling it a night before I finished installing these. these are "R2 Dual Moonlights", purchased from Marine Depot. 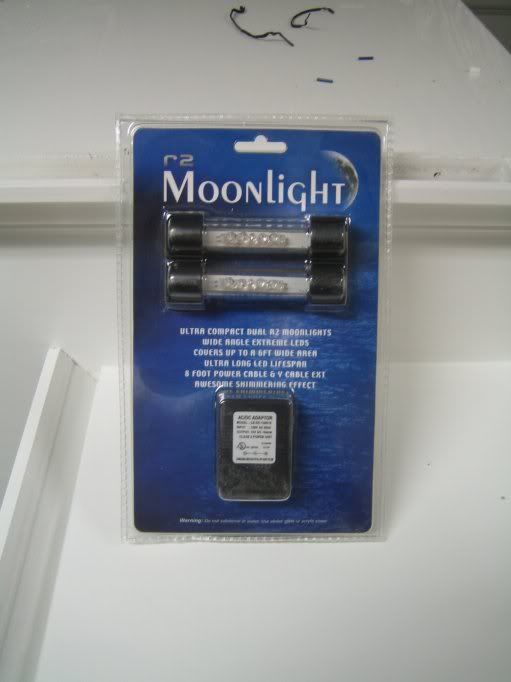 Each unit houses five LEDs, with each one tilted to spread the light out over a wide area. 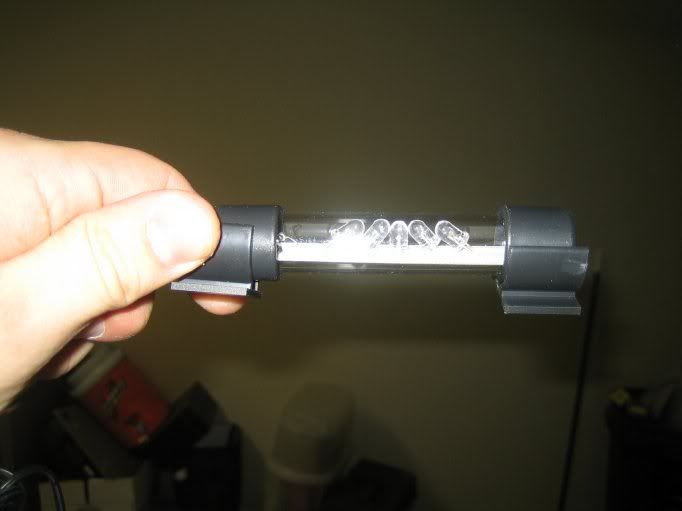 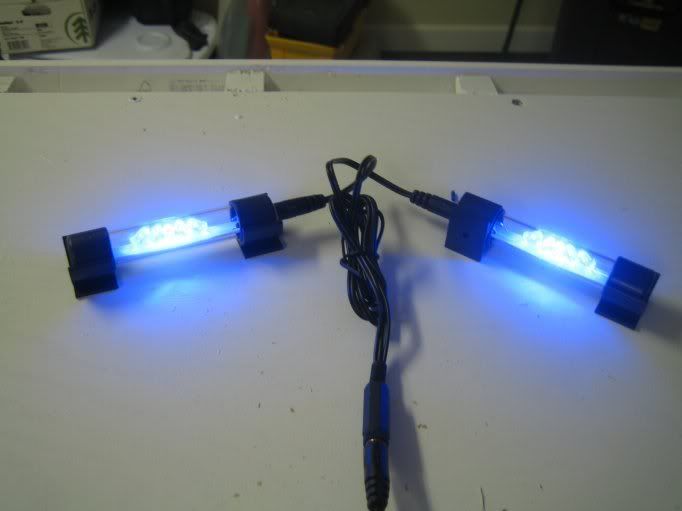 It will take some thought as to how to install these...I would like them to be centered, like the metal halides are, so they would cover the tank with moonlight nicely. This isn't possible, because I can't mount them near the metal halides out of fear of melting the plastic. I think I will cut some oak stock to fit in the mogul base standoff bracket, and screw the moonlight units to the wood. This would place them only about 6" off center, and away from the brunt of the metal halide's heat. 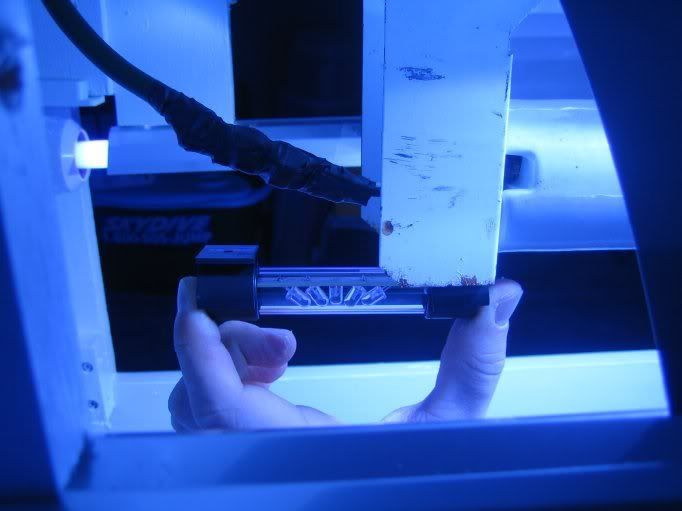 Your advice is welcomed!
__________________
90g reef/29g sump, DIY cabinet, 2x250w MH, 2x54w T5 actinics, ER RS135 skimmer, VorTech pump, 18w UV sterilizer Last edited by RedEDGE2k1; 11/11/2007 at 07:59 PM. |
|
#222
11/12/2007, 08:54 AM
|
|||
|
|||
|
Well it's about time we got an update RE21K!
I thought you may have just given up, with all that hand sanding and turned it into a fancy workbench or something  As usual your forethought is paying off with a very professional end result. It should give years of trouble free service. Cheers, now lets get a tank and some water on that beast. (There is still going to be a reef installed right? The better half isn't trying to staore the good china in there now, is she?)
__________________
"It is never too late to give up your prejudices" H. D. Thoreau |
|
#223
11/12/2007, 09:24 AM
|
|||
|
|||
|
Come on, only six days between updates!
In other news....I had to return the two 200w Jager heaters I bought from Marine Depot, because they are NOT fully submersible as the website description claims. Maybe some of their models are, but these are NOT. http://www.marinedepot.com/ps_viewIt...ct~EJ1119.html When I called to get an RMA # for the return, the Marine Depot rep even argued with me a little bit....until I opened the box and read the instruction manual to him where it clearly states "CAUTION....do not submerge below water line." Anywho...any advice on two good heaters for ~$30 each?
__________________
90g reef/29g sump, DIY cabinet, 2x250w MH, 2x54w T5 actinics, ER RS135 skimmer, VorTech pump, 18w UV sterilizer |
|
#224
11/12/2007, 09:40 AM
|
|||
|
|||
|
I am a fan of the stealth heaters.
__________________
If my phaser discharges off by as little as .06 terra watts, it would cause a cascading exothermal inversion. |
|
#225
11/12/2007, 09:53 AM
|
|||
|
|||
|
The 250w stealth is only rated up to 75g? Weird....
Will two be enough for my 90g w/ 20g sump?
__________________
90g reef/29g sump, DIY cabinet, 2x250w MH, 2x54w T5 actinics, ER RS135 skimmer, VorTech pump, 18w UV sterilizer |
|
|


 Linear Mode

