|
|
|
#76
 10/12/2007, 03:04 PM
|
|||
|
|||
|
Quote:

__________________
90g reef/29g sump, DIY cabinet, 2x250w MH, 2x54w T5 actinics, ER RS135 skimmer, VorTech pump, 18w UV sterilizer |
|
#77
10/12/2007, 03:09 PM
|
|||
|
|||
|
As does the back:

__________________
90g reef/29g sump, DIY cabinet, 2x250w MH, 2x54w T5 actinics, ER RS135 skimmer, VorTech pump, 18w UV sterilizer |
|
#78
10/12/2007, 03:11 PM
|
|||
|
|||
|
Quote:
__________________
90g reef/29g sump, DIY cabinet, 2x250w MH, 2x54w T5 actinics, ER RS135 skimmer, VorTech pump, 18w UV sterilizer |
|
#79
10/12/2007, 03:18 PM
|
|||
|
|||
|
The back is close enough to the plywood from the sketch up drawing that I could see. I would have liked to see it directly over the plywood instead of relying on the fasteners to hold it up. What is the possibility of gluing a ledger under those front to back 2x4s for a little extra support?
__________________
If my phaser discharges off by as little as .06 terra watts, it would cause a cascading exothermal inversion. |
|
#80
10/12/2007, 03:22 PM
|
|||
|
|||
|
I thought there was a little more of a front lip involved. The photos on page two seemed to show it in a different perspective perhaps.
Have you placed the empty tank into position yet to verify the fit? As for the paint, I have had decent results with enamel paint over grainy woods like the oak you are using.
__________________
"It is never too late to give up your prejudices" H. D. Thoreau |
|
#81
10/12/2007, 03:26 PM
|
|||
|
|||
|
I don't recall seeing the 2x4 stiffeners in the actual build photos, only in the sketch-up. I believe it is strictly plywood over the front 2x6 with 2x4 legs and plywood sides and back.
__________________
"It is never too late to give up your prejudices" H. D. Thoreau |
|
#82
10/12/2007, 03:29 PM
|
|||
|
|||
|
Quote:
Quote:
 Seriously though...sometimes it's neccessary to step back and look at the big picture. A 90g tank, when fully loaded, will weigh ~1000lbs. It sounds like a lot of weight, and it is, but not when you consider the strength of plywood. Go to your LFS and open up one of the mass-produced stands for a 180 gallon tank (or larger). They're all made of 3/4" plywood, with no additional support from 2x members. They all work just fine, and will not fail. It's kind of funny (not trying to sound insulting) to browse the DIY forums and look at pictures of all the people building stands for 55g tanks using 3/4" ply and pressure treated 4x4s. I understand the safety factor of 2x or 3x.....but come on folks, 10x and 20x is just wasting money Quote:
__________________
90g reef/29g sump, DIY cabinet, 2x250w MH, 2x54w T5 actinics, ER RS135 skimmer, VorTech pump, 18w UV sterilizer Last edited by RedEDGE2k1; 10/12/2007 at 03:34 PM. |
|
#84
10/12/2007, 03:36 PM
|
|||
|
|||
|
I didn't mean to sound like a smart aleck.....just making the point that if anyone at home builds a stand for a 180g tank the same way All Glass builds their stands, people would be running for the hills and screaming its going to fail.
__________________
90g reef/29g sump, DIY cabinet, 2x250w MH, 2x54w T5 actinics, ER RS135 skimmer, VorTech pump, 18w UV sterilizer |
|
#85
10/12/2007, 03:45 PM
|
|||
|
|||
|
Quote:
 That is what had me concerned. You will see people harp on not putting a load on the fasteners. Always have support below. You may have changed your design since that file you uploaded. If so you are golden. Don't get me wrong, I love your design. Is it going to be on a slab or 2nd floor? Andy
__________________
If my phaser discharges off by as little as .06 terra watts, it would cause a cascading exothermal inversion. |
|
#86
10/12/2007, 03:49 PM
|
|||
|
|||
|
MDF boards, a few pastic thing-a-ma-jig fasteners, some vinyl wood grain and of course, the almighty magnetic door catch. What's not to love about that?
I'm sure you will enjoy many years of faithful service from this tank/stand combo. Keep us posted with pics when it's all said and done.
__________________
"It is never too late to give up your prejudices" H. D. Thoreau |
|
#87
10/12/2007, 03:52 PM
|
|||
|
|||
|
NOOOOOOOO MDF.
__________________
If my phaser discharges off by as little as .06 terra watts, it would cause a cascading exothermal inversion. |
|
#90
10/12/2007, 07:42 PM
|
|||
|
|||
|
Quote:
The cabinet will be on our 2nd floor, but I got lucky in the fact that the cabinet will back up to a firewall in our townhome, as well as sit perpendicular to the 2nd floor joists.
__________________
90g reef/29g sump, DIY cabinet, 2x250w MH, 2x54w T5 actinics, ER RS135 skimmer, VorTech pump, 18w UV sterilizer |
|
#91
10/12/2007, 07:44 PM
|
|||
|
|||
|
Quote:
Not funny? Cool. -Dustin
__________________
90g reef/29g sump, DIY cabinet, 2x250w MH, 2x54w T5 actinics, ER RS135 skimmer, VorTech pump, 18w UV sterilizer |
|
#92
10/12/2007, 07:50 PM
|
|||
|
|||
|
Quote:
__________________
If my phaser discharges off by as little as .06 terra watts, it would cause a cascading exothermal inversion. |
|
#94
10/13/2007, 12:44 PM
|
|||
|
|||
|
Quote:
). Bow, yes, but not fail. Think about all the 600lb morbidly obese people walking around (oxymoron?) their homes placing all that weight on one foot, 4"x10" area, between floor joists, over and over again, all day long. When was the last time anyone heard of a person falling through their floor? Back to the build....I'm working as we speak (taking a break!), completing the top section. I went to Lowe's today and dropped $70 on a DeWalt orbital sander, and it's proving itself worthy of every penny. The old fashioned sanding block, for the 20 minutes I used it, sucked. I also bought the crown moulding -- I got lucky and Lowe's had the exact same style of crown that my house has, in a smaller size. One more aspect of the tank blending in with my home! Pics to come.
__________________
90g reef/29g sump, DIY cabinet, 2x250w MH, 2x54w T5 actinics, ER RS135 skimmer, VorTech pump, 18w UV sterilizer |
|
#95
10/13/2007, 03:58 PM
|
|||
|
|||
|
Quote:
__________________
90g reef/29g sump, DIY cabinet, 2x250w MH, 2x54w T5 actinics, ER RS135 skimmer, VorTech pump, 18w UV sterilizer |
|
#96
10/16/2007, 08:22 AM
|
|||
|
|||
|
I wasn't as productive this weekend as I planned, as it is now Tuesday and the cabinet still isn't finished. However I'm very close....all that's left is hinging the access panel, access panel trim, and crown moulding. I bought two different sets of hinges for the access panel; the Rockler set recommended by cannarella as well as a euro set from Lowe's. Hopefully one of them will work the way I need them to -- I'll keep you posted.
I took cannarella's advice and glued a 2x2 support into the front panel/side panel joint for added stiffness. I then packed the outside of the miter joint with wood filler. Hopefully this 2x2 will prevent the wood filler/paint from cracking when the top section is removed from the tank/bottom section. 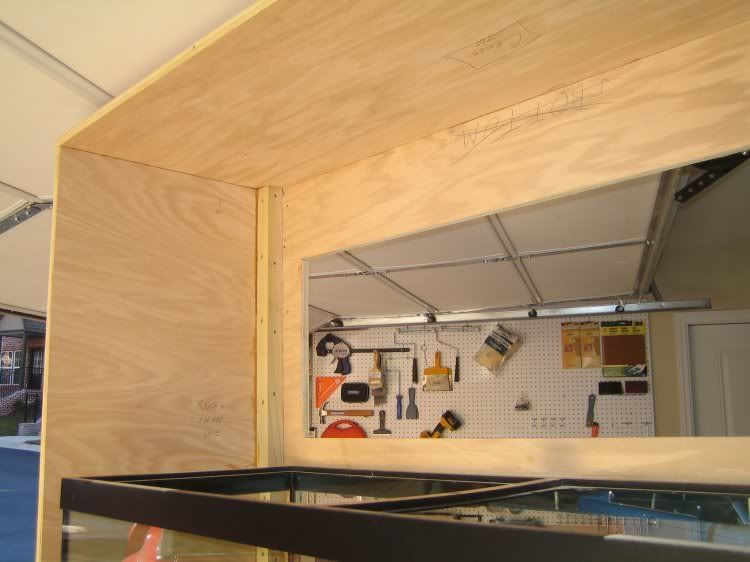 I trimed the tank base panel with 1x2 poplar from Home Depot. I screwed this trim into place, as well as glued it, because when I get help moving the cabinet I know this will be the piece everyone grabs and pulls. I don't want it coming loose. 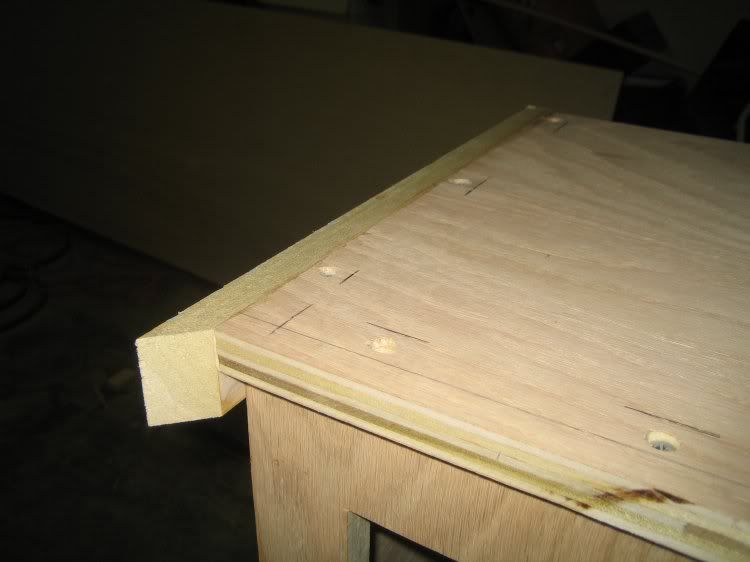  All wood puttied up and ready to sand. 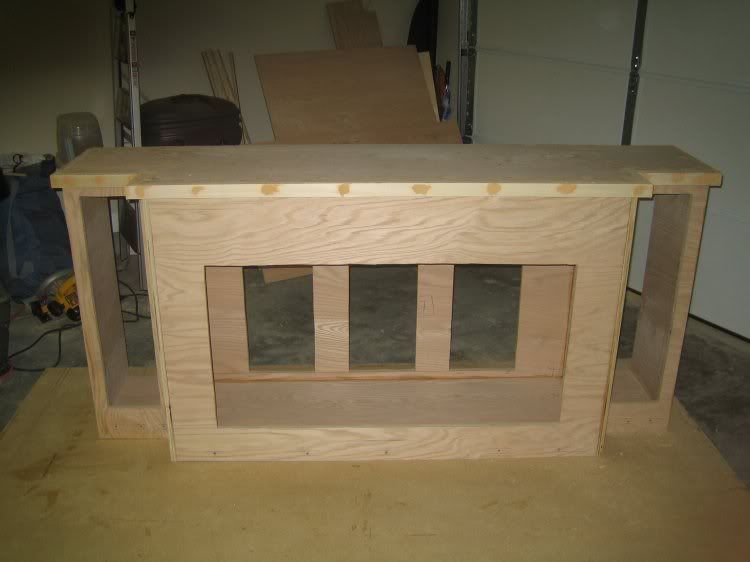
__________________
90g reef/29g sump, DIY cabinet, 2x250w MH, 2x54w T5 actinics, ER RS135 skimmer, VorTech pump, 18w UV sterilizer |
|
#97
10/16/2007, 08:29 AM
|
|||
|
|||
|
I couldn't resist putting the 90g tank in the cabinet to see how it would look. The measurements were dead-on, thankfully.
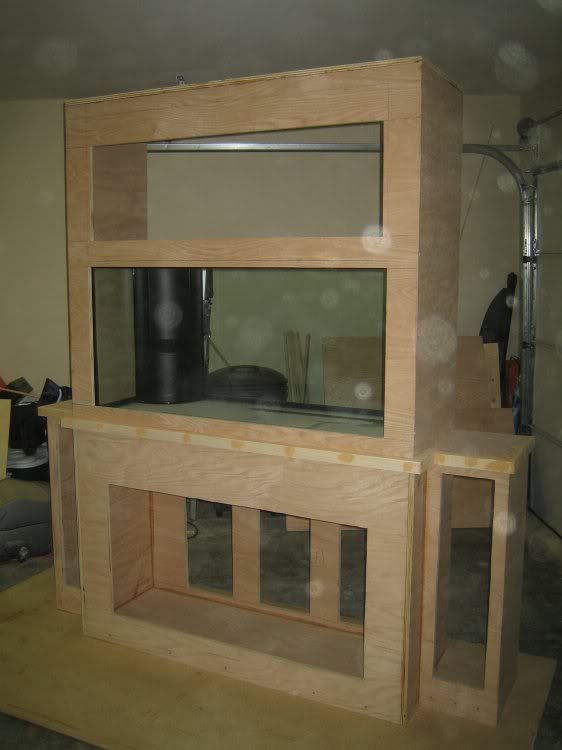 The back of the tank, sitting directly above the rear plywood panel. 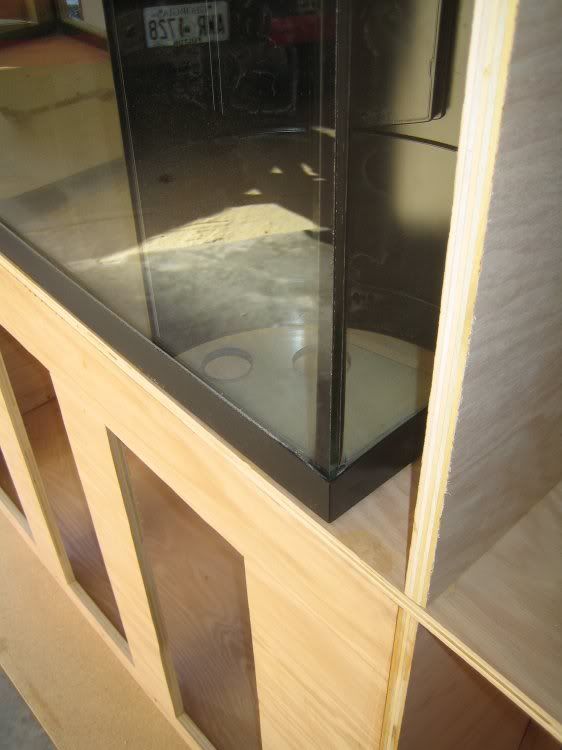 Space for the Vortech pump. 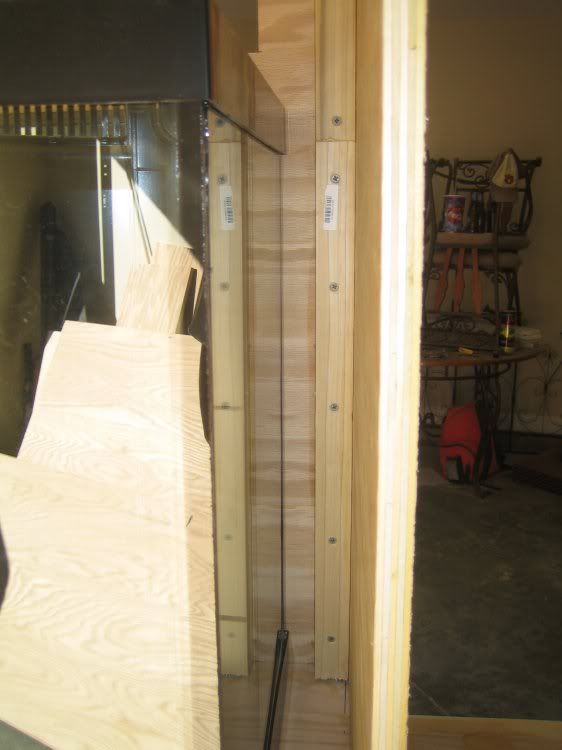 Originally I planned on sanding the wood putty with a sanding block, in hopes of avoiding the cost of a quality power sander. I used the sanding block for about 3 minutes before picking up my keys and driving to Home Depot. I dropped $70 on DeWalt's mid-level sander, and it was worth every penny. 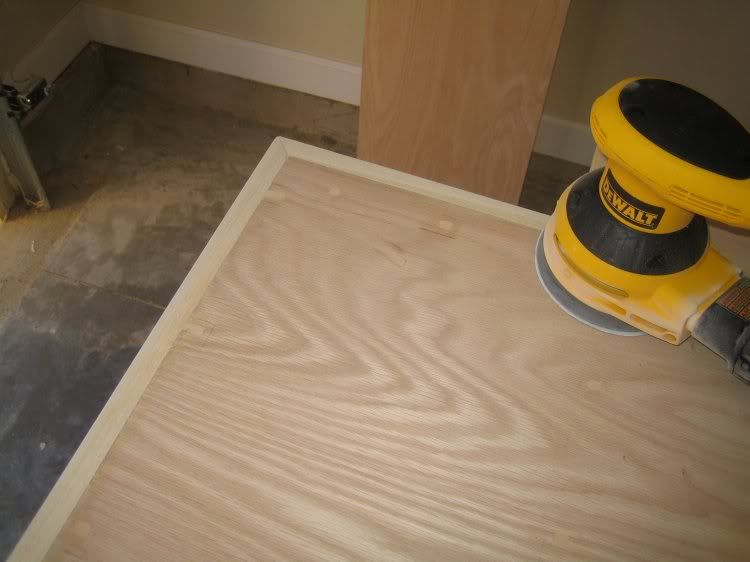 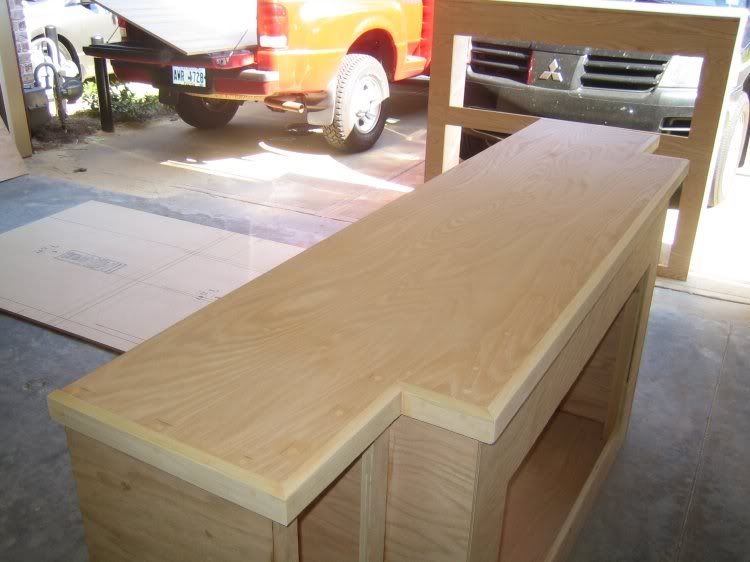
__________________
90g reef/29g sump, DIY cabinet, 2x250w MH, 2x54w T5 actinics, ER RS135 skimmer, VorTech pump, 18w UV sterilizer |
|
#98
10/16/2007, 08:38 AM
|
|||
|
|||
|
While the tank was in the cabinet, I measured and marked the height of the metal halide mogul base, positioned so the bulb itself is 12" above the water level.
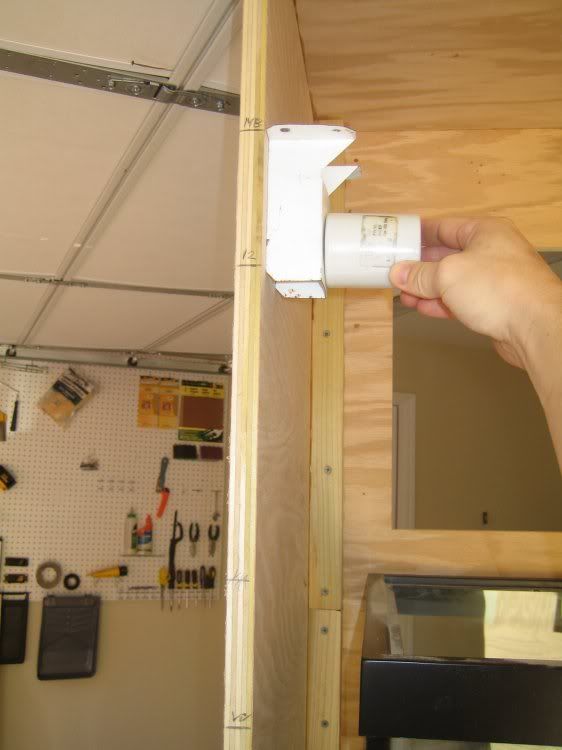 I installed a panel to attach the halides & T5s to. This also helped stiffen up the sides of the entire top section. 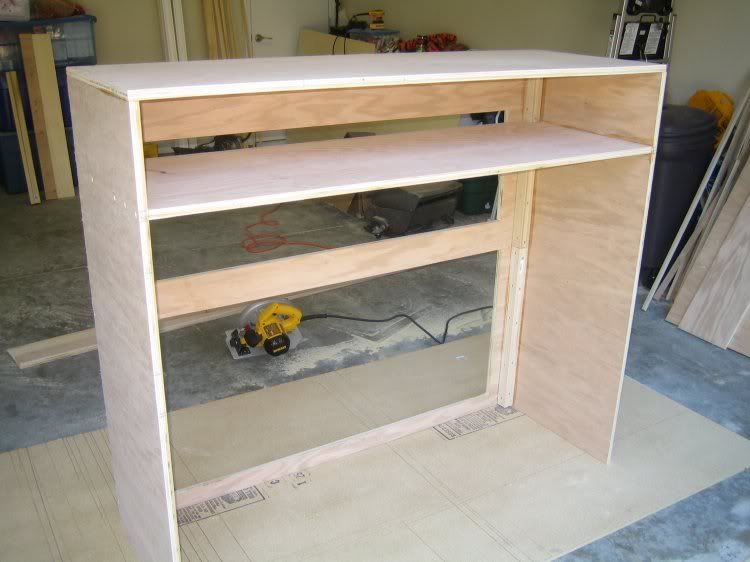 The center sagged a bit, so I added a stiffener. 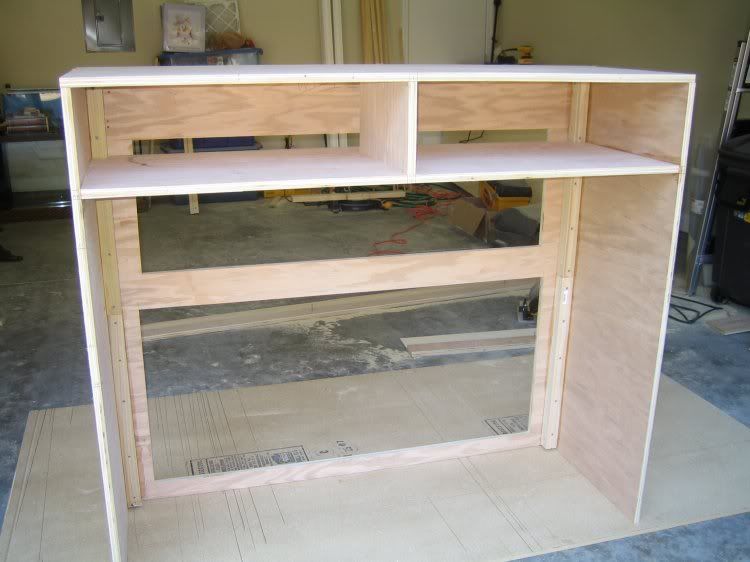 I know it looks goofy, but keep in mind the light panel will be hidden by the access panel door, and will not conflict the opening/closing of the door. 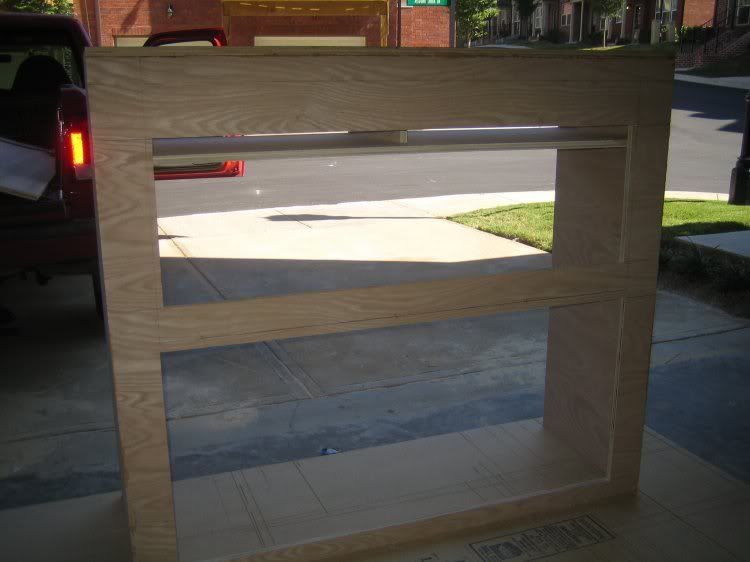
__________________
90g reef/29g sump, DIY cabinet, 2x250w MH, 2x54w T5 actinics, ER RS135 skimmer, VorTech pump, 18w UV sterilizer |
|
#99
10/16/2007, 09:54 AM
|
|||
|
|||
|
Looks good. I posted up a build thread for my tank. Check it out.
http://archive.reefcentral.com/forum...7#post10979677
__________________
If my phaser discharges off by as little as .06 terra watts, it would cause a cascading exothermal inversion. |
|
#100
10/16/2007, 09:58 AM
|
|||
|
|||
|
More pictures are coming...just got busy at work this morning. Go figure.
__________________
90g reef/29g sump, DIY cabinet, 2x250w MH, 2x54w T5 actinics, ER RS135 skimmer, VorTech pump, 18w UV sterilizer |
|
|


 Linear Mode

