|
|
|
#1
 12/12/2007, 05:01 PM
|
|||
|
|||
|
Thanks for looking at my build log. I have spent about 6 months on this so far and feel that the project has come far enough that I can show the log to the rest of reef central. Hopefully some of this information can be of use or at least keep you entertained.
I purchased a 360 gallon glass tank off of a local reef club forum here on ReefCentral for $500. It was not in the best of shape, but it came with a considerable amount of rock and sand. Since I was planning on an upgrade I jumped on the deal. A friend and I set off for an all day round trip with my jeep, trailer in tow. After putting the tank onto the trailer (an easy task  ) , wrapping it up, and thoroughly overloading my Jeep we were on our way. ) , wrapping it up, and thoroughly overloading my Jeep we were on our way.It made the trip in one piece! 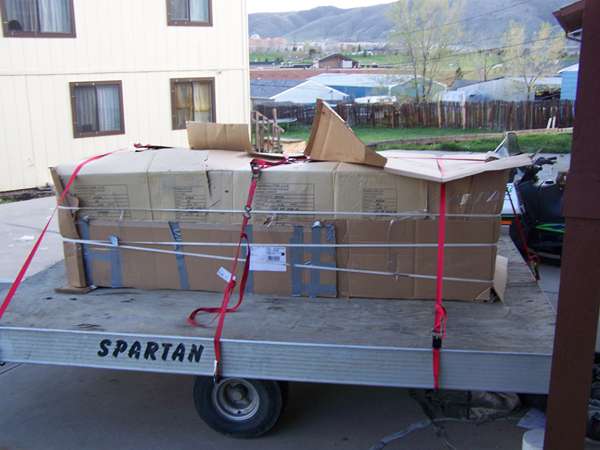 My friend Shane taking a well deserved break. This is going to be a fun project isn't it.  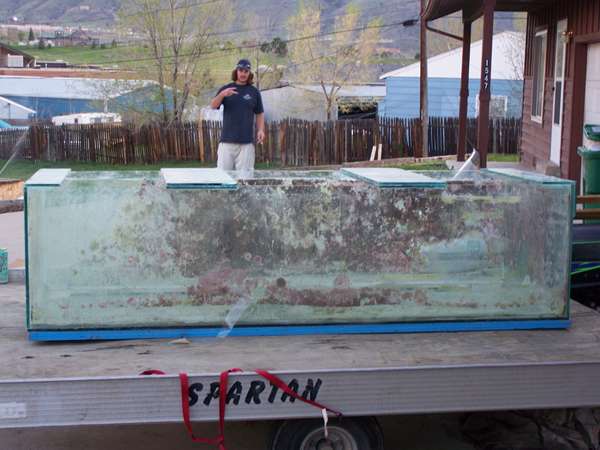 It did not take long to attract some attention..... little did they know we couldn't lift it with 2 people  . This thing didn't weigh this much when we put it on the trailer did it? . This thing didn't weigh this much when we put it on the trailer did it?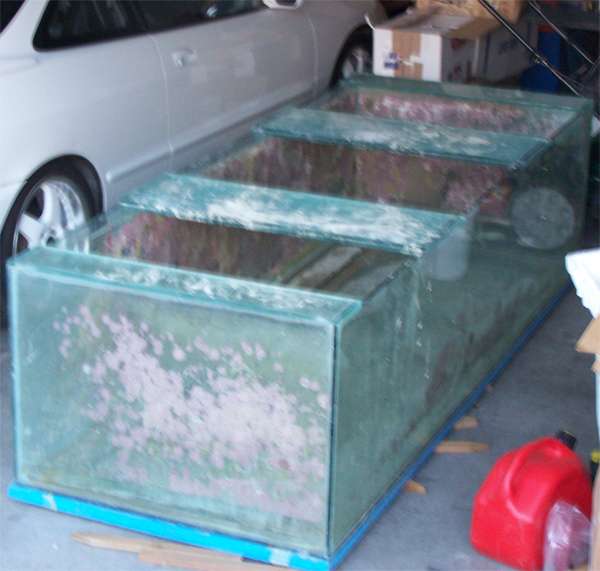 I spent some time(days) cleaning the tank, it came out with very few scratches. I couldn't complain. 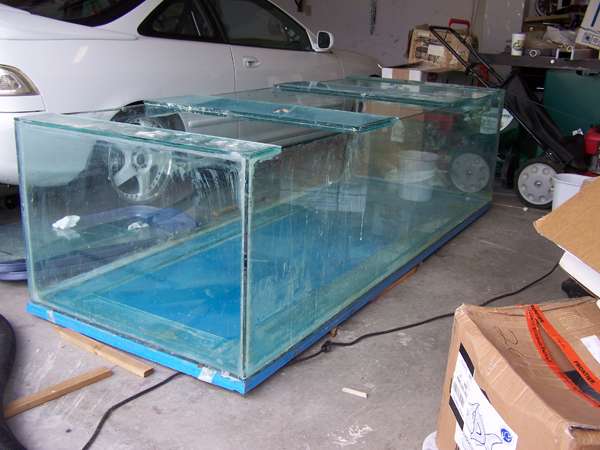 Now that the tank was cleaner I could see what I was dealing with. The first thing that jumped out at me was the bracing. 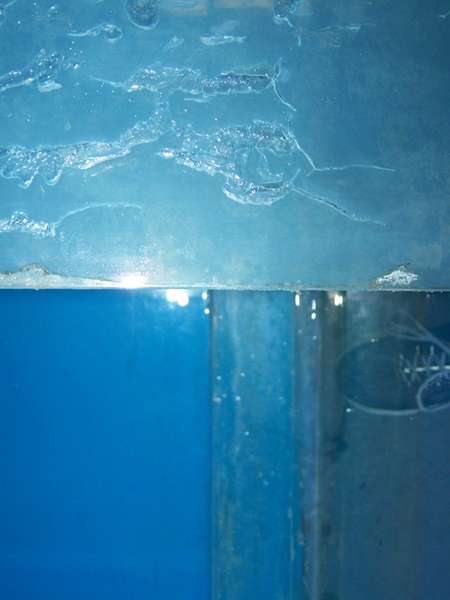
__________________
______________________________ Colorado is sweet. I'm always down to go to the MJ My Turbo Honda -> Click little red house. Friends don't let friends buy from Front Range Aquatics |
|
#2
12/12/2007, 05:02 PM
|
|||
|
|||
|
Having fun yet? You know I am. It took a matter of hours to remove each piece. I swore up and down they had used glue and not silicone, it had just been squeezed so tight that it was near impossible to separate. I think I'm going to need more razor blades....
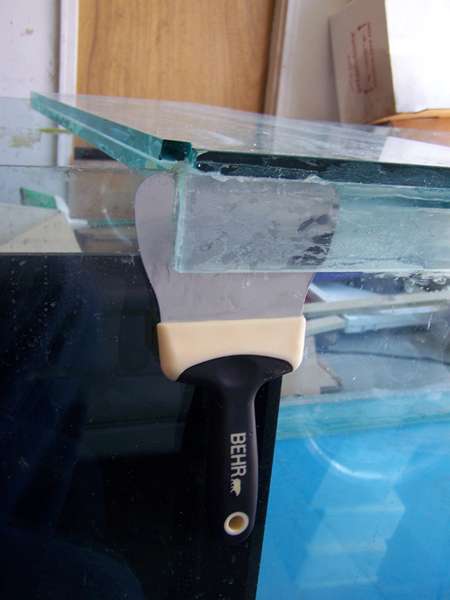 Yeah, I need more razor blades... 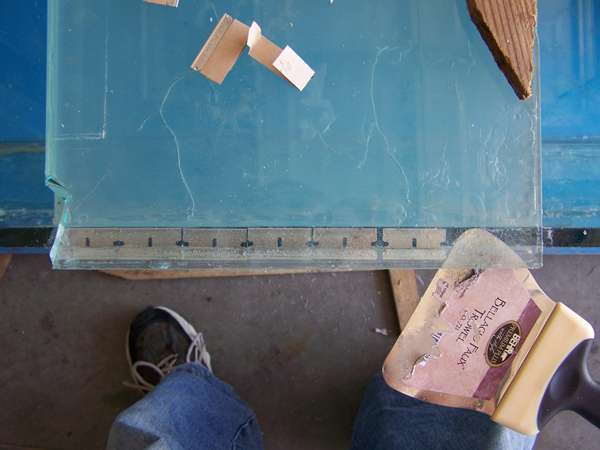 Whew, one off.  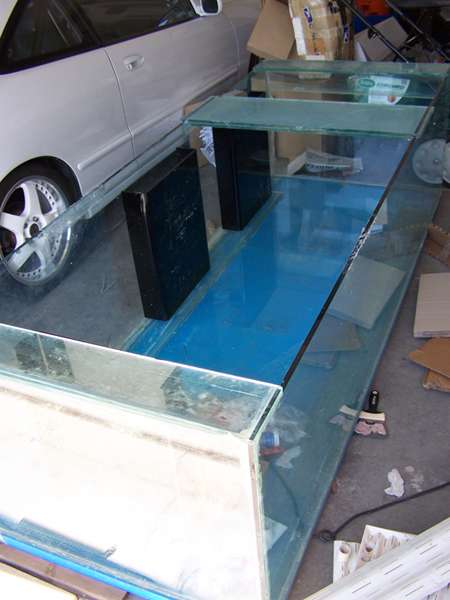 Do it all over again and this is what you get. Don't worry, I am going to replace them with a much better solution  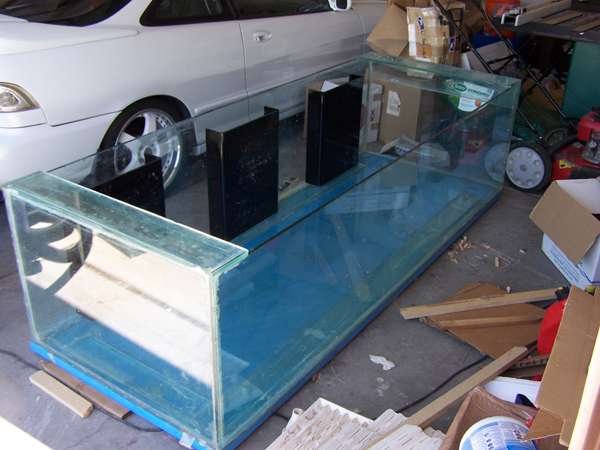 I can re-use the end braces, they need to be removed anyways as I plan on pulling the rear pane and drilling it. 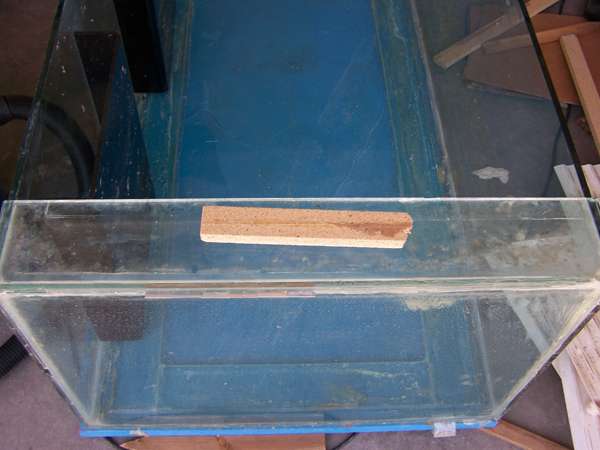
__________________
______________________________ Colorado is sweet. I'm always down to go to the MJ My Turbo Honda -> Click little red house. Friends don't let friends buy from Front Range Aquatics |
|
#3
12/12/2007, 05:03 PM
|
|||
|
|||
|
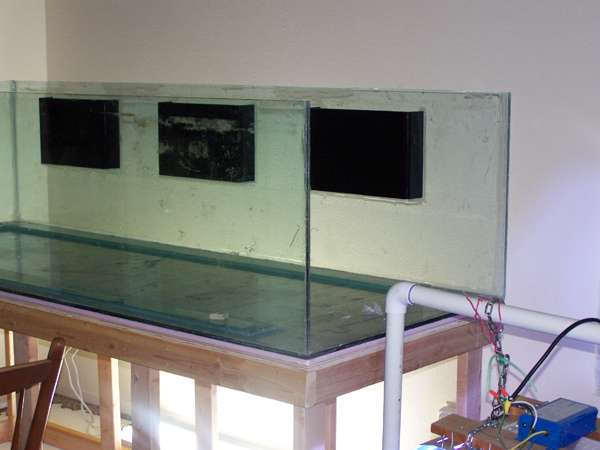
The bracing is off of the tank.
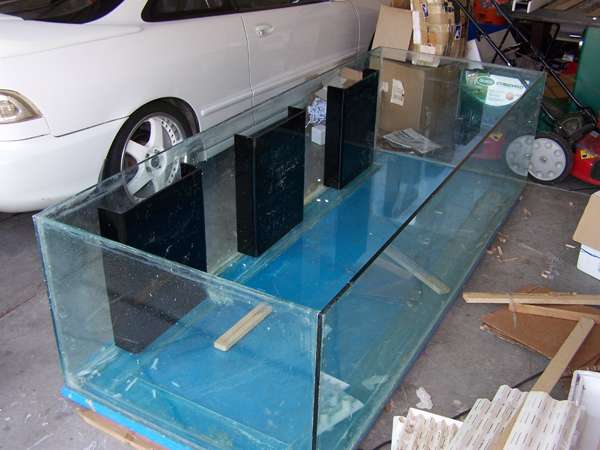 There are a few problems I can see off hand. I am going to have to knock those out. The last thing I want is water on the floor... I am already a pretty good spiller, I don't need the hardware helping me. The silicone is not so good. It held water, but that is because a lot was gooped on. Once I cut all of the silicone out of the inside of the tank the back panel had very little if anything holding it in place.  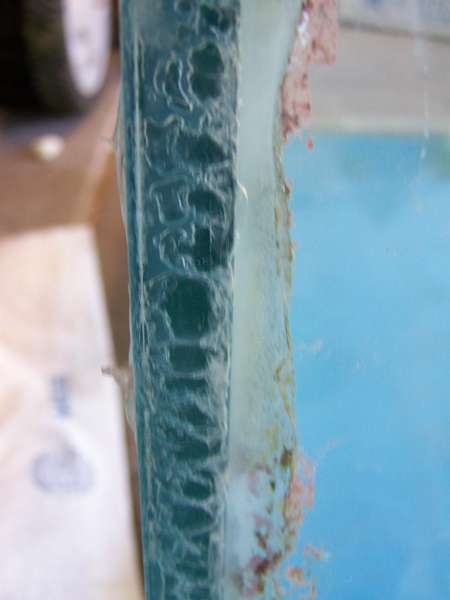 I cut the panel off and cleaned it up. It was moved inside were I setup my drill press. I drilled holes for 9 1" bulkheads. After drilling was over and the pane back on the tank the overflows were trimmed to fit. I found a nice box that worked great for supporting the overflows as I siliconed them in. 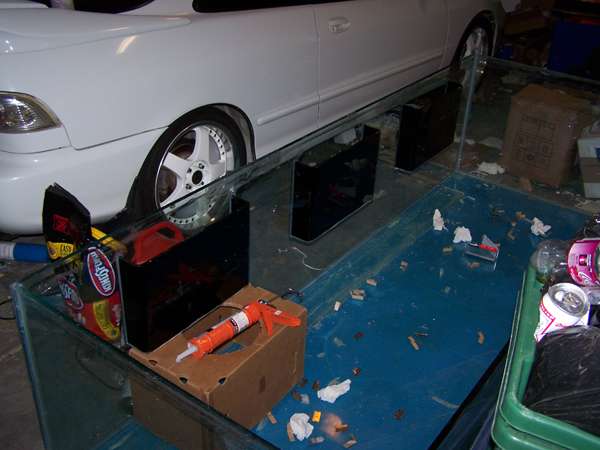 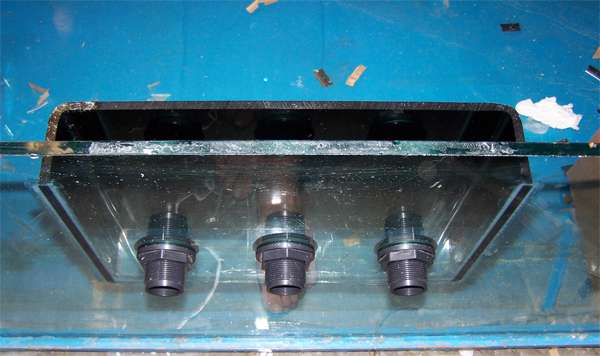
__________________
______________________________ Colorado is sweet. I'm always down to go to the MJ My Turbo Honda -> Click little red house. Friends don't let friends buy from Front Range Aquatics |
|
#4
12/12/2007, 05:03 PM
|
|||
|
|||
|
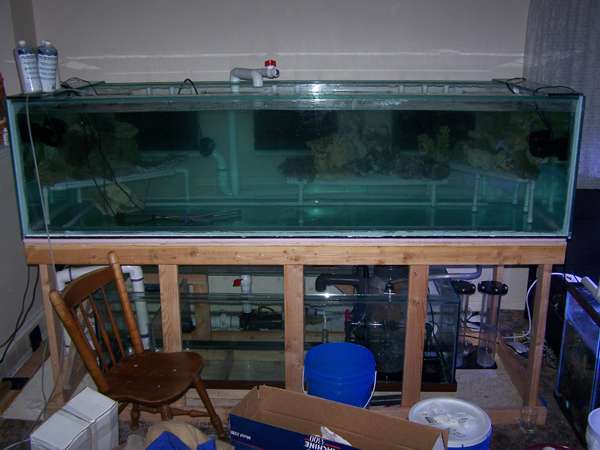
The tank is coming along well at this point. The plan is to move the current tank into a temporary tank but.... there was a slight problem. My 150 burst a seam, dumping about half of the water on the floor. I had a spare 5 foot tank that I had laying around. Everything was transfered into my frag tanks, qt, and the 100G. It was a frantic day. Not going as planned.
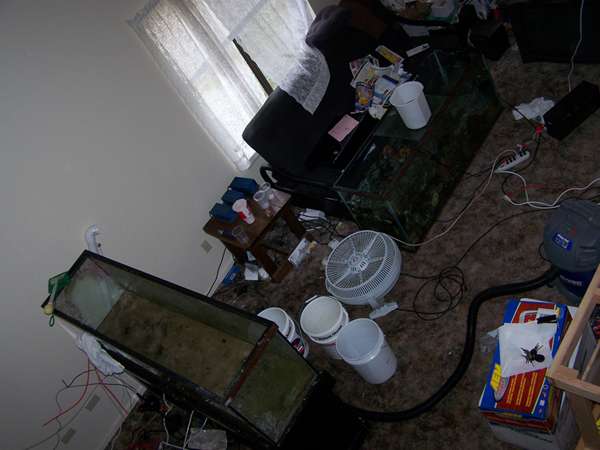 The tank failed due to being out of level and having the center brace removed by it's previous owner. It lasted many years through hard abuse.  This is what it looked like before the break.  
__________________
______________________________ Colorado is sweet. I'm always down to go to the MJ My Turbo Honda -> Click little red house. Friends don't let friends buy from Front Range Aquatics Last edited by tkeracer619; 12/12/2007 at 05:47 PM. |
|
#5
12/12/2007, 05:04 PM
|
|||
|
|||
|
Now that all of the water is out of the way. Back to business.
Time to test fit the stand. Strait from garf.org I am going to put diagonal braces once there is some water in the tank and everything is leveled. 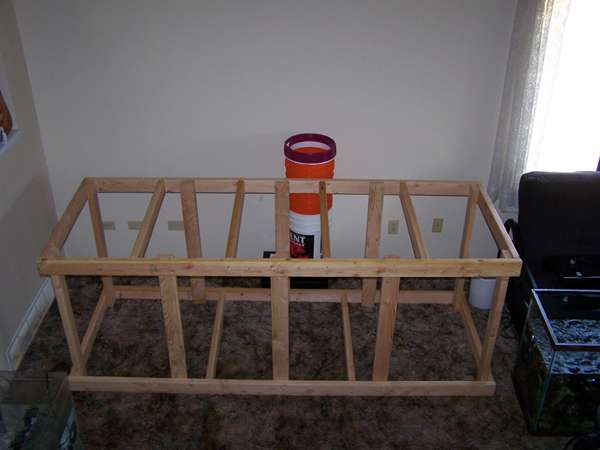 It fits in the spot I want, grab the box cutter! I am tired of waiting.  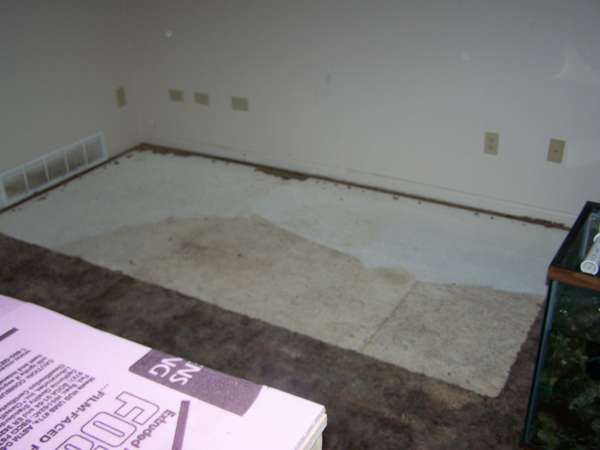 The only way in was the back sliding door. Since this was planned I had a lot of help. This should be easy. A new sheet of 3/4" sanded plywood and foam were installed on the stand as the crowd prepared themselves. 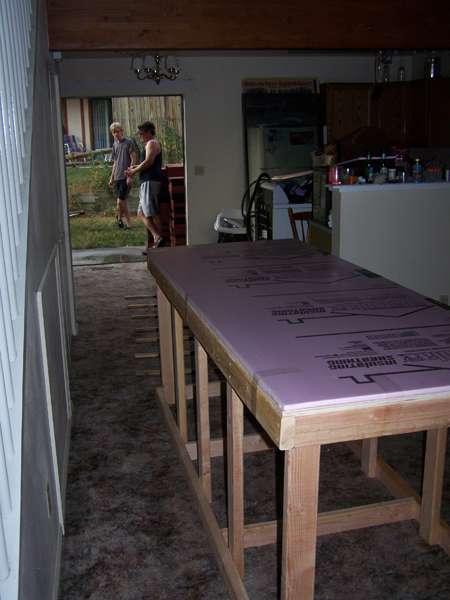  
__________________
______________________________ Colorado is sweet. I'm always down to go to the MJ My Turbo Honda -> Click little red house. Friends don't let friends buy from Front Range Aquatics |
|
#6
12/12/2007, 05:04 PM
|
|||
|
|||
 I rented some suction cups to help transfer it to the new surface. Nobody feels like loosing a finger. 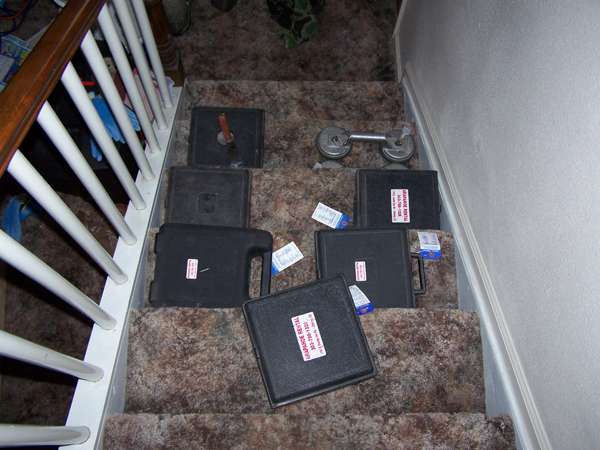 The tank is in place! I am pleased, it doesn't look too big, the 2 story vaulted ceiling is going to help this tank in more ways then one. Before installing the braces and silicone the inside I wanted to test the bottom seams. I had a hard time seeing what was really going on in there.  Damn! A leak!  Its ok, Ill fix it Its ok, Ill fix it 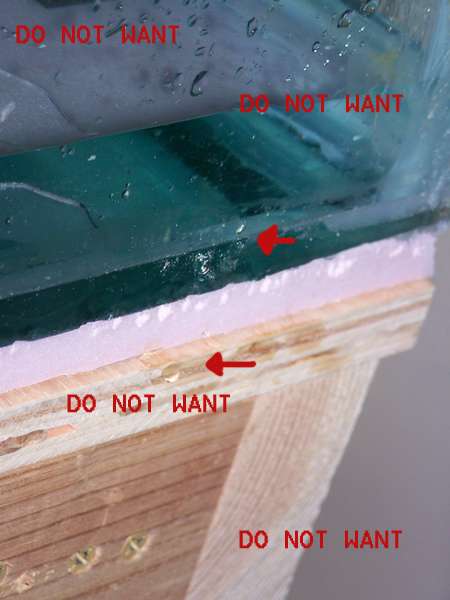
__________________
______________________________ Colorado is sweet. I'm always down to go to the MJ My Turbo Honda -> Click little red house. Friends don't let friends buy from Front Range Aquatics |
|
#7
12/12/2007, 05:05 PM
|
|||
|
|||
|
No reason to rush this thing. It's never worth water on the floor and dead livestock. I removed the front and side panes to re-silicone the structural joint. I didn't intend to rebuild the whole tank. These types of projects have an untold number of hurdles.
 Once it was re-assembled I started on the bracing. The first pieces to go back on are the original end braces. 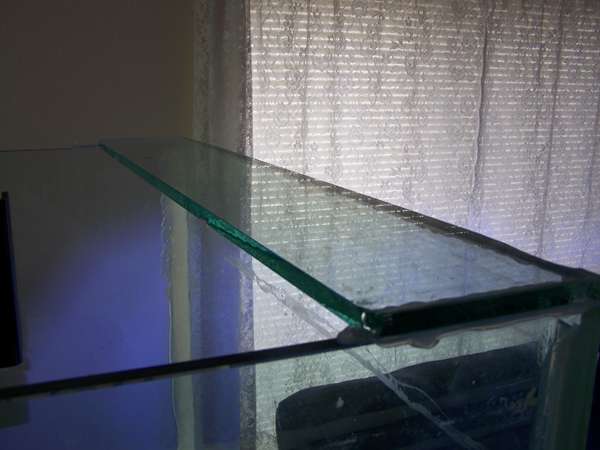 The second set of pieces are the front and rear euro braces. I had the inside edges flat polished for a smooth non sharp edge, they are 4" wide out of 1/2" glass. A simple jig was assembled from 2x4s and ratcheting tie downs. This process was a bit nerving as the glass can get stuck between the end panels quite easily. 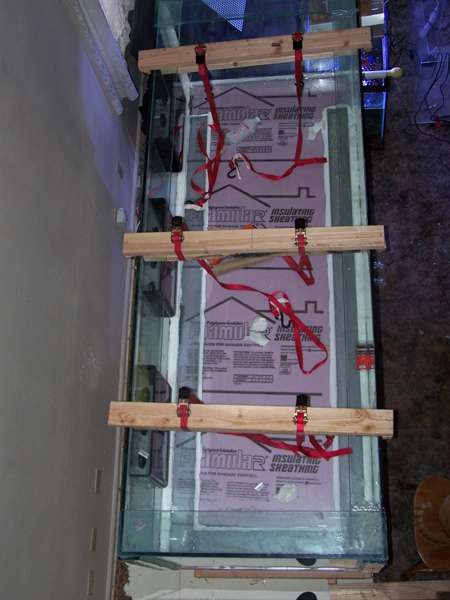 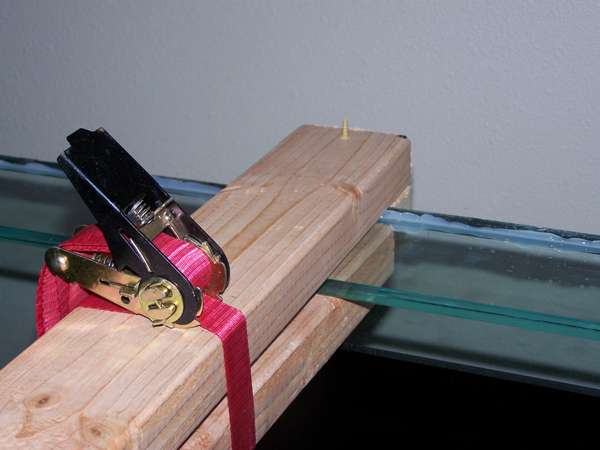 Inside doing some final cleanup before I put the seal on. It's a lot easier when you can get in the tank 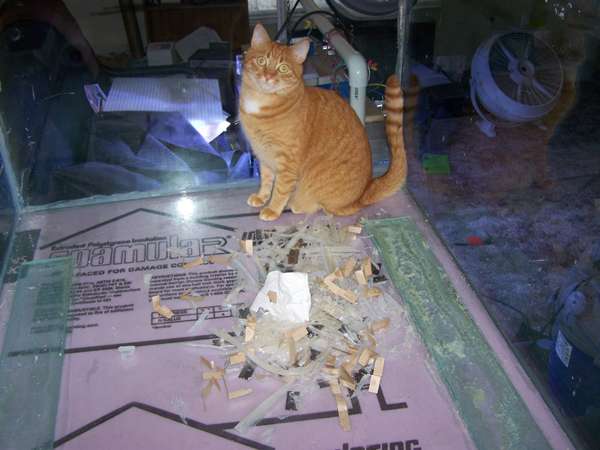
__________________
______________________________ Colorado is sweet. I'm always down to go to the MJ My Turbo Honda -> Click little red house. Friends don't let friends buy from Front Range Aquatics |
|
#8
12/12/2007, 05:06 PM
|
|||
|
|||
|
Originally I was building my own skimmer based on a dart nw but found it more cost effective to buy one. I might end up with the Reeflo Orca but for now this is working ok. It's an Octopus Dual Recirc 250 model.
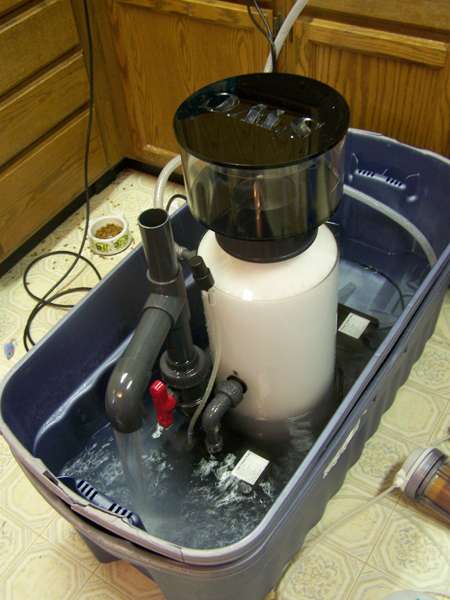 My old tank is back from the dead! I tore apart the tank that burst and had the panels cut down. The scraps were used to make euro bracing  . This was my best and cheapest option for a nice sump. . This was my best and cheapest option for a nice sump. After receiving one defective skimmer, a tense situation, sending it back, and getting the replacement I can finally(weeks later) put the skimmer in the sump and the sump under the tank. I wish I had gone through an official Coralvue distributor. 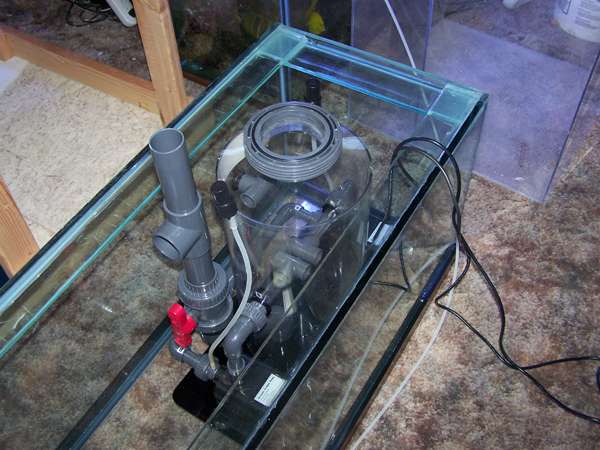 This was also a good time to finish the euro bracing and level the sump. 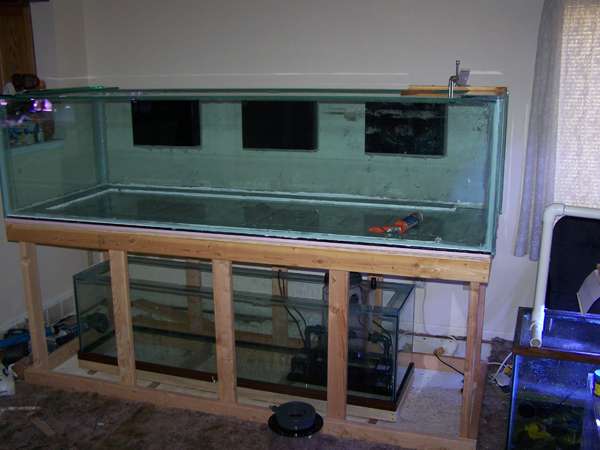 This step went as smooth as it could in the plumbing isle of home depot. I should have known better. After hours of laying thing out on the floor of HD I came home and got back to work. 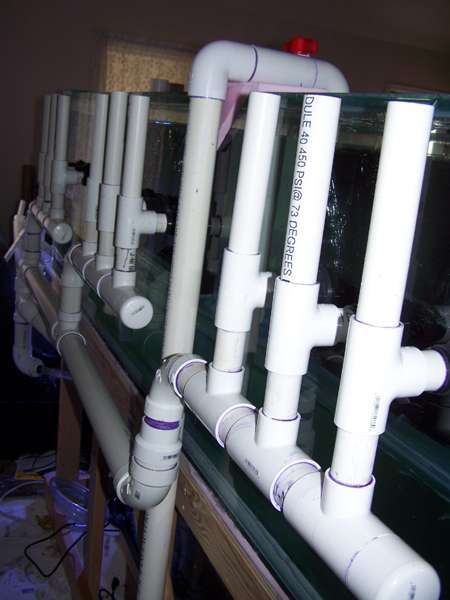
__________________
______________________________ Colorado is sweet. I'm always down to go to the MJ My Turbo Honda -> Click little red house. Friends don't let friends buy from Front Range Aquatics |
|
#9
12/12/2007, 05:07 PM
|
|||
|
|||
|
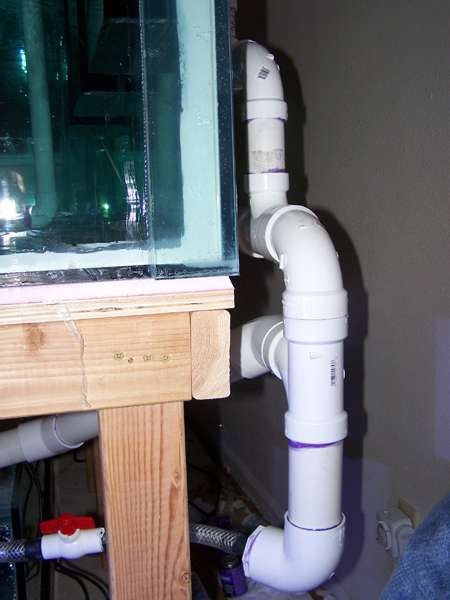
The skimmer water comes directly from the overflow through a Mag7. I had to custom cut all the inlet pieces or the plumbing wouldn't work with the width of the sump.
  The closed loop on my last tank was a dart, I figured it would make a good return pump on this tank.  Before I spend a week filling with RO/DI to learn I need to drain the tank...... I am just going fill it with the hose again. 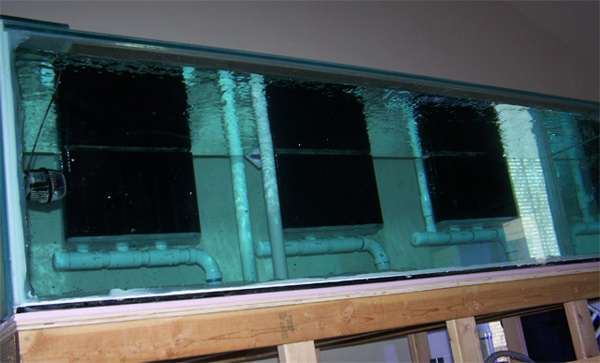 Everything ran great, I drained it and used the time to see what the PVC racks I made would look like. 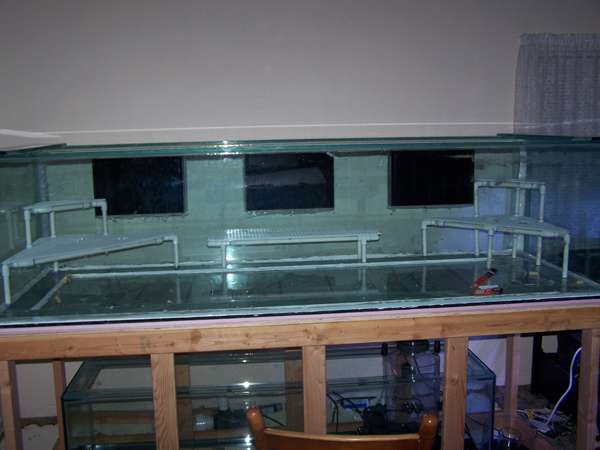
__________________
______________________________ Colorado is sweet. I'm always down to go to the MJ My Turbo Honda -> Click little red house. Friends don't let friends buy from Front Range Aquatics |
|
#10
12/12/2007, 05:07 PM
|
|||
|
|||
|
While waiting on the RO in the display I installed the baffles in the sump and worked on mounting the rest of the equipment.
 UV Sterilizer 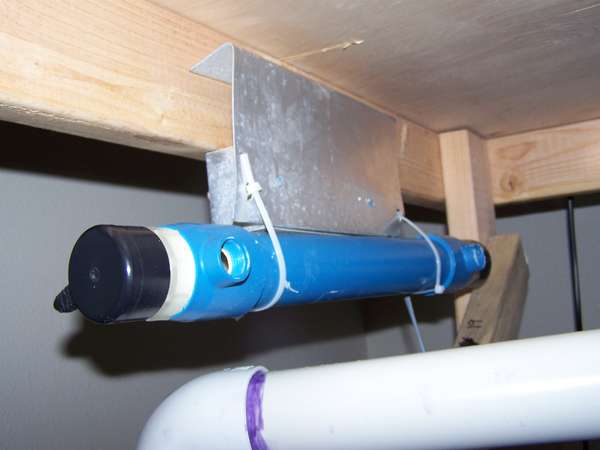 Finished assembling the skimmer.  Found a good spot for the MRC Calcium reactor. 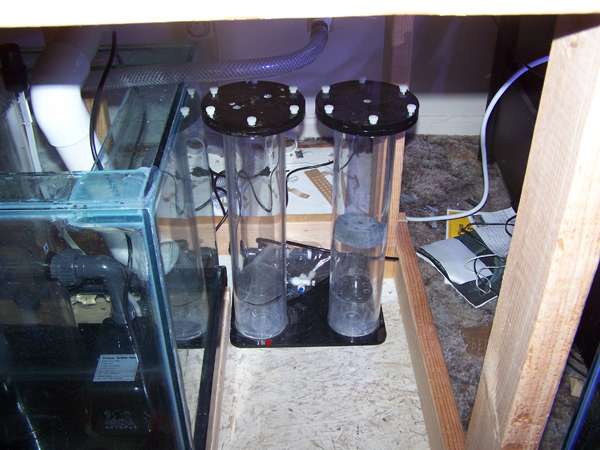 The RO finished after a few days and It was salt time. Check out how I go strait from bucket to tank. I used a 50/50 mix of Oceanic and Instant Ocean salts.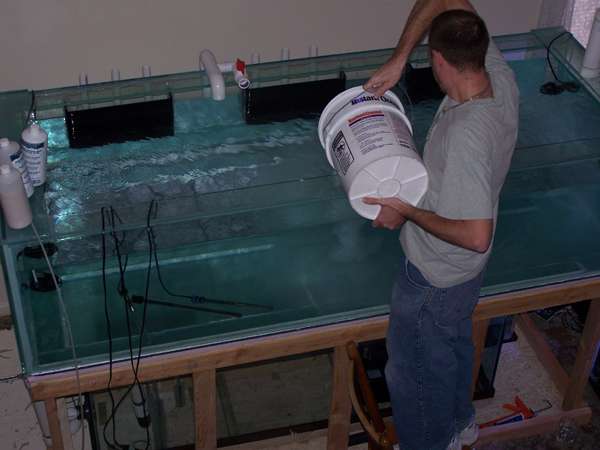
__________________
______________________________ Colorado is sweet. I'm always down to go to the MJ My Turbo Honda -> Click little red house. Friends don't let friends buy from Front Range Aquatics |
|
#11
12/12/2007, 05:08 PM
|
|||
|
|||
|
So what am I going to put in it? I am going to move my rock, fish, and corals from all of my other tanks into this one. It will be a mixed reef.
The rock that came with the tank had great coraline on it but I feel as if I have battled my way through hitchhikers and predators enough times already. All of my current stuff has coraline growth and plenty of good life..... I chose to bleach the new rock to remove all organic material, I will seed it with my current rock and cure it for 3-4 months. The results were fantastic! 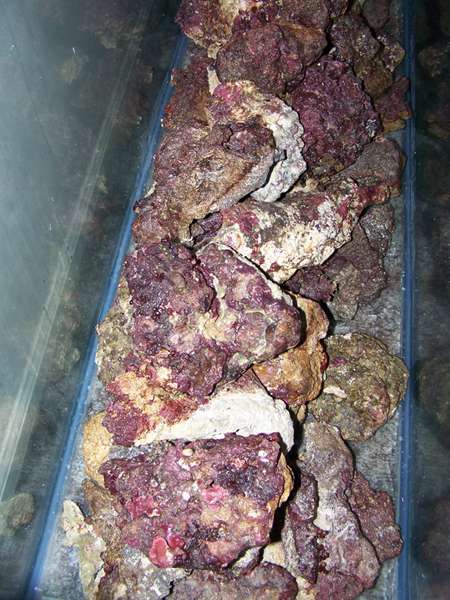 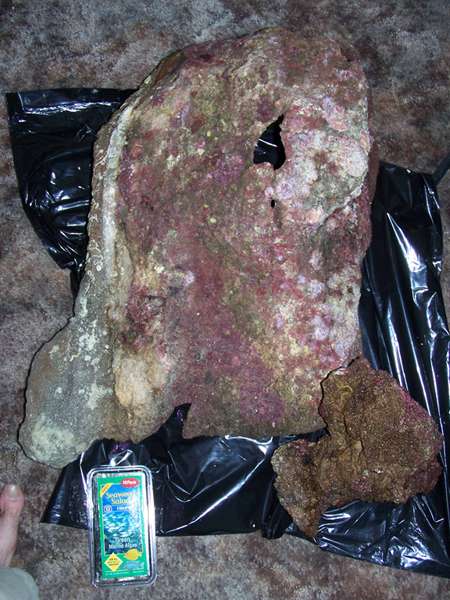 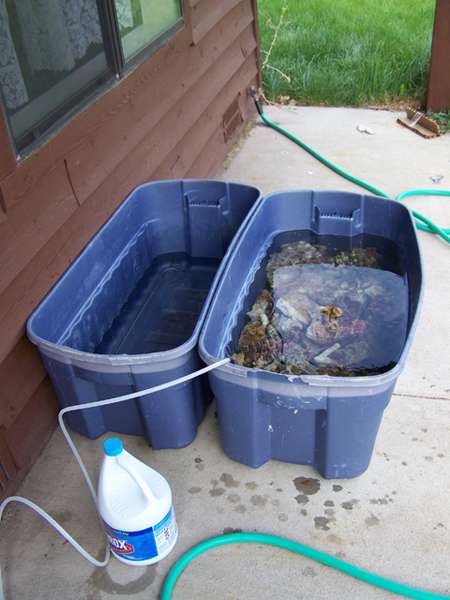 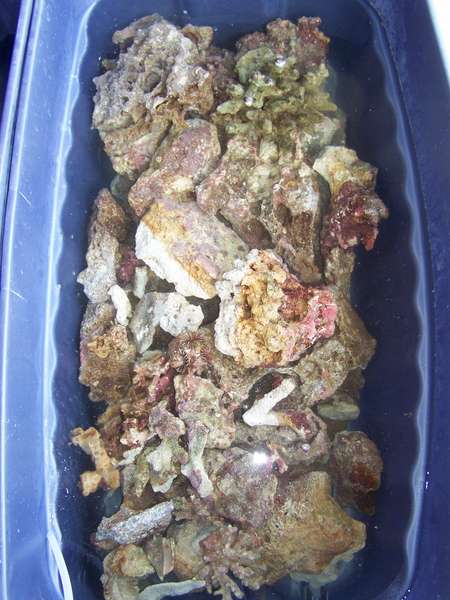 
__________________
______________________________ Colorado is sweet. I'm always down to go to the MJ My Turbo Honda -> Click little red house. Friends don't let friends buy from Front Range Aquatics |
|
#12
12/12/2007, 05:08 PM
|
|||
|
|||
|
Now that the rock was long cured and the tank is finished it's time to start the aquascaping! The first step was to load up the tops of the pvc racks.
  1200lbs of aragonite sand was sourced from local reefers as they broke down tanks or had random buckets available. I bleached, rinsed, and sifted every pound of it. I ended up with very clean, white, sugar sized sand. You get about 3.5 buckets of crushed coral out of 1200lbs if you sift it . This is exactly what I wanted  Add sand, get a sandstorm.... imagine that  As the sand settles out you can see how the return is plumbed. Most of the flow goes through the piping to the front middle of the tank. Loc-Lines were used on the returns to provide easy aiming. 
__________________
______________________________ Colorado is sweet. I'm always down to go to the MJ My Turbo Honda -> Click little red house. Friends don't let friends buy from Front Range Aquatics |
|
#13
12/12/2007, 05:09 PM
|
|||
|
|||
|
A section of Loc-Line was used after a ball valve as a surface break, in case of a power outage it will not drain the display. More rock was also put into place, hiding the main returns.
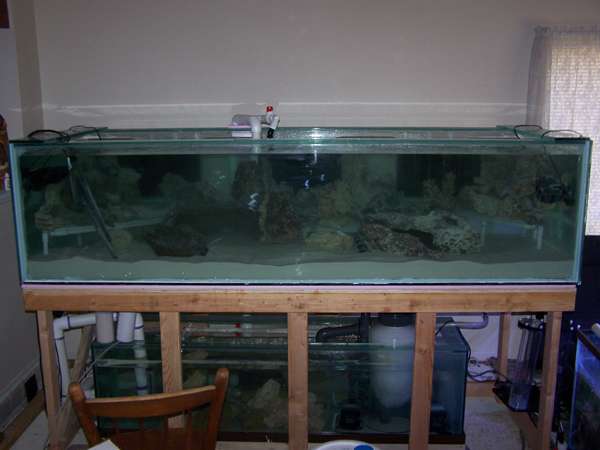 More rock. 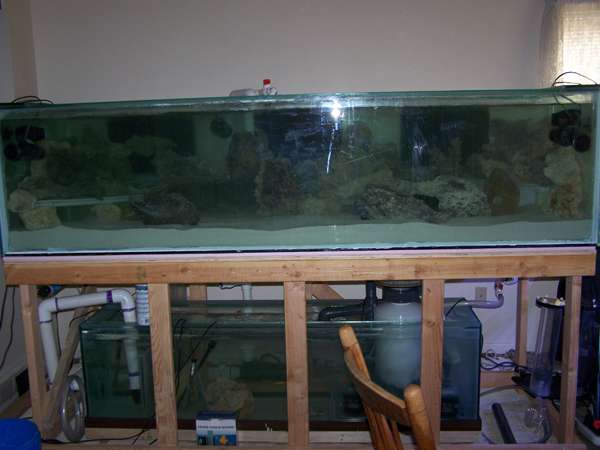 The contents of the 100G are going into the tank. This included the majority of the rock, fish, and anemones. The rest of the coral will have to wait a few days. 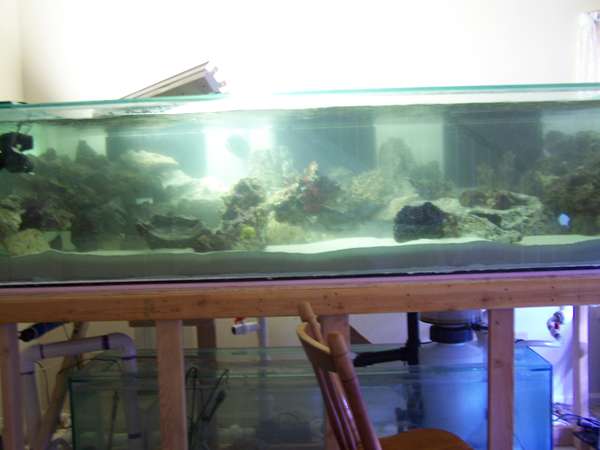 The sand has settled down, the fish are comfortable, and the temporary light fixture is in place. Things are really starting to take shape. 
__________________
______________________________ Colorado is sweet. I'm always down to go to the MJ My Turbo Honda -> Click little red house. Friends don't let friends buy from Front Range Aquatics |
|
#14
12/12/2007, 05:10 PM
|
|||
|
|||
|
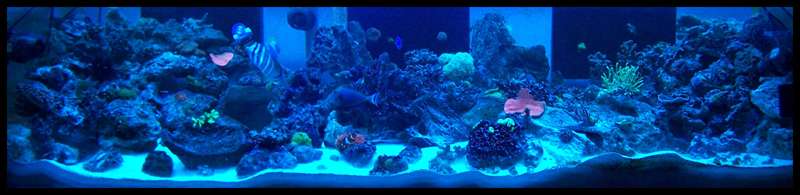
I went through all my coral and put it into the tank. Since I lost a bunch of coral I picked up some nicer pieces from a reefer a few hours away. These will help me with sps trades in the future to stock this with a bunch of sps.
 The two inside 14k bulbs on, all coral in the tank. 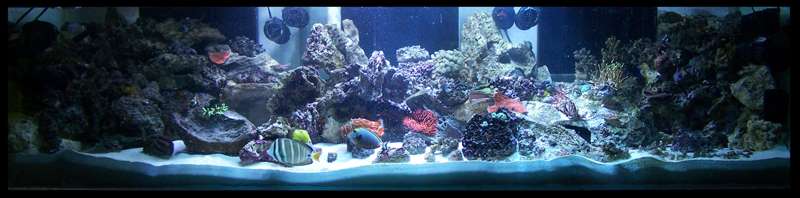
__________________
______________________________ Colorado is sweet. I'm always down to go to the MJ My Turbo Honda -> Click little red house. Friends don't let friends buy from Front Range Aquatics Last edited by tkeracer619; 12/12/2007 at 05:24 PM. |
|
#15
12/12/2007, 05:11 PM
|
|||
|
|||
|
Since this was one of the most extreme DIY projects I have ever done I figured why stop.
Lighting is going to be put together from combining my halide tank with my t5 tank. It consists of 4x 250W 12K SE halides, 4x 54w T5 with Blue Plus bulbs, and 2x 160w VHO Super Actinics. I chose Coralvue ballasts except for the T5 which are powered by Fulham Work Horse 5's. Batwing reflectors Suck, this is a known fact. I ordered sheets of hammertone from sunlightsupply and built my own reflectors with another local reefer. I have a brake and bender that made time fly by. The results were wonderful. The difference in light quality is considerable, if you have batwings you need better reflectors. 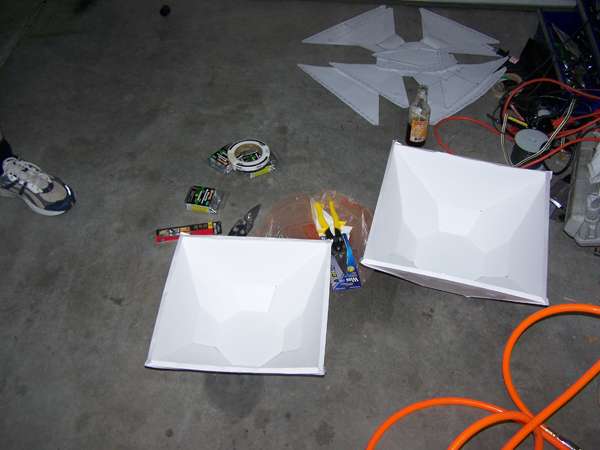  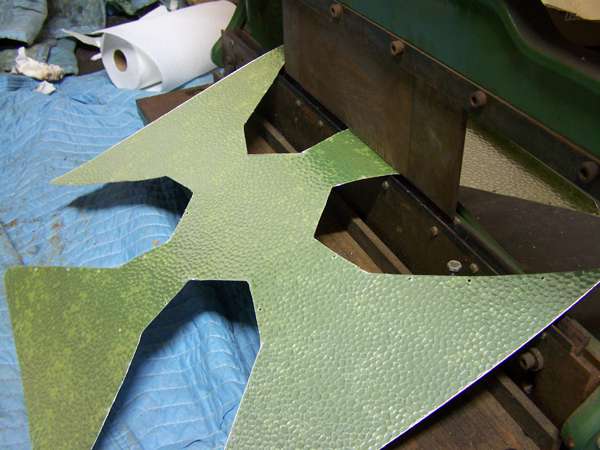 
__________________
______________________________ Colorado is sweet. I'm always down to go to the MJ My Turbo Honda -> Click little red house. Friends don't let friends buy from Front Range Aquatics |
|
#16
12/12/2007, 05:13 PM
|
|||
|
|||
|
The Blue Plus and Super Actinics put a surprising amount of light into the tank. The phosphorescence is incredible.
 The spread is great with these reflectors. Right now I have my old bulbs in them so the corals can get used to the reflectors. 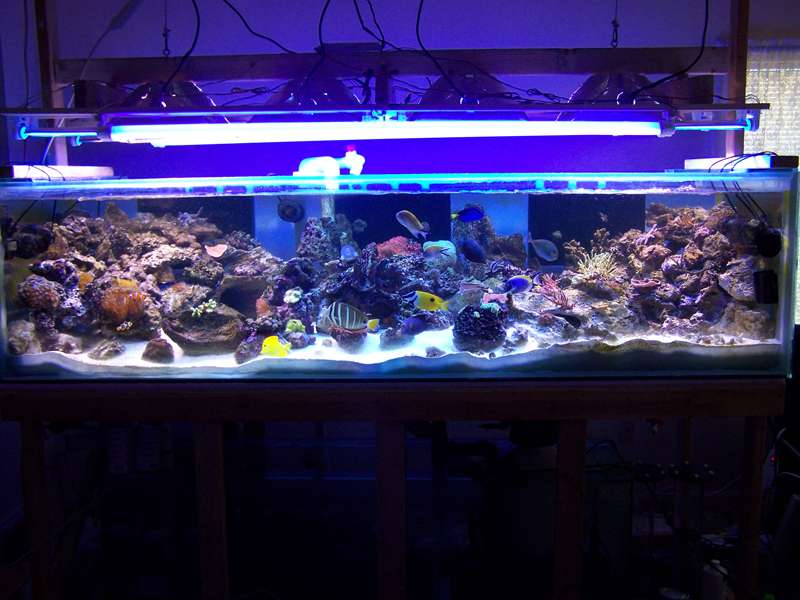 Overall I am very pleased with the setup, at this point it is running great even on a minimal clean up crew. I am using 8x Koralia #4 pumps for circulation. Half of them are modded and I plan on doing the rest as the sand allows. I will probably add a set of Vortecs or a Tunze wavebox in the next few months. Many more updates to come. Longest set of posts in my life I would like to thank everyone involved for making this possible! Thanks again for looking
__________________
______________________________ Colorado is sweet. I'm always down to go to the MJ My Turbo Honda -> Click little red house. Friends don't let friends buy from Front Range Aquatics |
|
#17
12/12/2007, 05:39 PM
|
|||
|
|||
|
Wooot!
__________________
If it it's not broken, don't fix it. |
|
#18
12/12/2007, 05:45 PM
|
|||
|
|||
|
Wow man, sick tank, maad props for posting all those so closely together, however you did it. It makes it SO much easier for us to read when your build posts arn't seperated by 15 people saying "Wow man, sick tank, maad props"
I'll follow the tank, as there is a lot of potential with it and it's obvious that you'll take it to great heights with all of the effort you're putting in to it to just make it right. Cheers, Eric |
|
#19
12/12/2007, 05:54 PM
|
|||
|
|||
|
Great job Mark!!!!!!! Hope to see it in person some day!!!!!!

__________________
MAY THE REEF BE WITH YOU! |
|
#20
12/12/2007, 05:57 PM
|
|||
|
|||
|
Great find on the aquarium and D.I.Y!!!
|
|
#23
12/12/2007, 07:02 PM
|
|||
|
|||
|
Looking good Marc! Great photos and nice reflectors
.---edit--- I hadn't seen the pics of the old seams. They sucked! I can't believe the thing ever held water with that many air bubbles in the silicone.
__________________
Cheers! |
|
#25
12/12/2007, 08:02 PM
|
|||
|
|||
|
=D thanks for the all of the comments! My updates won't let you down
Brandon, I haven't finished setting the calcium reactor up so haven't turned it on yet. It is the factory recomended pump so I assume it should work fine. Mike, the seams were horrible.... you could move the side panes back and forth a bit. I to have no idea how it held, but I saw it with my own two eyes.
__________________
______________________________ Colorado is sweet. I'm always down to go to the MJ My Turbo Honda -> Click little red house. Friends don't let friends buy from Front Range Aquatics |
|
|


 Linear Mode

