|
|
|
#180
 12/27/2006, 03:46 AM
|
|||
|
|||
|
Quote:
Ben |
|
#183
12/28/2006, 02:03 AM
|
|||
|
|||
|
Okay! Just in time from digging out from the last blizzard (I got stuck in another state and my whole holiday plans ended up somewhat discombobulated), I'm here with the promised small update, including some pics. Getting right down to business:
 Here's Bertha! Now, do go back to page 1 of this thread and see if this looks anything like my sketches and crude Photoshops of yore. Oh, heck, I'll do it for you:   Not too bad, right? Not too bad, right? Here's a closer look at the trim work, which is stained to match the wood in other parts of the house. I had to have a "drop-weighted" frame of sorts because the gap below the tank was much bigger than the gap above the tank. I was originally a little annoying by this, but I've quickly gotten used to it in the room, and I think it works just fine. Besides, when the tank ends up finished, nobody will even see the trim anyway! (The dust you see has just statically clung to the acrylic... no worries, it's scratch-free so far.)  Here's a fresh shot of Bertha's back. A few things worth mentioning: the lights and their aluminum bracket and ceiling rails, the corrugated catwalk walkway material (also aluminum), and the black acrylic back panel. Well, it's actually three panels and each can be taken off:  So there's an end view. You can see the acrylic is just velcro-ed on to the back of the tank. The air gap means the back looks different than the side (which is made of actual black acrylic), so I'm waiting to see how this looks in real life. From the front-on view (through the main big panel) it looks okay so far with just water. From the side view, panels at 90 degrees turn into mirrors -- which may also just be fine, but we'll see. Not much I can do about it either way, but it may behoove you to plan ahead if you do a tank like this and be consistent -- either clear or black on all rear sides. I chose the clear for the big back side because I wanted to be able to see into the tank from the back while working on it in the fish room -- otherwise I have to go out into the living room, probably with wet feet or shoes, just to see what I'm doing. No way Jose!  Here's a closer look at the lights. The light rack is made from aluminum ell's and tee's welded together with just the right spacing to hold the six reflectors and the six ballasts, whose cords you can see hanging down right now. The whole rack is secured to four vertical struts which attach to the trolley hardware previously mentioned in this thread (and carefully stolen from other large tank build discussions, mind you). If you notice, there are also two long aluminum struts going horizontally between each of the pairs of vertical struts. This is because before I put those in there the trolleys tended to get into dynamic un-equilibrium with themselves when the rack was slid across the room -- a crazy wobbly, discombobulated sliding effect resulted. By making the spacing rigid, now the whole thing slides like butter. Well, like 300 pounds of butter! You might also notice, if you look carefully, one additional rail in the ceiling. That rail is a lighter-gauge setup that is put there to hold the electrical "tether" that will power all the ballasts. The tether will be made up of several regular extension cords tied together and attached to the many small trolley hooks in the track. When the light rack is in operating position over the tank, the hooks will be compressed together and the cord will be gathered up against the wall. When the light rack is slid across the room to the other side for tank maintenance, the cord will stretch out across the room. So, what looks like it's going to be sort of uncool so far? I had James at Envision design the return bulkheads in kind of the wrong place -- they are going to require clearance for the plumbing ell's that come out of them at the top of the tank, so the light rack can go no lower than you see it -- roughly six inches above the top acrylic panel. That might be fine, or it might be too high... I dunno. I'd love to hear what you guys think. If I had put the bulkheads over a little more, this would not be an issue. One convenient side effect of this potential problem is that the light rack actually clears my short self by 1.5 inches -- so I can walk underneath it even when it is in the middle of the room. (Okay, I have to keep shaving my head...) Cool! I plan to finish mounting the lamps and wiring the ballasts this week, especially if the new blizzard cancels my travel plans for Saturday. It will be nice to see the tank lit up and verify all the lighting is wired and ready for action! The next steps are considerably trickier, and they including ordering the plumbing parts for the sump and return, selecting the sump (and possibly having it built), and bringing in the big skimmer and getting it on an appropriate stand. Oh, and building a water top-off/change/mixing gizmo, and selecting a Ca reactor, and and and... Until next time, Ben |
|
#184
12/28/2006, 11:37 AM
|
|||
|
|||
|
so sweet. that tank looks really nice. you are making some serious progress!
__________________
Jonathan--DIBS Breeder and Card carrying member of the Square Skimmer Brigade (Click on the Red House to see my pics garage) |
|
#185
12/28/2006, 12:03 PM
|
|||
|
|||
|
I think I had the same issue with my return bulkheads. In my case, I reversed the bulkheads from their normal position (so that their long noses stick down into the tank). This lowered the bulkhead clearance. One wouldn't normally do that except that these bulkheads don't need to be that water tight.
Then, use street elbow to make the turn as low as possible and you might gain another inch or so. Sorry, this is the best photo I have to describe it. Tank looks awesome btw. I'm going to steal your idea for hanging the light power cords. Thanks...that's two of your suggestions for lights that will make it to my tank! 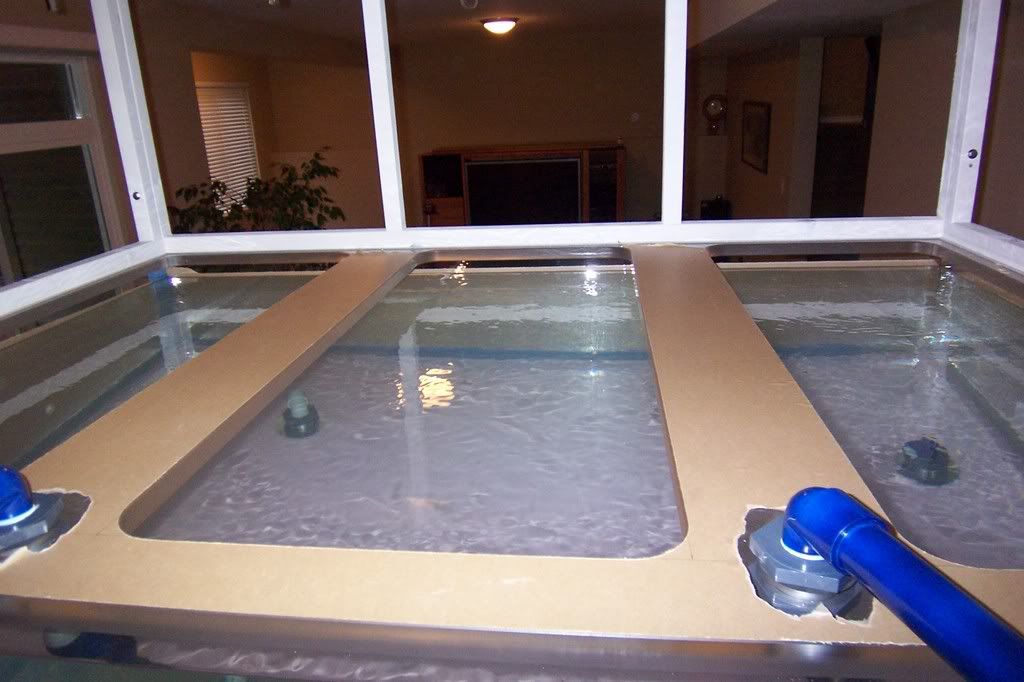
|
|
#186
12/28/2006, 03:25 PM
|
|||
|
|||
|
Quote:
Ben |
|
#187
12/28/2006, 03:32 PM
|
|||
|
|||
|
Did you ever think about cutting down one side of the street "L" using a band saw or hack saw?
I do it all the time to get a tighter look when things need to be in a viewable area of a tank
__________________
Jim C. |
|
#188
12/28/2006, 11:20 PM
|
|||
|
|||
|
Quote:
I got a chance today to install and test all six lamps! Here are the results, even though I'm not sure they're worth much with a dirty tank wall in the dark and a nearly impossible white balance:  And the view from the back:  The good news is that all the hardware is working fine. I now have an extra 250W ballast (from earlier testing) and 10K bulb in need of a reflector. I'll use that for the propagation tank. My extension cords I purchased, intentionally as thin as possible while staying within rated amperage, get a little warm when the lights are on for a while. I hope that's okay. The meter says the ballasts are, true to billing, drawing 1200 watts per threesome. Tomorrow I'll rig together the entire power tether (I need a few extra, individual power outlets up there for moonlighting and in case I change something around, so I will have a total of four extension cords connected together) and attach it to its dedicated rail. I also need to go bonkers with the zipties and attach everything firmly to all the rails on the rack. Then the lights will be done. Can't believe I get to say that about something. Ben |
|
#189
12/28/2006, 11:52 PM
|
|||
|
|||
|
first of all that viewing room and tank are sweet. It can't be said enough!
I am a little uneasy about the whole extansion cord thing with the lamps and I think you should research that to be damn sure that #1. That it is within spec. of the ballasts to run them on extension cords. I have a feeling that is a "no-no". The reason why is that there is a power loss for every foot of wire and the ballasts need a certain amount to operate properly; #2. That the cords you have chosen to use are significantly over-rated for your power draw. If they are getting warm already, that may spell trouble, and FWIU when ballasts start up, they draw a lot more than the running amps. #3. Any connections between extension cords may need to be liquid tight. I say this because I have already had experience with plugs getting corroded by the salt air of the fish room. I wouldn't use ANY extension cords with MH ballasts. It was a problem that had to be dealt with though, and I understand why you want/need to use them. What I did was bring plugs to them. I installed a sub-panel in the tank room and used liquid-tight conduit running to plugs ABOVE the tank. I used wire, plugs, etc. that are made for double the current demand. This enabled me to use the stock lamp cords, which are extra heavy duty, and not worry about power loss or a melt-down. Just something to think about and certainly just an opinion not backed by any professional electrical experience.
__________________
Jonathan--DIBS Breeder and Card carrying member of the Square Skimmer Brigade (Click on the Red House to see my pics garage) |
|
#190
12/29/2006, 01:01 AM
|
|||
|
|||
|
Quote:
One interesting thing I noticed was that the ballast power draw did *not* spike when starting the lamps. I was a bit surprised by this. It is possible that the draw was higher for a tiny fraction of a second, but it was definitely less than half a second if so, because my meter is time-integrated and it showed no significant additional flow over the one second display interval. I was also under the impression that initial draw was much higher, but what I suspect happens is that the ballasts have a capacitor that they load up before they strike the bulb. The other interesting thing is that, through my several power-ons of multiple ballasts, not once did more than a single ballast fire at the same time. It was almost like they knew to wait their turns. However, it might have just been luck -- my sample size was 5. The cords I selected are rated for 14A outdoor-use and the actual draw is just over 10A. I'm not excited about warm cords, but the counterpoint is that everything up there is getting pretty darn warm -- considerably moreso than the slightly warmth I can feel on the extension cords. In any event, I'll be sure to check with the PGS folks about the ballasts and figure out what's up with that. And your comment about water-tight is a good one -- I believe what I will end up doing is sealing all the power connections (there are eight in total; the ballast-HV cable connectors are gasketed) with either a heat-shrink tube or some kind of epoxy. I just want enough pressure to keep condensation from wicking up in there and splashes from reaching in. (I'm actually more worried about big-time water eruptions getting water onto the lamps, which I'm pretty sure would crack them in a heartbeat.) As always, thanks for your input Jonathan. |
|
#191
12/29/2006, 08:08 AM
|
|||
|
|||
|
I was worried about splashes too, but so far haven't had any problem with that, and I do notice water spot marks on the lamps themselves. If you are using (and I am sorry I can't remember rigtht now) double ended lamps, then you would need a glass insert for your reflectors anyway to absorb UV radiation. I am guessing though that you are using single-ended lamps and that they will be open to spray.
About the ballasts, my experience is primarily with M47 and perhaps if you are using electronic ballasts, they don't draw extra power on start up. I have no idea about that and I have never checked the start up amps on mine anyway. Again I cannot emphasize how nice that install looks from the viewing room. It's in a great place because you can enjoy it from the room but also see it any time you use the stairs. Very nice! One of my local reefer buddies actually installed his tank in-wall at a landing in his stair case and I think that is pretty cool too.
__________________
Jonathan--DIBS Breeder and Card carrying member of the Square Skimmer Brigade (Click on the Red House to see my pics garage) |
|
#192
12/29/2006, 10:00 AM
|
|||
|
|||
|
Ben, I have been using heat shrink seals on a dual 400W MH setup now for about 4 years. No issues that I can see. You should be fine with that type of seal.
__________________
Scott Stop and smell the Coral. |
|
#193
12/29/2006, 10:12 AM
|
|||
|
|||
|
Hey Scott! So you have heat-shrinked an extension cord connection? That sounds interesting...must be large diameter heat shrink then. Can you post a pic? How are you removing any existing moisture before you heat shrink, or does that matter? I thought about doing this but felt that the odds were high I would be sealing in moisture.
__________________
Jonathan--DIBS Breeder and Card carrying member of the Square Skimmer Brigade (Click on the Red House to see my pics garage) |
|
#194
12/29/2006, 10:17 AM
|
|||
|
|||
|
Very Very Nice. This is probably one of my favorite tanks I have seen on RC. --even though theres nothing in it yet--
I love the shape of the tank- how it becomes part of the house and actually fits in-- and I love the lighting temp so far! Great Work! I cant wait to see more! 
__________________
-Alien |
|
#195
12/29/2006, 10:22 AM
|
|||
|
|||
|
I haven't ever taken a picture of it. I didn't think it was that big of a deal at the time. The cord I'm using looks identical to the cord that comes out of the fixtures I bought several years ago. Its round, black and slightly larger than the diameter of an outdoor, 3 prong extension cord. Also, I soldered the connections and wrapped them with electrical tape before shrink wrapping them. Don't forget to slide the shrink wrap on 1st
. I think I remember doing that on my 1st attempt...what a dope
__________________
Scott Stop and smell the Coral. |
|
#197
12/29/2006, 02:08 PM
|
|||
|
|||
|
Quote:
In any event, my LA3's have glass spray shields installed in each... so I just have another six flat surfaces to clean occasionally. Ben |
|
#198
12/29/2006, 02:11 PM
|
|||
|
|||
|
Absolutely AMAZING!
Love this shot:  ... and your recent room shot!
__________________
- Johnny Love - Team RC Member |
|
#199
12/29/2006, 07:33 PM
|
|||
|
|||
|
Quote:

__________________
Jonathan--DIBS Breeder and Card carrying member of the Square Skimmer Brigade (Click on the Red House to see my pics garage) |
|
#200
12/29/2006, 07:39 PM
|
|||
|
|||
|
Yes, you heat shrink the splice...
__________________
Scott Stop and smell the Coral. |
|
|


 Linear Mode

