|
|
|
#1
 09/27/2007, 04:23 PM
|
|||
|
|||
|
Well it's that time; for an upgrade. My current tank is a 40g and the new tank will be a 100g measuring 60"L. x 18"D. x 20"H.
So after receiving my wife's blessing the project got under way for the new tank, well it technically is a used tank but new to me so good enough, I plan for the new tank to be a mixed reef. The tank is acrylic and not reef ready so I have dropped it off at the local acrylic shop to have an external box added to the back of the tank for drain/return from a sump. New tank means new stand right I have started on the new stand and have copied a very familiar design here from the boards I am no carpenter but since the tank will be sitting in my living room I have been trying to make it as nice as possible. Still need to figure out what kind of doors but here is where I am at so far.... I plan on a 30-35 gallon sump for this project. Lighting; I have been thinking about the aquactinics MH/T5 classic fixture running 175w Iwasaki bulbs on ice cap ballasts. Flow still have not yet decided; Tunze vortech?? Probably around a 2 to 3" sandbed to deal with as well.. Skimmer is a Tunze 9010 that I just picked up.. Any and all comments & or suggestions are welcome thanks for looking.. Current tank: [IMG] 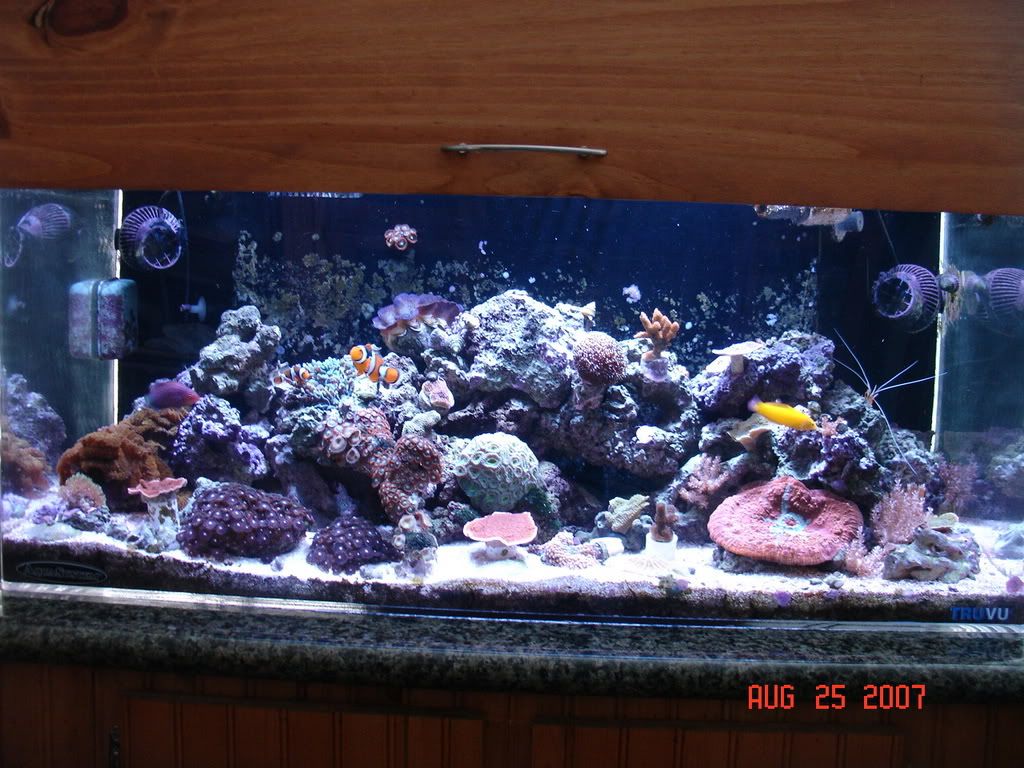 [/IMG] [/IMG] new stand progress: [IMG] 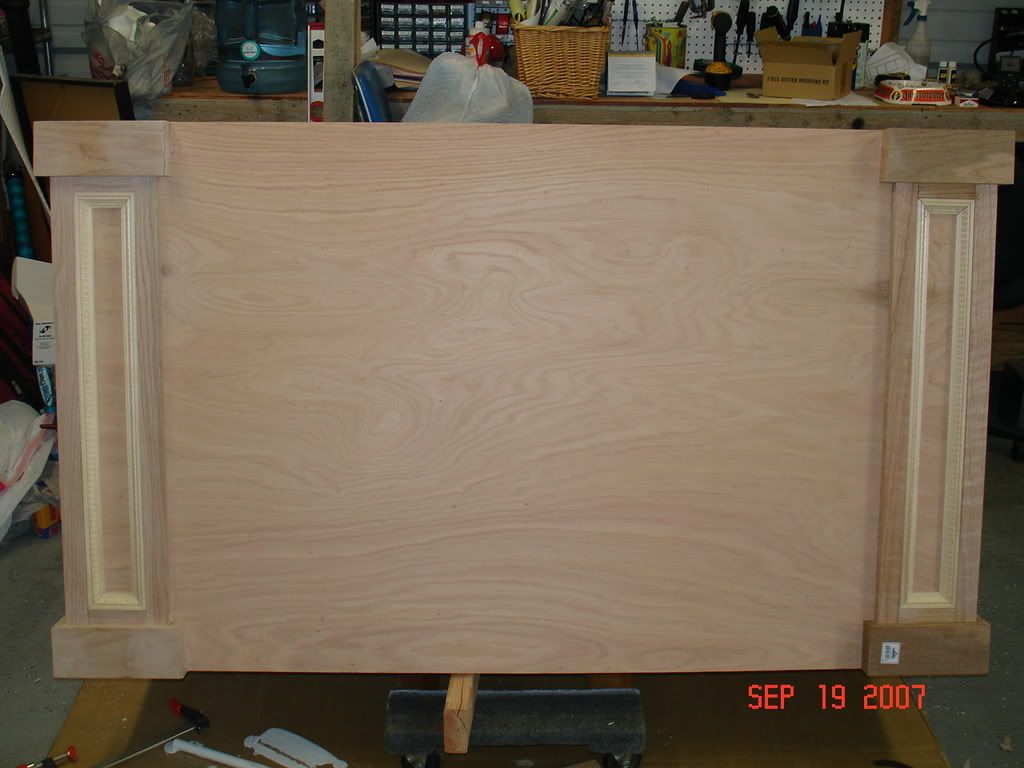 [/IMG] [/IMG]
|
|
#3
09/27/2007, 06:53 PM
|
|||
|
|||
|
Thanks Hop; the 40 has been up & running for almost 4yrs. now, I really like the tank the only real drawback is that it is a converted all in one filtration setup; so the room from front to back is pretty shallow, the only plus side to that is you can't see the lifereef overflow while viewing the tank...
__________________
------- Chris |
|
#4
09/28/2007, 12:07 PM
|
|||
|
|||
|
Well i got the call this morning from the acrylic shop that the tank was ready; so i dropped in over there and picked it up; I still need to decide if I'm going to glue some strips across the 2 openings to form a grate to keep snails & fish out of the box or just let the water flow over the edge in a thin sheet; The box is setup with 2 1" drains & 1 3/4" return. Here are some quick pictures i snapped. Laying on the bottom of the tank is a bag full of pre-cut strips and a lid that covers the whole back area; including the 2 rectangles on the top of the tank.
[IMG] 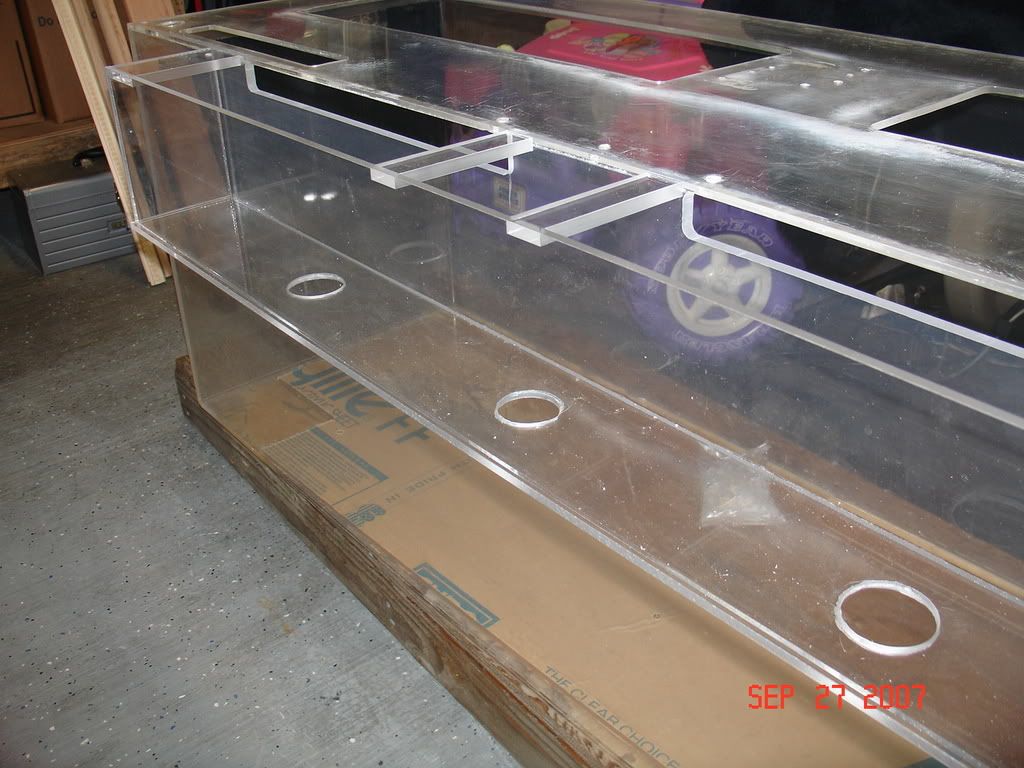 [/IMG] [/IMG] [IMG] 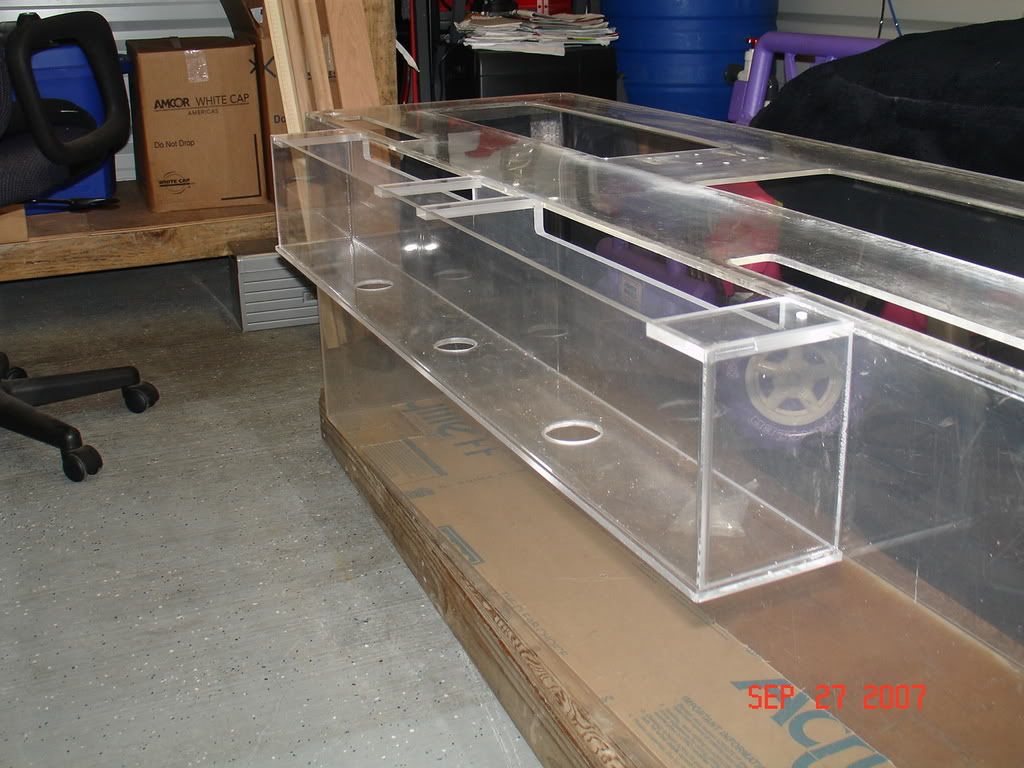 [/IMG] [/IMG] [IMG] 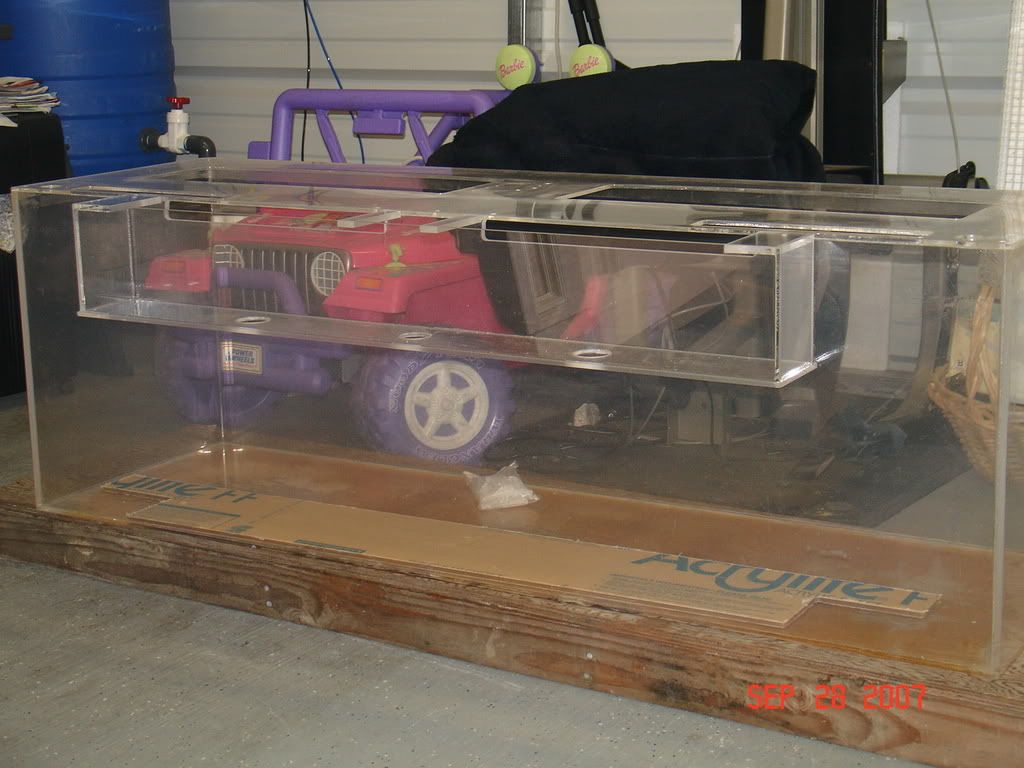 [/IMG] [/IMG]
|
|
#5
10/03/2007, 10:32 AM
|
|||
|
|||
|
Hey Dazed, I got your PM and thought I'd reply in the thread. What are the dimensions on everything? The back wall of the tank is 1/2", the box 3/8" but with 1/2" bracing strips? Also, the distance between the two overflows is 6" or 8"?
Overall, I think that's going to work just fine for you though. Obviously most of the stress is going to be taken by the section where the back wall meets the top, but the bottom of the overflow box should reduce or eliminate any bow in the back wall. I would definitely water test it for about a week (or more if you have time while finishing up the stand) just to make sure all the joints are sound. Also, I wouldn't glue the strips in place over the overflow slots. If you really want teeth of some sort there, you should check out jnarowe's thread in the large tank forum. He has these removable overflow teeth that are very cool. It's like a comb, a big long row of teeth all attached to a single base, and then the base sits in this little channel so the teeth stick up. The whole thing is a single removable piece (making cleaning nice and easy). The little channel (which would be attached to the overflow box side of your overflows) is the only thing that is permanently attached. I want to say he posted pics of them in a thread other than his, but I'm sure if you asked he'd give you a link or a couple pics.
__________________
Michael |
|
#8
10/03/2007, 11:46 AM
|
|||
|
|||
|
I'm diggin that stand. post some pics when your done.
|
|
#9
10/04/2007, 09:36 AM
|
|||
|
|||
|
Woz9683; the overall box dimensions are 42"L. x 4"W. x 6"D. The distance between each of the overflows is 10.5" (2) 1" drains on each side and a 3/4" return in the middle. I did some searching around and I think I found the thread that you mentioned to check out for the overflow teeth is this what you were talking about?
http://www.aquacave.com/detail.aspx?ID=90 I have ordered the bulkheads and plan on water testing the whole system in my garage before moving it into the house just to be safe. Quote:
|
|
#10
10/04/2007, 09:46 AM
|
|||
|
|||
|
mg426; thanks...
thor32766; I had not thought about it being a custom tank more of a used tank that has been converted, lol; nice picture in your avatar by the way I have an american bulldog at home. filmoholic; thanks I will post some more when I get a little further along, right now I am waiting on the doors to get done.
__________________
------- Chris |
|
#11
10/04/2007, 12:44 PM
|
|||
|
|||
|
Thats a sweeet Jeep! Is it lifted? I wish they had the purple Goodyear MT/R's when I had my Jeep, I would have got those instead of the black ones.
Stand looks cool, the overflow boxes on the outside looks great also. Look forward to some updates. |
|
#12
10/04/2007, 06:58 PM
|
|||
|
|||
|
AHH; yes those are the ever rare and limited edition purple swamp monsters, lol. The one and only reason my daughter wanted the jeep, "but dad look it has purple wheels" her favorite color.
__________________
------- Chris |
|
#15
10/05/2007, 11:10 AM
|
|||
|
|||
|
Quote:
|
|
#16
10/05/2007, 11:14 AM
|
|||
|
|||
|
Quote:

|
|
#17
10/05/2007, 05:52 PM
|
|||
|
|||
|
Nice tank.
|
|
#19
10/08/2007, 09:15 AM
|
|||
|
|||
|
Quote:
|
|
#20
10/08/2007, 09:38 AM
|
|||
|
|||
|
Very nice on the current tank. I have that same chalice you have down in the front on the right.
I have a Vortech in my 120 with about 1" of sand. No sand storms, even at full blast. I think you'll like it. Start with one and see if you need more, especially since it'll be a mixed reef.
__________________
Never argue with idiots. They'll bring you down to their level and then beat you with experience. |
|
#22
10/08/2007, 01:51 PM
|
|||
|
|||
|
Quote:
New 6101: Switchable between the 6000 and 6100 power settings: set to 6100 power option Flow rate: 4,000 to 12,000 l/h (1,056 to 3,170 US gal./h) Energy consumption: maximum 45 W set to 6000 power option Flow rate: 2,500 to 7,000 l/h (660 to 1,849 US gal./h) Energy consumption: maximum 15 W |
|
#23
10/11/2007, 04:39 PM
|
|||
|
|||
|
Dazed you said you were interested in the siphon regulated overflow setup.
Yes it will work with what you have. I would drill a 4th hole (from my understanding you want to use 1 of them for a sump return pump?) in the bottom of the overflwo to accomodate the emergency drain. It can also be placed in the side of the overflow box if you like. |
|
#24
10/11/2007, 04:58 PM
|
|||
|
|||
|
yes that is exactly what I was asking about; and you are correct currently I have it set up as the two outside holes are for 1" drains and the one in the middle is 3/4" and I plan to use that for the sump return.
Then I found your other thread and read through that and it seems to make allot of sense. I would need to add another for the emergency drain but that should not be a problem as there is room in the box for one. I have been using this style of overflow instead of a durso: Would this style still work with the design. Just to make sure I have it right in my head; The #1 drain has no provisions for an airline & is throttled back by a ball valve. The #2 drain is setup with an airline/cap on the top. The #3 drain is slightly set higher than 1 & 2 and is only brought into use during start up of (return pump being off) or when needed as an emergency drain to the sump? Is that correct??
__________________
------- Chris |
|
#25
10/11/2007, 04:59 PM
|
|||
|
|||
|
oops I forgot the link to the overflow style; sorry about that..
http://home.everestkc.net/jrobertson57268/HGB/
__________________
------- Chris |
| Thread Tools | Search this Thread |
| Display Modes | |
|
|


 Linear Mode

