|
|
|
#101
 10/16/2007, 02:30 PM
|
|||
|
|||
|
Redneck 90° clamps
 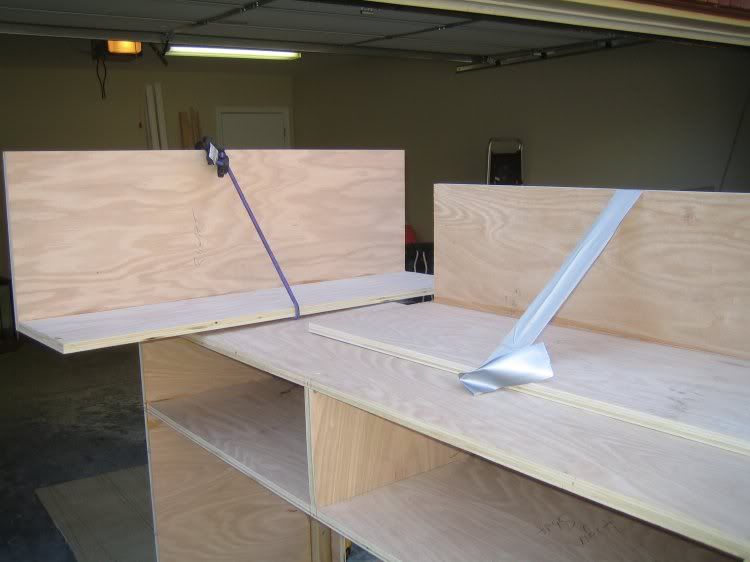 The side shelves 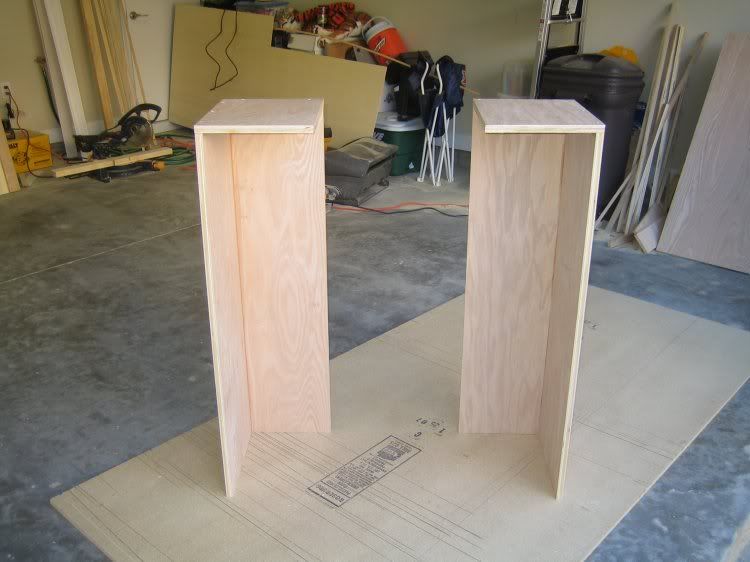 Screwed/glued to the top section 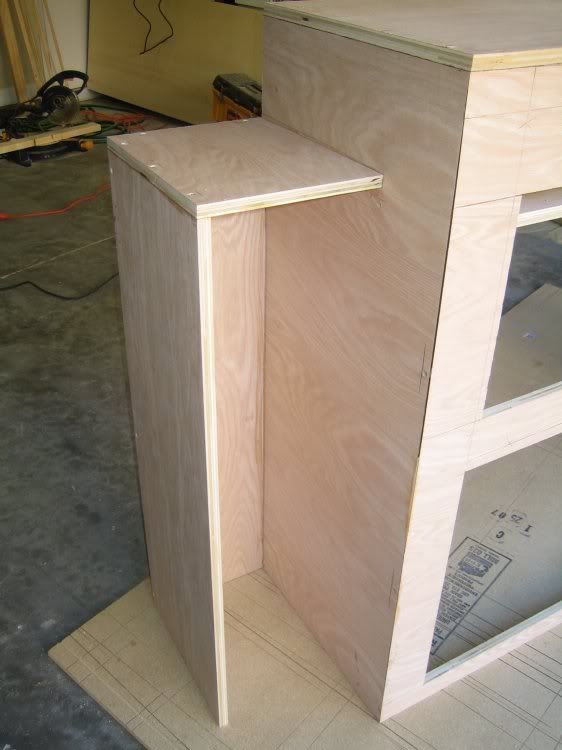 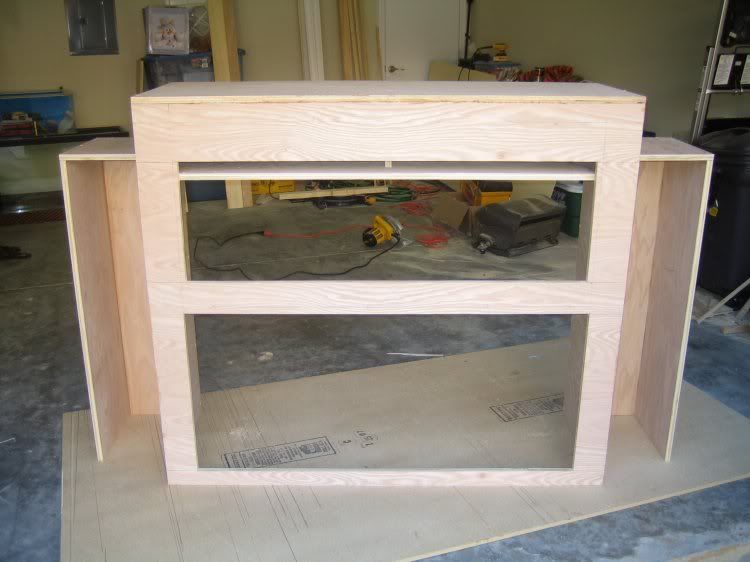 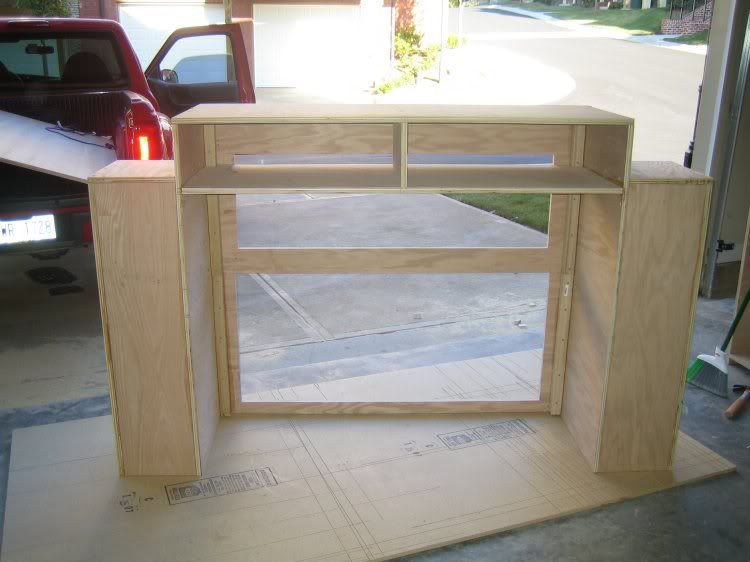
__________________
90g reef/29g sump, DIY cabinet, 2x250w MH, 2x54w T5 actinics, ER RS135 skimmer, VorTech pump, 18w UV sterilizer |
|
#102
10/16/2007, 02:35 PM
|
|||
|
|||
|
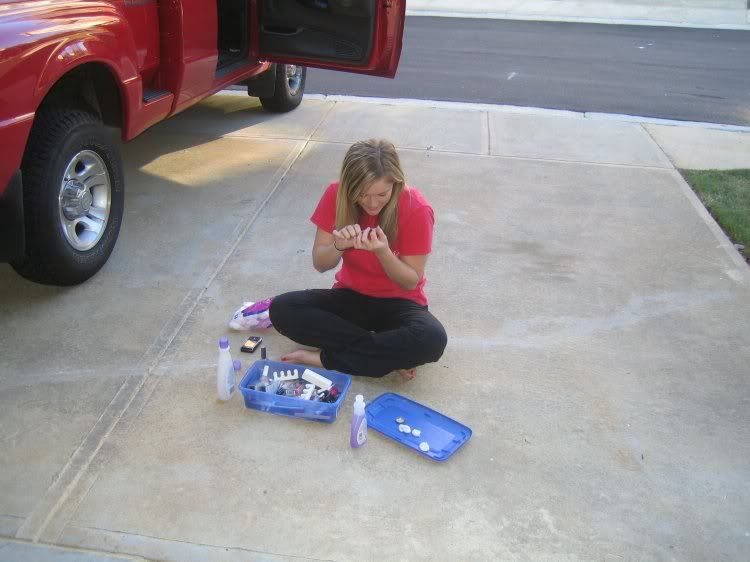
My blue-eyed blonde helper
 Installing the shelves 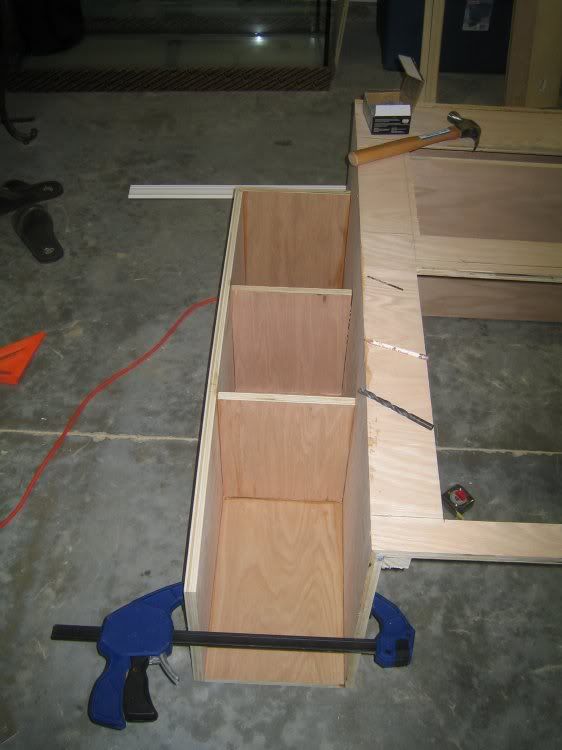 Trim, to hide the cut edge of the plywood shelf 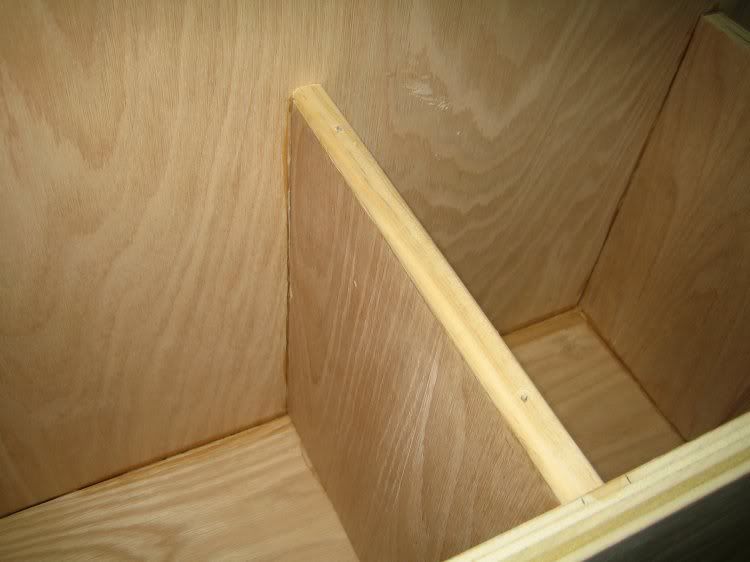  1/4" pine stop trim around the tank display cutout. I positioned the cutout/trim to cover the 1/2" silicone smears at each side of the tank. It worked out well -- now only only clean glass is visible through the front panel. 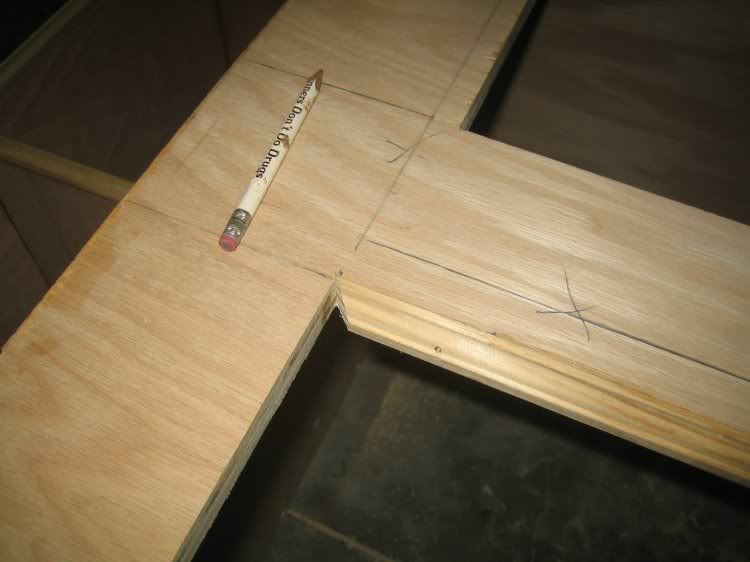 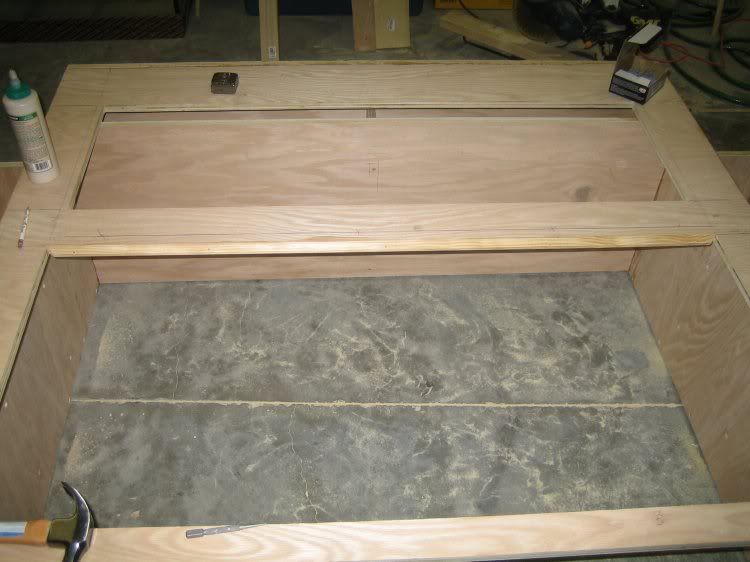 Progress photo, as of Friday night, 10/12/07 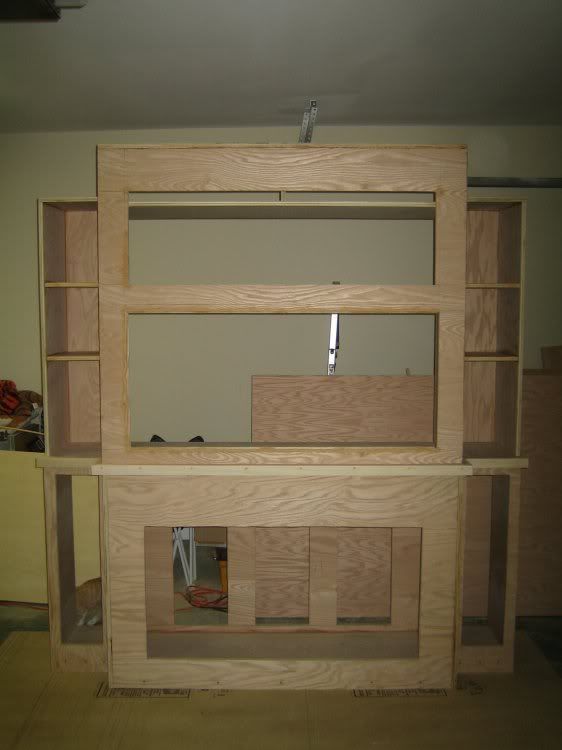 I have more progress to show since that last picture, I just haven't had time to download the pics from my camera and get them on Photobucket (great picture host, by the way). All that's left on the build is crown moulding, hinging & trimming the access panel, and final wood putty/sanding. Hopefully I can finish the build tonight, and start sanding/priming tomorrow night.
__________________
90g reef/29g sump, DIY cabinet, 2x250w MH, 2x54w T5 actinics, ER RS135 skimmer, VorTech pump, 18w UV sterilizer Last edited by RedEDGE2k1; 10/16/2007 at 02:40 PM. |
|
#103
10/16/2007, 05:30 PM
|
|||
|
|||
|
This was obviously going to be a fantastic built from the very beginning and I am looking forward to each installment you post up. I have a rather general question for the woody heads (no pun intended) though; how does the 1x2 poplar trim glued up to the more stable plywood react to humidity? Wouldn't it try to pull out? If there is one thing I learned from Norm, that is not to lock two different material together and pay attention to the grain direction. I see quite a bit cross grained plywood in your built but I presume it wouldn't matter as much since it is plywood which is more stable than non-engineered wood. Any tips, hints?
Thanks again sharing this great adventure with us. |
|
#105
10/16/2007, 09:39 PM
|
|||
|
|||
|
Quote:
To my knowledge, it might be a concern if the wood were left unfinished; but with a couple coats of primer and a couple coats of paint, the humidity resulting from tank evaporation, particularly outside the "hood" area, isn't worth worrying about. If it were, I'd be more worried about our drywall and hardwood floors than the tank cabinet. Also, the 1x2 poplar is glued to the plywood end-to-end. I couldn't pull it off with a hammer, even if I wanted to.
__________________
90g reef/29g sump, DIY cabinet, 2x250w MH, 2x54w T5 actinics, ER RS135 skimmer, VorTech pump, 18w UV sterilizer |
|
#106
10/16/2007, 09:57 PM
|
|||
|
|||
|
Quote:
__________________
If my phaser discharges off by as little as .06 terra watts, it would cause a cascading exothermal inversion. |
|
#107
10/17/2007, 12:00 AM
|
|||
|
|||
|
Interesting thread. Couple quick comments:
1) Forget the bar in between the two doors at the base of the stand - you will hate yourself forever if that is constantly in your way. Instead, afix the bar to one of the two doors so it swings out of the way when you open or close the door. You get the same result without a permanent bar in your way. 2) Next time you are doing cut-outs in plywood consider a router and a drywall straight-edge. Perfectly straight and smooth cuts without splintered edges. Just need to finish the corners with jig saw, but if you use the right router bit you are talking 1/4" or less of touch-up per corner.
__________________
"You are a very fine person, Mr. Baggins, and I am very fond of you; but you are only quite a little fellow in a wide world after all!" - The Hobbit; J. R. R. Tolkien |
|
#110
10/17/2007, 08:10 AM
|
|||
|
|||
|
Quote:
The bar between the doors isn't attached to anything, it will be held in place by friction only....so it's completely removable. I didn't want to attach it to the cabinet doors because in order to keep the doors swingy nicely, I couldn't put enough friction between the bar and the front panel of the cabinet. I'd have to leave a little bit of room for it to move, and this would let light shine through from the refugium light. The cabinet doors are approximtely 21x22" each, and the bar between is only 1", so I don't think it will get in the way. If I had to bet, I'm guessing I'll probably very rarely remove the bar, if at all. Of course, after the sump and everything is in place. I finished the crown moulding last night....wow, what a pain in the butt that was. Last time I played with crown, I used a handsaw and a plastic miter box, and had near perfect results. This time I used an electric compound miter saw and a plywood jig, and had the most miserable time. After 3hrs, I had crown moulding, but the joints were sloppy and will need to be packed with wood filler and sanded a couple rounds. Kudos to those of you who install crown for a living. The cabinet is not complete, with the exception of hinging the access panel above the tank. I have two different sets of hinges, I'm going to build a mock-up tonight and see if (hopefully) one of them will work. Pictures to follow.
__________________
90g reef/29g sump, DIY cabinet, 2x250w MH, 2x54w T5 actinics, ER RS135 skimmer, VorTech pump, 18w UV sterilizer |
|
#111
10/17/2007, 08:16 AM
|
|||
|
|||
|
Quote:
The only tools needed for this job, at least the way I like to do things, are as follows: Rotary saw w/ homemade straightedge jig Drill and drill bits/screw driver Hack saw & miter box Hammer & nail set Power orbital sander (not technically "required"....but lets be real) Thats it for me...it would have been nice to have a nail gun for the trim work, and a router for the cabinet door openings, and clamps of all different sizes/shapes, but hey....I did just fine without all that stuff. I did drop $100 on a jig saw, which I regret, because in the end a $10 hack saw would have accomplished the same thing (cleaning up the edges @ cabinet door openings).
__________________
90g reef/29g sump, DIY cabinet, 2x250w MH, 2x54w T5 actinics, ER RS135 skimmer, VorTech pump, 18w UV sterilizer |
|
#112
10/17/2007, 12:45 PM
|
|||
|
|||
|
Quote:
The fewer loose pieces you have, the better, in my opinion. Something held in place by friction will last as long as the wood (1) dries or (2) expands, which is highly likely given temp and humidity around an aquarium.Here's a build on the last idea. Afix the bar to the back of one of the doors. Then at the TOP and the BOTTOM of the opening (where the bar would fit when the door is closed) place a small piece of backer board (thin wood piece) that sticks up from the bottom of the frame about 1/2" and down from the top of the frame 1/2". Perfectly light-proof and you only have a small nub of wood to work around instead of a bar. I always justify one new tool per project Now I can look at my tools and say - oh, there's the hammer drill I got for the security fence in the pool deck; or there's the nail gun I got for the bar cabinets It's like personal history and functionality all built into one
__________________
"You are a very fine person, Mr. Baggins, and I am very fond of you; but you are only quite a little fellow in a wide world after all!" - The Hobbit; J. R. R. Tolkien |
|
#113
10/17/2007, 12:58 PM
|
|||
|
|||
|
Only one new tool per project??? I mean something this big should deserve at least 2-3 new tools. I mean if you hang a shelf you deserve at least a jack hammer or demo saw...
__________________
If my phaser discharges off by as little as .06 terra watts, it would cause a cascading exothermal inversion. |
|
#114
10/17/2007, 01:04 PM
|
|||
|
|||
|
Quote:
Let us know how the hinge tests for the opening turn out.
__________________
If my phaser discharges off by as little as .06 terra watts, it would cause a cascading exothermal inversion. |
|
#115
10/17/2007, 01:15 PM
|
|||
|
|||
|
Quote:
Jeez, why didn't I think of that?  
__________________
"It is never too late to give up your prejudices" H. D. Thoreau |
|
#116
10/17/2007, 03:15 PM
|
|||
|
|||
|
I finally found some time to post pictures from the build from this past weekend. The build is now complete, with the exception of hinging the access panel door.
The fluted column cap & base. I bought these at Home Depot, they were originally much larger than what you see here. I cut them down to size with a miter saw, to match what I needed. 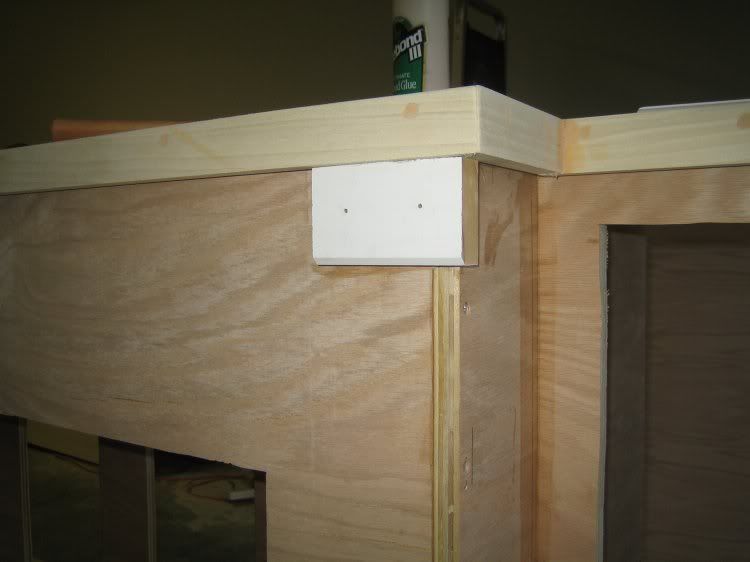 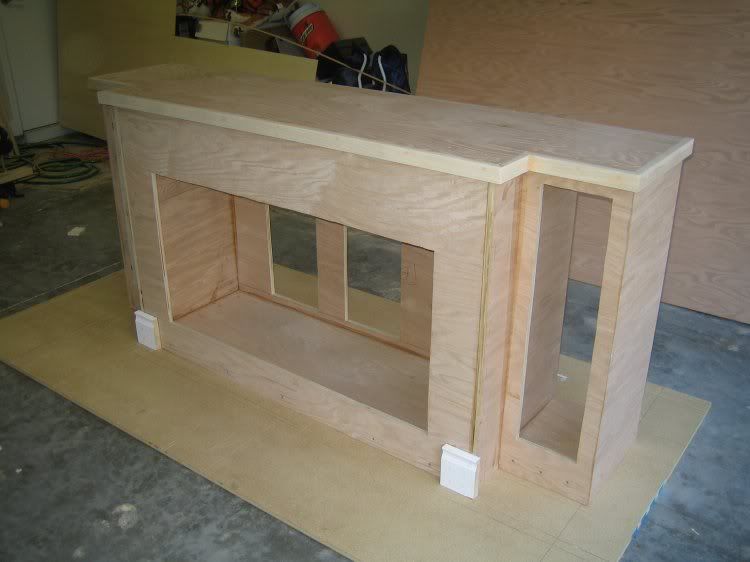 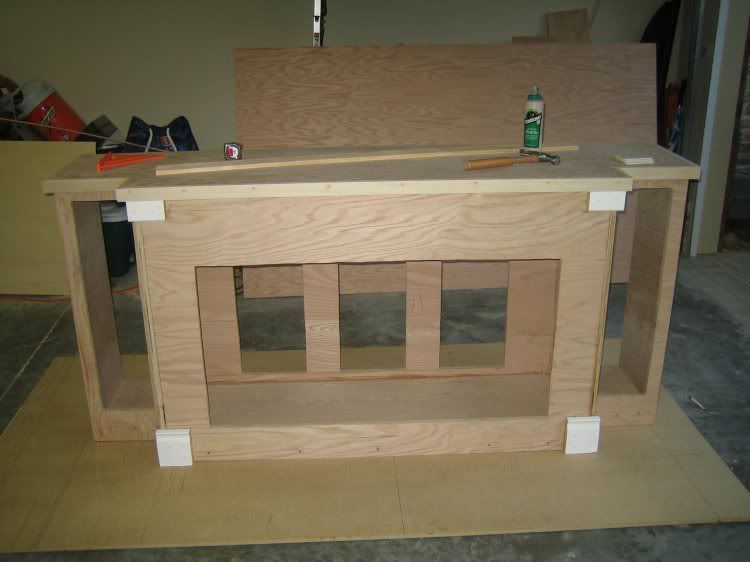 The fluted column trim, also from Home Depot, went in between. It hides the exposed plywood cut edge at the corner of the cabinet. I glued these in place and also used 3 or 4 finish nails to hold them in place until the glue dries. Later I'll fill in all these little holes with wood filler, then sand smooth. 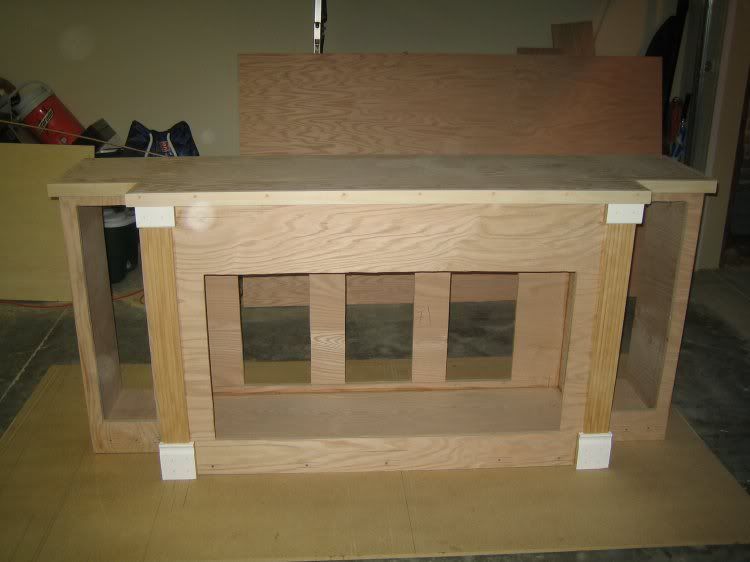 Pre-primed wood base, again from Home Depot. Cuts were made on a compound miter saw. 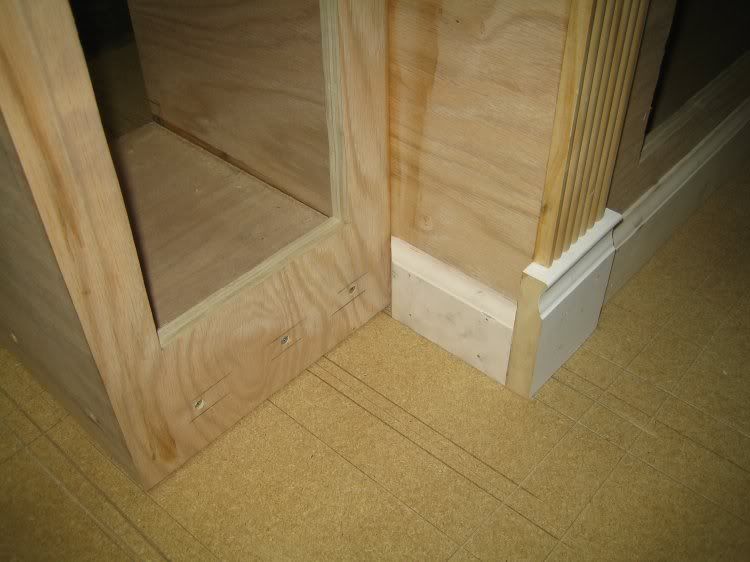 
__________________
90g reef/29g sump, DIY cabinet, 2x250w MH, 2x54w T5 actinics, ER RS135 skimmer, VorTech pump, 18w UV sterilizer |
|
#117
10/17/2007, 03:23 PM
|
|||
|
|||
|
Looking good as usual. Did they let you buy 1' of that moulding for the top and bottom of the column?
__________________
If my phaser discharges off by as little as .06 terra watts, it would cause a cascading exothermal inversion. |
|
#118
10/17/2007, 03:34 PM
|
|||
|
|||
|
As mentioned earlier in the thread, I bought a jig saw to cut out the cabinet door openings. I tried running the jig saw along a straight edge while making the cuts, but it didn't work because of the flexible blade on the saw....the saw tends to follow the blade, wherever/whenever it chooses to bend/stray from the cut line. And once it leaves the cut line, there's no going back and retrying the cut, because the blade will still follow the bad cut (least resistance). Check out the resulting cut:
 To fix this, I used my rotary saw, with the blade depth lever completely loose, allowing the blade to move up & down freely. I positioned the saw blade where it needed to be, with the saw base against a straight edge, and slowly lowered the blade down and into the plywood. Once all the way seated, I pushed the saw along the straight edge. The corners were finished with the jig saw, handheld, by eye. Here's the result, a much straighter cut: 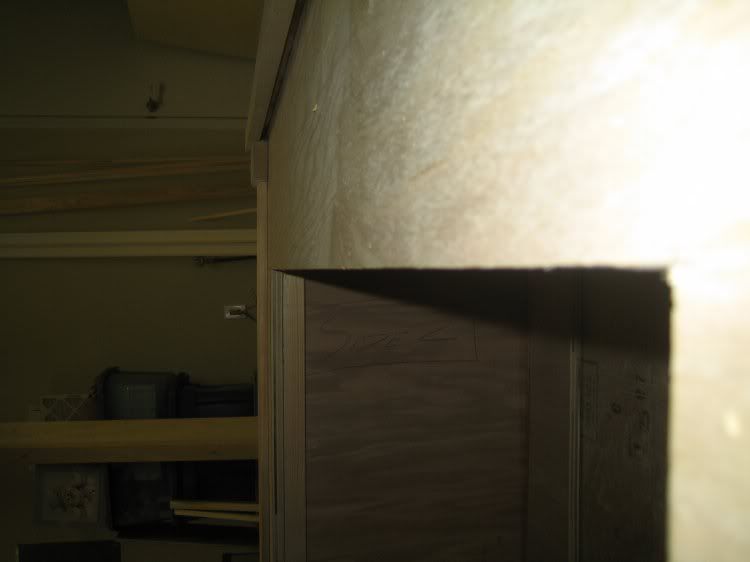 At this point I packed all the screw/nail holes and wood imperfections with Elmer's wood filler, to be sanded smooth later. 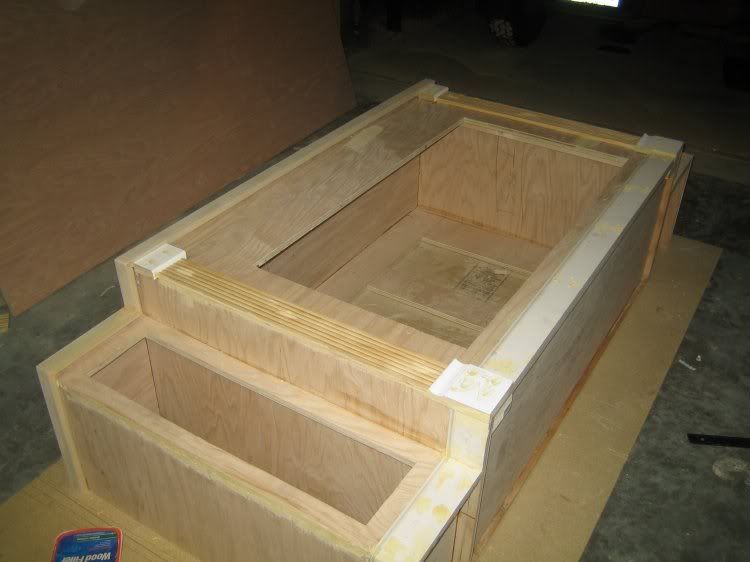 The following day I began the crown molding. Wow...what a pain in the butt. I had three 8' lengths of pre-primed pine crown from Home Depot, and ended up going through all of it before getting things right. The miter cut angles have to be perfect, otherwise the pieces will never line up in the same plane with each other, and you get a resulting bad joint that must be packed with wood filler and sanded. This removes the clean corner of the joint, and leaves a slight rounded look, but hey....whatever. I was just glad to be finished with this stage of the build. 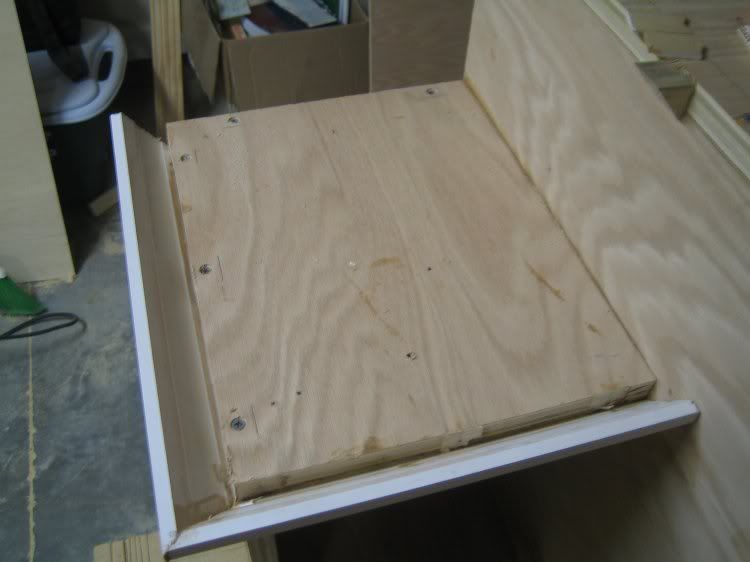  I covered the vertical plywood edge of the left/right shelf sections with this simple pine trim from Home Depot. It has very subtle fluting, to distinguish it from the shelf trim, while helping it match the fully fluted trim columns on the bottom section. I think it ties the two trim selections together nicely. 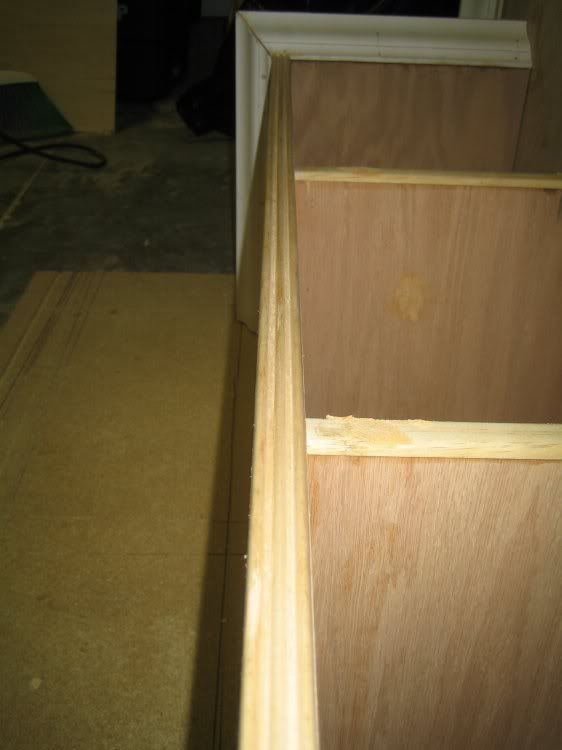 The top section, almost complete. Just needs the access panel to be installed. 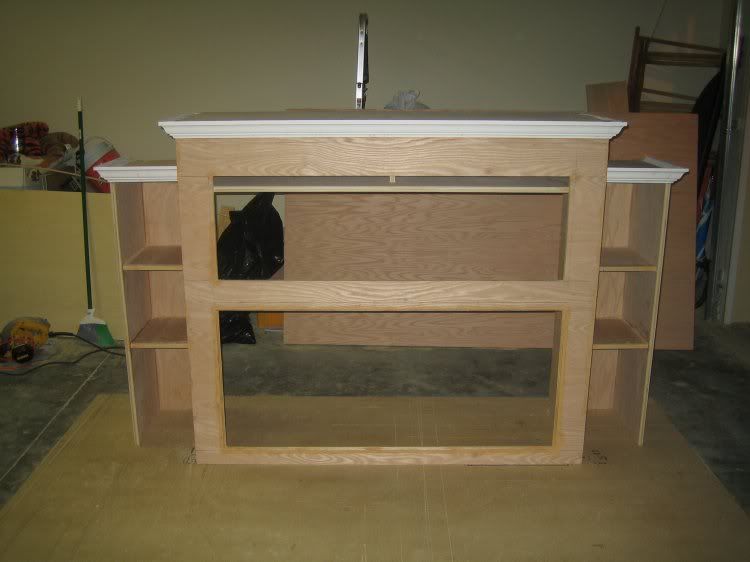 The two sections together, thus far. 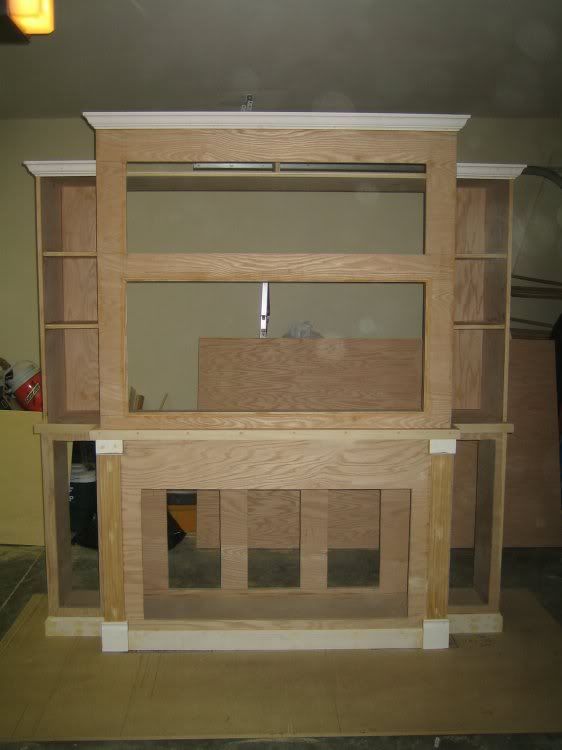 The custom cabinet doors arrived at my office today from www.advantagecabinetdoors.com via FedEx. They were exceptionally well-packed, arriving in a wood crate filled with packing peanuts. They arrived much faster than I expected, I ordered them on 10/2 and received them on 10/17. Keep in mind these are totally custom doors (size, edging, panels, etc) so that turnaround time is surprising. I work for a general contracting firm, so of course the guys in the office were as curious to pry open the crate as I was. The doors look great, I'll post some pictures tonight or tomorrow. However, I paid extra ($1 per door) to have 35mm holes bored for the hidden Euro hinges, but they forgot to bore them before shipping them to me. Oh well...it was only $4 total, so I'm not going to worry about it. I'll just call around to some local cabinet shops and see if they can bore the holes for me on a walk-in after work. Tonight I'm going to build a mock-up access panel and see if the Rockler or the Euro hinges I bought will allow the access panel to swing open, without binding the trim. See my previous post (with pictures) for details, if you missed it. Of course I'll let you guys know how it goes, with a nerdy write-up and a couple of pictures. Take care folks and thanks for showing so much interest! Dustin
__________________
90g reef/29g sump, DIY cabinet, 2x250w MH, 2x54w T5 actinics, ER RS135 skimmer, VorTech pump, 18w UV sterilizer Last edited by RedEDGE2k1; 10/17/2007 at 03:41 PM. |
|
#119
10/17/2007, 03:37 PM
|
|||
|
|||
|
Quote:
__________________
90g reef/29g sump, DIY cabinet, 2x250w MH, 2x54w T5 actinics, ER RS135 skimmer, VorTech pump, 18w UV sterilizer |
|
#120
10/18/2007, 08:14 AM
|
|||
|
|||
|
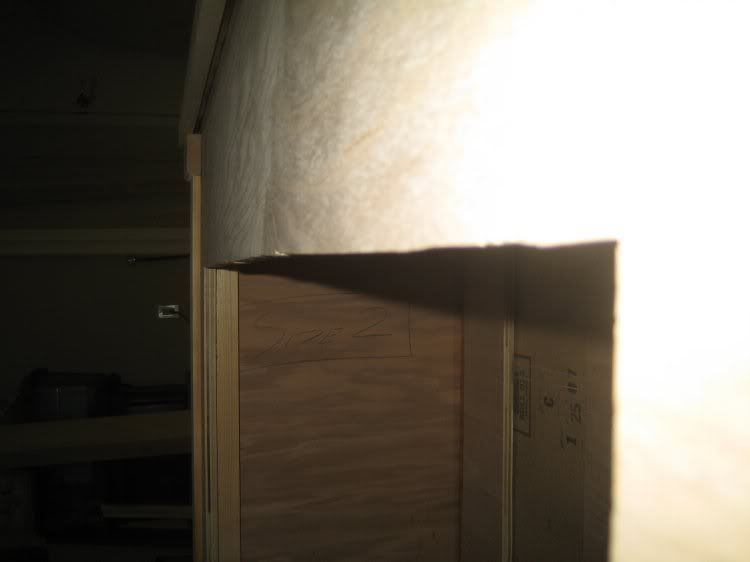
The custom cabinet doors, fresh off the FedEx truck. These are paint-grade poplar, sanded very smooth.
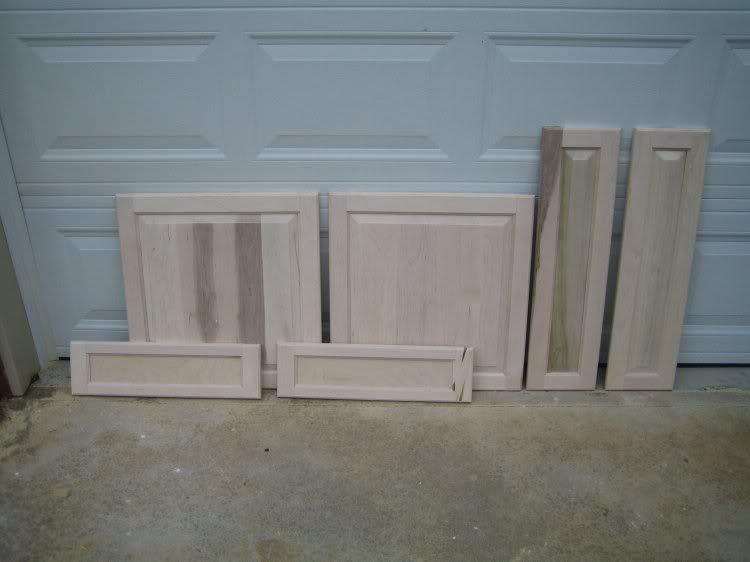 I was very impressed with the quality. Well worth the $28/ea price tag. 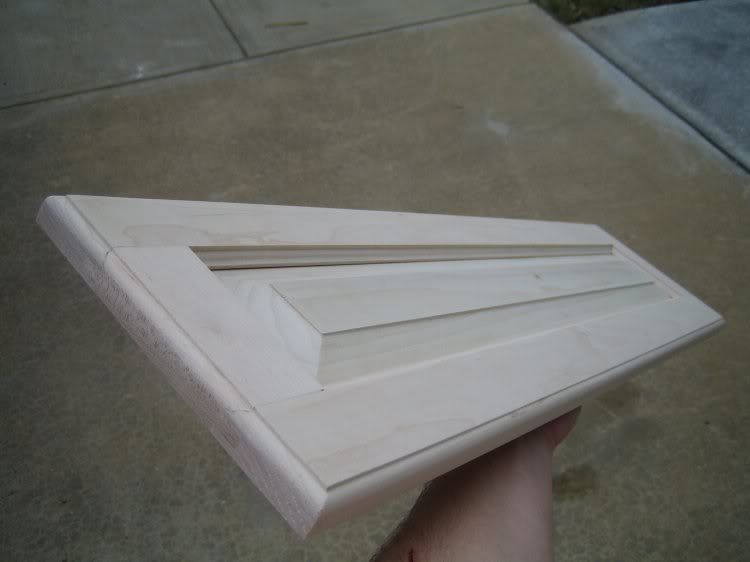 Access panel hinges, #28845, from Rockler. Big thanks to cannarella for suggesting them, as I'm pretty sure (after reviewing several types of hinges from several different manufacturers) that these are the only ones that would work for my purpose. Cheap, too, at $6.99 per pair. I bought one pair to test on a mock-up, before gluing anything into my cabinet or doing any further modifications. 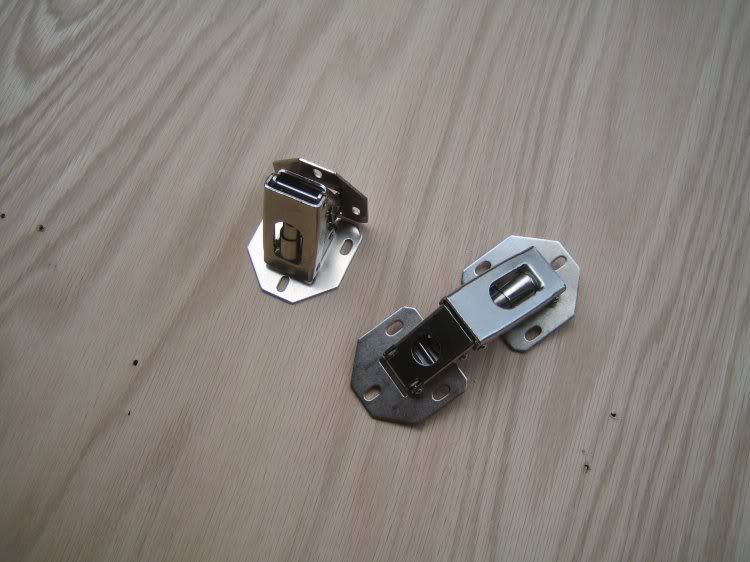 Here, the mockup works great, without trim. These are interesting little hinges, they actually push the door out about 1/4" before lifting it up. Exactly what I needed to happen. Next I added trim to the gap, hoping it would still work. 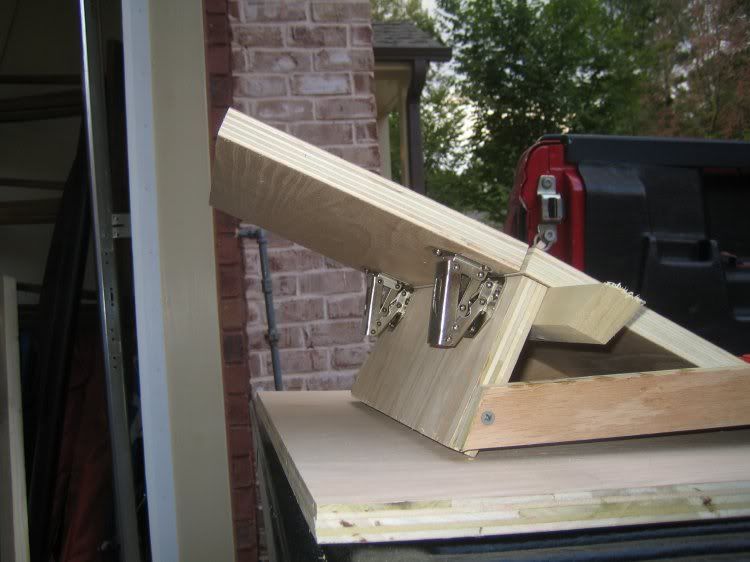 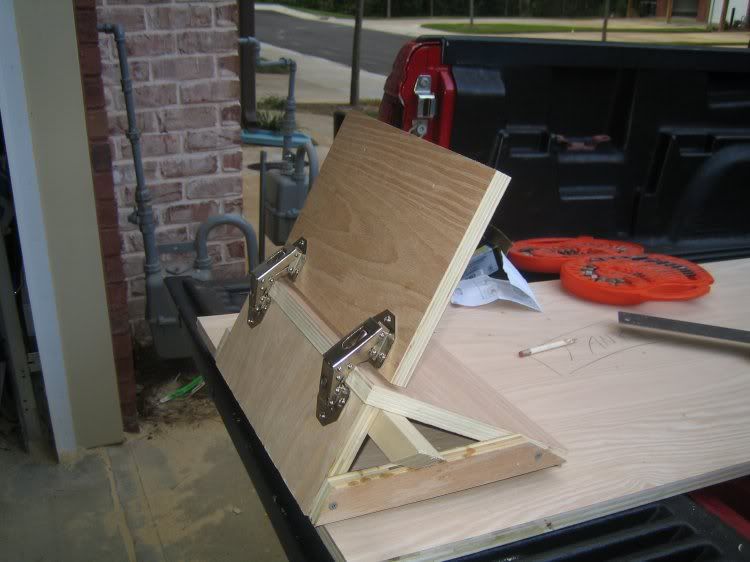 1.25" Pine chair railing trim, with about 3/16" overlap, to cover the seam between the two plywood panels. 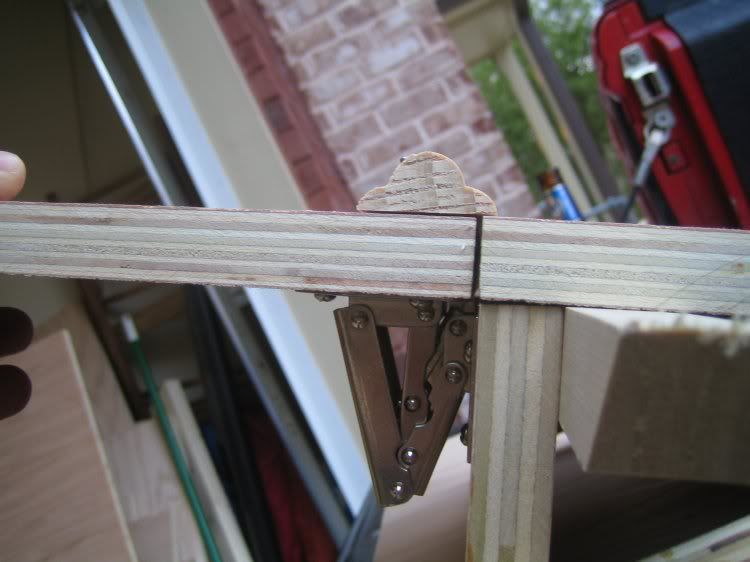 The door open.....and it works! Flawlessly. The hinges even have springs inside them, so the door stays open automatically, and also closes snug. 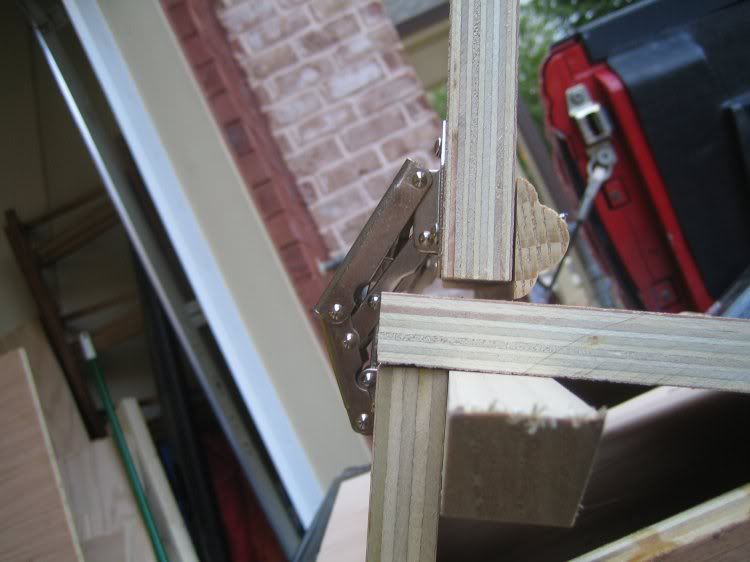
__________________
90g reef/29g sump, DIY cabinet, 2x250w MH, 2x54w T5 actinics, ER RS135 skimmer, VorTech pump, 18w UV sterilizer |
|
#121
10/18/2007, 08:26 AM
|
|||
|
|||
|
Looks great. Remember that on the sides and bottom you can have more overlap on your trim if you wanted. How are you going to make that piece thay goes back to hole the hinges to the cabinet? I also see that you got some nicer plywood on one of your trips to the home center. (the one with more plys) You may need more hinges if you want them to hold the panel open.
__________________
If my phaser discharges off by as little as .06 terra watts, it would cause a cascading exothermal inversion. |
|
#122
10/18/2007, 08:36 AM
|
|||
|
|||
|
Yep, the 3/4" American ply came from Home Depot; the 18mm Japanese plywood came from Lowe's. Same price. However, the Americans were smart enough to use easy-peel glue on their barcode stickers. I had to sand the barcode sticker off the Japanese ply with a power sander.
__________________
90g reef/29g sump, DIY cabinet, 2x250w MH, 2x54w T5 actinics, ER RS135 skimmer, VorTech pump, 18w UV sterilizer |
|
#123
10/18/2007, 08:50 AM
|
|||
|
|||
|
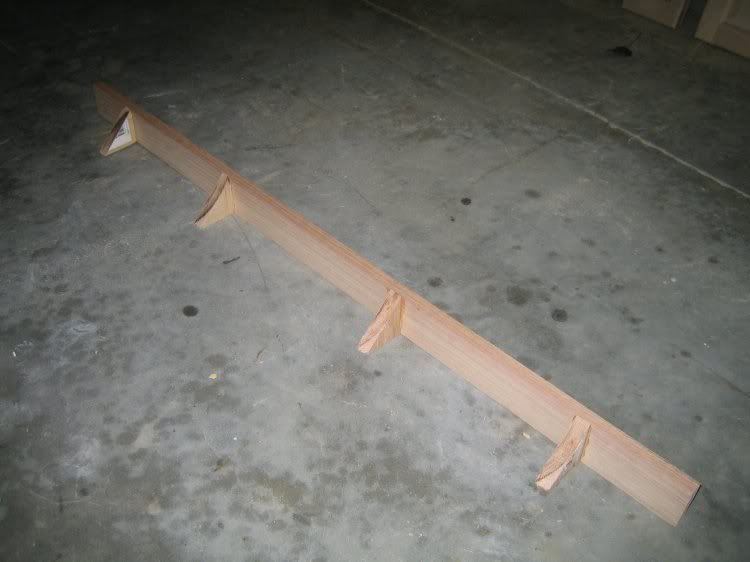
I had to make a support to attach the hinges to inside the cabinet, at 90° to the front panel. Here's what I came up with, using 1x3 oak from Lowe's.
 With the hinges installed.  I had to make a cutout in the light panel, as it was blocking the hinge travel range. I did this using a rotary saw & straightedge, and a jigsaw at the corners/ends. 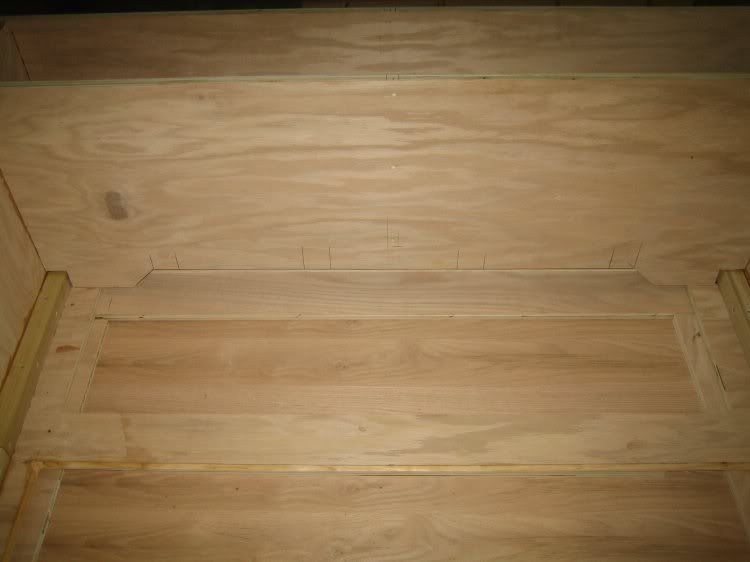 I clamped the support bar in place, then checked the alignment of each hinge the ensure they were in the right position. I needed to adjust the hinges for the right gap, as well as ensure that the access panel door would close flush with the cabinet, etc. The hinges are attached with 3 screws, and are adjustable, so getting them aligned was pretty straight forward. Once satisfied, I screwed/glued the support bar in place. 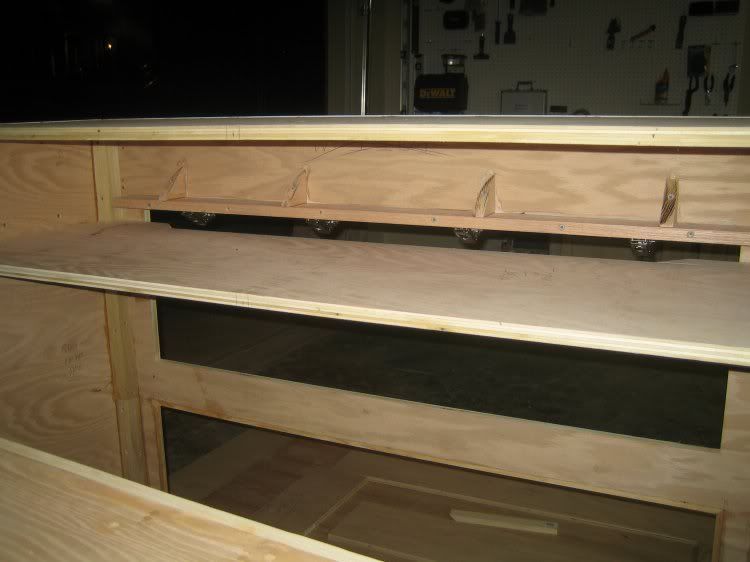 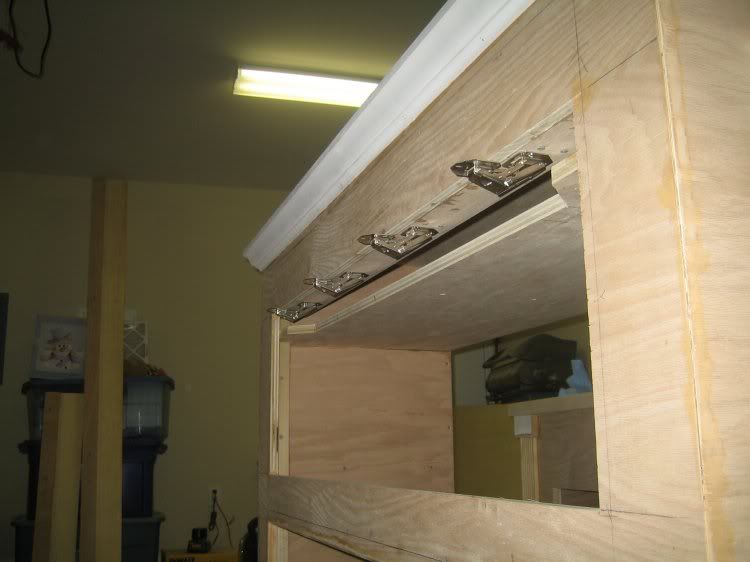  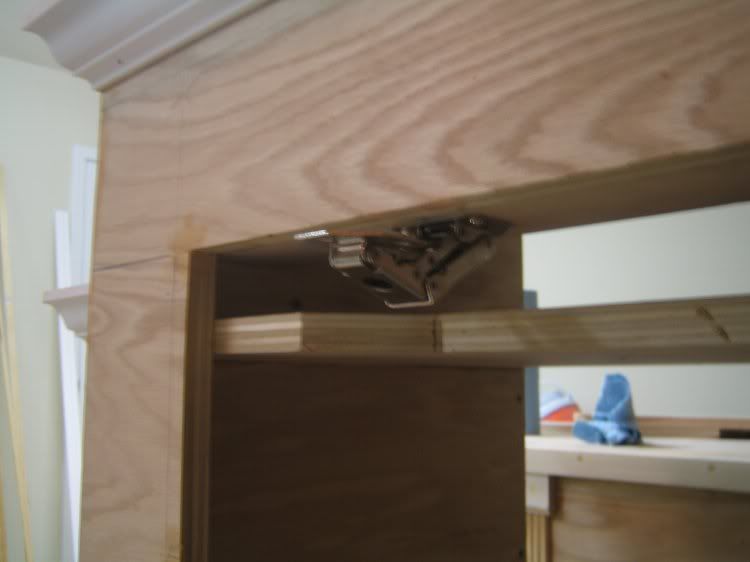
__________________
90g reef/29g sump, DIY cabinet, 2x250w MH, 2x54w T5 actinics, ER RS135 skimmer, VorTech pump, 18w UV sterilizer |
|
#124
10/18/2007, 08:53 AM
|
|||
|
|||
|
Perfect.
__________________
If my phaser discharges off by as little as .06 terra watts, it would cause a cascading exothermal inversion. |
|
#125
10/18/2007, 09:04 AM
|
|||
|
|||
|
My girlfriend is brilliant. Check out my anniversary present, complete with Marine Depot gift wrap.
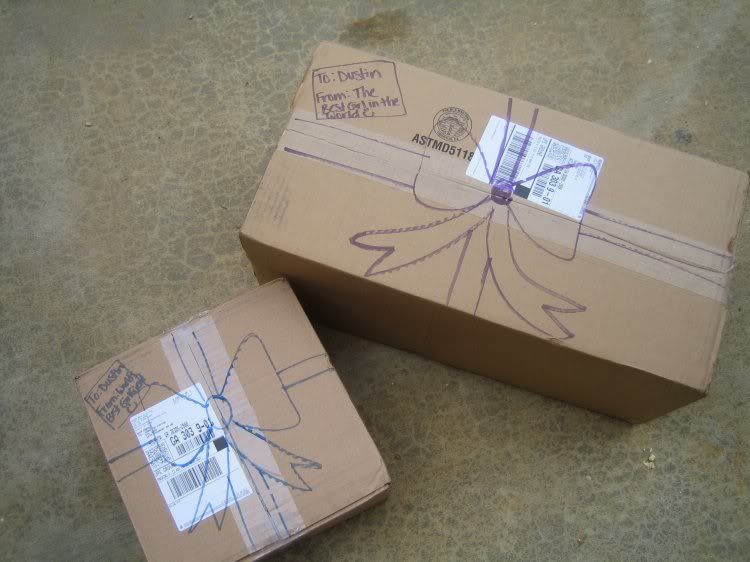 Vortech pump, 18w UV sterilizer, and a 3-day SCUBA diving course to get started on my diving certificate. I think I'll hold on to her for a while. 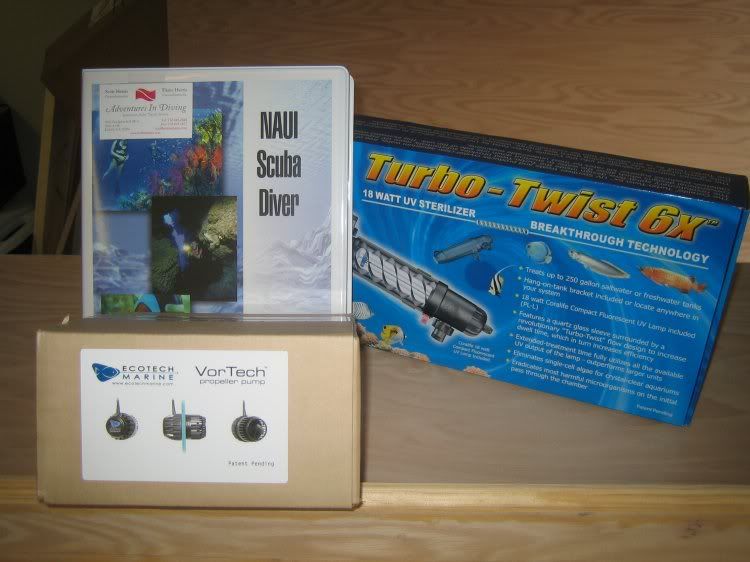 I highly, highly recommend girlfriends/wives who support our never-ending hobby/mental illness. Tonight I will mount the access panel to the hinges and trim it out. Also, I still need to find a cabinet shop willing to bore holes for my euro hinges, since the door manufacturer forgot to (even though I paid for it!). Once those are on, that will officially complete the build....then its time for the really boring part, sanding/priming/painting. What do you guys know about paint? I was thinking 2 coats acrylic primer, sanded in between, and 2 coats acrylic semi-gloss paint.....probably pure white, to match the fireplace millwork in our living room.
__________________
90g reef/29g sump, DIY cabinet, 2x250w MH, 2x54w T5 actinics, ER RS135 skimmer, VorTech pump, 18w UV sterilizer |
| Thread Tools | Search this Thread |
| Display Modes | |
|
|


 Linear Mode

