|
|
|
#2
 12/29/2007, 10:58 AM
|
|||
|
|||
|
Its not clear to me what your question is...Are you looking for pictures of the stands (and how they are braced) for in-wall tanks...?
|
|
#3
12/29/2007, 02:42 PM
|
|||
|
|||
|
you can just build a 2x4 ot 4x4 frame for the tank to sit on. Brace it as much as you want, but more then 2x4 on the corners and 2x4 in the center is overkill on a 180. Since you won't see the stand not need to skin it, but if you are not going to secure it to the studs (which i highly recommend) then you will want to skin it with something just to help firm up the stand. If you don't want to skin it i wouldn't do anything less then 4x4 framing. how big of a room behind it are you putting the tank in? have you thought about ventilation for the room?? It is going to get humid in the room with a large tank.
i think more info is required. |
|
#4
12/29/2007, 05:03 PM
|
|||
|
|||
|
it's my 210 fowlr tank, it's in my basement right now I plan on putting in wall. I have a room I'm truning into a bathroom and not useing all the room for the bathroom so I thought I might put the tank in the wall(as I hate the stand that it sit's on now). Thats what I might do is de skin my stand and use it, I just didn't know how most ppl do it.
|
|
#5
12/29/2007, 06:08 PM
|
|||
|
|||
|
I have a 180 inwall, the only problem I had was only access from the back made alot of things hard like moving rock and things like that...You may want to think about some sort of access from the front for feeding and such...I will try to get some pics of mine...
__________________
Rick Gaskins |
|
#7
01/01/2008, 12:16 AM
|
|||
|
|||
|
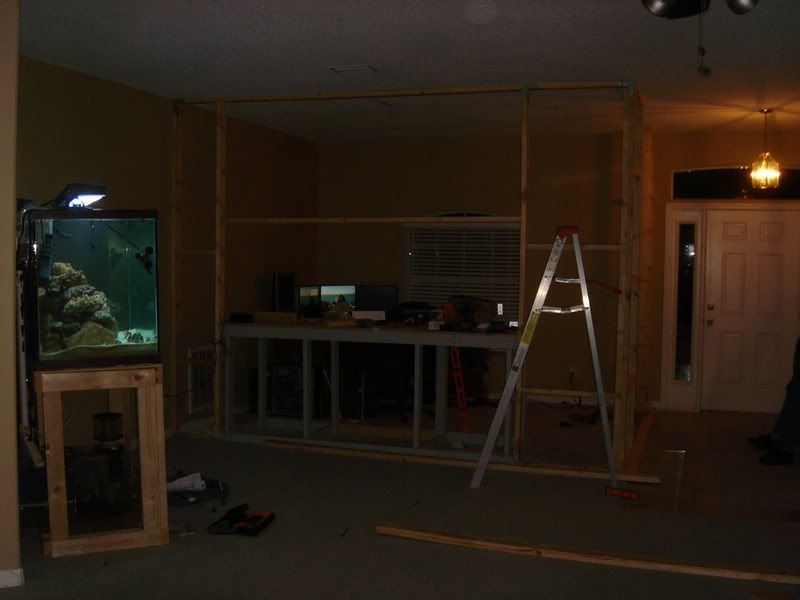
Here's how I've done mine. I'm not much of a carpenter/craftsman. Basically I own some tools, so hopefully someone who knows better can chime in with any mistakes I've made. That being said, tank seems pretty sturdy.
A look from the right side. You can see the bottom of the tank (black part) sitting on Owens Corning styrofoam insulation material, then the stand. The top portion of the stand is basically a rectangle, with the front edge sitting on the original studs for the wall (more on that later): 
|
|
#8
01/01/2008, 01:49 AM
|
|||
|
|||
|
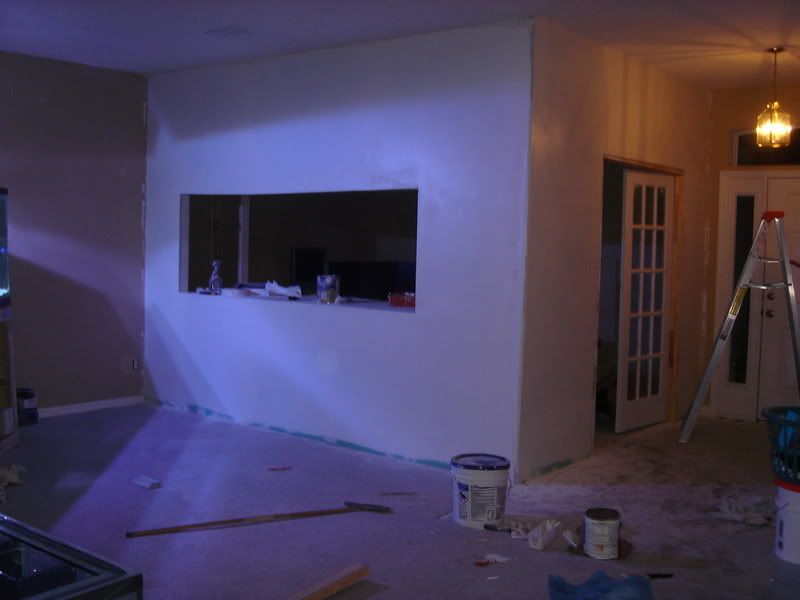
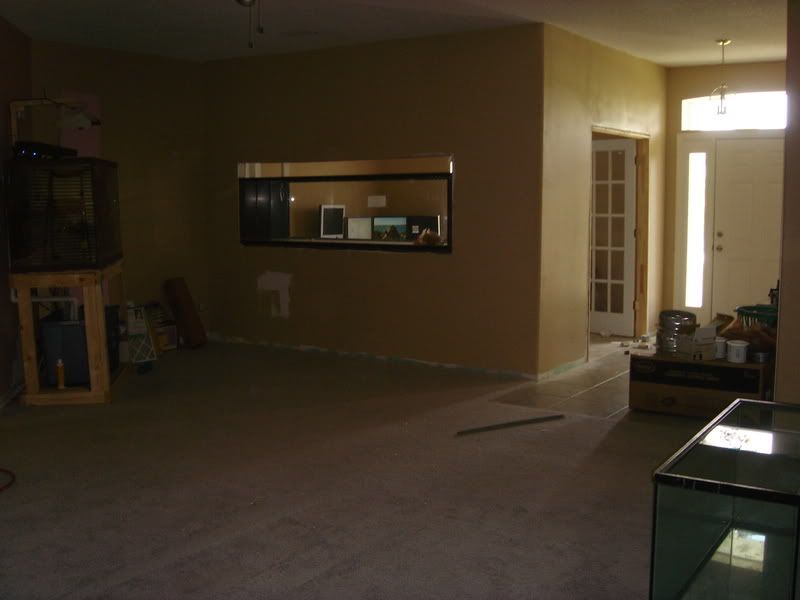
Here are a few pictures on my in-wall 220. Also a link to the build thread that started me down this path. My stand is built more or less just like Tasher's.
Tashier's [url]http://thereeftank.com/forums/showthread.php?t=85076&page=2[url] The stand:  The beginning of the tank front.  The finished product with doors that open on the bottom and a swing up lid on top. 
Last edited by kingsland; 01/01/2008 at 02:12 AM. |
|
#9
01/01/2008, 02:22 AM
|
|||
|
|||
|
Her is some pics of mine. I built a stand and then framed the wall and screwed them together. I got my basic stand directions from and old site www.garf.org from there how to pages. if you wana see more of my pics click my red house and you can look at my thread.
__________________
Eric (Red House for my 425 system) |
|
#10
01/01/2008, 10:05 AM
|
|||
|
|||
|
here is my 50g inwall.
Here is the backside taken a few months ago after I installed my OM squirt. 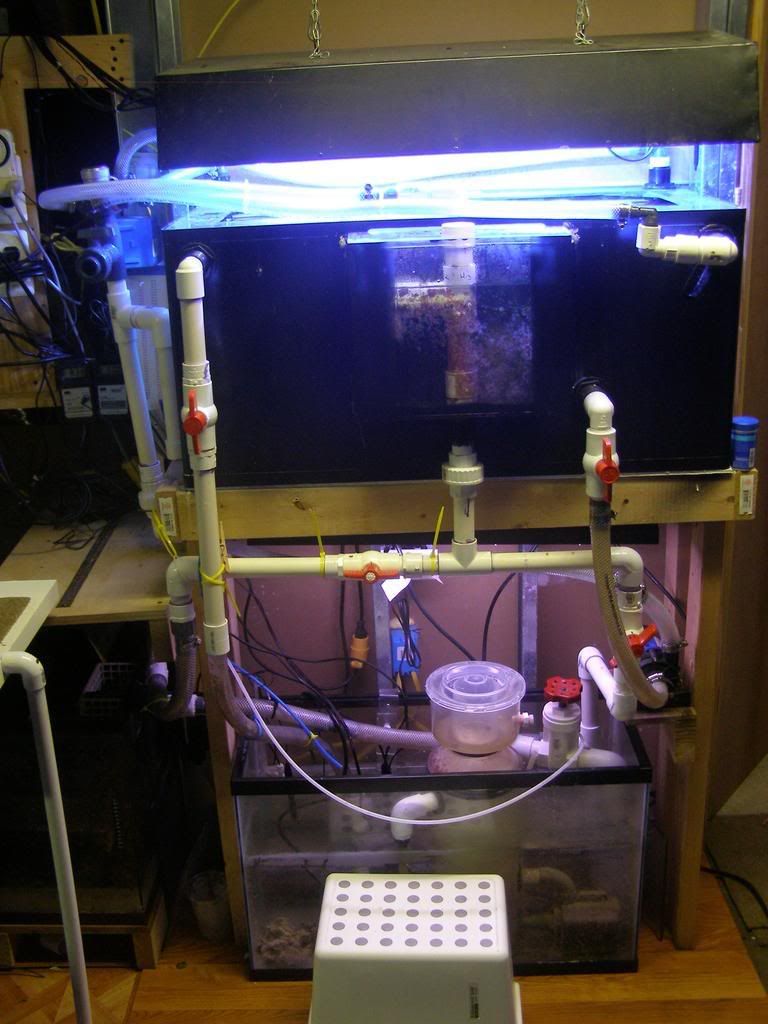 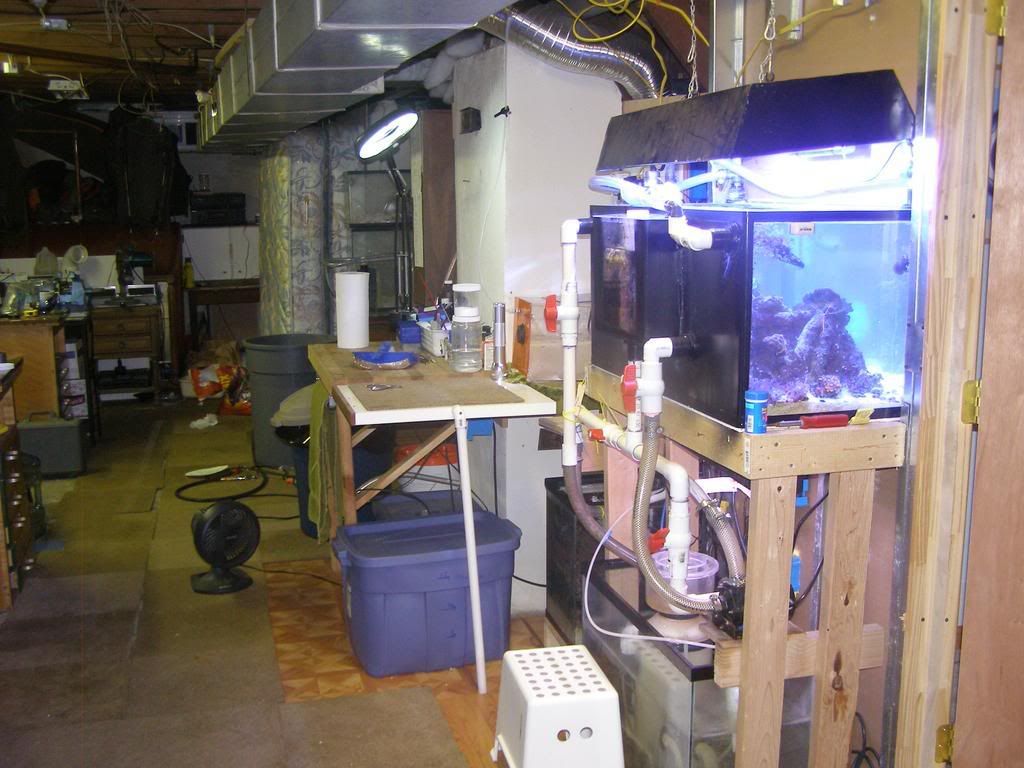 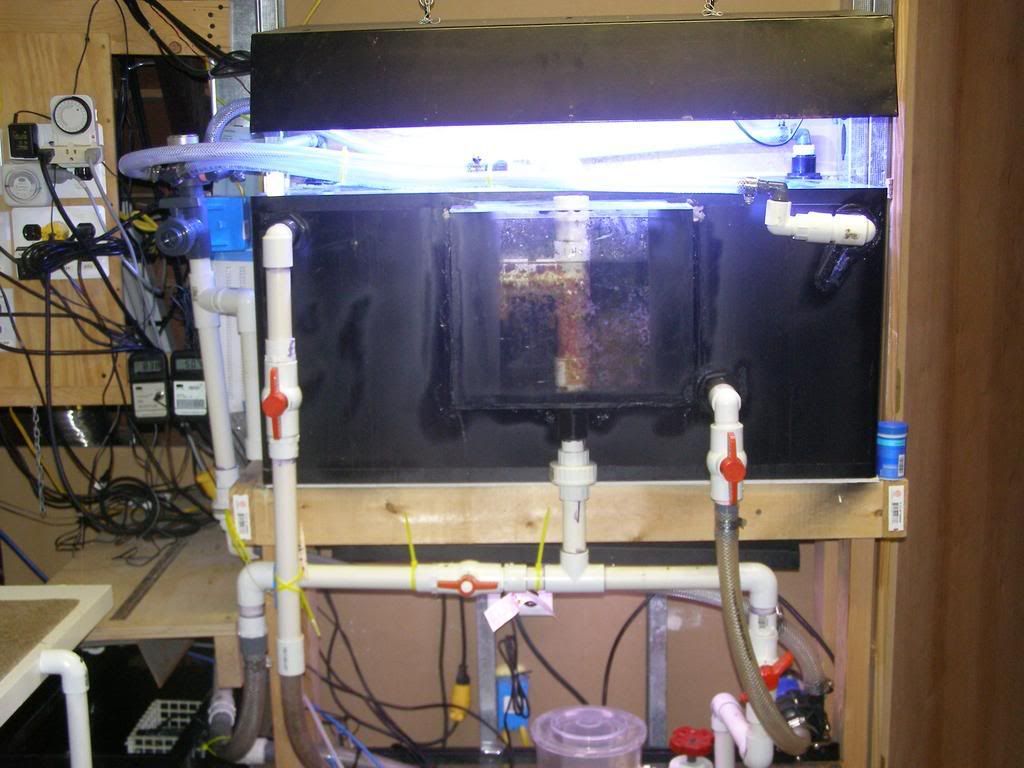 an pic of my old sump  I just re-did the whole sump/fuge configuration. I am adding a prop tank too.
__________________
----------------------- Matt DVRC President Prop&Save! ...Sure don't know what I'm going for, but I'm gonna go for it for sure... |
|
#13
01/01/2008, 08:10 PM
|
|||
|
|||
|
Since the earlier post, some additional work has been done to the stand. The original sump was taken down and a remote sump installed. The supports were reconfigured and a floor installed. Some finish trim still remains to be completed. Pond liner was placed under the frame and will be wrapped up on the sides and finished with trim and calk. The purpose of the pond liner is to insure that no water comes in contact with the bottom of the frame.
  
|
|
#14
01/02/2008, 04:12 AM
|
|||
|
|||
|
Quote:
__________________
Earl 250gl In wall tank set up on Dec 27 2003 with a 20 gal sump for heaters and skimmer and a 30gal summp used for a ref |
|
#15
01/02/2008, 08:11 AM
|
|||
|
|||
|
Thanx Kingsland! Now my wife wants this too!
Quote:
(old pic) 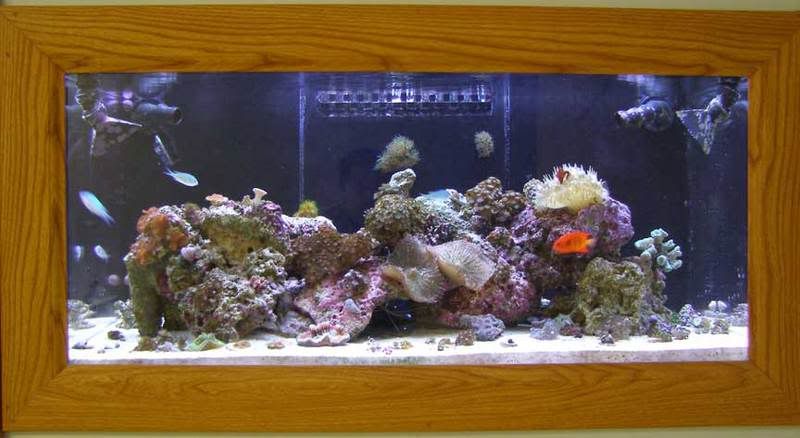
__________________
----------------------- Matt DVRC President Prop&Save! ...Sure don't know what I'm going for, but I'm gonna go for it for sure... |
|
#16
01/02/2008, 03:02 PM
|
|||
|
|||
|
I see a tank on here that I know.... hey Deb! Man, that is looking great! I really like the idea of a "remote" sump... maybe someday I will get brave and have you come over and help me with doing that...did youy just recently paint the stand... I don't remember if it was painted when I came over or not...
On a side note... all SPS frags are doing great! I can't believe how fast they are growing.
__________________
Jenni AKA "Reefmama" |
|
#17
01/02/2008, 03:11 PM
|
|||
|
|||
|
Here is the backside of my 180 inwall, nothing really too fancy but it works great for me... I have half of the back storage/maintenence room dedicated to my tank...

__________________
Jenni AKA "Reefmama" |
|
#18
01/02/2008, 11:22 PM
|
|||
|
|||
|
Hey Jenni. I love the remote sump. It is way too easy to clean, adjust, and everything else you need to do. Just let me know when you're ready. Yes, I finally painted it after I decided what to do with the extra space. I neglected to mention that the stand is assembled with screws and construction adhesive.
Thanks Matt. It has been a lot of work, but worth every bit of it. Last edited by kingsland; 01/02/2008 at 11:37 PM. |
|
#19
01/03/2008, 12:17 AM
|
|||
|
|||
|
Deb... did the paint affect the tank at all?
__________________
Jenni AKA "Reefmama" |
| Thread Tools | Search this Thread |
| Display Modes | |
|
|


 Linear Mode

