|
|
|
|||||||
|
|
Thread Tools | Search this Thread | Display Modes |
|
#76
 08/28/2006, 01:46 PM
|
|||
|
|||
|
Yeah, I checked out those cubes really cool. JBJ makes a halide like that would work with those cubes. Those would be real cool as just a hermit crab tank or something. Maybe a small neon goby.
__________________
"If your going through hell, Keep going" -Winston ChurchHill- |
|
#77
08/28/2006, 01:50 PM
|
|||
|
|||
|
Great thread, Travis. I especially like the pics of stuff @ the shelves in the stores.
 I just have one thing to add: I just have one thing to add:Captain Bunzo's Tips on Siliconing Nicely 1. Buy some wide blue painters tape. Generally speaking, the wider the better. You MIGHT have to use some of the skinnier stuff on some of the parts. 2. Get all your parts cut, fit, and ready to be glued. 3. Add painters tape approximately 1/4 inch from the joint of each seam. And remember to tape all 4 sides - 2 on each of the 2 pieces you are joining. 4. I always leave some tape foldered over at the ends for ease of removal later. 5. Get smoothing soapy water ready: get a cup with about 2-3 inches of water in it, add about 2-3 drops of liquid dish soap (like dawn, etc), and swirl that around a bit. Or add the drops and then add the water. 6. Get other parts at hand: paper towel (lots of it), a trash can, and possibly latex gloves (in case, like me, you hate the feeling of silicone on your hands for the next 24 hrs). 7. Silicone part in place. Get a good solid bead along the entire edge where the item will go. Then carefully put it in place. 8. Massage silicone joints by dipping your finger in your water solution and running it along the joint. Longer motions are better. Clean excess silicone off your finger with paper towel often. Try not to drip too much soapy water into the mix. 9. IF NEEDED, add some extra silicone (if you have any empty areas). 10. IMMEDIATELY AFTER you have finished massaging the silicone into silicone prettiness, remove the tape. If you wait too long to remove the tape, then the silicone on the glass/plastic and on the tape will have sealed already and pulling the tape will be aweful. 11. Let sit for 8 hours or so to get really set up. Let sit for another 24 to 72+ hours to be ready for water (depending on how risky you feel). Sources of Silicone: I REALLY like to use something I found at O'Reilly's auto parts. It is called "Type 7" silicone, I believe. The tube I found was white with green labelling and had a picture of a fish on the side somewhere. I am SURE it is reef safe. But what is REALLY cool is that right next to that kind, they also sell a black version of EXACTLY the same stuff. I think it might have a different type number. But it is obviously to me the same. ( Travis: You may now resume your regularly scheduled thread.  ) )
__________________
Paul Thompson Downley, Buckinghamshire, England RK: Where only bad things happen fast... CRAZY 4 the CRASE - Oct 13, 2007 Conf for Reef Aquarists and SW Enthusiasts Google it - Search for: craseokc |
|
#78
08/28/2006, 02:06 PM
|
|||
|
|||
|
Thanks for the Bunzo-Tutorial. You're far better at siliconing then I am. I'm getting better though.
__________________
Travis Stevens |
|
#79
08/28/2006, 06:11 PM
|
|||
|
|||
|
Quote:
|
|
#80
08/28/2006, 06:21 PM
|
|||
|
|||
|
[welcome]
Welcome Fellow Oklahoman! Have you looked at the COMAS and OMAS forums? Send me a PM and I can give you a hand.
__________________
Travis Stevens |
|
#81
08/31/2006, 08:49 AM
|
|||
|
|||
|
this will work indeed, i am in the research of building my own 10 gallon, the suspense is killing me,
the bulkhead comes in two piece when you purchase it right, and for the gasket that you cut you cutted it off horizontally, if you know what i mean? for your siliconing, maybe you could cut a smaller tip of to help control excessive silicon coming out. |
|
#82
08/31/2006, 09:15 AM
|
|||
|
|||
|
Quote:
T |
|
#83
08/31/2006, 02:52 PM
|
|||
|
|||
|
Quote:
As far as the makeshift bulkhead that I used, yes, I cut the gasket horizontally as even as I could. Quote:
 I make sure NOTHING gets through I make sure NOTHING gets through Also, I have a four day weekend coming up. I'll be working on the tank then. I should have the stand and canopy completed, stained, sealed, possibly start the plumbing, and I might even be able to add sand and rock!  See, I'm chugging along with this project. See, I'm chugging along with this project.
__________________
Travis Stevens |
|
#84
08/31/2006, 06:23 PM
|
|||
|
|||
|
Bring it!
I've decided on a 40G breeder. I love the width and visual depth it creates front to back. I also feel it will give me a lot of aquascaping options. Should only be a couple of weeks to get it. Time to build the stand. Might hit that this weekend! T |
|
#85
09/05/2006, 09:01 PM
|
|||
|
|||
|
the suspense, oh the humanity, where did you guy
|
|
#86
09/05/2006, 09:33 PM
|
|||
|
|||
|
I got a 40G breeder for display and a 20G long for my sump, as well as built the stand today. Some tank drilling and a Calfo style overflow and I'll be all caught up...
|
|
#87
09/05/2006, 10:11 PM
|
|||
|
|||
|
damn, just like a good movie that gets the the good part and goes to a commercial, I get to the end of the thread and it leaves me hanging
Nice thread, keep up the good info. I have a 10 gal sitting in my back room that I may end up using now that you have inspired me.
__________________
Click the red house to see tank pics and my blog and to get the link for my RC tank thread! |
|
#88
09/06/2006, 12:08 AM
|
|||
|
|||
|
Travis, cool thread! I really think you need more to do at work though! You obviously have more time on your hands than I do
 Anyways can't wait to see how it turns out... What are you gonna put in it? Anyways can't wait to see how it turns out... What are you gonna put in it?
__________________
"Friends don't let friends put xenia in their tanks" |
|
#89
09/06/2006, 06:43 AM
|
|||
|
|||
|
Hey Travis. Things must be busy on your end or you've just been off busily working away on the tank, snapping pics like crazy so that you can satisfy all of our cravings for updates
Hope things are going great with the project and updates are in our future. Adam
__________________
"I spent 90% of my money on women and drink. The rest I wasted" - George Best |
|
#90
09/06/2006, 08:33 AM
|
|||||
|
|||||
|
Quote:
 I'll stifle the suspense shortly. I have an update. But, you lost me at the end there I'll stifle the suspense shortly. I have an update. But, you lost me at the end there Quote:
Quote:
Quote:
Quote:
__________________
Travis Stevens |
|
#91
09/06/2006, 09:22 AM
|
|||
|
|||
|
Step 3: Building a Stand and Canopy (Continued)
Finally, I scored a four day vacation weekend with little to do. On Labor Day I labored all day with my buddy Nick (nIx_tank). We headed up to Lowe's (without the camera) and picked up a couple pieces of Birch Plywood; one 2'x4'x.25" for the sides and one 2'x4'x.75" for the front door. I also needed to pick up an 8ft 90º Corner in order to get all the trim done. Lastly, I picked up a 12" hinge for the canopy and a 30" hinge for the door. While I might have been able to save a few bucks with a pair of smaller hinges, I like the look of these better and it feels a little safer. All in all, we spent a heavier amount than I was expecting. It was $49 and some change. So, I have spent almost $80 for the stand and canopy. It could be done cheaper or more expensive. A good $20 of that was just 90º trim and another $10 was just hinges. First off, we ripped the .25" plywood to the sides of the stand which was roughly 36" tall x 10 7/16" wide. We then used some finishing nails and nailed it up there. Sorry, no picture available. It wasn't anything fancy, I promise. Next, came the time to place in the hinge. Because of the way we had the stand put together, we were going to be stuck with the door opening a hair over 90º. But, we can live with that. So, we decided to at least make it looks nice and sink the hinge in the wood. Here it is after we took it to the router. 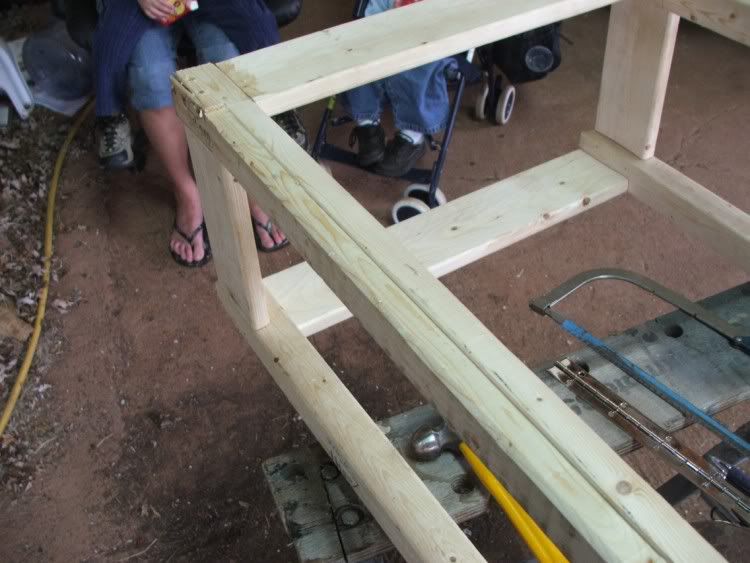 Here is the hinge sunk into the wood. 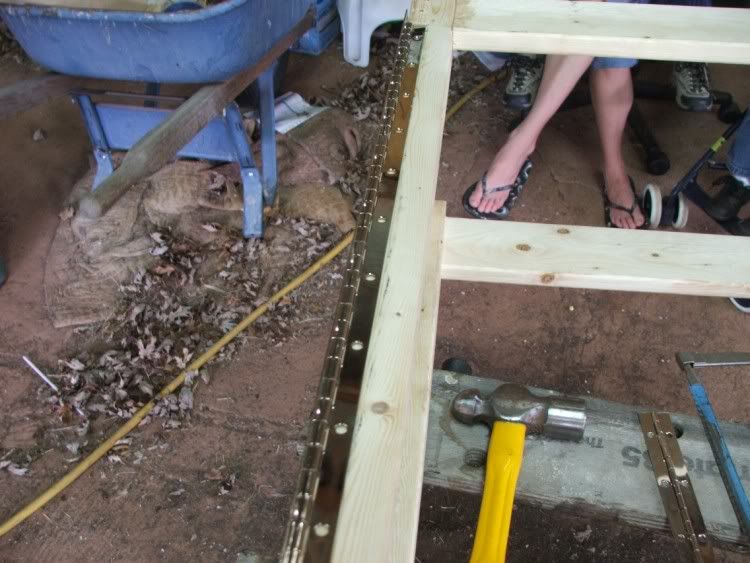 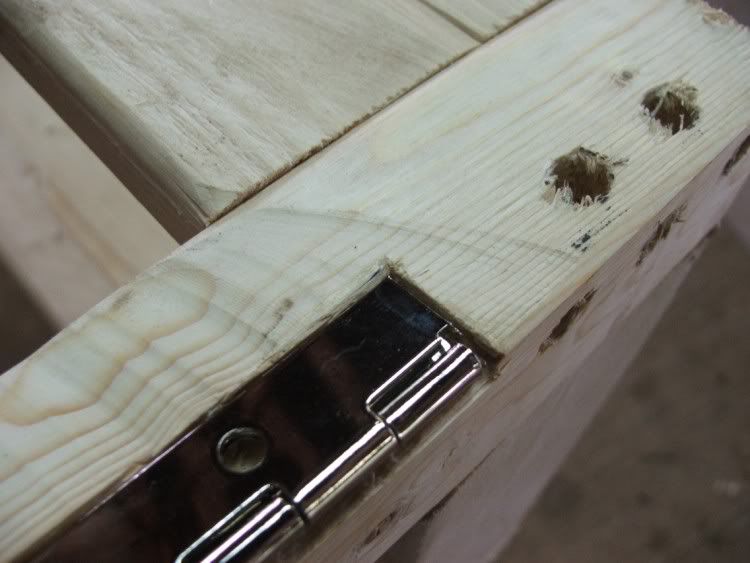 Here is the stand so far. 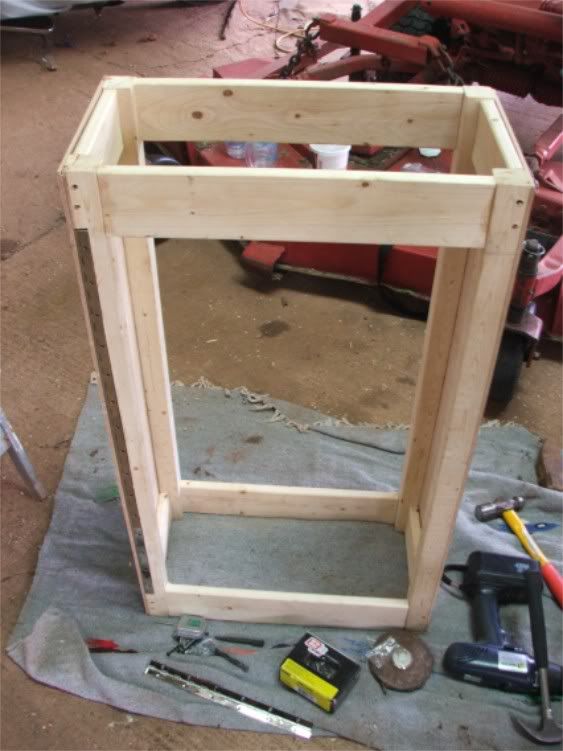 After the hinge was set in and a few food and beverage breaks later, we finally get the door cut and all the 90º Corner Trim cut up to be nailed down. This was an interesting process I won't go into detail here. Lots of preplanning should be done before ever deciding to trim a stand. We kept encoutering simple problems, but it's because we weren't thinking it through enough. Luckily there were two minds at work helping to keep each other in check. So, we called it good from there on the stand. I can take it back to my apartment to screw the door on the hinge and do the other quiet stuff.
__________________
Travis Stevens |
|
#92
09/06/2006, 09:33 AM
|
|||
|
|||
|
Step 3: Building a Stand and Canopy (Continued)
Now comes the fun with the canopy. Back when we made the frame for the stand, we cut all the pieces we needed for the canopy. All you need is either some 1"x6"x4' or 1"x8"x4'. It all depends on how tall you want your canopy. I like mine a little taller so I went with the 1x8. You'll need some 1x1 in order to put in a back brace to put the hinge on and to make an inner lip for the canopy to sit on. Canopies are really simple to make. Just cut a length of the board to cover the whole front of the tank as well as overlap enough to cover the wood for the sides. This will leave out one full piece for the front of the canopy. Then you will need two pieces for the side. Attach them with a few screws, like so. 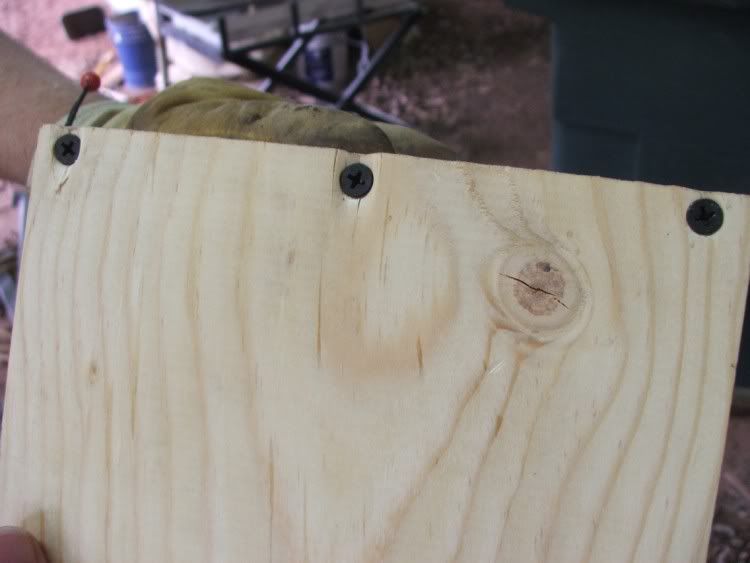 Next, you will want to fit the canopy to the tank to make sure it fits. We had to sand a little bit off for it to slide on there. 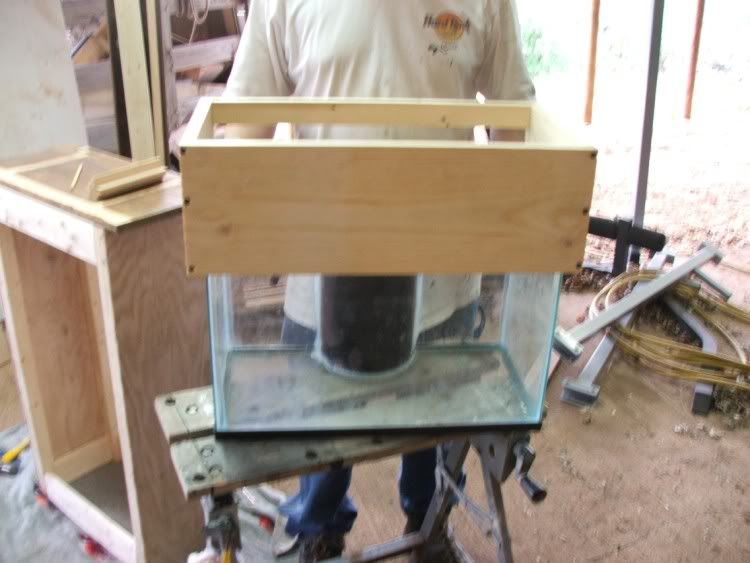 Then, you will need to cut a piece of 1x1 to fit inside of the canopy to be used as a back brace and place to put the hinge. Just push a screw into it on both sides to hold it firmly in place and then tap a nail in to make sure it doesn't twist as you lift the lid to the canopy, like so.  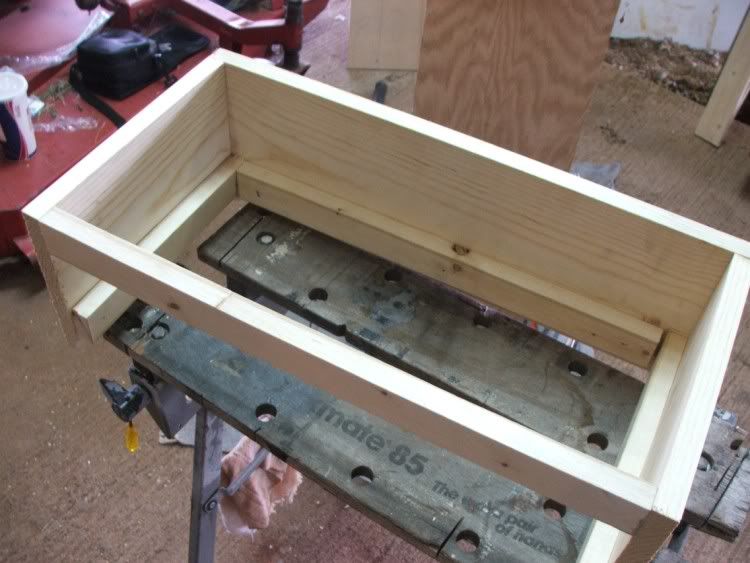 Finally, you'll need to make a lip on the inside to let the canopy sit on the tank. We offset the lip 1" and it worked great to cover the black strip as well as a little lower to cover the water line. Just cut some 1x1 and hold them in with a few nails. No need to be fancy here.  Always test your fit. 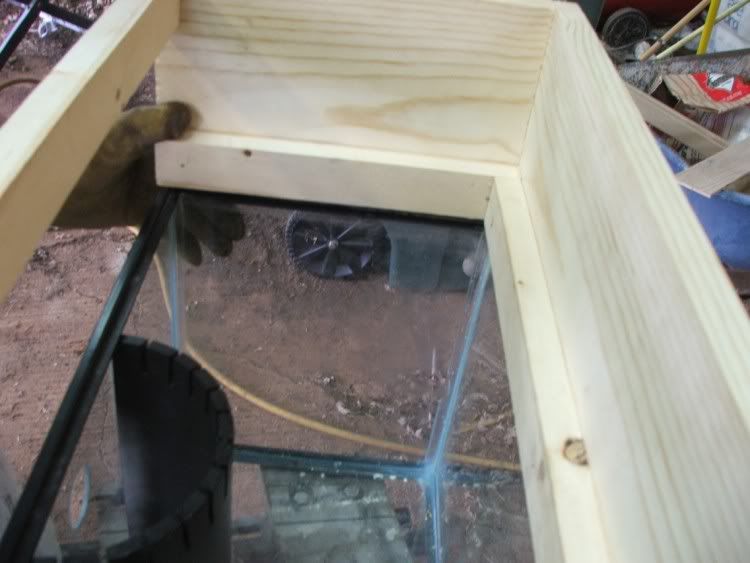 Lastly, we cut and nailed all the trim so I could take it home for the quite side of working.
__________________
Travis Stevens |
|
#93
09/06/2006, 09:44 AM
|
|||
|
|||
|
Step 3: Building a Stand and Canopy (Continued)
Ah, finally I get home for the quiet part. Well, it wasn't so quiet. The screws that came with the long hinge SUCKED! They were phillips style screws, but the plus sign shaped holes weren't well formed. You might as well call them partially stripped. I was very angered at this. What should have been a 10 minute job took almost 30+ minutes of loud, rapid, thumping sounds as my powerdrill repeatedly slipped out of the grooves and ripped up the screws. I have to publicly thank my downstairs neighbors for putting up with my late afternoon screw stripping, two in the morning glass drilling, and early morning rubber mallet pounding to knock braces off of tanks. They have been far more understanding than I would have ever suspected. Luckily, I don't do this often. Here is what we have as a finished product. Here is the stand with the finished door. It took some real inginuity to get the trim on there right and make it look like all the sides are trimmed. Since this is just a little temporary tank, I might not fill all the gaps with wood putty or anything. The door doesn't open up much more than what is shown below, but as you can see there is plenty of room. 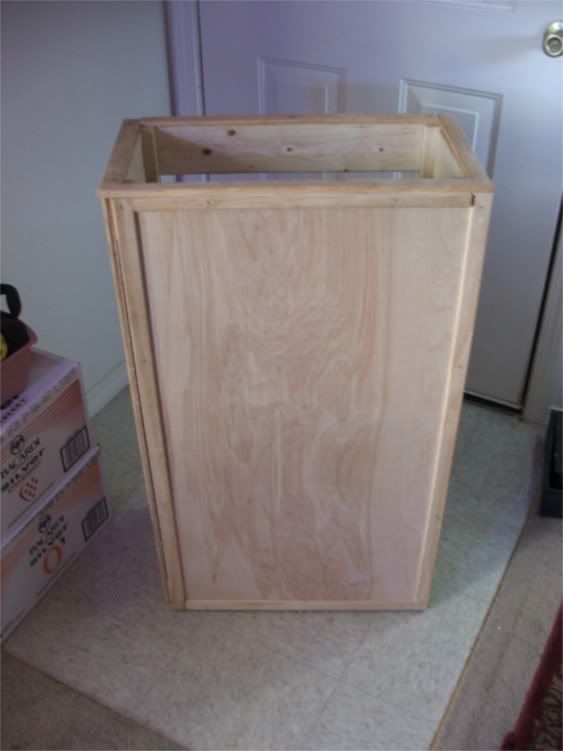  For those that like open tops, here is what the stand would look like with just the aquarium on it. 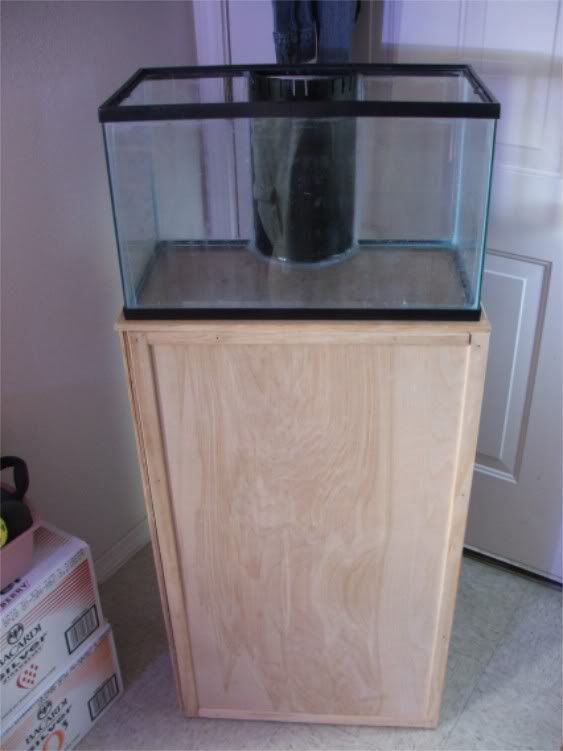 Here is the canopy. The lid is actually a piece of the old door off of my 75g stand. We just cut a little off of it, and stripped the old stain on it. We left the inside unfinished. It's not going to matter much. 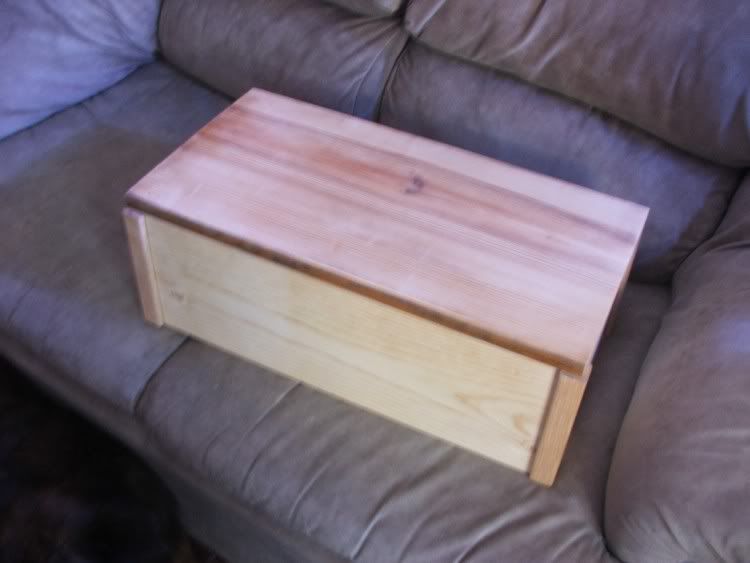 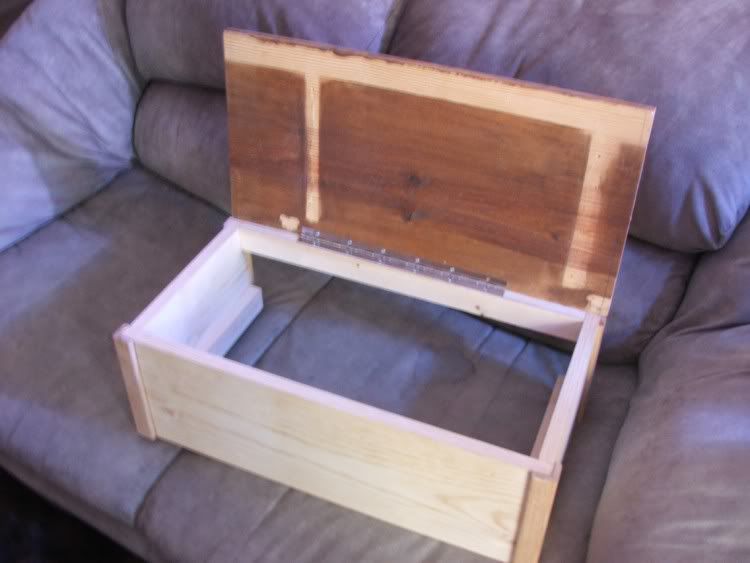 Finally, here is the thing all put together. It's not too shabby if I say so myself. I'm not a master carpenter. The last picture shows you the size and look differences in the WalMart metal 10g tank stands. 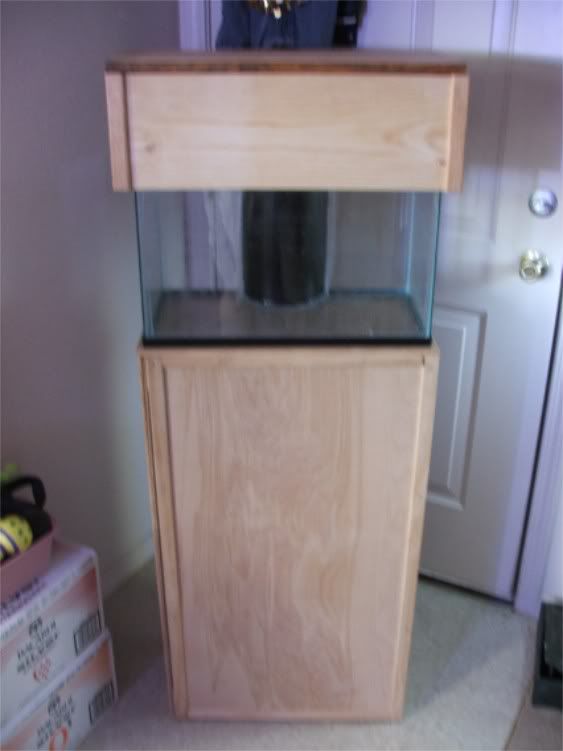 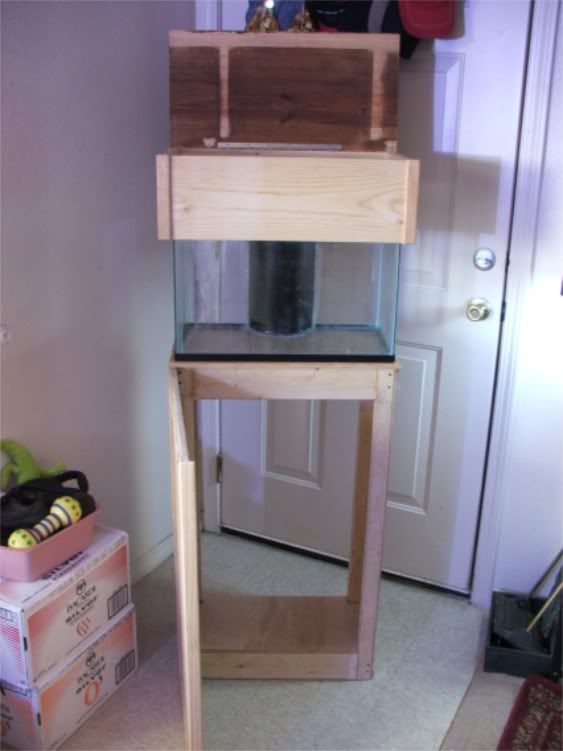 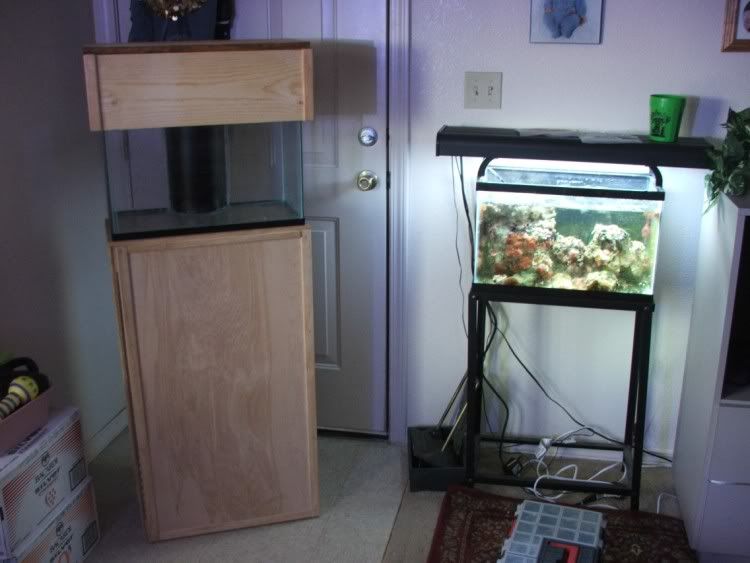 Finally, the actual woodworking is done. To save my time and the reader's time, I'll refer to my 75g tank log to highlight on adding wood putty, putting stain on, and putting sealant on.
__________________
Travis Stevens |
|
#94
09/06/2006, 09:59 AM
|
|||
|
|||
|
Step 3: Building a Stand and Canopy (Continued)
Finally, the last steps will be detailed here. This will include adding wood putty to fill any nail holes, gaps, and so on. Then you will need to sand it down after it dries. Next, you will put a couple coats of the stain of your choice. Finally, you'll add a few coats of your prefered polyurethane. Then it will be ready to get set up. This might take a few days between everything to get completed. Here is the process I took on my 75g stand. First, take some wood putty and fill all the gaps. Let it dry the amount of time that is placed on the container. Usually this is between 24-48 hours. After that, sand off all your extra putty for a smooth finish. 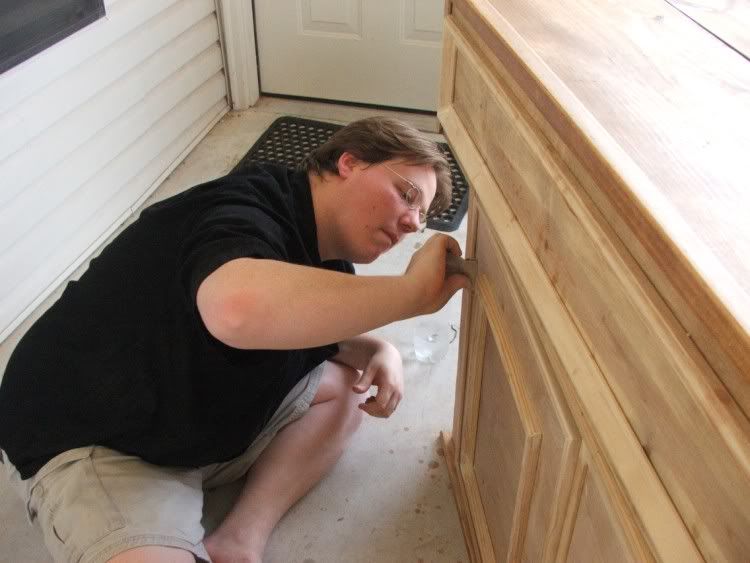 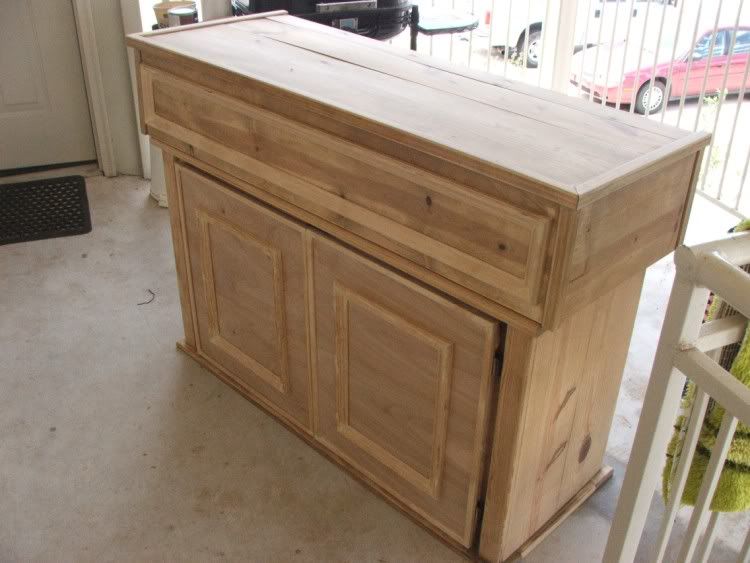 Next, you sand down the whole thing and clean it up with a damp wash cloth. Then you take your prefered stain color and follow the directions. Usually, you just apply a wet coat, let it soak for a while and wipe off the excess. Then repeat the process if you would like a deeper, bolder color. This is what I used. 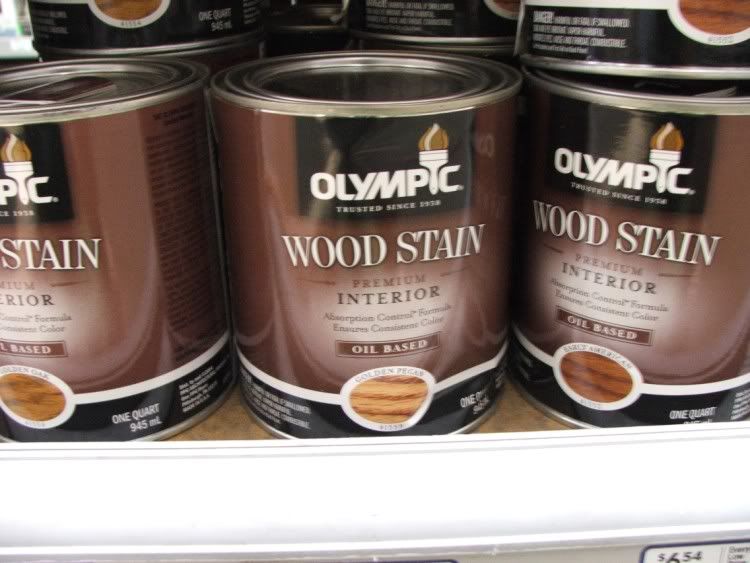 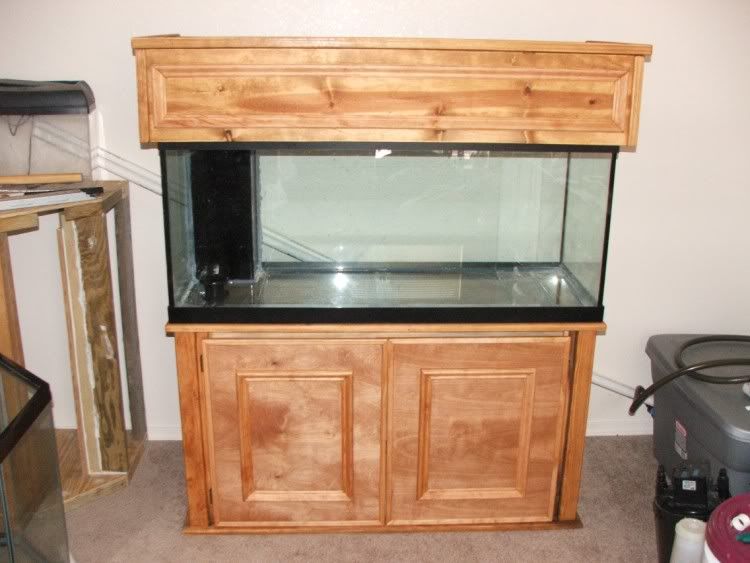 Finally, get the prefered polyurethane and follow the directions on it. I used three coats of a semi-gloss. 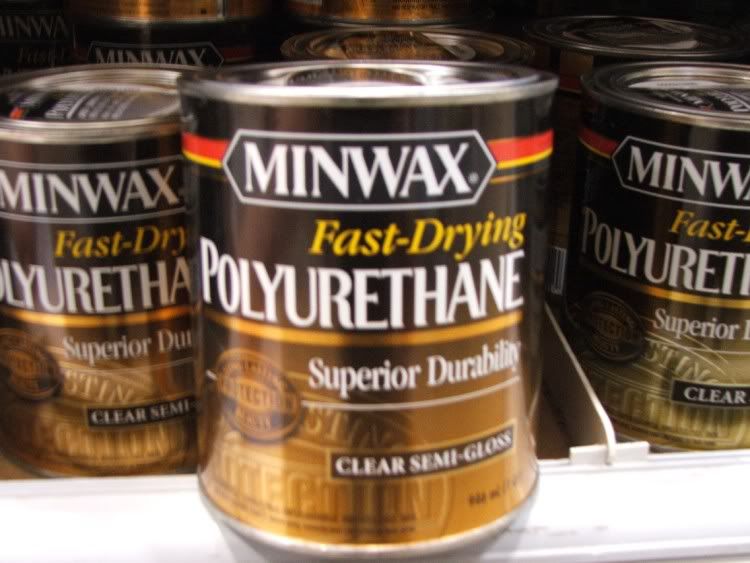 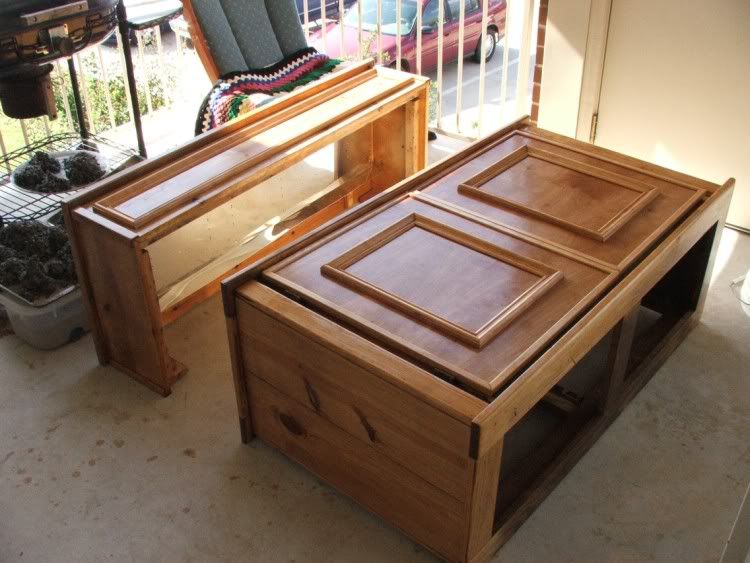 We are finally done and ready to get to the more exciting parts!!!
__________________
Travis Stevens |
|
#95
09/06/2006, 11:38 AM
|
|||
|
|||
|
Awesome Travis. Talk about an update
Definitely looks like you were busy over Labor Day and I hope you had enough time to sneak in a couple beverages here and there. I look forward to future updates and education....Adam
__________________
"I spent 90% of my money on women and drink. The rest I wasted" - George Best |
|
#96
09/06/2006, 11:56 AM
|
|||
|
|||
|
I still need to do some minor, aesthetic touches to the stand and canopy like add a handle to the door, etc. But those are minor issues that I'll update people on as it gets done. I'll be advancing into more detail on filtration methods, lighting methods, water circulation, substrate choices, and rock choices very soon.
Psst.. Just think, now you know who your tank building hero is  *points to the picture of the guy sanding and then points to himself* *points to the picture of the guy sanding and then points to himself*
__________________
Travis Stevens |
|
#97
09/06/2006, 05:04 PM
|
|||
|
|||
|
Does this mean I need to buy power tools?
__________________
"Leading the information hungry reefer down the road to starvation" Tom |
|
#98
09/06/2006, 05:07 PM
|
|||
|
|||
|
Well, if it wasn't for nIx_tank, I would have done the whole thing by a handsaw and lots of elbow grease
__________________
Travis Stevens |
|
#100
09/06/2006, 05:59 PM
|
|||
|
|||
|
Quote:
__________________
Travis Stevens |
| Thread Tools | Search this Thread |
| Display Modes | |
|
|


 Linear Mode

