|
|
|
#427
 10/06/2003, 07:31 PM
|
|||
|
|||
|
Ernie: Thanks, I appreciate that. As if the whole Finding Nemo capitalists weren't bad enough. Now this.

|
|
#428
10/08/2003, 12:23 PM
|
|||
|
|||
|
I thought I would add this photo I shot last night in the tank darkness. This is of my Lawnmower Blenny atop his favorite nightime bed, the large Toadstool coral (Sarcophyton trocheliophorum) at the left side of the tank. It looks pretty comfy to me.
 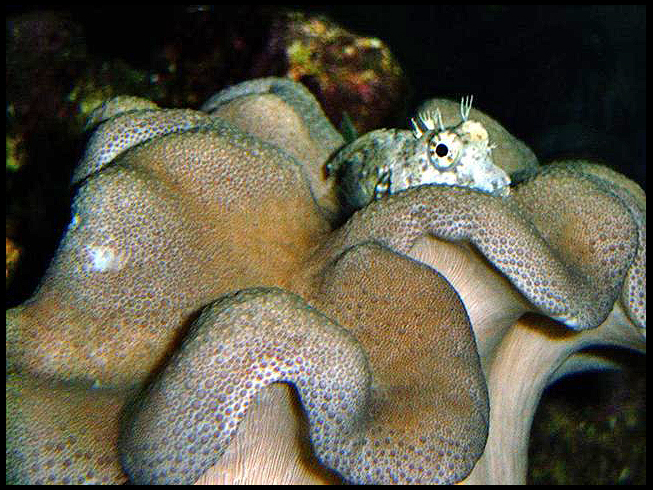
Last edited by Skipper; 04/04/2004 at 12:08 AM. |
|
#429
10/08/2003, 01:28 PM
|
|||
|
|||
|
Joseph
I have been following this great thread for a while now and I want to say you are a true enthusiast and a great member of Reef Central. You have taken the time to reply to each and every reefer who has shown an interest in your thread. With this thread now so long as it is that is no mean feat. I, and I am sure other reefers, really appreciate that. A great big THANKS  Cheers Alan PS I think you surprised the sh*t out of your blenny - he's got that 'what the heck was that big bright sun' look on his face (? do fish have faces?) |
|
#431
10/08/2003, 04:57 PM
|
|||
|
|||
|
you are right he definatly looks comfortable kind of makes me want to crawl up on my toad stool

|
|
#433
10/08/2003, 09:33 PM
|
|||
|
|||
|
Alan: Thank you very much for the kind words and you are welcome. It's been my pleasure sharing and responding to all the questions. I hope that some have gained from the time spent. As to the Blenny, fish must have faces as his is one only a mother could love.
You just have to grin when you see those monkey lips, Bart Simpson "hair" and of course, those penetrating eyes. Here's a shot where he seems to think it's a swimsuit layout. 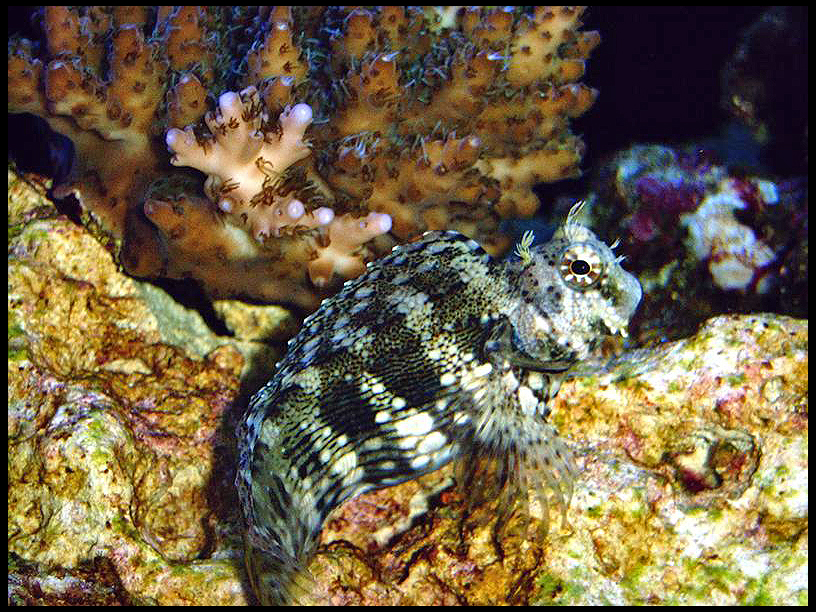
Last edited by Skipper; 04/04/2004 at 12:09 AM. |
|
#434
10/08/2003, 09:47 PM
|
|||
|
|||
|
Derrik: "Your" clam is doing fine.
I relocated him higher up the rocks to better saturate him with light. He's very appreciative of this move and has anchored down as proof. Thanks for the amazement.  saltaholic: LazyBoy couldn't have done it better. yznhmr: Inserting photos only requires that they be hosted somewhere on the net. Most ISPs allow for some space to upload photos or a personal web site. Then all you do is click the IMG button and insert the address of the individual photo. This then creates the image whenever someone opens the page of the thread by linking to the photo hosted by the your ISP or wherever. Tha advantage of this as opposed to just attaching the photo is you are not limited to the forums photo size limitations which is rather small. |
|
#435
10/08/2003, 09:59 PM
|
|||
|
|||
|
Here's a close shot of the Acropora coral seen in the background of the above Blenny photo. I couldn't get the color right as it's actually a pinkish-mauveish-green.
It always amazes me of how colors of corals change depending upon the particular lighting. I guess it has to do with the effervescence factor but almost every photo has a different color for the same coral. Unfortunately, no one of these ever seems to be true.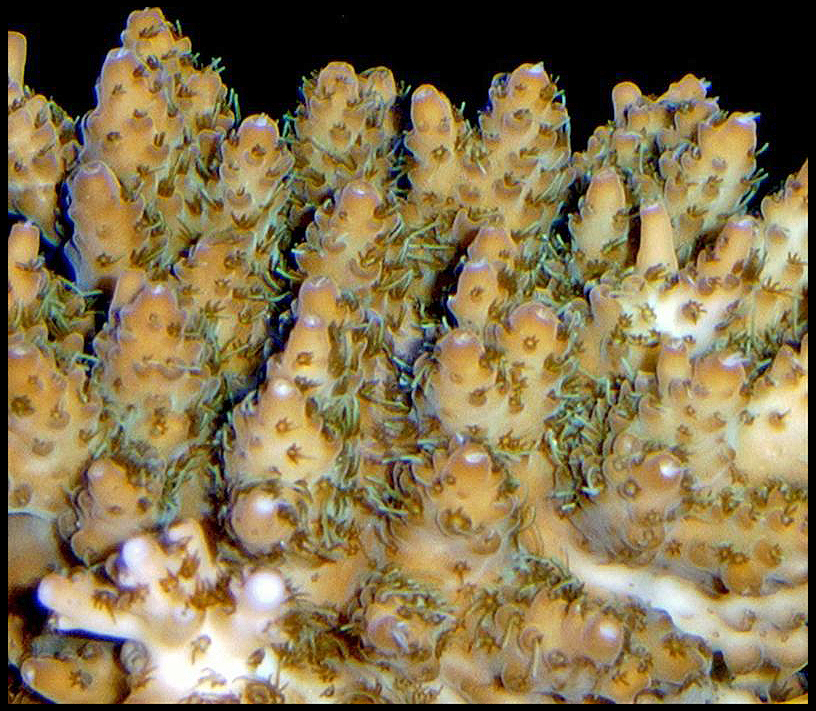
Last edited by Skipper; 04/04/2004 at 12:10 AM. |
|
#436
10/08/2003, 10:07 PM
|
|||
|
|||
|
Here's a shot of the ever ellusive Tiger Stripe Serpent Star. This guy is only about 8" from tip to tip and rarely let's himself be seen.
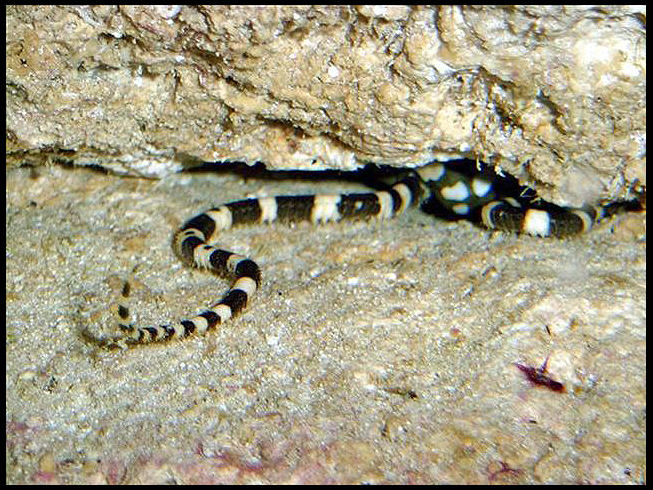
Last edited by Skipper; 04/04/2004 at 12:12 AM. |
|
#437
10/08/2003, 10:47 PM
|
|||
|
|||
|
Joseph, quite an amazing tank and setup! Look forward to seeing more and more pics of this beauty as it continues to mature. Aren't lawnmower blennies the coolest?
Derek
__________________
"When we try to pick out anything by itself, we find it hitched to everything else in the universe." --John Muir |
|
#438
10/09/2003, 04:37 AM
|
|||
|
|||
|
weatherson
sorry havent cheked on your posts in a while, just saw the 10-3 picts and i have to say it looks good, great job |
|
#439
10/09/2003, 07:36 AM
|
|||
|
|||
|
weatherson, how did you attach the black acylic to the back of your tank? I noticed it looks like you can remove it if need be.
__________________
Click on the Red House for my 120g Tech Series Build. Yes it's updated with pics. |
|
#440
10/09/2003, 11:10 AM
|
|||
|
|||
|
Weatherson,
Awesome setup, believe it or not I'm in the process of building a house and I've designed that exact size tank into a wall, only difference will be, each end will be open. I had to design a laminated beam for the ceiling above to support the wall since I'll have no jacks to support it. I have just two questions, do you have any regrets to the 240 size, as far as height. I've thought it may look a little funny in my wall which is 8 ft. long x 10 ft high. Just don't want it to look to skinny, if you know what I mean. Your pics are great, but its always hard to picture without seeing in person. I've had the 30" high tank and hate it so, I thought I'd try 24", but once its designed in the house thats it. I'll be using arcylic also, as Starfire glass from Oceanic is out of site, my dealer cost is around $3,000.00 and I have to have either arcylic or starfire. My last question is, does it bother you not having access from the front? I've got a 150 gal. now built in the wall at my store, but because of the 30" height, its almost impossible to clean and I hate that. I was going to leave around 6" on top of the tank and cover with raised removable panels on the front for access. Just so I could get to the front glass easier and clean. I hate dirty tanks, so I'm trying to plan a bit better for this one. Thanks in advance. Footings are in so my time is running out...
__________________
Have HOPE because God is in control of YOUR future. |
|
#442
10/09/2003, 12:40 PM
|
|||
|
|||
|
Regalman
Have you tried getting a price from Mitch at Bow Valley Aquarium in Canada (403 272 4960? I too gagged at the price my LFS quoted for an Oceanic with Starfire (almost $3000 for a 48x20x24). Mitch quoted around $450 plus delivery!!!! Cheers Alan |
|
#443
10/09/2003, 01:51 PM
|
|||
|
|||
|
WOW, Nice job. I have a 240 with 100g sump and I Thought I was cool. I must say you did a wonderful job.
__________________
"My Little Bride Said" The only way you would pay attention to me is, if I was swimming in your reeftank! |
|
#446
10/09/2003, 08:42 PM
|
|||
|
|||
|
Derek: Thanks, I'm glad you like it. I too look forward to it becoming equally stocked and established as my old 65 gallon but time is needed. Yes, lawnmower Blennies are cool. They and Hawk fish have very interesting personalities but I prefer the Lawnmower as a Hawk I had once took a great liking to the various shrimp in the tank.
 StroKnight: Thanks for the kind words. I appreciate them. Larry: It should have been covered well in the previous post you since read but if not please let me know of any further questions. RegalMan: Thanks for the praise. An open-ended 240 should be very nice. I miss that angle that I had on the old tank. As far as the balance of the tank to wall aspect, my wall is about 6' wider than the 8' tank so this seems to balance things a bit. The height of 24" I like and this also helps when considering lighting. My power bill is plenty high as it is without the need for a few more thousand watts. The only thing I regret about the tank choice is that I would prefer a deeper size. While 24" is plenty, it does limit your aquascaping flexibility and deeper would better simulate the ocean. Don't get me wrong, I like the setup as is but even after this project I can still dream. Personally, I prefer glass to acrylic for its durability (scratches) although it sure would be nice to easily add a hole if needed. However, the Starfire from Oceanic was definitely out of the cost question. As far as the lack of front access, I don't see this as an issue that bothers me. The addition of the removable back panel cover alleviated this. In a short minute, I can remove this and that enables rear viewing for maintenance. My preference was to have a simple and plain viewing wall so front access doors were out of the question. I didn't want the front to appear in any way, other than what's behind the glass, to be a tank. More a window to the sea. tanker240: I guess your name says it all. Thanks for the kind words.skylsdale: So what you are saying is that I should take more photos with the flash off? The only issue with this is that whenever I do the images tend to be not as true to life in regards to color. The down side is that with the flash the tank appears to be more under-lighted than it is. The reality is that I need a new digital camera that's not five years old. Yup, it's the camera and not me!
|
|
#447
10/10/2003, 10:15 AM
|
|||
|
|||
|
weatherson,
Just wanted to say your an inspiration to us all. Your dedication and willingness to share your experiences is a wonderful quality in a hobby that can be sometimes very disappointing. Patiently waiting for you to start your next project. |
|
#448
10/10/2003, 04:42 PM
|
|||
|
|||
|
5y5tem 0verload: Thank you very much for the kind words of encouragement. I appreciate the feedback and am honored your first post was here.
As to the next project, see the next post and photo.
|
|
#449
10/10/2003, 05:25 PM
|
|||
|
|||
|
Well it's been awhile but I worked on the tank again today and finally got to the painting of the back panel. If you haven't read through the thread, I created a removable back panel of black acrylic. I made it reversible so I could paint one side blue and leave the other black to change according to my preference. Before I get into details as to the painting process, I thought I would share a photo of my new additions to the tank.
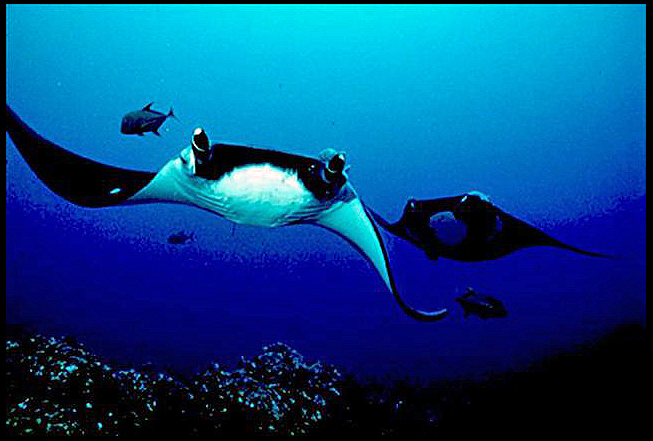 Obviously, I'm kidding! This photo is actually one of the many I pulled from the web after searching for underwater shots. I did this some time ago and unfortunately I don't recall where I found this particular one so if this was your photo, please let me know and I will give credit where due. What I was looking for is how the background appears in the wild. So this and the other photos gave me the idea as to how I wanted to paint the back panel. It's a gradual darkening shade of blue from top to bottom. What I did was to pick two shades of blue and one black. The lighter blue is Navy and the darker Deep Blue. These are Rust-Oleum Painter's Touch from Home Depot. After applying the paint, I added a coat of flat Clear. I did this to even out any surface textures left from feathering the three colors together and also because when the bare black acrylic is used as the background, its reflective surface had the fish initially attacking their reflections. The flat clear coat should alleviate this issue and I may still apply this coating to the bare black side as well. Prior to painting I sanded the complete side with 400 grit sandpaper to make for better adhesion. So... here's the result still curing in front of the tank. I've since placed it outside in the sun to speed drying along. Obviously, I'm kidding! This photo is actually one of the many I pulled from the web after searching for underwater shots. I did this some time ago and unfortunately I don't recall where I found this particular one so if this was your photo, please let me know and I will give credit where due. What I was looking for is how the background appears in the wild. So this and the other photos gave me the idea as to how I wanted to paint the back panel. It's a gradual darkening shade of blue from top to bottom. What I did was to pick two shades of blue and one black. The lighter blue is Navy and the darker Deep Blue. These are Rust-Oleum Painter's Touch from Home Depot. After applying the paint, I added a coat of flat Clear. I did this to even out any surface textures left from feathering the three colors together and also because when the bare black acrylic is used as the background, its reflective surface had the fish initially attacking their reflections. The flat clear coat should alleviate this issue and I may still apply this coating to the bare black side as well. Prior to painting I sanded the complete side with 400 grit sandpaper to make for better adhesion. So... here's the result still curing in front of the tank. I've since placed it outside in the sun to speed drying along. 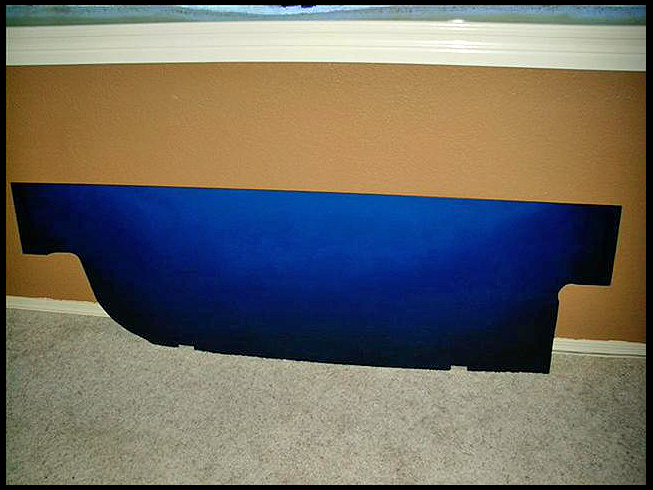 Note that I used the black paint at the bottom but also at the top ends so there would be a gradual transition from the black pre-filter boxes. Perhaps not identical to the real thing but I think I am pleased with the outcome. As soon as I feel it's completely cured, I'll place it on the tank and try to get a good shot from the viewing side. Last edited by Skipper; 04/04/2004 at 12:15 AM. |
|
|


 Linear Mode

