|
|
|
#1
 10/05/2007, 08:16 PM
|
|||
|
|||
|
Hi All
This thread will continue essential where my last one left off. http://archive.reefcentral.com/forum...hreadid=932755 I moved in to a new place, and like any self respecting reefneck would do, I took the opportunity to upgrade. It wont be a huge step up from my 90 gallon in terms of water volume, but it will be allot cooler than my old tank. It is a 72cm cube (about 28 ¼) made out of 10mm glass, which comes out to just over 373L or around 99 gallons. I am building the tank myself with an external coast to coast overflow, and euro bracing. For hardware, I will list the components below: The Brains: I am going with an Aqua Controller 3 with two DC8s to control things like light, heat, monitor pH, ect. I havent really figured out all the features of this little unit yet, but I hope to put it to good use. The Heart: For flow Im going with two Echotech Marine Votrecs. The Bowels: For skimming and filtration I am going to use my heavily modified ASM G-4X, which has proven to be more than powerful enough. I am thinking about adding another sedra 9000 needle wheel pump. I am also going to use a fuge with a deep sand bead, and lots of cheato. Im probably going BB, so the sand bed will probably be a good 8 deep. I have plenty of LS from my old tank. I will also run carbon with a TLF phosban reactor. The Bones: For calcium supplementation, I am going to use a DIY reactor ran off a Milwaukee controller. I could use the AC3 to control my effluent pH, but Id rather use its pH probe to monitor the waters pH. I also use a DIY Kalk reactor that I process all the top off through. The Kidneys: For water top offs and changes, all tap water will be processed through my Purely H2O 5 stage RO/DI unit. The Sun: For lighting I am going with a 400W HQI MH lamp powered by a PFO HQI ballast. I have a 14,000k Hamilton bulb on order, but I am thinking of switching brands after I get things up and running. For reflectors I have a cheapo retrofit one on order, but Id like to replace it with a lumenarch eventually. I am also going to use a 4x 24W t-5 actinic retrofit kit for supplementary lighting. All The Rest: 2 x 250W titanium heaters, external centrifugal return pump, a Red Sea 100mgpd ozone generator (I have not used ozone before, so I plan to acclimate my tank slowly once everything is back to normal after the move.) Thats all I can think of right now. Here are some pics of my first day of work on the big project. Heres the new tank in 2D  Step one: The bottom is being siliconed to the front. The bottom will be set 5mm off the ground so the weight is supported by the sides of the tank. 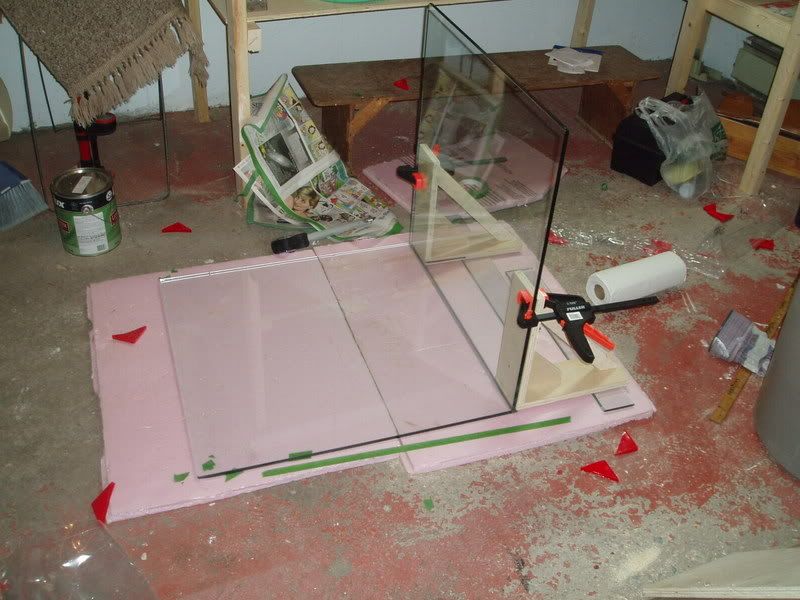 Step two: The back being siliconed to the bottom.  Step 3: Side one 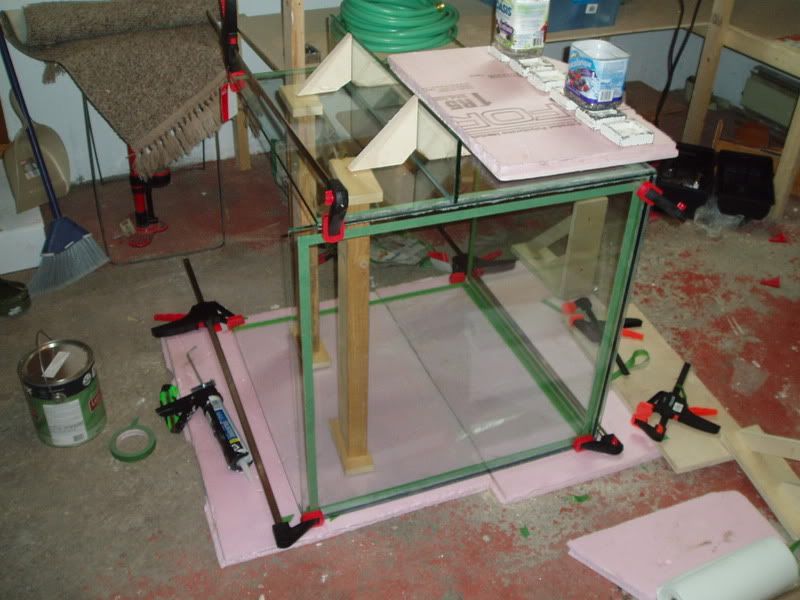 Step 4: Side two, almost done. The piece sticking up is the bottom of the overflow box. Since it will be a coast to coast overflow, the eurobracing wont do anything for the back pain. This should help shore it up. The drain pipes will stick out the back of the overflow. 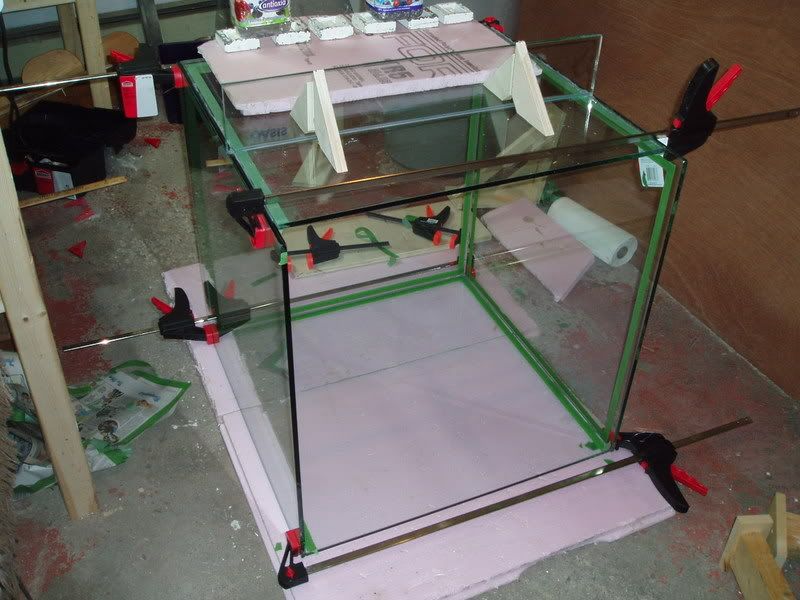 thats all for now. Tomorrow when it sets up I will tip it upright and put on the eurobracing. After that I want to leave it for a good 48 hours before I water test it.
__________________
I'm not as think as you stupid i am |
|
#4
10/06/2007, 11:41 AM
|
|||
|
|||
|
Agreed^
|
|
#5
10/06/2007, 08:11 PM
|
|||
|
|||
|
that's cool, thanks. I'ce decided what I want to do is get a whole bunch or live rock rubble and spread it over the floor of the tank. I;m also going to go with a 1/4" acrylic sheet on the bottom to protect my bottom pain, and help anchor my rock work. Stay tuned for more pics, if i don't get them up tonight i'll get them up tomorrow.
__________________
I'm not as think as you stupid i am |
|
#8
10/07/2007, 03:24 PM
|
|||
|
|||
|
How did you do that rockwork pic? Its looks great, and you can also click on it and it changes. Way cool!
__________________
The new and improved www.calebkruse.com is coming soon! Check out my website for info on fragging mushrooms, and the benefits of Vitamin C on soft corals! |
|
#9
10/07/2007, 03:26 PM
|
|||
|
|||
|
THAT ROCK WORK EXAMPLE IS AWESOME!!!! Wish i would have seen that prior to my middle build up!!
__________________
1 - Amphiprion Latezonatus 7 - Amphiprion Percula GBTA - 4 inches 2 - True Bali RBTA - 6, and 8 inches i think Sweet Green Carpet - 12 inches |
|
#11
10/07/2007, 03:57 PM
|
|||
|
|||
|
Another day another dollar.
Here we are on day two, and she can stand on her own now. Everything sealed nicely, no visible bubbles of silicone between glass pains, and everything stayed well aligned over night. 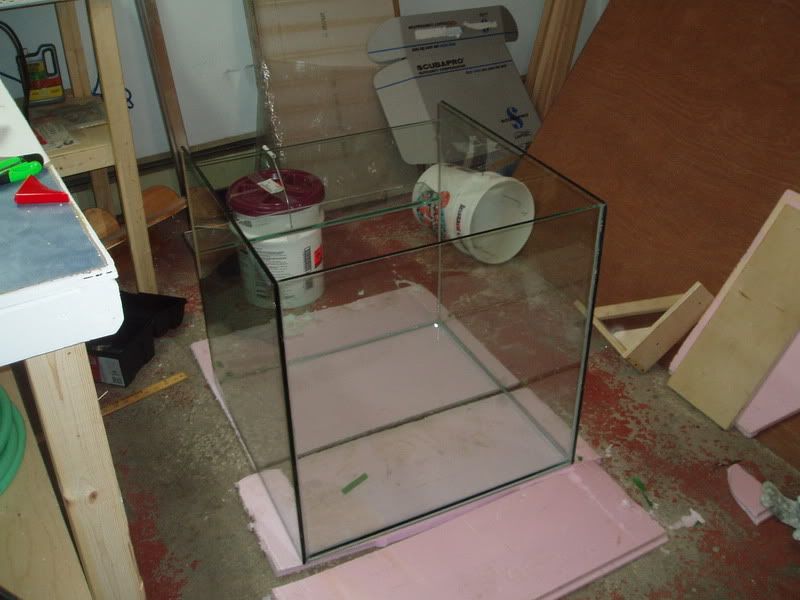 Now its time to start euro bracing. The braces are 8cm thick, and made from the same 10mm glass. Here is the front and back being silicone in place. The front was fussy, and I had some trouble with air bubbles, so I enlisted my recently purchased, and sufficiently heavy salt jug to keep everything in line. 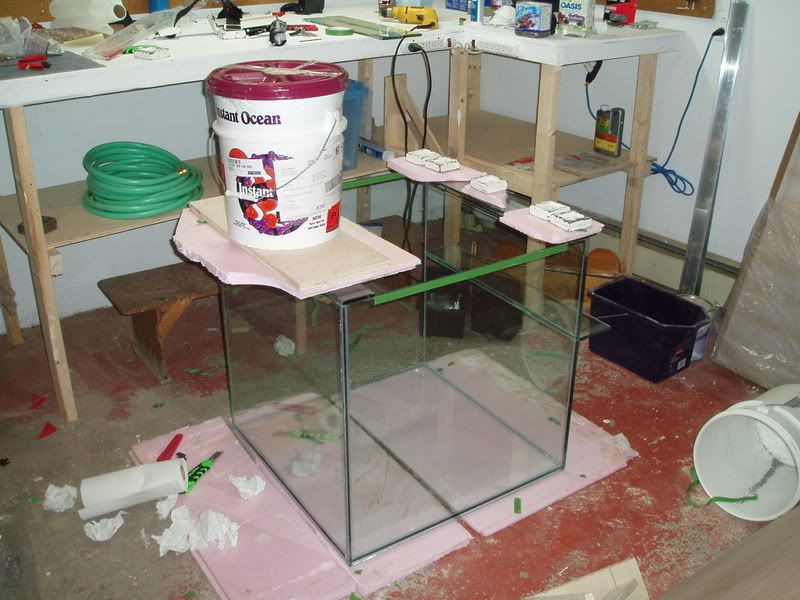 I let that cure up for the better part of the day before I added the side pieces. Tank maker node: you can never own too many clamps.  and here she is all set up with the tape and weights off. 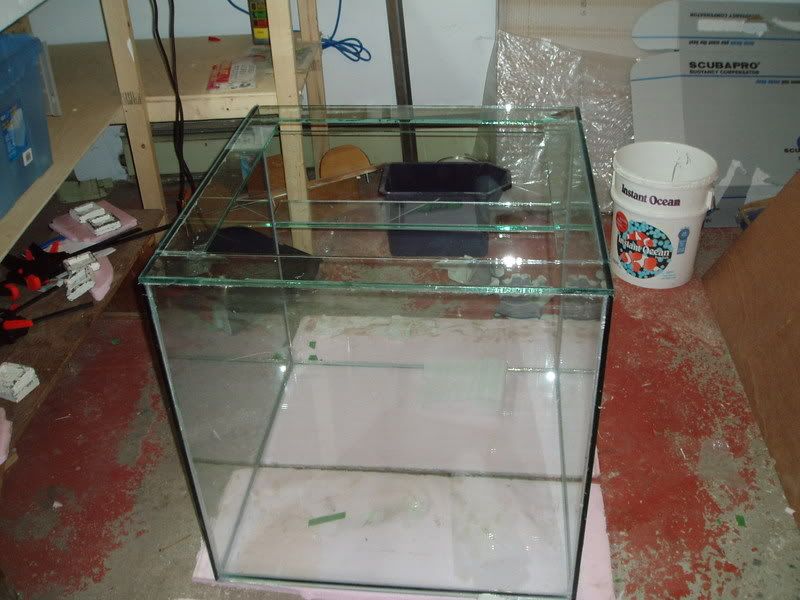 Next up we have some overflow pics. For the overflow I am using 5mm glass that I cut myself. This glass is from an old window that I cleaned with rubbing alcohol. 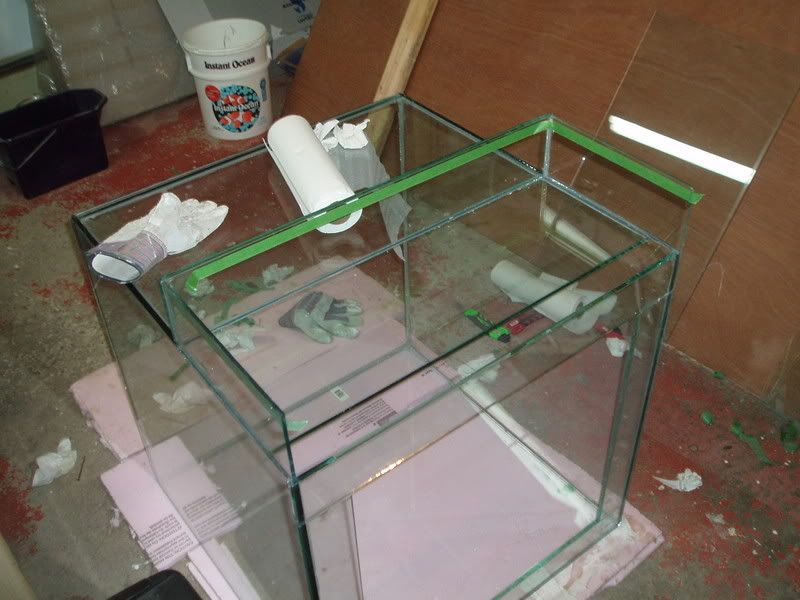 The pain for the back of the overflow is where I am putting my bulkhead, but I decided to drill it before I attach it to the tank. I used a 85mm diamond coated hole saw from e-bay. I drill tanks professionally (well.. quazi professionally) so I have all the necessary gear. 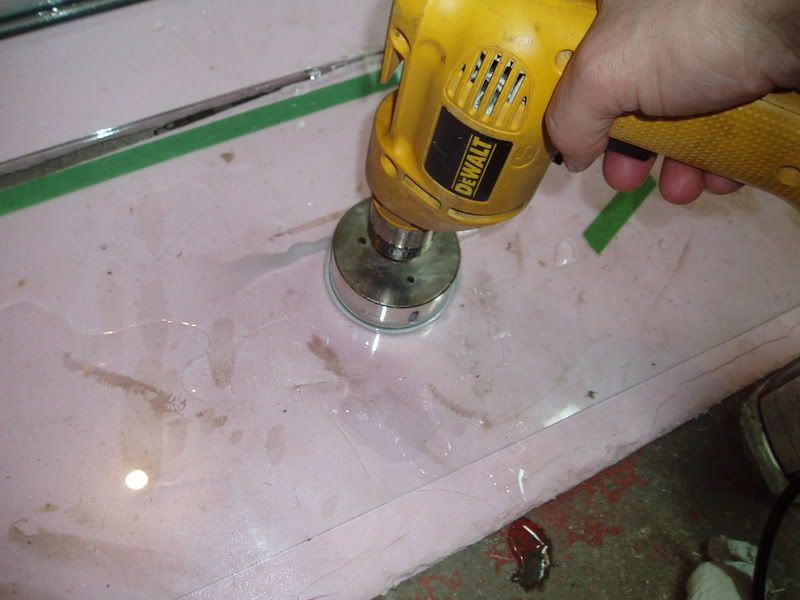 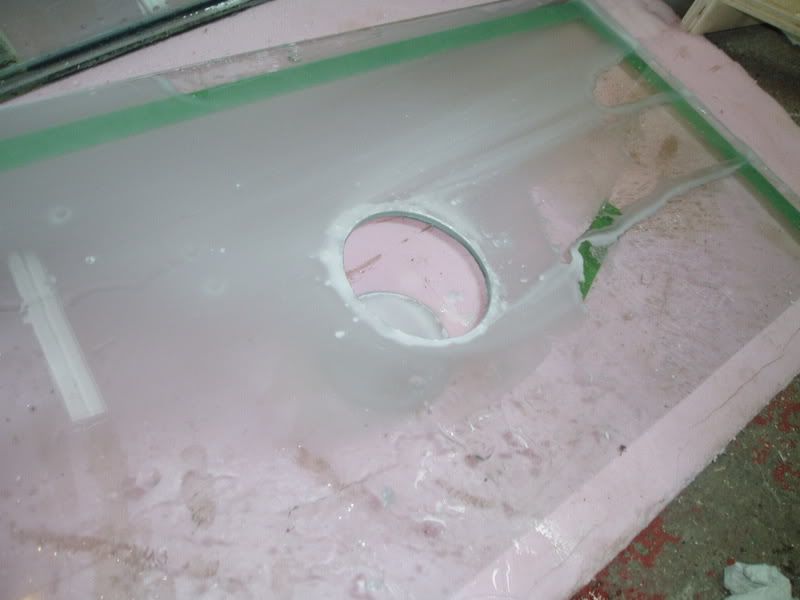 Finally the last pain is in place and I can call the tank just about done. I still have to dull the edges of the glass that I cut, which I will do with a diamond bit and a dremel, and clean all the fingerprints and silicone boo boos, which I will do with razor blades, paper towel and rubbing alcohol. 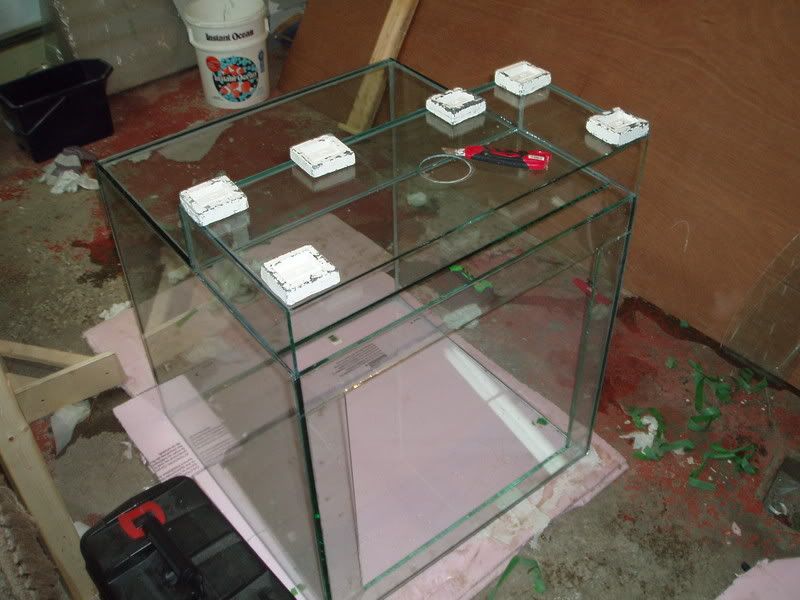
__________________
I'm not as think as you stupid i am |
|
#12
10/08/2007, 11:42 AM
|
|||
|
|||
|
Quote:
2. PAIN = when you cut your finger on the glass tank you just built PANE = a piece/side of the glass. 
__________________
"Give a man a fish and he will eat for a day. Teach a man to fish and he will sit in a boat all day and drink beer." QUOTE by deschlayer: I don't want real life lighting...I want better! Nature/god never grew a 400 pound pumpkin, man did. |
|
#13
10/08/2007, 02:56 PM
|
|||
|
|||
|
tomato tomaaaato. If your a stickler for grammer and spelling, this thread might annoy you because I am brutal. What spell check doesn't pick up probably won't get fixed. I think a rimless tank would be cool. If you do it, use 1/2" glass.
__________________
I'm not as think as you stupid i am |
|
#15
10/08/2007, 04:16 PM
|
|||
|
|||
|
Yeah, that glasswork is pretty dang neat.
Are you drilling any other holes in the tank for closed loops, pumps, or other fun items?
__________________
This post approved by Mrs. Sixline. assign <= six.line(#FFFFFF && string("nerdy")) |
|
#16
10/08/2007, 04:36 PM
|
|||
|
|||
|
Nope, no more holes. I thought about doing a closed loope with on OM 4-way and a Dart (like my old tank), but I opted for two vortechs as they would be cheaper (slightly, when the plumbing parts are factored in), provide more flow and use less power.
__________________
I'm not as think as you stupid i am |
|
#17
10/10/2007, 01:28 PM
|
|||
|
|||
|
Alright, water test time. My water test procedure is simple. Fill it half full (or half empty, depending on what kind of day youre having), and see if it leaks
If it doesnt, take it to capacity and then see how she holds up.
Filling up 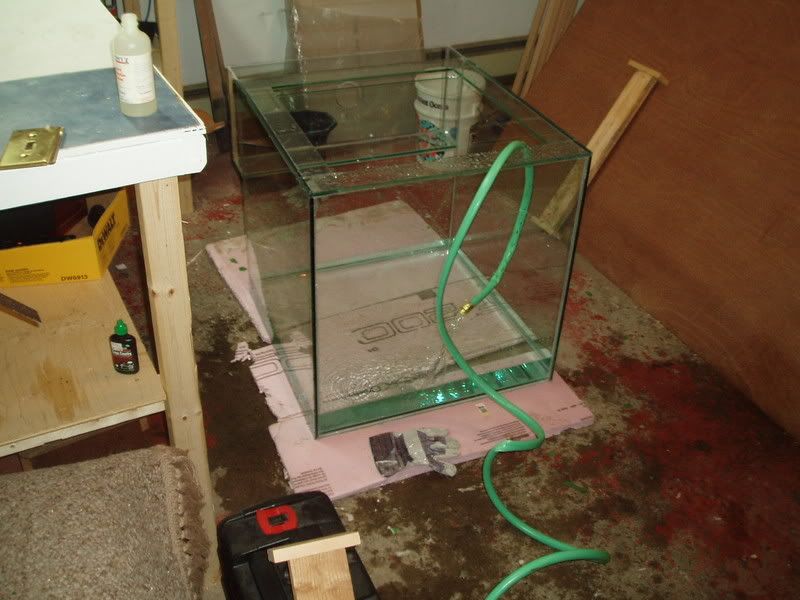 These pictures may not look any different, but one was taken a 1 in the afternoon, and the second was taken when I got home from work at midnight 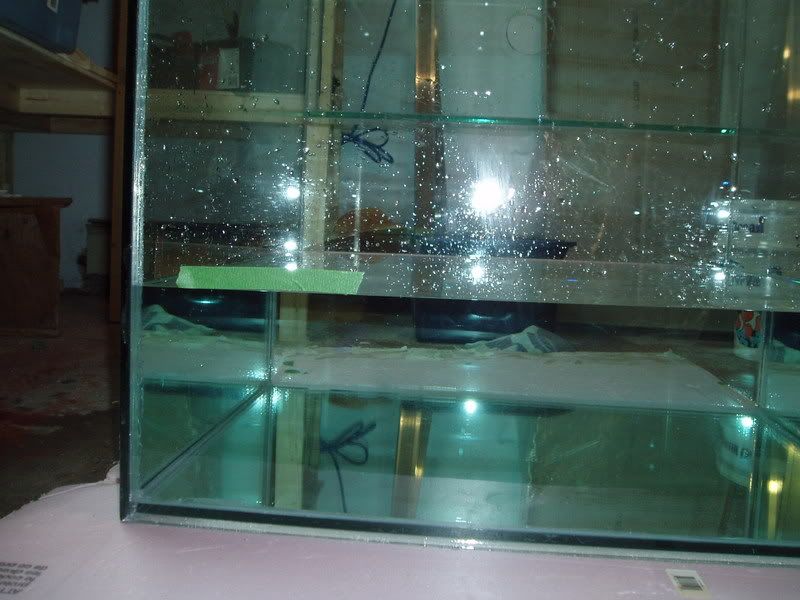 no chance, therefore no leaks 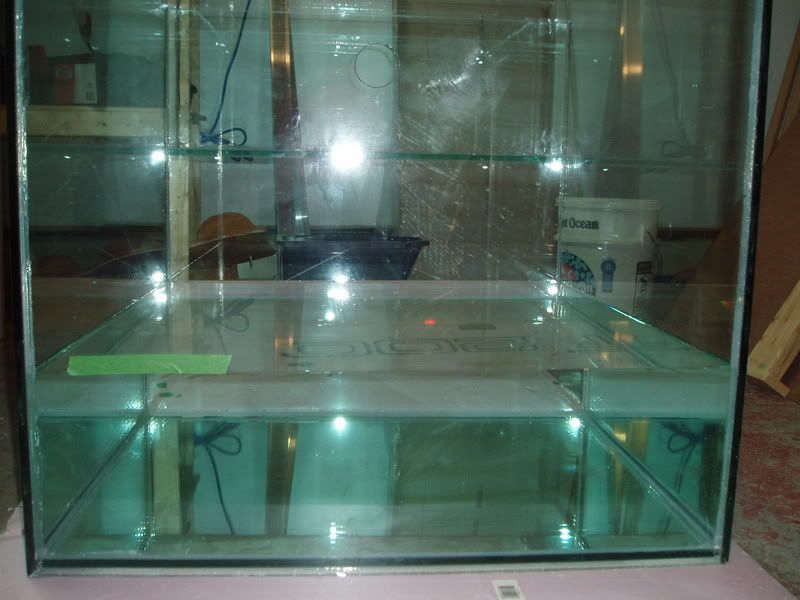 I took her up until she was full, and I also filled the overflow box to test that. Its been sitting for three days and no leaks yet. 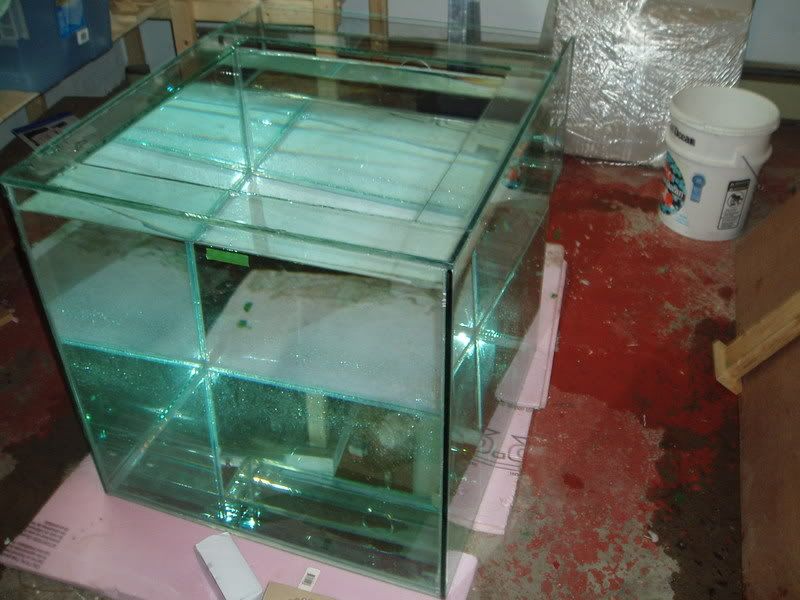 Here is all my new gear laid out in reef-geek fashion. There is still more to come, but this is what arrived yesterday morning. 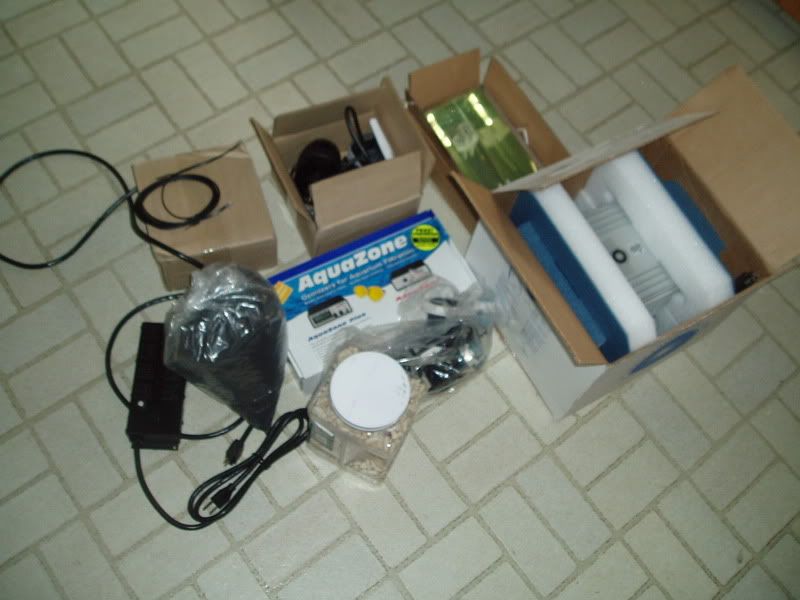
__________________
I'm not as think as you stupid i am |
|
#19
10/10/2007, 10:14 PM
|
|||
|
|||
|
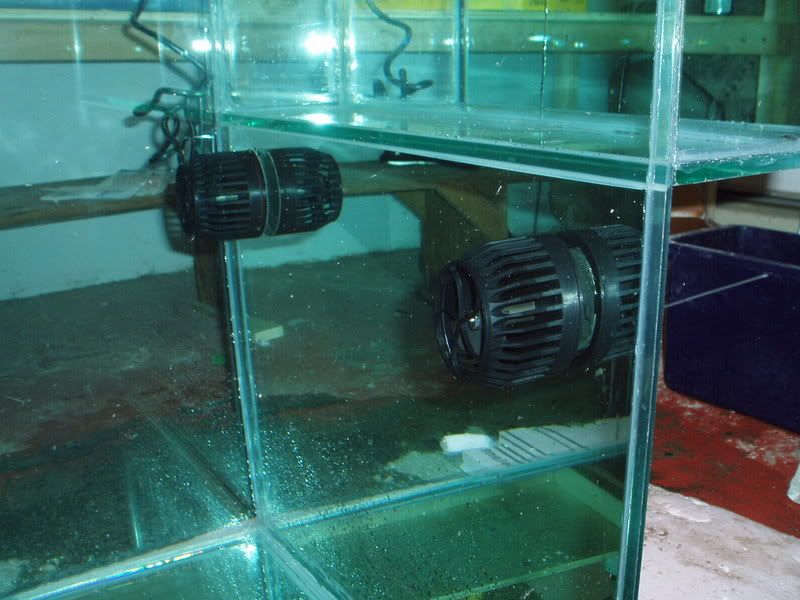
Heres a shot I forgot to include last update. I couldnt resist, and I had to try out my vortechs. These things are awesome! They generate incredible water movement, and I cant wait to play with the controller (if it ever comes out)
They are a little loud, but the directions say they should quiet down.
 I tried out my MH lighting today. I went with a PFO HQI ballast, a 14,000k Hamilton bulb, and the cheapest pendant I could find. 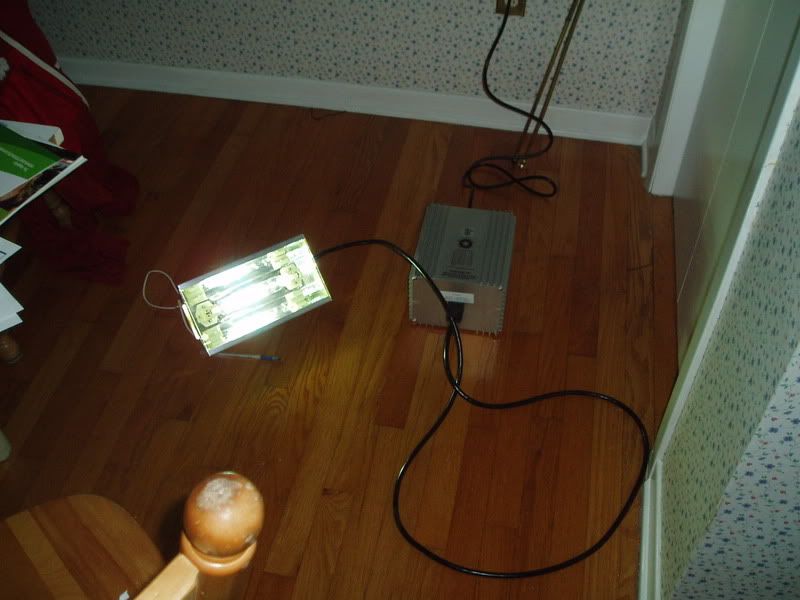 The pendant is a cheap retrofit that would be pretty good for a rectangular tank, but I wanted something more along the lines of a lumenarch type pendant for my square tank. My pendant cost $25, and the only reason I bought it is so I could canabolize it to build my own lumenarch type pendant. I am going to use some sheet aluminum to make an octagonal reflector that will be about 20 or so in diameter. I probably wont get started on the reflector anytime really soon, but for now I knocked up a ¼ scale model out of computer paper .you get the idea. 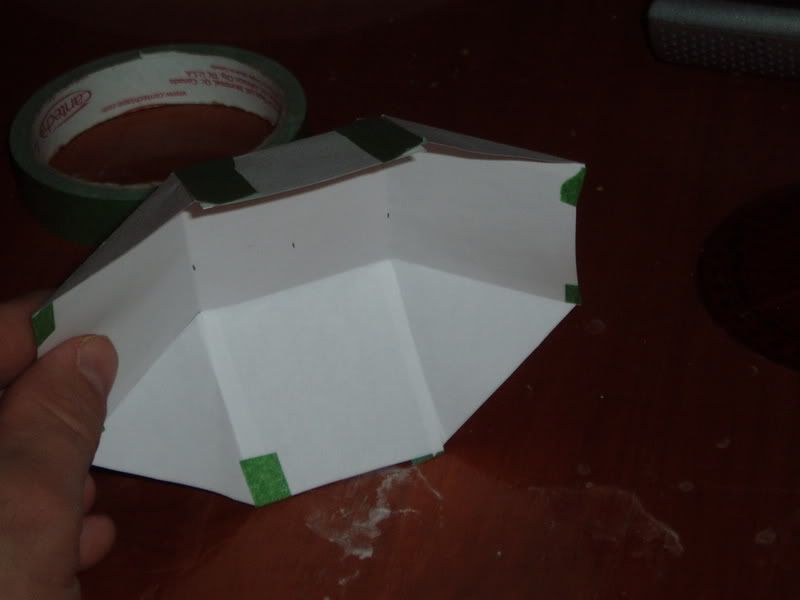 I plan on picking up some bristle board to knock up a full scale model first, and I will use those pieces as a template for when I cut my aluminum.
__________________
I'm not as think as you stupid i am |
|
#22
10/12/2007, 07:25 AM
|
|||
|
|||
|
Hi all
Heres a quick update.. while Im supposed to be working.. anyway, last night I built my reflector out of sheet aluminum. You just use a king and a straight edge to score it, and it pretty much rips apart like paper. 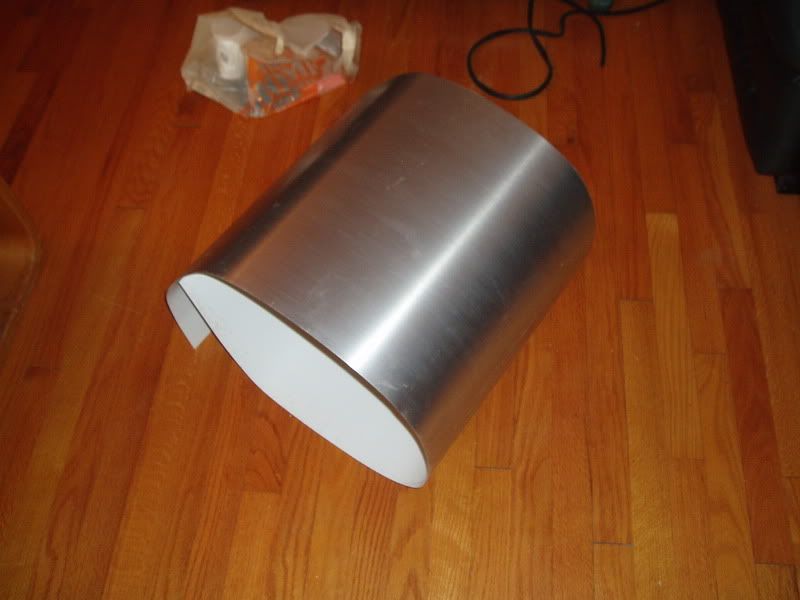 A few rivets later and I got this 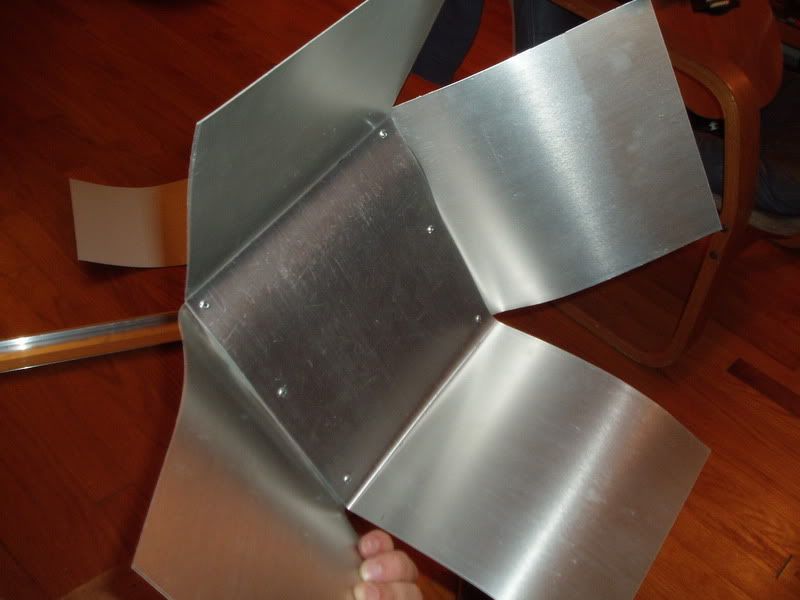 a few more and I got this: 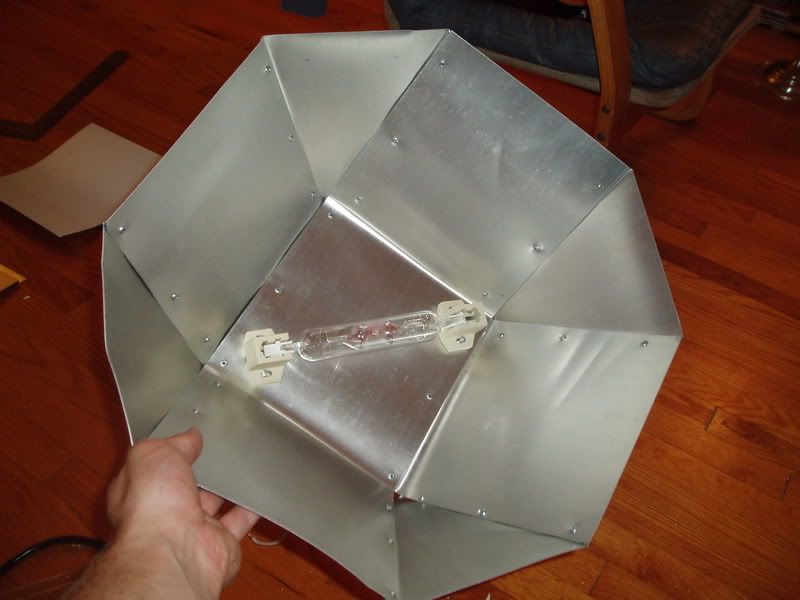 Its not the prettiest thing, but it will serve its purpose well, and it will be covered by an oak canopy so I could care less. I used some aluminum tape to cover up the cracks. This is the stuff that is used on heat vents. 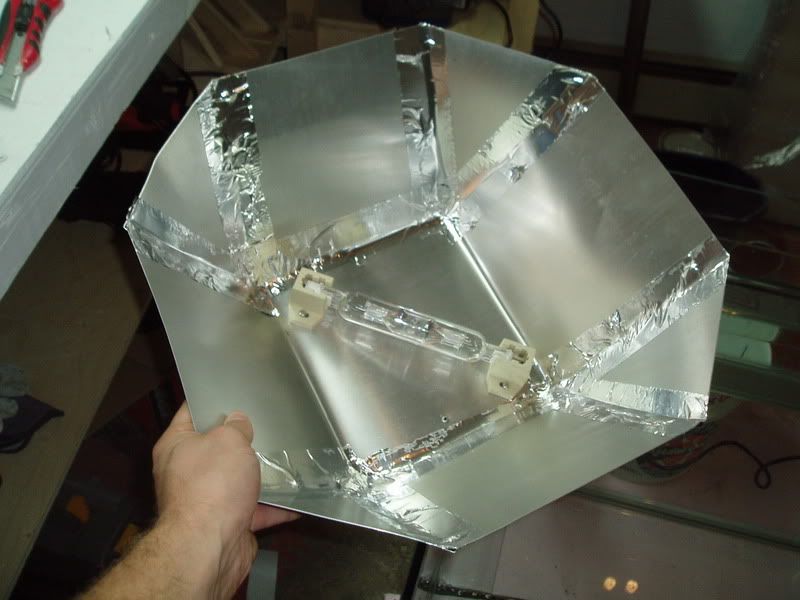 it works! 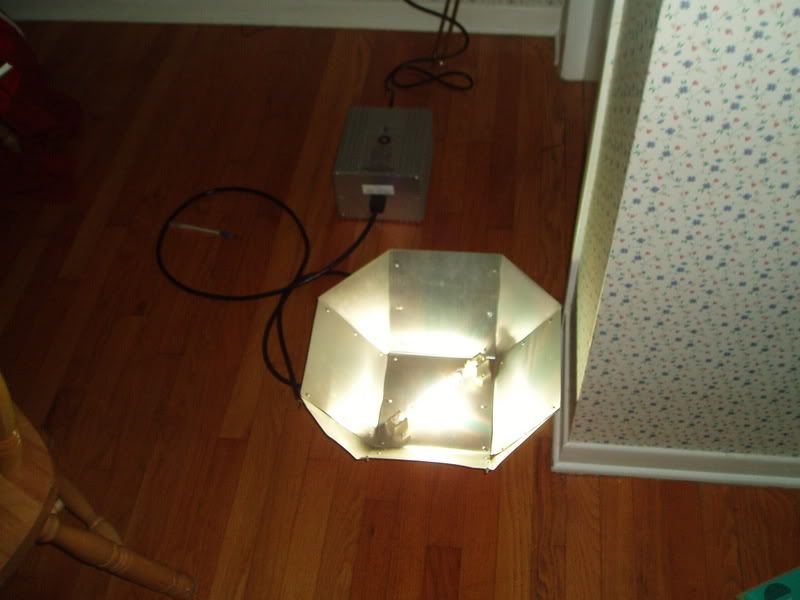 and here it is mocked up over the tank. its exactly the right size and should work great on my cube. 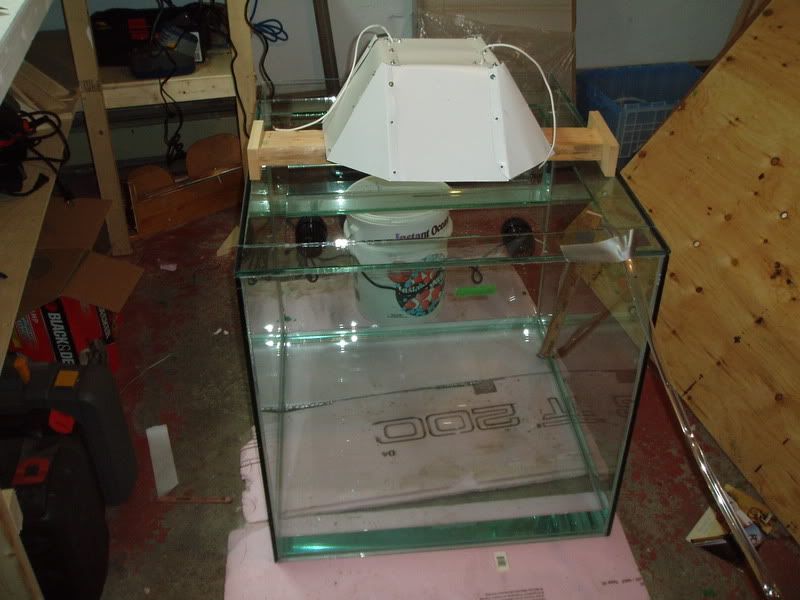
__________________
I'm not as think as you stupid i am |
|
#23
10/12/2007, 07:37 AM
|
|||
|
|||
|
are you at all concerned about the reflective surface not being very bright? the tape looks like it will reflect better than the reflector itself.
__________________
55G tall mixed reef 30G sump,2x250W10K XM+ 2 VHO super actinic,CsS220, 130FOWLR 60Gsump. |
|
#25
10/12/2007, 10:46 AM
|
|||
|
|||
|
I'm not concerned about the reflective surface Idealy it would be polished aluminum, but i've used this stuff for many reflectors and it alwais worksd well for me. I think i may upgrade to a lumenarch sometime in the future, and this will do for now. About the glass, i've been thinking about that. I want to use an acrylic water guard to pretect my t-5's from water splashes. Do you guys think acrylic would be any good at blocking UV? or should I go with a glass water guard?
__________________
I'm not as think as you stupid i am |
|
|


 Linear Mode

