|
|
|
#1
 01/04/2008, 05:26 PM
|
|||
|
|||
|
55g to 120g upgrade - A peninsula build
Well, I actually have been working on this for a couple of weeks and planned it out weeks beyond that. My 55 gallon is still running and I plan on taking this upgrade slowly. I have the 120 gallon tank in possession and have started to build the stand. I will start with a quick drawing of my initial plans and then guide you step by step on everything I have done so far. Comments or recommendations welcome but I can not promise I will follow them or agree with you. The tank will actually face the wall for now but I wanted to make it a peninsula just in case I ever wanted it somewhere else as a room divider. I plan on having this tank a long time and not looking to touch it once it is complete to my likings.
Here is my current 55. This cabinet was sort of half-assed and not my best work. It was rushed and I just wanted something half decent. It was also built for about $130. It has served me about 2 1/2 years. 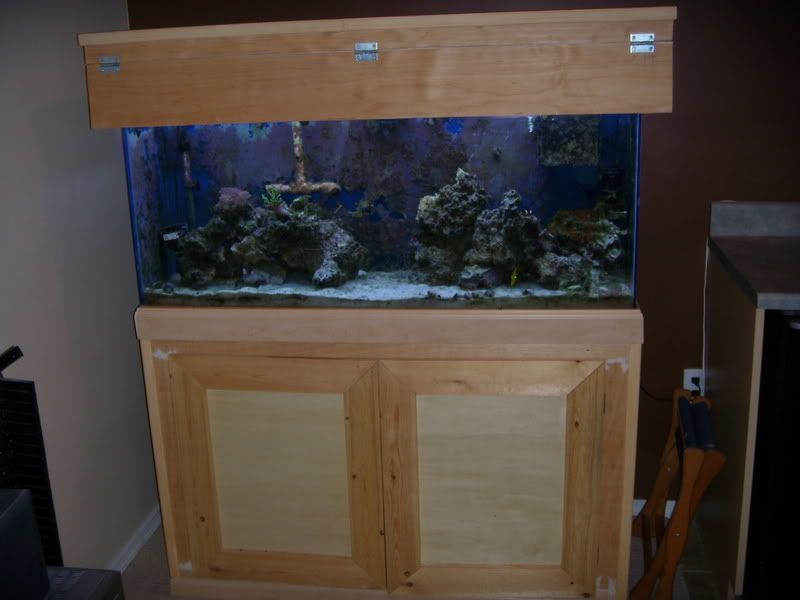 Here was the initial plan/drawing for the new 120. Some things have changed from here such as going over the top with the returns. I also drilled 1 3/4" bulkhead in for a quick way to drain water for a water change and to put in a closed loop if I feel like it also going over the top with them. 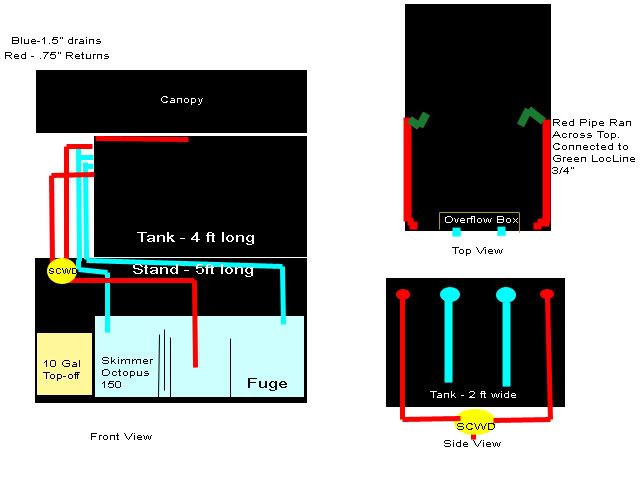
|
|
#2
01/04/2008, 05:39 PM
|
|||
|
|||
|
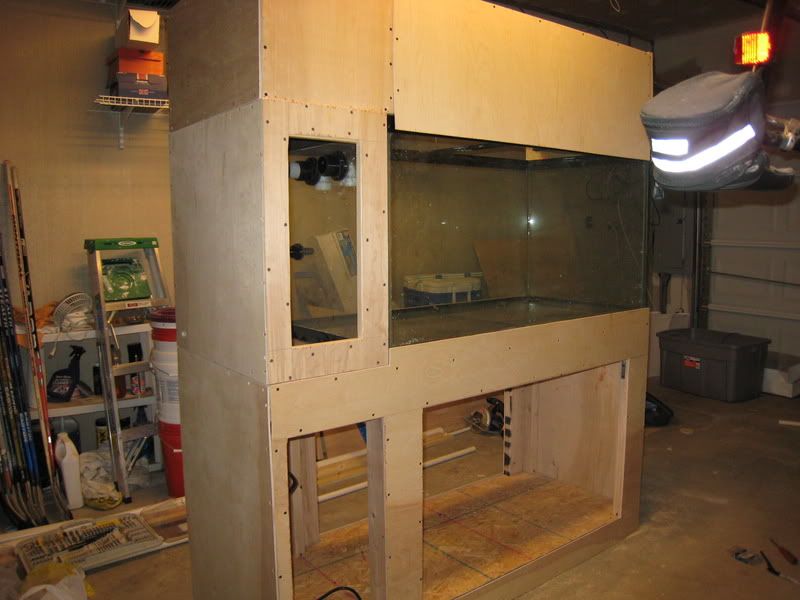
On to the build. Here is a picture of the main frame I put together. It is about 63 inches long. This will allow it to accomodate the 4 foot tank along with an extra foot to hide all my electric, 10gallon top off, etc.. This is the only way I could think of doing the peninsula.
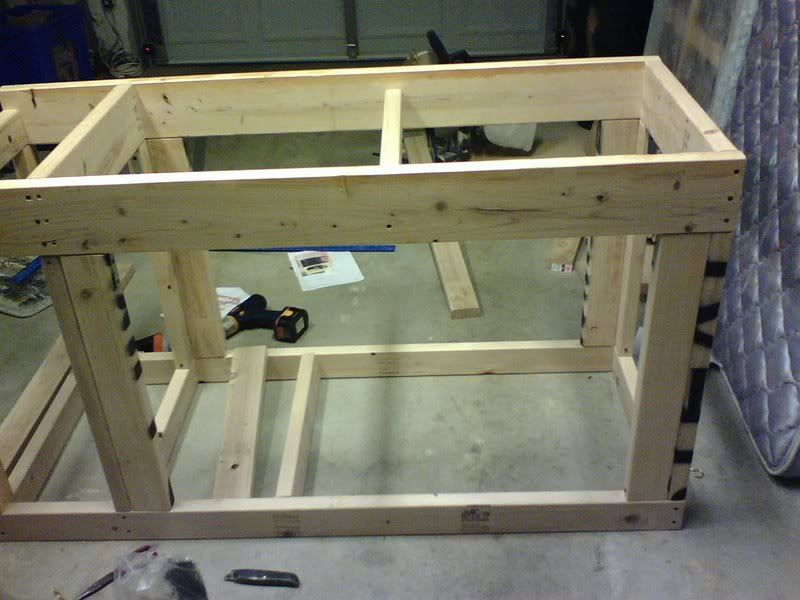 Notice the 2x6. Maybe over kill since it is only a 4 foot long tank but since I am not going to use a center brace, I decided to go with them. All of these headers rest directly on the 2x4's so the weight will transfer directly to the ground. This is a much better plan then having the weight rest on bolts instead. On the bottom, I did put in 2x4's at ever 16 inches. On top of this went a 1/2 sheet of plywood to hold the 55 gallon sump. This should easily be able to support the weight of the sump. |
|
#3
01/04/2008, 05:42 PM
|
|||
|
|||
|
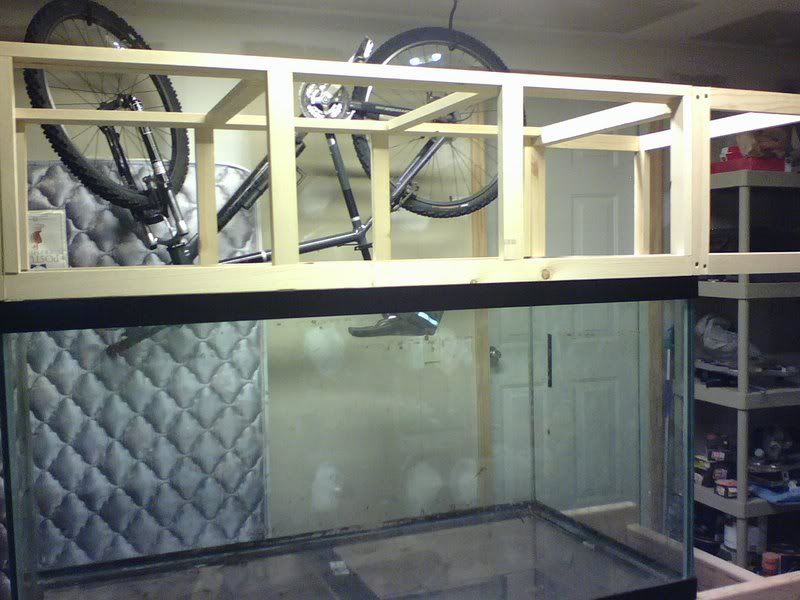
For the top canopy, since it is not going to be weight bearing, I went with 1x2's for the frame. Here is a pic below on the tank. I plan on having a pull out drawer for the lights. I will install 6x54w t5's for lighting. I will have room to add 2 more if I feel it is necessary but highly doubt it. The lights will sit 4 1/2's above the water and will have two fans blowing air across them.
|
|
#4
01/04/2008, 05:49 PM
|
|||
|
|||
|
On to the Tank!
Now that the basic frame is out of the way, its time to pay attention to the tank. I got all the glass I needed for baffles and an overflow cut at a local glass shop for $40 total. I siliconed the overflow together and it is shown below already completed. I got a tube of aquarium safe silicone at walmart for about $4. Anyway, I used this overflow to judge where I want my 1.5" bulkheads to go.
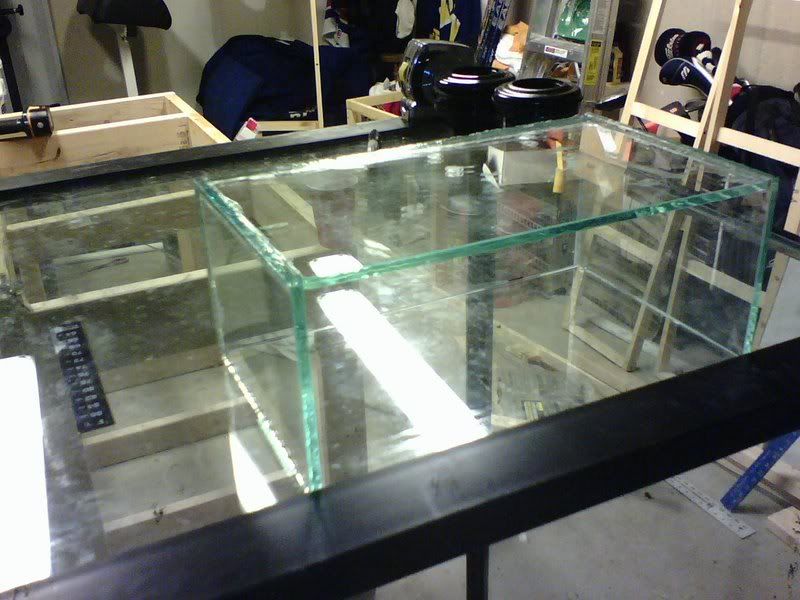 Once I figured and measured everything out, it was time to drill the tank. I got a set of 3 diamond hole saws on ebay for $20 shipped. The sizes I got were for 3/4, 1, 1.5". I was a little nervous doing this for the first time but figured if it broke, I was out $200 on the used tank and learned a big lesson, it wouldn't be the end of the world. You can't learn if you don't try! Here is a pic of the progress below. I used plumbers putty for the damn and let the drill do the work. It was so easy that I will never be nervous about drilling glass again. 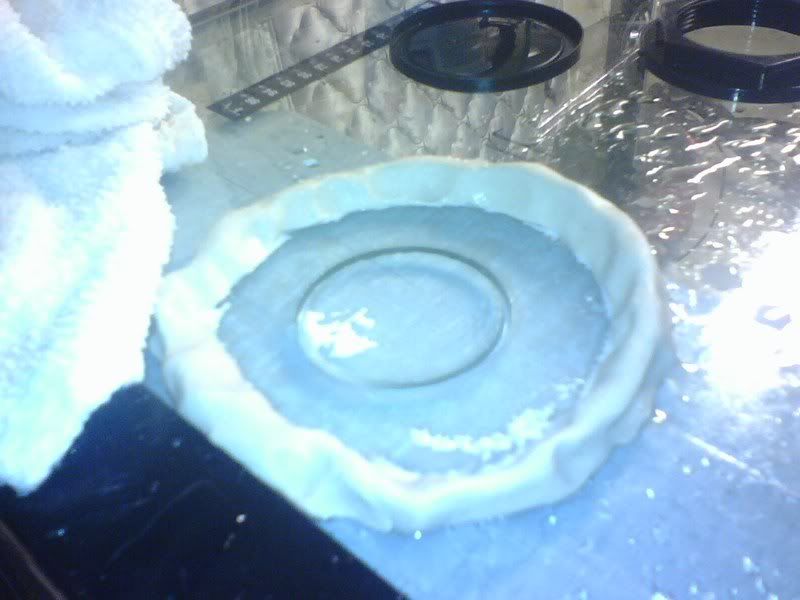 the hole was about halfway done here. And below is the finished product with all three bulkheads installed: 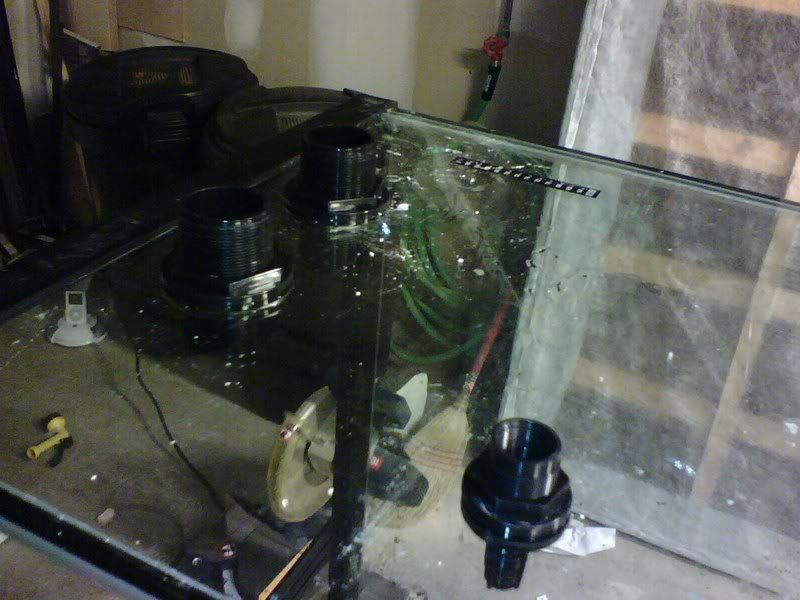
|
|
#5
01/04/2008, 05:57 PM
|
|||
|
|||
|
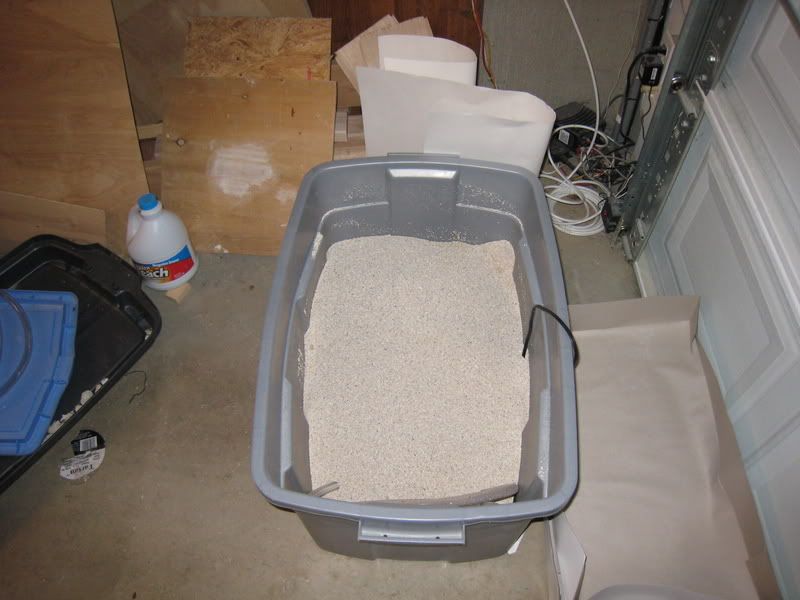
Back to the tank itself. I know I am going to need a lot more sand for this tank so I started looking to local reefers. I only used play sand from home depot on my 55 and feel it has caused me some problems with algae so I decided to try and get the good stuff. I came across about 140lbs of caribsea arogonite special grade reef sand. Thanks fishtri. There was nothing of value in this sand and it needed to be washed so I soaked it in a bleach/water solution for a few hours and rinsed it. It still has a faint smell of chlorine even after it is dry so I am going to rinse it again and add some dechloronator just to make sure. This should get it ready to go when I am about to get the tank up. Here it is after being rinsed:
|
|
#6
01/04/2008, 06:04 PM
|
|||
|
|||
|
Moving along quickly
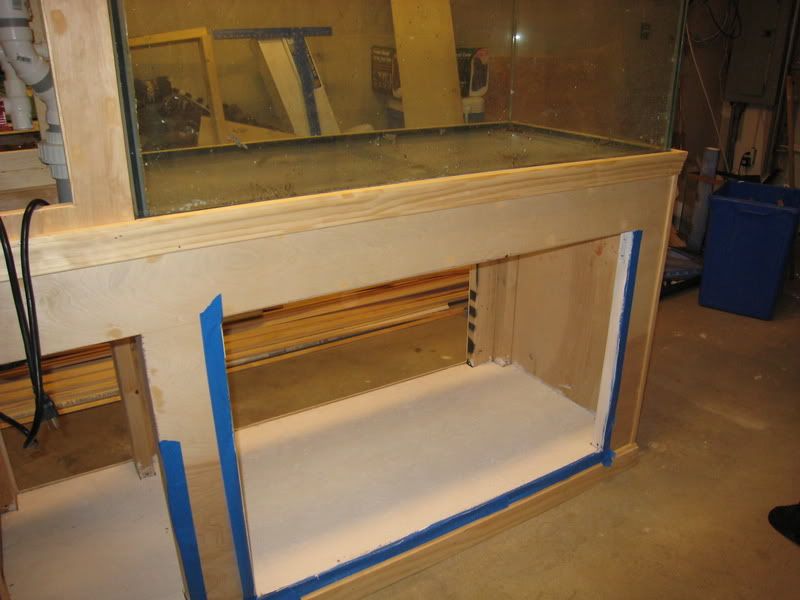
Well, this is where I stand so far today. Here is a shot of the cabinet with the plywood attached to the frame. Here I used 1/4 inch natural birchwood sheets. It took me four sheets @ $20 each. I wanted to get something nice. I still need to make so minor adjustments but everything pieces together nicely. This stand will be able to pull apart in three pieces for ease of movement. I am also putting in quick disconnects at the cannopy for the lights and the extra outlet in there in case I want to plug in equipment down at that far end. Here is a full stand shot:
 In this shot below, you can see the canopy without the door in place. Doors will swing out on both sides for access to the top of the tank. 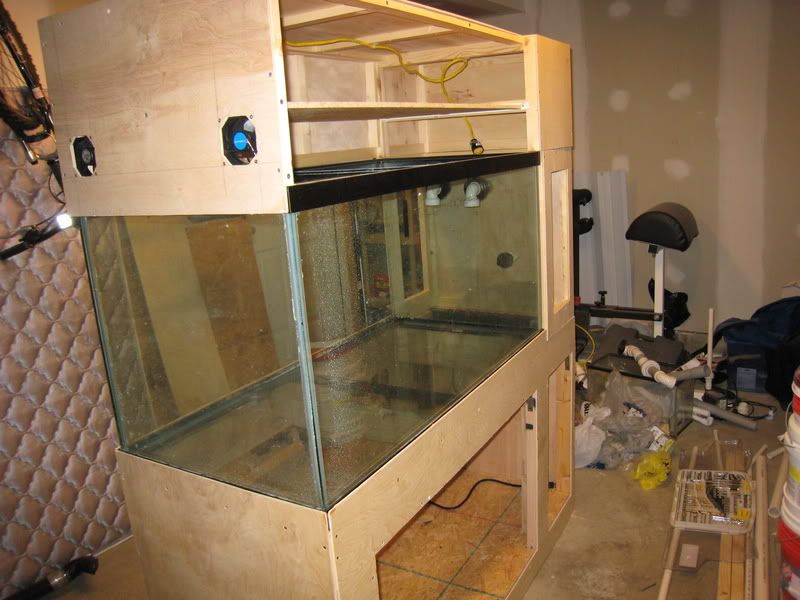 Also, I added in a light rack so I can change the bulbs easily or just simply remove the lights from the canopy in case I want to do some work in the tank without removing the top: 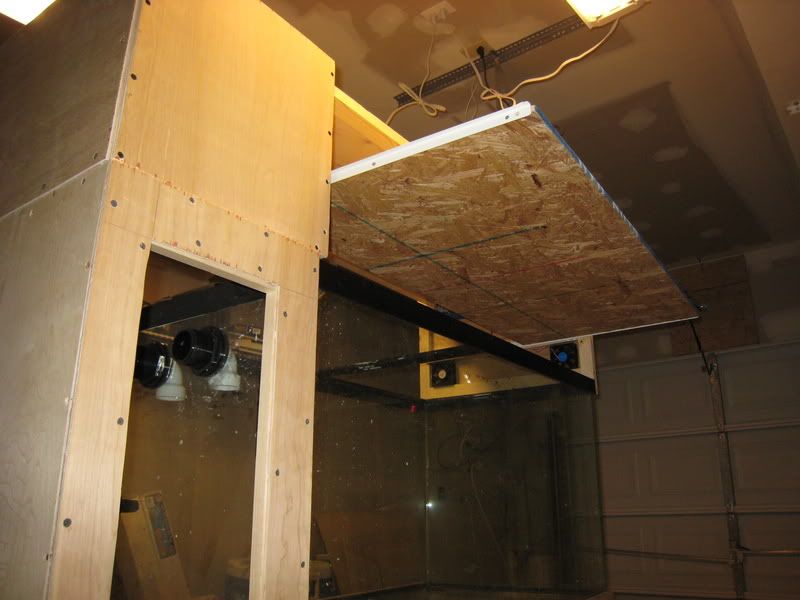
|
|
#7
01/04/2008, 06:08 PM
|
|||
|
|||
|
Here is a shot of the side compartment with access to the plumbing and electric:
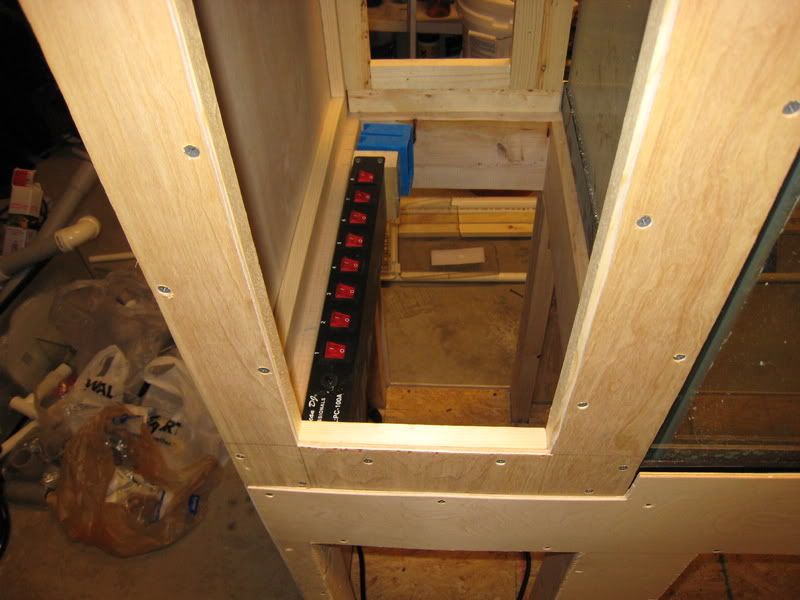 Here you can see the electric. I only rough plumbed everything so far but here is a pic of that. 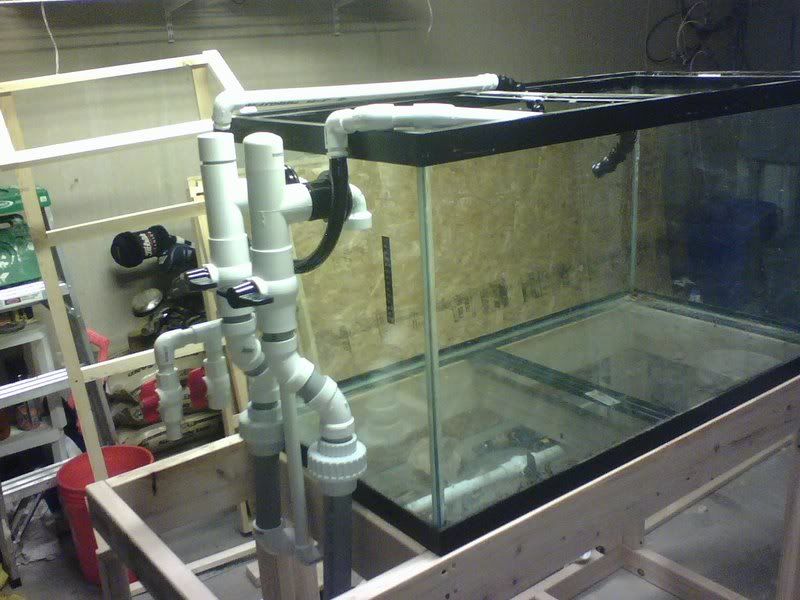 Thats it for now, I'll try and keep this updated. |
|
#8
01/04/2008, 09:43 PM
|
|||
|
|||
|
Your a perfect fit to join our club!!!!
Click on the little read house and check out or web site. Very nice system.
__________________
One day I will not have to scrape my windows! DVRC Vice President |
|
#10
01/07/2008, 04:34 PM
|
|||
|
|||
|
Just a question as I plan on doing something similar but wouldnt you want the intakes facing up so you could get the surface skum (for lack of a better term).
|
|
#11
01/07/2008, 04:46 PM
|
|||
|
|||
|
If you look on the 5th picture from the top, you will see and overflow box that I made. Once I silicone it in, it will allow me to keep the water level constant and skim the surface. I wasn't sure about going without and overflow box and turning the intakes up because a durso pipe is the only way I know how to keep an overflow like this quiet unless someone else has some better recommendations.
|
|
#12
01/07/2008, 11:46 PM
|
|||
|
|||
|
Making some progress
Its coming along, slowly but coming along. I am devoting whatever time I have available and taking my time to get it right. Here is an updated pic. Its all wood puttied up, painted inside the base and I started on the trim. I also painted the light rack white but its not pictured here.
|
|
#13
01/07/2008, 11:58 PM
|
|||
|
|||
|
peninsula set ups are the ish!
__________________
Red House=My 90 build. Matt. |
|
#14
01/08/2008, 01:15 AM
|
|||
|
|||
|
very nice build so far.
and excellent choice on the sump/refuge design. I made one of those for my sister this christmas. Now I just have to make her upgrade from her 29 to her 60 so she will actually use the thing!!!! a little hard to do from ~2000 miles away. |
|
|


 Linear Mode

